🧸 A. TITLE + CATEGORY/TAG LINE
Free Floral Burst Granny Square Bedspread & Matching Pillow Cover Crochet Pattern
Category: Home Decor Patterns | Blankets & Bedspreads | Granny Square Motif Projects | Level: Easy to Intermediate
📖 B. INTRODUCTION
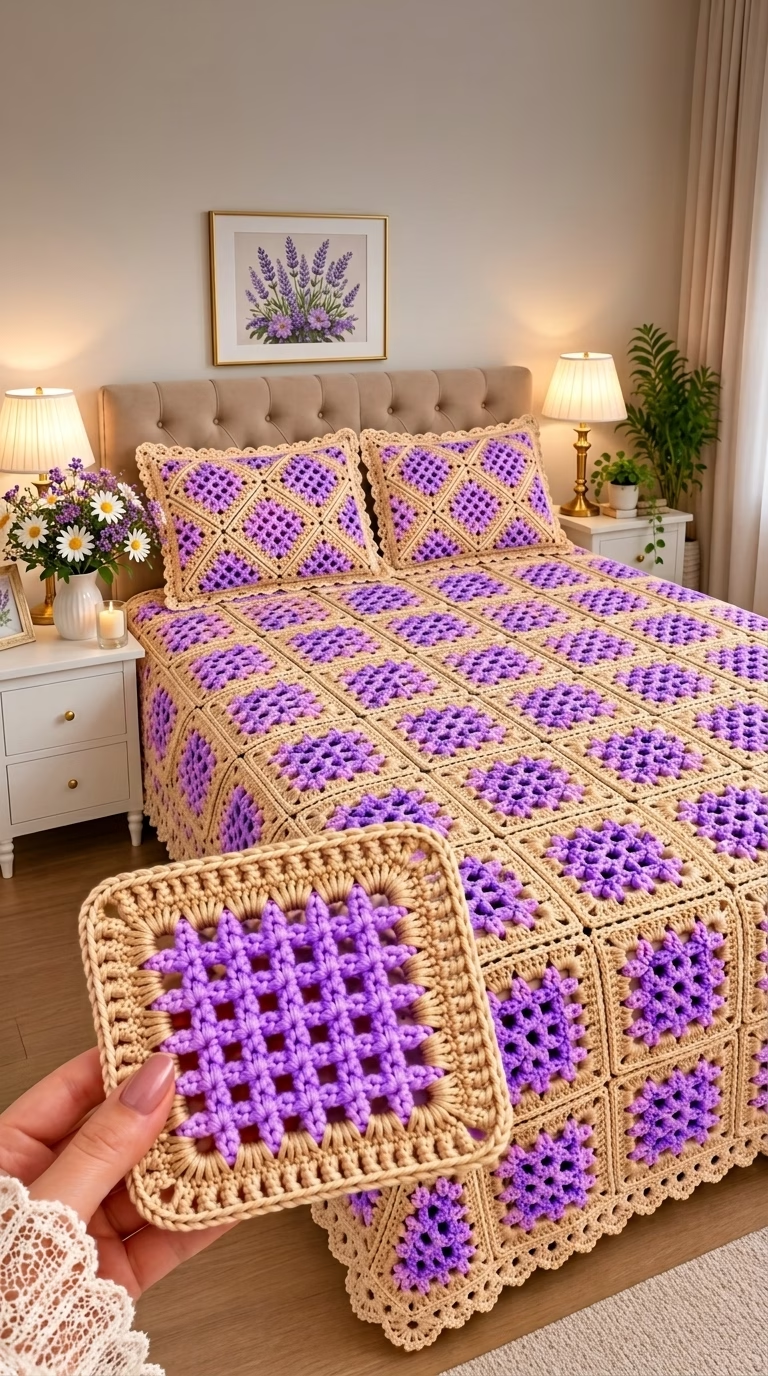
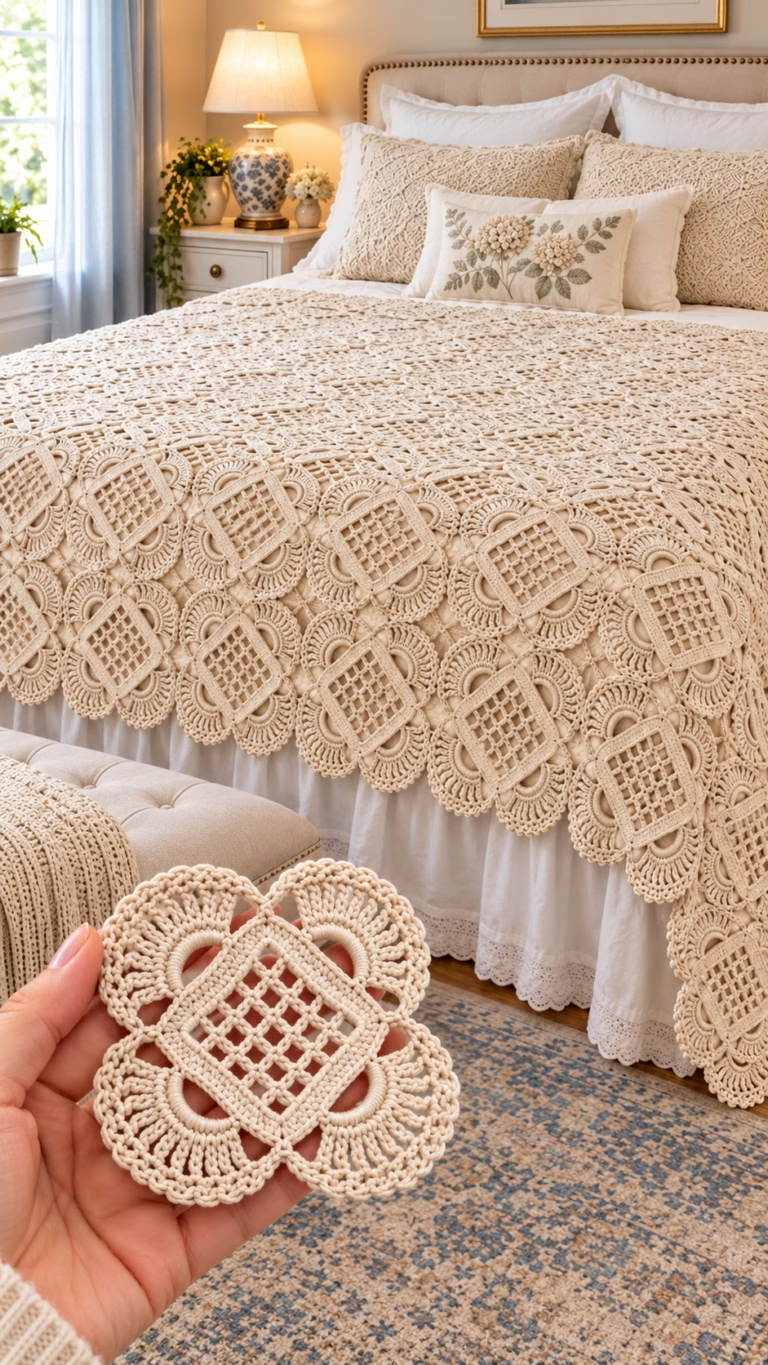
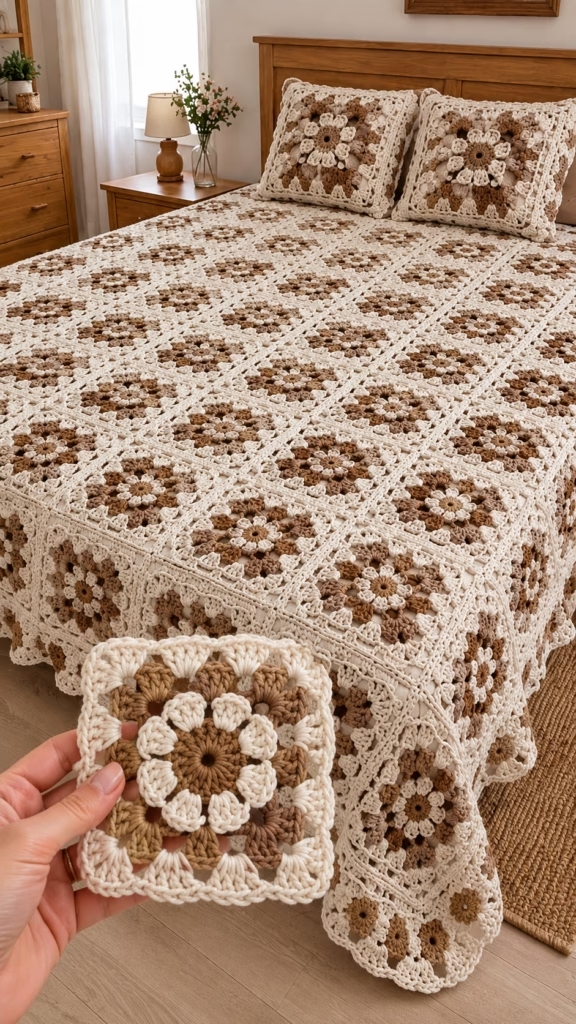
Transform your bedroom into a warm, bohemian sanctuary with this stunning Floral Burst Granny Square Bedspread and Matching Pillow Cover. Featuring rich neutral tones—warm mocha, soft tan, and creamy ecru—this project highlights a central flower motif enclosed within a traditional granny square frame. The repeating motif creates a textured, eye-catching grid that drapes beautifully over a queen-sized bed, accompanied by coordinating accent pillows for a cohesive interior design statement.
PNG+ 1
Whether you are looking to create a heirloom bedspread for your own home or crafting a thoughtful wedding, housewarming, or anniversary gift, this project offers a rewarding stitching experience. The modular nature of granny squares makes this blanket portable and easy to work on in stages. You can easily adapt the dimensions to fit any mattress size, from a cozy lap throw to a full king-size bedspread, simply by adjusting the total number of motifs joined together.
The motif relies on classic stitches combined in fresh ways: double crochet clusters create soft central petals, while structured corner groups transform the circular flower into a crisp square. Finished with an elegant scolloped lace border across the edges, this ensemble combines rustic charm with timeless sophistication.
PNG+ 1
🔍 C. MAIN PATTERN OVERVIEW
The ensemble consists of two major components: the full-coverage Bedspread Coverlet and matching Square Pillow Covers.
PNG
- 🌸 The Floral Burst Motif Square: The foundation of the entire set is a 5-round sunburst-style granny square measuring approximately 6″ x 6″ (15 cm x 15 cm). It features a dark mocha central ring, light cream petal clusters, a tan intermediate granny layer, and an ivory outer border that allows for seamless joining. PNG+ 1
- 🛏️ The Bedspread Assembly: Constructed from a grid of 13 x 15 motifs (195 squares total) joined using the continuous flat slip-stitch method. It includes a decorative 4-round scalloped lace border that frames the bedspread along all outer edges. PNG+ 1
- 🛋️ Matching Pillow Covers: Two matching 18″ x 18″ throw pillow covers made from a 3 x 3 grid of motifs (9 squares per side, 18 squares total per pillow) with a matching lace edge. PNG
🎯 D. SKILL LEVEL
Skill Level: Intermediate
This pattern is suited for confident beginners ready to expand their skills, as well as intermediate crocheters. While the stitches themselves are foundational, maintaining consistent tension across multiple motifs and executing clean joins requires attention to detail.
Techniques Used:
- ⭕ Magic Ring (MR) PNG
- 🧶 Working in continuous and joined rounds
- 🌼 Double Crochet Clusters (3-dc cl and 4-dc cl) PNG
- 📐 Squaring off a circular motif PNG
- 🔗 Flat Slip-Stitch Joining (or Join-As-You-Go method)
- 🌾 Working in back loops only (BLO) and chain spaces
- 🪡 Block blocking and seamless yarn weaving
📏 E. FINISHED SIZE
Measurements are given after light steam blocking.
PNG
- ⏹️ Individual Motif: 6 in x 6 in (15 cm x 15 cm) PNG
- 🛏️ Queen Bedspread: 86 in wide x 98 in long (218 cm x 249 cm) including border PNG
- 🛋️ Pillow Covers (Set of 2): 18 in x 18 in (45 cm x 45 cm) PNG
Note on Sizing: You can easily modify the size of your bedspread by altering the square grid arrangement:
- Twin Bed (9 x 14 grid): ~62 in x 92 in
- Full Bed (11 x 14 grid): ~74 in x 92 in
- King Bed (15 x 15 grid): ~98 in x 98 in
🧮 F. GAUGE
- ⏹️ Motif Gauge: 1 single completed motif = 6 inches x 6 inches (15 cm x 15 cm) using a 4.5 mm (US 7) crochet hook. PNG
- 📐 Stitch Tension: Gauge in amigurumi or home decor square work must be consistent so that all joined pieces lie flat without buckling or pulling. If your square measures larger than 6.25 inches, decrease your hook size to 4.0 mm. If your square measures smaller than 5.75 inches, increase your hook size to 5.0 mm.
🧶 G. REQUIRED YARN AMOUNTS
Amounts are calculated using Worsted Weight / Aran (Category 4) Medium Cotton or Cotton-Blend Yarn (~200 yds / 183 m per 100g skein).
- 🤎 Color A (Mocha / Center Core): 4 skeins (~800 yards / 730 m) PNG
- 🥛 Color B (Ecru / Cream Petals): 12 skeins (~2,400 yards / 2,195 m) PNG
- 🍞 Color C (Warm Tan / Middle Frame): 8 skeins (~1,600 yards / 1,460 m) PNG
- 🍦 Color D (Soft Ivory / Main Outer & Join): 18 skeins (~3,600 yards / 3,290 m) PNG
Total Yarn Required: ~42 skeins / 8,400 yards (7,675 m) for full bedspread and two pillow covers.
PNG
🧰 H. MATERIALS
- 🪡 Crochet Hook: Size 4.5 mm (US 7) or size needed to obtain gauge
- ✂️ Tapestry Needle: Large blunt-eye yarn needle for weaving ends and assembly
- 📍 Blocking Accessories: Foam blocking boards and rust-proof stainless steel T-pins
- 📏 Measuring Tape: Flexible tape measure
- ✂️ Scissors: Sharp craft scissors
- 🛋️ Pillow Inserts: Two 18 in x 18 in (45 cm x 45 cm) square pillow forms PNG
- 🔖 Stitch Markers: 10–20 locking stitch markers for alignment during joining
🔤 I. ABBREVIATIONS – US TERMS
- ch: chain
- sl st: slip stitch
- sc: single crochet
- hdc: half double crochet
- dc: double crochet
- tr: treble (triple) crochet
- st(s): stitch(es)
- sp(s): space(s)
- ch-sp: chain space
- MR: magic ring
- YO: yarn over
- 3-dc cl (3-double crochet cluster): (YO, insert hook into st/sp, YO, draw up a loop, YO, pull through 2 loops) 3 times in same st/sp, YO, pull through all 4 loops on hook.
- 4-dc cl (4-double crochet cluster): (YO, insert hook into st/sp, YO, draw up a loop, YO, pull through 2 loops) 4 times in same st/sp, YO, pull through all 5 loops on hook.
- beg: beginning
- rep: repeat
- FO: fasten off
📝 J. NOTES BEFORE YOU BEGIN
- 🧵 Work in Rounds: All individual motif squares are worked in joined rounds from the center outward. PNG
- 🔄 Color Changes: Change colors on the final yarn-over of the slip stitch that joins the round, or join new colors directly into a designated chain space with a standing stitch for cleaner joins.
- 📍 Weaving Ends As You Go: To avoid weaving in hundreds of loose ends at the end of the project, lay yarn tails along the top of stitches and crochet over them for 4-5 stitches whenever changing colors.
- 📐 Consistency is Key: Keep your tension uniform across all motifs. Blocking each square to 6″ x 6″ before assembly ensures smooth, square alignment during joining. PNG+ 1
🪡 K. COMPLETE PATTERN
🌸 FLORAL BURST MOTIF SQUARE
(Make 195 for Queen Bedspread; Make 36 for two Pillow Covers — Total: 231 Squares)
PNG
       Round 5: [Ivory] Granny Frame & Square Edging
       Round 4: [Warm Tan] Granny Corners & Outer Frame
       Round 3: [Cream] 4-DC Clusters Outer Petals
       Round 2: [Cream] 3-DC Clusters Inner Petals
       Round 1: [Mocha] Magic Ring Base
🤎 Round 1 (Center Core)
With Color A (Mocha):
- R1: Start with a MR, ch 2 (does not count as st), work 12 dc into MR. Join with sl st to first dc. (12 dc) PNG
- Fasten off Color A.
🥛 Round 2 (Inner Petals)
Join Color B (Ecru/Cream) in any dc space:
PNG
- R2: Ch 2, 3-dc cl in first st, ch 1, (3-dc cl in next st, ch 1) 11 times. Join with sl st to top of first cluster. (12 clusters, 12 ch-1 sps) PNG
- Fasten off Color B.
🥛 Round 3 (Outer Petal Layer)
Join Color B (Ecru/Cream) in any ch-1 sp:
PNG
- R3: Ch 2, 4-dc cl in first ch-1 sp, ch 2, (4-dc cl in next ch-1 sp, ch 2) 11 times. Join with sl st to top of first cluster. (12 clusters, 12 ch-2 sps) PNG
- Fasten off Color B.
🍞 Round 4 (Squaring the Circle)
Join Color C (Warm Tan) in any ch-2 sp:
PNG
- R4: Ch 3 (counts as dc), (2 dc, ch 2, 3 dc) in same ch-2 sp (first corner).
- Side: [3 hdc in next ch-2 sp] twice.
- Corner: (3 dc, ch 2, 3 dc) in next ch-2 sp.
- Repeat from * 2 more times. 3 hdc in each of the remaining 2 ch-2 sps.
- Join with sl st to top of beg ch-3. (4 corners of [3 dc, ch 2, 3 dc] and 8 side groups of 3 hdc) PNG
- Fasten off Color C.
🍦 Round 5 (Outer Granny Edge & Border)
Join Color D (Soft Ivory) in any corner ch-2 sp:
PNG
- R5: Ch 3 (counts as dc), (2 dc, ch 2, 3 dc) in corner ch-2 sp.
- Side: [3 dc in sp between next 3-st groups] 3 times across side.
- Corner: (3 dc, ch 2, 3 dc) in corner ch-2 sp.
- Repeat from * 2 more times. [3 dc in sp between next 3-st groups] 3 times across final side.
- Join with sl st to top of beg ch-3. (5 groups of 3-dc per side; 20 groups of 3-dc total) PNG
- Fasten off leaving a short tail for weaving.
🛏️ BEDSPREAD BORDER & SCALLOPED FINISH
Once all 195 squares are joined into a 13 x 15 grid, attach Color D (Soft Ivory) at any outer corner of the assembled bedspread.
PNG
- Round 1 (Base Round): Ch 1, sc in every st around entire perimeter, working 3 sc into each outer corner ch-2 sp. Join with sl st to first sc.
- Round 2 (Granny Frame Round): Ch 3 (counts as dc), 2 dc in same st, ch 1, skip 2 sts, *3 dc in next st, ch 1, skip 2 sts; rep from * around, adjusting to place (3 dc, ch 2, 3 dc) in each corner. Join with sl st to top of ch-3.
- Round 3 (Arch Round): Ch 1, *sc in ch-1 sp, ch 4, skip 3 dc; rep from * around, placing (sc, ch 5, sc) in each corner sp. Join with sl st to first sc.
- Round 4 (Scallop Shell Edge): Sl st into first ch-4 sp, ch 1, work 7 dc in same ch-4 sp, sc in next sc, *7 dc in next ch-4 sp, sc in next sc; rep from * around, placing 9 dc into each corner ch-5 sp. Join with sl st to first sc. Fasten off and weave in ends. PNG
🛋️ PILLOW COVERS (MAKE 2)
🧱 Front Panel (Make 2)
- Join 9 Motif Squares into a 3 x 3 grid using Color D (Soft Ivory). PNG
- Work Rounds 1–4 of Bedspread Border around outer edge of the 3 x 3 grid to match the blanket. PNG
📐 Back Envelope Panels (Make 4 total — 2 per pillow)
With Color D (Soft Ivory), work in flat rows:
- Row 1: Ch 68, sc in 2nd ch from hook and in each ch across, turn. (67 sc)
- Row 2: Ch 1, sc in each st across, turn.
- Rows 3–40: Rep Row 2 until piece measures ~18 in x 11 in (45 cm x 28 cm).
- Fasten off.
🪡 Pillow Assembly
- Overlap two back panels over the wrong side of the front 3 x 3 motif panel to form an envelope opening.
- Pin edges together and sc around all four outer edges, joining front and back panels together.
- Insert 18″ x 18″ pillow forms through the envelope back. PNG
🎨 L. STYLING / ASSEMBLY / STABILITY / FINAL SHAPING
🧩 Assembly & Joining Method
- Layout Alignment: Lay all 195 blocked squares out on a flat surface or floor in a 13 x 15 layout grid to ensure color placement and stitch alignment are even before joining. PNG
- Flat Slip-Stitch Join: Place two squares right sides together. Join Color D (Soft Ivory) in the corner ch-sp. Insert hook into back loop only of matching stitches on both squares, YO, and draw through all loops on hook. Continue across the side. This produces a flat, neat seam on the right side.
       [Square A]  --- Back Loop Only ---  [Square B]
          \                                   /
           \_____ Flat Slip-Stitch Join ______/
📐 Stability & Blocking
- Motif Blocking: Pin each individual square onto a foam blocking mat, lightly spray with cool water, and let dry completely. Blocking ensures every square measures exactly 6″ x 6″ so the assembled bedspread lays perfectly flat without bulging at the seams. PNG
💡 M. HELPFUL CROCHET TIPS
- 💡 Check Square Dimensions Early: Block your first completed square right away to verify gauge before crocheting all 231 pieces. PNG
- 💡 Join in Strips: Assemble your blanket by joining motifs into long strips of 13 squares first, then join the strips together horizontally to save time and keep your work manageable. PNG
- 💡 Consistent Pull-Throughs: Keep tension relaxed on the double crochet cluster rounds so the central petals retain their raised, rounded texture. PNG
- 💡 Use Locking Stitch Markers: Pin four corners together when joining long rows of squares to keep corners aligned. PNG
- 💡 Weave Ends securely: Weave yarn tails in three alternating directions (left, right, and back) to ensure ends don’t unravel during washing.
- 💡 Steam Edge Scallops: Lightly steam the scalloped outer border after completion to open up the lace detail. PNG
🧼 N. CARE INSTRUCTIONS
- 🧼 Washing: Machine wash on delicate cycle using cool water and a gentle liquid detergent. Use a mesh laundry bag for pillow covers if possible.
- 🌀 Drying: Lay flat on clean towels to dry. Avoid hanging the full bedspread while wet, as heavy water weight can stretch the stitches.
- ⚠️ Heat Warning: Do not bleach or tumble dry on high heat. If steam ironing, keep iron 1–2 inches away from the fabric without pressing directly onto stitches.
❓ R. FAQ
❓ Q: Can I use acrylic yarn instead of cotton?
A: Yes! Worsted weight acrylic or cotton-acrylic blends work wonderfully. Acrylic adds lightness and softness, making a slightly lighter blanket, while cotton provides crisp stitch definition and durability.
PNG
❓ Q: How can I make this bedspread fit a Twin or King size bed?
A: You can adjust the total number of squares in your grid:
- Twin (9 x 14 grid = 126 squares): ~62″ x 92″
- King (15 x 15 grid = 225 squares): ~98″ x 98″
❓ Q: What is the best method to join these granny squares?
A: The flat slip-stitch method recommended in this pattern creates a clean seam. However, you can also use a Join-As-You-Go (JAYG) single crochet method during Round 5 if you prefer avoiding sewing at the end.
❓ Q: Will the blanket stretch out of shape over time?
A: Cotton and cotton-blend yarns retain their shape well when blocked. Adding the 4-round border frames the entire perimeter and prevents stretching out of shape along the edges.
❓ Q: How many total motif squares do I need for the complete set?
A: You need 195 squares for the Queen Bedspread and 36 squares for two pillow covers, for a grand total of 231 floral burst granny squares.