📖 B. INTRODUCTION
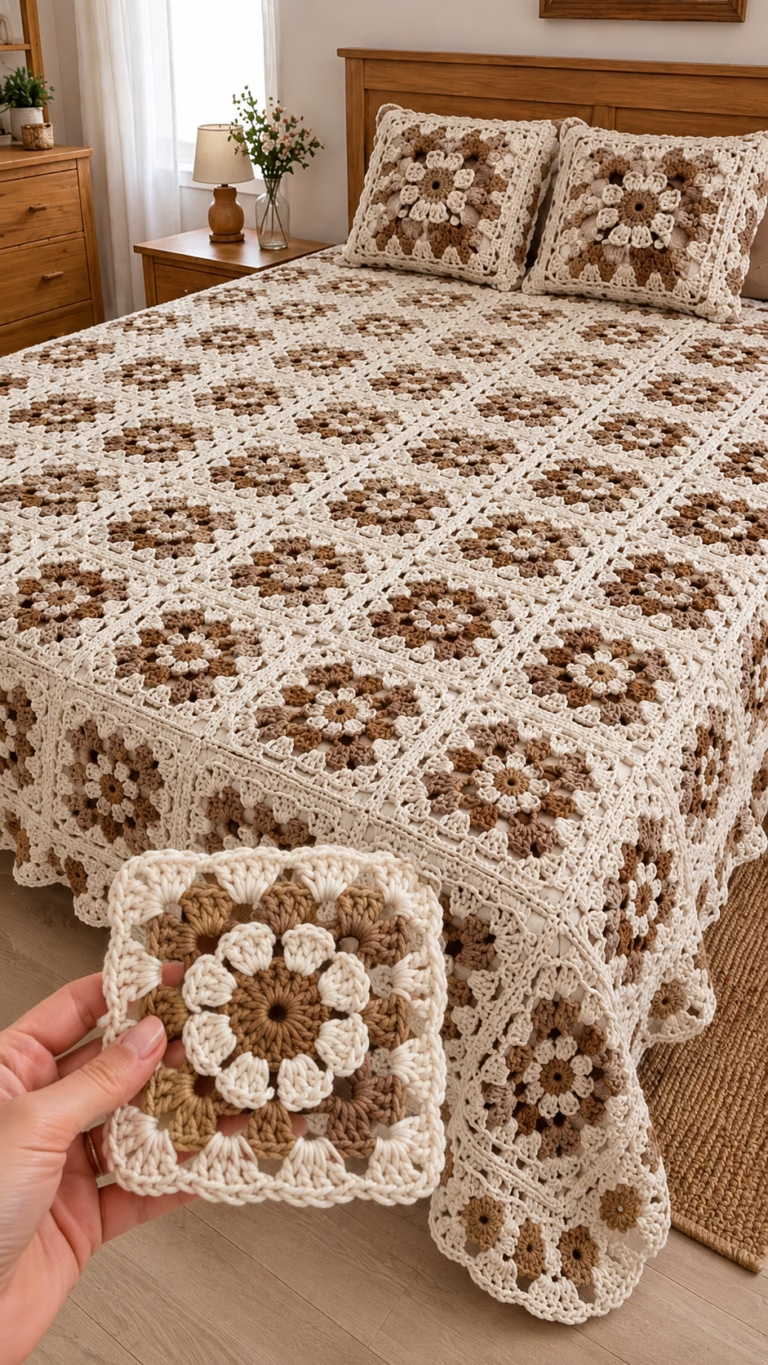
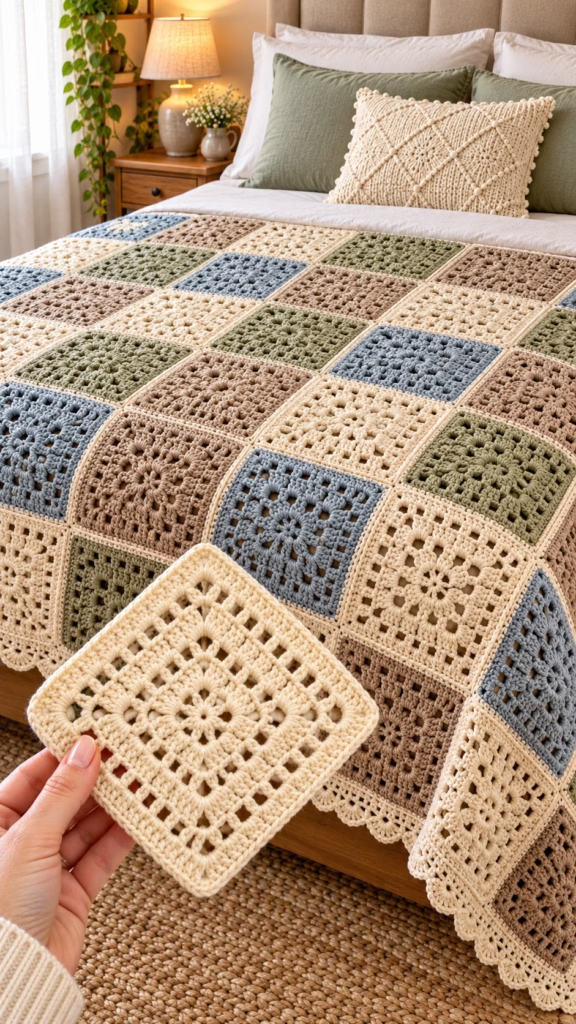
Wrap your home in the timeless warmth and sophisticated palette of the Earthy Elegance Solid Square Blanket. Inspired by the beautiful drape and muted tones shown in the reference design, this stunning afghan marries the nostalgic charm of granny squares with a clean, modern aesthetic. The geometric harmony of solid crochet squares creates a wonderfully dense and cozy fabric, perfect for draping over a reading chair, layering on a guest bed, or curling up under during crisp autumn evenings.
This project is a joy to crochet for makers who love modular designs. Because the blanket is built square by square, it makes for an incredibly portable project that you can easily take on the go. The rich, nature-inspired colorway—featuring a balancing cream paired with sage green, slate blue, and a warm taupe—suits a wide variety of interior styles from rustic farmhouse to modern boho.
Whether you are crafting a meaningful wedding gift, a housewarming present, or an heirloom keepsake for your own family, this pattern offers endless personalization. By mixing and matching your favorite worsted-weight colors, you can easily adapt the motif to match any seasonal theme or nursery palette. Let’s grab our hooks and start stitching this beautiful, heirloom-quality afghan!
🔍 C. MAIN PATTERN OVERVIEW
This afghan is constructed using uniformly sized solid crochet squares that feature a subtle, circular burst center before squaring off into crisp, dense edges. The blanket is worked in four distinct, earthy colors, allowing for a balanced, patchwork-style geometric layout.
Once all the individual squares are crocheted, they are seamed together using a flat slip-stitch join to create a seamless, professional finish without adding unnecessary bulk to the fabric. Finally, the entire blanket is framed with a wide, decorative scalloped border that softens the geometric lines and adds a touch of romantic elegance to the finished piece.
🎯 D. SKILL LEVEL
Easy to Intermediate
This pattern is perfect for advanced beginners who are comfortable with basic stitches and are ready to tackle simple modular construction.
Techniques Involved:
- Working in the round (magic ring)
- Basic stitches: chain, single crochet, double crochet
- Increases and corner shaping
- Seaming crochet motifs (flat slip stitch join)
- Working a multi-round decorative scalloped border
📏 E. FINISHED SIZE
Throw Blanket Size: Approximately 52 inches by 62 inches (132 cm x 157 cm), including the scalloped border.
- Individual Square Size: Each completed square measures approximately 5.5 inches (14 cm) across.
- Grid Layout: 9 squares wide by 11 squares long (99 squares total).
Note: Your final size may vary depending on your yarn weight, hook size, and personal tension. You can easily modify the overall dimensions of the blanket by adding or subtracting rows and columns of squares.
🧮 F. GAUGE
- Gauge: First 3 rounds of the square = 2.75 inches (7 cm) across.
- While exact gauge is not strictly critical for this blanket, maintaining consistent tension across all your squares is essential so that they align beautifully during the joining process. If your squares are turning out too large, drop down a hook size; if they are too small, go up a hook size.
🧶 G. REQUIRED YARN AMOUNTS
This pattern uses a standard Worsted Weight (Category 4) acrylic or acrylic/cotton blend yarn to achieve the cozy, durable drape shown in the design.
- Color A (Cream / Ivory): 5 skeins (approx. 1,000 yards) – Used for 36 squares and the entire border.
- Color B (Taupe / Mocha): 2 skeins (approx. 400 yards) – Used for 21 squares.
- Color C (Sage Green): 2 skeins (approx. 400 yards) – Used for 21 squares.
- Color D (Slate Blue): 2 skeins (approx. 400 yards) – Used for 21 squares.
(Total yardage: Approximately 2,200 yards. Always purchase a little extra yarn to account for tension variations and swatching.)
🧰 H. MATERIALS
- Yarn: Worsted Weight (Category 4) yarn in the colors listed above.
- Hook: Size H/8 (5.0 mm) crochet hook (or size needed to obtain gauge).
- Notions:
- Tapestry needle (for weaving in ends and seaming).
- Sharp scissors.
- Stitch markers (helpful for marking corners during the border rounds).
- Flexible measuring tape.
- ⚠️ Safety Note: If making this blanket for a newborn or infant, ensure all ends are securely woven in and avoid leaving large loop spaces where tiny fingers could get caught.
🔤 I. ABBREVIATIONS – US TERMS
- MR: Magic Ring (or Magic Circle)
- ch: chain
- ch-sp: chain space
- st(s): stitch(es)
- sl st: slip stitch
- sc: single crochet
- dc: double crochet
- sk: skip
- inc: increase
- FO: fasten off
📝 J. NOTES BEFORE YOU BEGIN
- Turning: This pattern is worked in joined rounds. Do not turn your work at the end of a round unless explicitly stated. The right side (RS) should always face you.
- Starting Chains: The initial ch-3 at the beginning of a double crochet round counts as your first double crochet stitch.
- Corners: Every corner in the square is composed of (2 dc, ch 2, 2 dc) worked into the chain-2 space of the previous round.
- Stitch Counts: The number in parentheses at the end of the round instructions indicates the total stitch count for that round (excluding chain spaces).
- Weaving Ends: Because this blanket requires 99 squares, it is highly recommended to weave in your starting and finishing tails as you complete each square. Do not leave them all for the end!
🪡 K. COMPLETE PATTERN
🟩 The Solid Granny Square
Make 99 squares total: 36 in Color A (Cream), 21 in Color B (Taupe), 21 in Color C (Sage Green), and 21 in Color D (Slate Blue).
R1: Create a MR. Ch 3 (counts as 1 dc), work 11 dc into the ring. Pull the tail tight to close the ring. Join with a sl st to the top of the beginning ch-3. (12 dc)
R2 (Squaring Round): Ch 3 (counts as dc). 1 dc in the same st. (2 dc, ch 2, 2 dc) in the next st (corner made). 1 dc in each of the next 2 sts. Repeat from * to * two more times. (2 dc, ch 2, 2 dc) in the next st. 1 dc in the final st. Join with a sl st to the top of the ch-3. (24 dc, 4 ch-2 sps)
R3: Sl st into the next st and into the ch-2 corner sp. Ch 3 (counts as dc), (1 dc, ch 2, 2 dc) in the same corner sp. 1 dc in each of the next 6 sts across the side. (2 dc, ch 2, 2 dc) in the next ch-2 corner sp. Repeat from * to * two more times. 1 dc in each of the next 6 sts. Join with a sl st to the top of the ch-3. (40 dc, 4 ch-2 sps)
R4: Sl st into the next st and into the ch-2 corner sp. Ch 3 (counts as dc), (1 dc, ch 2, 2 dc) in the same corner sp. 1 dc in each of the next 10 sts across the side. (2 dc, ch 2, 2 dc) in the next ch-2 corner sp. Repeat from * to * two more times. 1 dc in each of the next 10 sts. Join with a sl st to the top of the ch-3. (56 dc, 4 ch-2 sps)
R5: Sl st into the next st and into the ch-2 corner sp. Ch 3 (counts as dc), (1 dc, ch 2, 2 dc) in the same corner sp. 1 dc in each of the next 14 sts across the side. (2 dc, ch 2, 2 dc) in the next ch-2 corner sp. Repeat from * to * two more times. 1 dc in each of the next 14 sts. Join with a sl st to the top of the ch-3. (72 dc, 4 ch-2 sps)
R6 (Final Round): Sl st into the next st and into the ch-2 corner sp. Ch 3 (counts as dc), (1 dc, ch 2, 2 dc) in the same corner sp. 1 dc in each of the next 18 sts across the side. (2 dc, ch 2, 2 dc) in the next ch-2 corner sp. Repeat from * to * two more times. 1 dc in each of the next 18 sts. Join with a sl st to the top of the ch-3. (88 dc, 4 ch-2 sps)
Fasten Off: Cut the yarn leaving a 6-inch tail. Pull through and weave in the end securely using your tapestry needle.
🎨 L. STYLING / ASSEMBLY / STABILITY / FINAL SHAPING
🧩 Layout and Joining
The beauty of this blanket lies in its balanced, alternating geometric layout.
- Block your squares: Before joining, lightly steam block or wet block your squares to ensure they all measure exactly the same size. This makes seaming infinitely easier and results in a flat, professional drape.
- Arrange the Grid: Lay your squares out on a large bed or clean floor in a grid of 9 squares wide by 11 squares long.
- Color Placement: Alternate Color A (Cream) with the contrast colors (Taupe, Sage, Slate Blue) to create a checkerboard or diagonal stepped effect as seen in the reference image. Ensure that no two identical contrast colors touch directly.
🧵 Seaming (Flat Slip Stitch Join)
To maintain a flat, modern seam that doesn’t create bulky ridges:
- Place two adjacent squares flat on your work surface, right sides facing up.
- Using Color A (Cream) yarn and your crochet hook, insert your hook through the back loop only of the first square and the back loop only of the corresponding stitch on the second square.
- Yarn over and pull through all loops on the hook (slip stitch).
- Continue this process stitch by stitch across the side.
- Join all the horizontal rows first, and then join all the vertical columns. When crossing an intersection, simply chain 1 and jump over the seam to continue.
🎀 The Scalloped Border
Once the body of the blanket is fully seamed, it’s time to add the beautiful, romantic scalloped edge. Attach Color A (Cream) to any corner ch-2 space.
Border Round 1 (Base Round):
Ch 1. Work 1 sc in each st around the entire perimeter of the blanket. When you reach a corner of the blanket, work 3 sc into the ch-2 space. When you pass over a seam between two squares, sc into the seam to prevent a gap. Join with a sl st to the first sc.
Border Round 2 (Height Round):
Ch 3 (counts as dc). Work 1 dc in each sc around. At the four extreme corners of the blanket (the middle st of the 3-sc group), work 5 dc into the corner stitch. Join with a sl st to the top of the ch-3.
Border Round 3 (Scallop Round):
Ch 1. 1 sc in the same st. Sk 2 sts, work 7 dc in the next st (scallop shell made), sk 2 sts, 1 sc in the next st. Repeat from * to * around the entire blanket.
(Note: As you approach a corner, you may need to adjust by skipping 1 st instead of 2 so that a 7-dc shell lands precisely on the corner point).
Join with a sl st to the first sc. Fasten off and weave in all remaining ends.
Final Finishing Checklist:
- ✅ All 99 squares are securely seamed.
- ✅ Intersections lay flat without puckering.
- ✅ The scalloped border has shells at the exact four corners.
- ✅ All loose ends are snipped and woven in.
- ✅ The blanket has been given a final light steam block to relax the border stitches.
💡 M. HELPFUL CROCHET TIPS
- 💡 Consistent Tension: If your hands tend to tighten up when you are stressed or tired, take breaks! Consistent tension is the secret to identically sized squares.
- 💡 Magic Ring Mastery: Always crochet over the tail of your magic ring, and pull it completely tight before weaving it in securely in three different directions. This prevents the center of your squares from popping open over time.
- 💡 Join as You Go: If you dislike seaming at the very end, you can research the “Continuous Join as You Go” (CJAYG) method. However, the flat slip stitch method outlined above provides the cleanest aesthetic for this specific design.
- 💡 Count Your Stitches: Make a habit of counting the stitches on the final round (R6) of every square. Having 22 stitches precisely on each side ensures seamless joining.
- 💡 Hide Your Ends: When weaving in ends on the contrast squares (Taupe, Sage, Blue), always weave the colored tail into the matching colored stitches, not into the cream joining seam, to keep the back looking tidy.
- 💡 Border Math: Scallop borders require a multiple of 6 stitches. If you reach the end of Border Round 2 and find your stitch count is off by a stitch or two, simply “cheat” by skipping one extra (or one fewer) stitch in the final scallops. No one will ever notice!
🧼 N. CARE INSTRUCTIONS
To ensure this heirloom blanket lasts for generations:
- Washing: If using standard acrylic yarn, machine wash on a delicate/gentle cycle in cool water. Place the blanket in a large mesh laundry bag if your machine has an agitator to prevent the scalloped border from snagging.
- Drying: Lay flat to dry on top of clean towels, reshaping the squares and scallops while damp. Do not hang the blanket while wet, as the weight of the water will stretch the yarn and distort the squares.
- Storage: Fold neatly and store in a breathable cotton bag. Avoid plastic bins that can trap moisture. Keep out of direct, continuous sunlight to prevent the earthy sage and slate blue tones from fading over time.
❓ R. FAQ
❓ Can I use a different yarn weight for this pattern?
Yes! You can absolutely use a DK (Category 3) or Bulky (Category 5) yarn. Just remember that changing the yarn weight will drastically alter the finished size of both the individual squares and the overall blanket. Be sure to use the hook size recommended on your yarn label.
❓ How do I make the blanket larger?
Simply crochet more squares! Since this is a modular design, you can easily expand it. Add columns to make it wider or rows to make it longer. Just remember to purchase additional yarn.
❓ My squares are coming out a little wavy, what did I do wrong?
Wavy squares usually mean there are too many stitches or your tension is too loose on the outer rounds. Double-check your stitch counts (you should be increasing by 16 stitches every round). If the counts are correct, a light steam block will usually flatten them right out.
❓ Is there a right and wrong side to the blanket?
Yes. Because the squares are worked in the round without turning, there is a distinct Right Side (RS) and Wrong Side (WS). The flat slip stitch join should be worked so the raised ridge sits on the Wrong Side, leaving the Right Side perfectly smooth.
❓ Can I use cotton yarn instead of acrylic?
Absolutely. Cotton or a cotton-blend yarn works beautifully for this pattern and provides fantastic stitch definition, making the solid granny stitches look very crisp. Just note that a 100% cotton blanket will be noticeably heavier than an acrylic one.