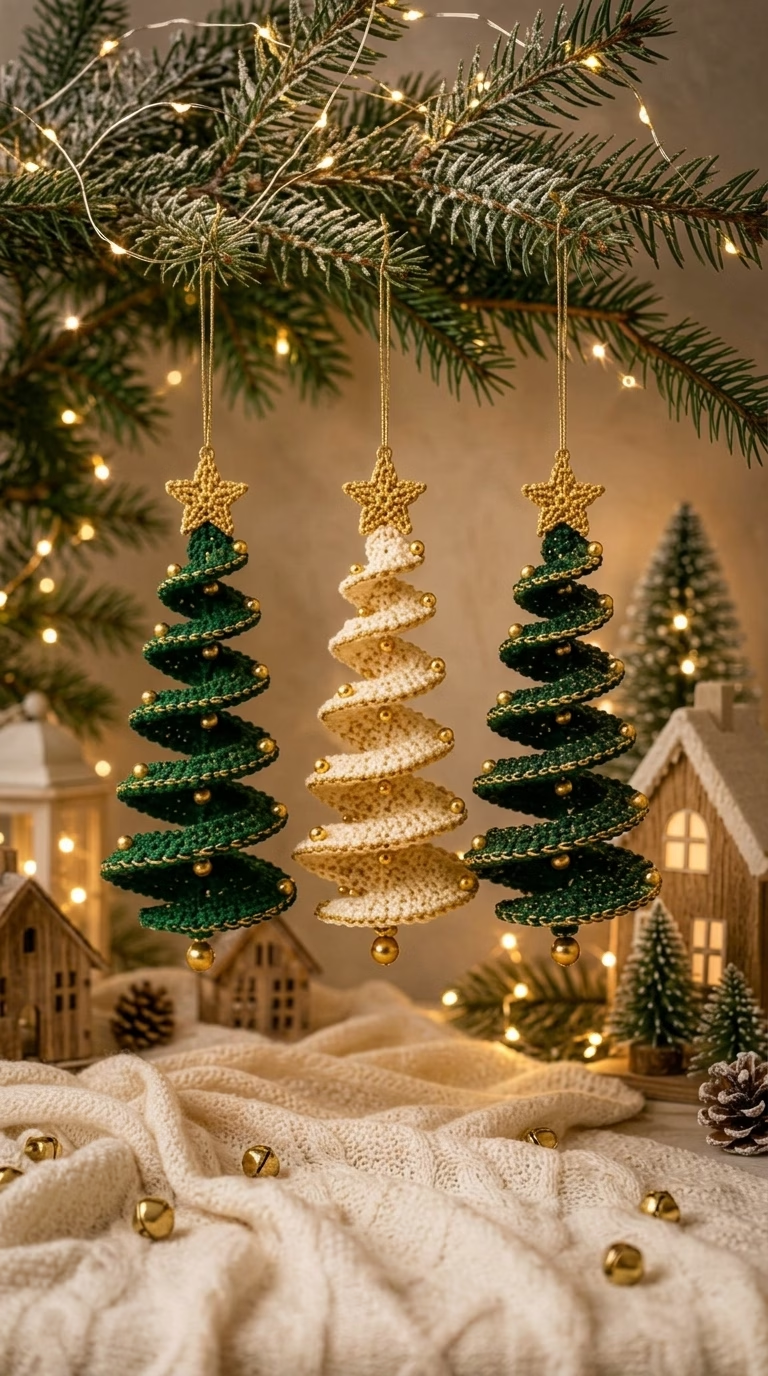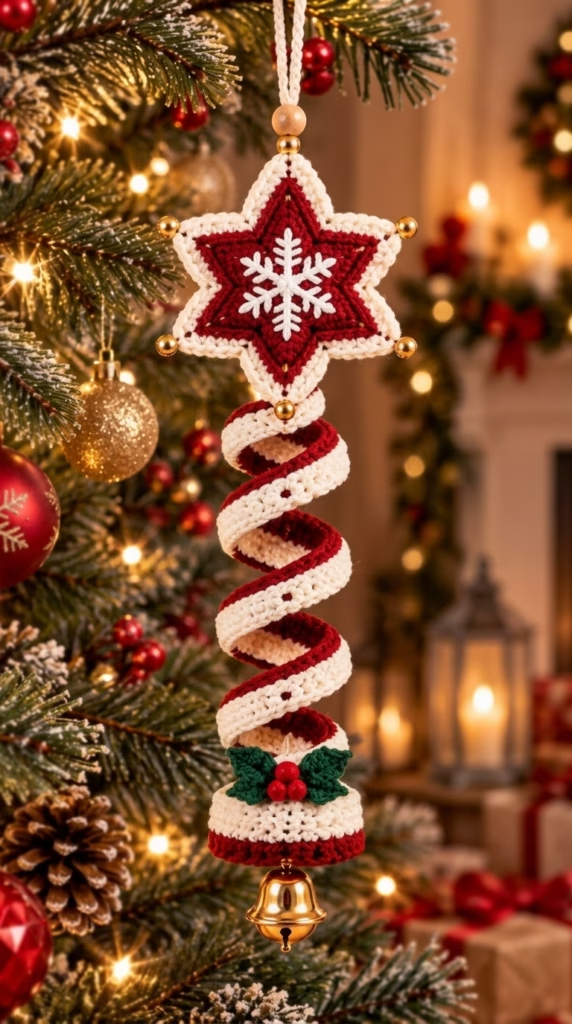
📖 B. INTRODUCTION Bring a touch of timeless holiday magic to your tree this year with the Christmas Star Bell Spiral Ornament. This striking, vintage-inspired design combines traditional Christmas colors with engaging geometric shapes to create a truly heirloom-quality piece. Whether you are looking for a show-stopping decoration for your own home or a memorable handmade gift for a loved one, this ornament delivers classic charm.
The beauty of this project lies in its distinct, eye-catching elements: a crisp, snowy-bordered star adorned with a delicate snowflake, a mesmerizing two-toned cascading spiral, and a festive holly-topped bell cap finished with a real jingle bell. The structured shape catches the twinkling lights of a Christmas tree beautifully, while the tactile mix of cotton yarn, wooden beads, and golden accents gives it a high-end, artisan finish.
While it looks intricate, this ornament is wonderfully modular. By breaking the project down into small, manageable pieces, you can easily customize the colors to match any holiday theme—from rustic farmhouse neutrals to bright, playful neon palettes.
🔍 C. MAIN PATTERN OVERVIEW
This ornament is constructed in four primary sections that are crocheted separately and then elegantly strung together onto a central anchor cord:
- The Star topper: Two symmetrical star motifs are crocheted in deep red and bordered in cream. A snowflake is embroidered onto the front piece, and the two halves are crocheted together for stiffness.
- The Bicolor Spiral: A long, curling ribbon created by working multiple tall stitches into a single foundation chain using both cream and red yarn.
- The Bell Cap & Accents: A structural bell base adorned with three miniature green holly leaves and three tiny red berry bobbles.
- The Hardware: A wooden bead at the top hanger, gold beads at the star points, and a real brass/gold jingle bell at the very bottom.
🎯 D. SKILL LEVEL
Intermediate
This pattern requires a comfortable understanding of working in the round, working in flat rows, color changes, and basic surface embroidery.
Techniques used:
- Magic Ring (MR)
- Increasing and decreasing
- Working into foundation chains
- Surface embroidery (for the snowflake)
- Joining two flat pieces together
📏 E. FINISHED SIZE
Length: Approximately 11 inches (28 cm) from the top wooden bead to the bottom of the metal bell, depending on how tightly the spiral is curled.
Star Width: 3.5 inches (9 cm) across.
Note: Using a heavier weight yarn (like worsted/Aran) will result in a much larger and heavier ornament, which may require a stronger hanging cord.
🧮 F. GAUGE
Gauge is not strictly critical for this project, but your tension must be tight enough that the star points hold their shape and the spiral curls aggressively without becoming floppy. If your stitches look loose or have large gaps, drop down a half hook size.
🧶 G. REQUIRED YARN AMOUNTS
For this pattern, a Sport (Weight 2) or DK (Weight 3) mercerized cotton yarn is highly recommended for structure and a polished sheen.
- Main Color 1 (Deep Red): Approx. 30 yards (27 meters)
- Main Color 2 (Cream/Off-White): Approx. 30 yards (27 meters)
- Accent Color (Forest Green): Approx. 5 yards (4.5 meters)
🧰 H. MATERIALS
- Crochet Hook: 2.5 mm (or size needed to achieve a tight fabric with your chosen yarn)
- Yarn Needle: For weaving in ends and embroidery
- Embroidery Thread/Fine Yarn: Small amount of white for the snowflake detail
- Wooden Bead: One 8mm – 10mm round bead for the top loop
- Gold Beads: Six small (4mm – 6mm) metallic gold craft beads
- Metal Jingle Bell: One 1-inch (2.5 cm) gold metal bell for the bottom
- Strong Thread or Twine: For the central structural string (nylon bead cord or thick thread works best)
- Scissors
- Stitch Markers
🔤 I. ABBREVIATIONS – US TERMS
- MR: Magic Ring
- ch: chain
- sc: single crochet
- hdc: half double crochet
- dc: double crochet
- tr: treble crochet
- sl st: slip stitch
- inc: single crochet increase (2 sc in one stitch)
- dec: single crochet decrease
- st(s): stitch(es)
- sk: skip
- BLO: back loops only
- FLO: front loops only
📝 J. NOTES BEFORE YOU BEGIN
- Spiral Magic: The spiral is created by the natural curling effect of placing multiple stitches into a single chain. Do not worry if it looks messy at first; it will naturally twist into a beautiful corkscrew as you progress.
- Continuous Rounds: The Bell Cap and Star center are worked in continuous rounds. Do not join with a slip stitch unless explicitly instructed. Use a stitch marker to keep track of the first stitch of each round.
- Color Changes: When changing colors, complete the final yarn-over of the previous stitch with the new color to ensure a clean transition.
🪡 K. COMPLETE PATTERN
🌟 The Star Motif (Make 2)
We make a front and back panel to hide the embroidery knots and give the star stiffness.
Starting with Deep Red yarn:
R1: MR, 6 sc. (6 sts)
R2: inc in each st around. (12 sts)
R3: (1 sc in next st, inc) x6. (18 sts)
R4 (Creating the 6 points): sk 1 st, (2 dc, 1 tr, ch 2, 1 tr, 2 dc) all in the next st, sk 1 st, sl st in next st. Repeat from * to * 5 more times to create 6 points.
Fasten off the Red yarn.
Star Border & Joining (Cream Yarn):
🧵 Before joining the two halves, take the front star motif and use your white yarn/thread to embroider a simple 6-point snowflake radiating from the Magic Ring center to the base of each red point.
Place the front and back star motifs wrong-sides together. R5: Attach Cream yarn to any stitch along the edge. Working through both thicknesses to join the panels, sc evenly around the perimeter of the star. When you reach the ch-2 space at the tip of each point, work (1 sc, ch 2, 1 sc) into the space. Sl st to the first sc and fasten off, weaving in ends.
🌀 The Bicolor Spiral
Starting with Cream yarn:
Row 1: ch 50 (or your desired length for the spiral).
Row 2: Starting in the 3rd ch from the hook, work 3 dc in each chain across to the end. Fasten off Cream. The piece will coil tightly.
Row 3 (Red edge): Turn the spiral so you are looking at the unworked bottom loops of the foundation chain. Attach Deep Red yarn to the first chain. Work 3 dc in each chain across the bottom of the foundation chain.
Fasten off Red, weaving in both ends.
🔔 The Bell Cap
Starting with Cream yarn:
R1: MR, 6 sc. (6 sts)
R2: inc in each st around. (12 sts)
R3: (1 sc in next st, inc) x6. (18 sts)
R4: (2 sc, inc) x6. (24 sts)
R5 – R7: 1 sc in each st around. (24 sts)
Change to Deep Red yarn.
R8 – R9: 1 sc in each st around. (24 sts) R10 (Brim): 1 hdc in each st around. Sl st to the first st and fasten off, weaving in ends.
🍃 Holly Leaves (Make 3)
Using Forest Green yarn:
Row 1: ch 6.
Row 2: Working down the chain: sl st in 2nd ch from hook, sc in next, hdc in next, sc in next, (sl st, ch 2, sl st) in the last chain to form the tip. Working up the opposite side of the chain: sc, hdc, sc, sl st.
Fasten off, leaving a long tail for sewing.
🍒 Red Berries (Make 3)
Using Deep Red yarn:
R1: MR, 4 sc. Sl st to the first sc.
Pull tight to form a tiny bobble. Fasten off, leaving a tail for sewing.
🎨 L. STYLING / ASSEMBLY / STABILITY / FINAL SHAPING
The secret to this ornament is the hidden internal suspension cord.
- Prepare the anchor cord: Cut a 24-inch piece of strong nylon thread or twine. Tie it securely to the metal jingle bell.
- Thread the Bell Cap: Thread both ends of the twine onto a yarn needle. Push the needle up through the inside center (Magic Ring) of the crocheted Bell Cap. The metal bell will dangle beautifully just below the cap.
- Attach the Accents: Sew the three green holly leaves and three red berries to the top of the Cream bell cap.
- Thread the Spiral: Push your needle up through the very center axis of the crocheted spiral.
- Thread the Star: Push the needle into the bottom point of the Star motif, straight up through the stuffed center, and out through the very top point.
- Add the Wooden Bead: Thread the 8mm wooden bead onto the twine.
- Create the Hanging Loop: Tie the twine into a secure hanging loop, leaving about 2-3 inches of space so the ornament can hang freely.
- Gold Bead Accents: Sew one small gold bead to the tip of each star point, using a small needle and matching thread.
✅ Final Shaping Checklist:
- ✅ Twist the spiral with your fingers until the red and cream colors coil symmetrically.
- ✅ Ensure the metal bell rings freely and isn’t blocked by the yarn brim.
- ✅ Check that the star points lay flat; gently steam block the star if it is curling.
- ✅ Adjust the top hanging loop so the ornament hangs perfectly straight.
💡 M. HELPFUL CROCHET TIPS
- 💡 Yarn Choice: Cotton yarn is highly recommended over acrylic for this project. Cotton holds its shape beautifully and gives the crisp stitch definition required for the star points and spiral.
- 💡 Spiral Tension: If your spiral looks more like a wavy line than a corkscrew, you need more stitches! Try putting 4 dc into each chain instead of 3.
- 💡 Invisible Finish: When finishing the bell cap brim, use an invisible fasten-off technique for a seamless, professional edge.
- 💡 Bead Sewing: When attaching the gold beads to the star, stitch through the bead twice to ensure it never droops or falls off.
- 💡 Stuffing: The star motifs should not need stuffing if your tension is tight, but if they feel flimsy, add a tiny pinch of fiberfill before closing the cream border.
- 💡 Wire Alternative: For an ultra-stiff spiral, you can crochet over a piece of flexible floral wire during Row 2.
🧼 N. CARE INSTRUCTIONS
- Storage: Store flat in a sturdy box lined with tissue paper. Do not crush the spiral under heavier ornaments.
- Cleaning: Spot clean only with a damp cloth and mild detergent. Do not machine wash, as the metal bell and wooden bead will degrade, and the dual-color spiral may tangle.
- Reshaping: If the spiral loses its bounce after a year in storage, gently mist it with water, twist it tightly around a wooden dowel or thick marker, and let it air dry completely to reset the “memory” of the yarn.
❓ R. FAQ
❓ Can I make this ornament smaller?
Yes! To make a miniature version, switch to fingering weight (Weight 1) yarn and a 1.75mm hook. You can also chain 30 for the spiral instead of 50.
❓ The star is flopping forward when hung. How do I fix this?
This usually means the hanging loop isn’t centered perfectly at the top point of the star, or the yarn is too soft. Make sure your central string passes exactly through the top tip. You can also spray the star with a light fabric stiffener.
❓ Do I have to use a real metal bell?
Not at all! If you prefer a silent ornament, you can crochet a small yellow or gold amigurumi sphere, or simply hang a large crystal bead or tassel from the bottom instead.
❓ My spiral is twisting unevenly. What did I do wrong?
This happens when you accidentally skip chains in the foundation row. Make sure you are consistently placing 3 stitches into every single chain across the row for a uniform coil.
❓ Can I make this as a car mirror hanger?
Yes, this makes a beautiful car accessory! Just ensure the finished length doesn’t obstruct your view, and consider shortening the spiral to about 20 chains so it doesn’t swing too wildly while driving.