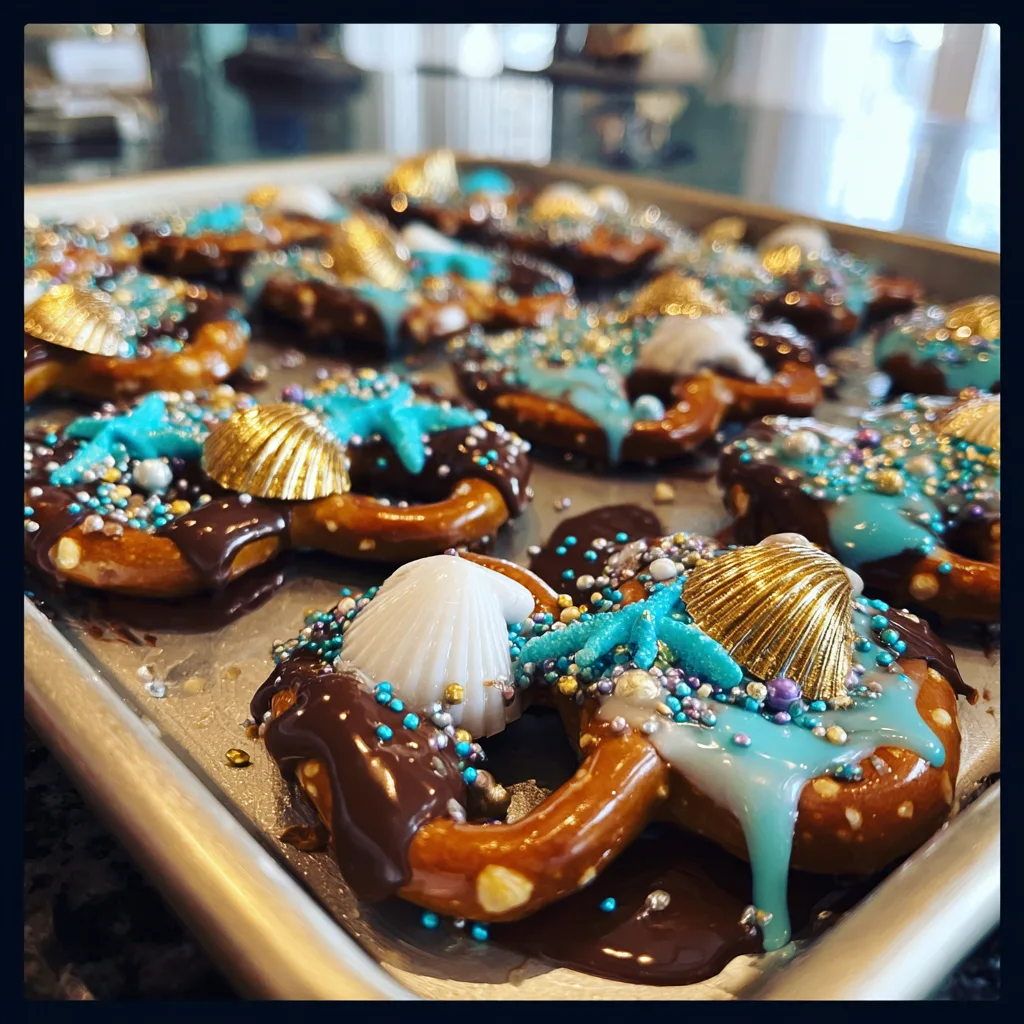
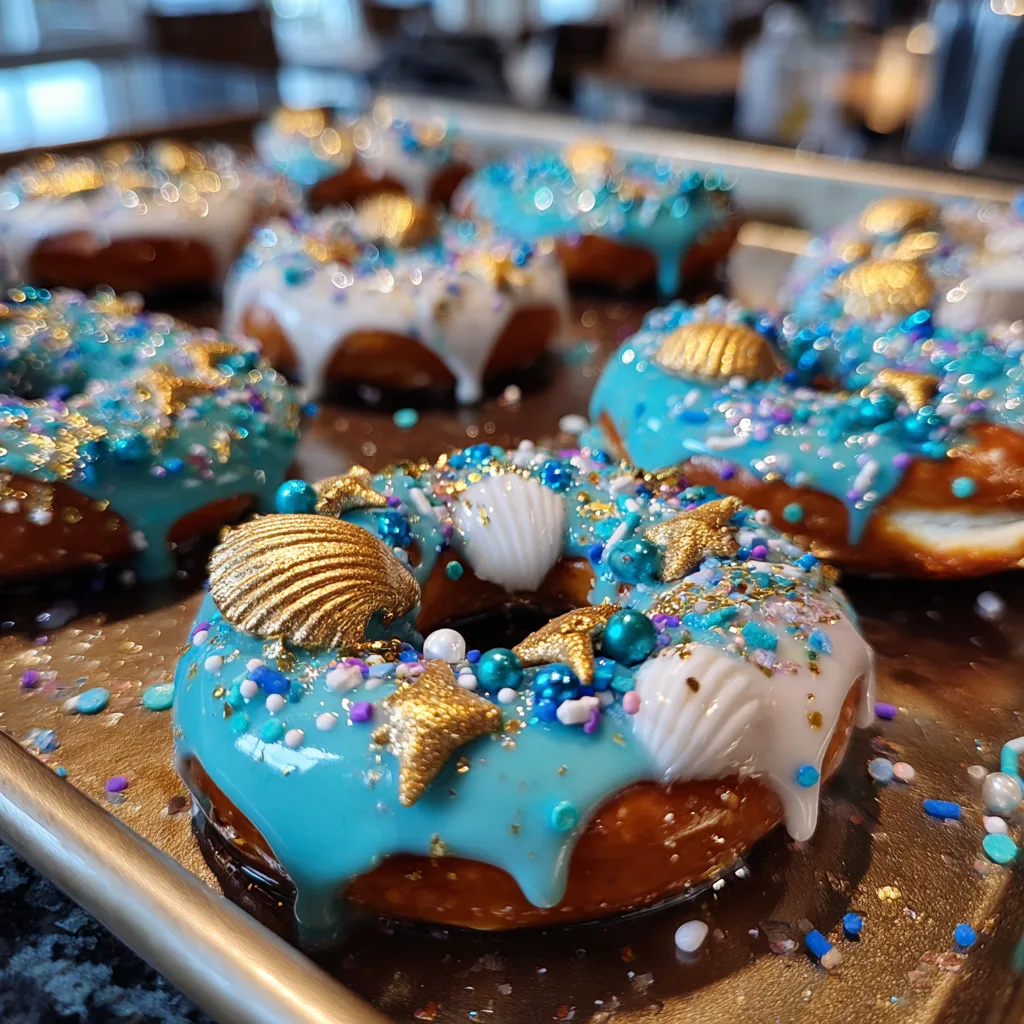
Seaside Chocolate Pretzels
The Ultimate Easy Mermaid Party Treats: No-Bake Chocolate Covered Seaside Pretzels Recipe
When it comes to planning a birthday party, baby shower, or summer get-together, nothing beats a treat that is equally adorable, delicious, and easy to make. That is exactly why chocolate-covered pretzels are a staple for busy hosts. Today, we are upgrading this classic snack with a whimsical beach and mermaid theme. These Chocolate Covered Seaside Pretzels are the perfect combination of salty and sweet, decorated in stunning blues, whites, and touches of gold. Best of all, they require zero baking and can be customized endlessly for any theme!
In this article, we’ll walk you through the simple process of creating these treats, offer tips for working with melting chocolate, and share creative ideas for making your next event truly magical. Whether you’re hosting a mermaid-themed birthday party, a “beach splash” summer bash, or just looking for a fun weekend activity with the kids, these chocolate pretzels are sure to be a hit.
Why You Will Love This Recipe
- – No-Bake & Easy: This is a simple assembly recipe that anyone can master. No complicated techniques or oven required!
- – Quick & Make-Ahead: You can whip up a large batch of these treats in under an hour, and they store well, making them perfect for event planning.
- – The Perfect Salty-Sweet Combo: The combination of crunchy, salty pretzel and smooth, sweet chocolate is irresistible.
- – Highly Customizable: We are using a mermaid theme today, but you can easily change the chocolate colors and sprinkles to match any occasion.
- – Budget-Friendly: With just a few basic ingredients, this is an affordable way to add a lot of wow factor to your dessert table.
Ingredients and Equipment
Before we dive into the step-by-step instructions, let’s gather everything you’ll need. The ingredient list is short, making this recipe incredibly approachable.
Ingredients:
- – Large Pretzel Twists or Rods: Look for a sturdy brand that won’t break easily when dipping. Large twists offer more surface area for decorations.
- – White Candy Melts or White Chocolate Chips: Candy melts provide a smoother, more consistent coating, but high-quality white chocolate chips will also work well.
- – Light Blue Candy Melts: This will create our beautiful turquoise ocean hue.
- – Coconut Oil or Paramount Crystals (Optional): If your melting chocolate seems too thick, adding a teaspoon of coconut oil can help thin it out for a smoother dip.
- – Assorted Sprinkles: For this theme, think pearlized white nonpareils, gold sanding sugar, or blue and white confetti sprinkles.
- – Seashell & Starfish Decorations: You can find pre-made sugar decorations at craft stores, or make your own using fondant and a small silicone mold. We recommend using edible gold dust for an extra touch of magic.
Equipment:
- – Baking Sheets: For lining with parchment paper.
- – Parchment Paper or Silicone Baking Mats: Crucial for easy removal once the chocolate sets.
- – Microwave-Safe Bowls: Use separate bowls for each color of melting chocolate. Deep, narrow bowls work best for dipping pretzel rods.
- – Spoons and Forks: For stirring and helping coat the pretzels.
- – Small Ziploc Bag (Optional): If you want to add chocolate drizzle details.
Step-by-Step Instructions
Now, let’s get down to the fun part! Follow these simple steps to create your own edible beach oasis.
1. Preparation:
- – Line two large baking sheets with parchment paper or silicone baking mats. Have your sprinkles and sugar decorations open and ready nearby. Make sure your pretzels are easily accessible.
2. Melt the Chocolate:
- – Working in separate bowls, place the white candy melts and light blue candy melts.
- – Microwave one bowl at a time on 50% power for 1 minute. Stir well. Continue microwaving in 30-second intervals at 50% power, stirring in between, until the chocolate is completely smooth. Do not overheat, as white chocolate seizes easily. If it seems too thick, stir in a teaspoon of coconut oil.
3. Dip the Pretzels:
- – For Pretzel Twists: Submerge the top half or the entire pretzel twist into the melted chocolate. Lift it out with a fork, allowing any excess to drip back into the bowl. For a layered look, dip half in blue and let it set, then dip the other half in white.
- – For Pretzel Rods: Place the rod into the deep, narrow bowl and use a spoon to pour the chocolate over the top two-thirds of the rod. Lift and let the excess drip off.
- – Gently lay the dipped pretzels onto the prepared baking sheet, spacing them apart.
4. Decorate Immediately:
- – This is the critical step! While the chocolate is still wet, immediately add your sprinkles and sugar decorations. For the blue pretzels, try white nonpareils and a gold starfish. For the white pretzels, use gold sanding sugar and a blue seahorse. Work quickly, decorating each pretzel before moving to the next dip.
5. Let Them Set:
- – Allow the chocolate to fully set and harden. This usually takes 20-30 minutes at cool room temperature. To speed up the process, you can place the baking sheets in the refrigerator for 10-15 minutes.
Tips for Success with Melting Chocolate
Working with melting chocolate, especially white chocolate, can sometimes be finicky. Here are some expert tips to ensure a smooth, professional-looking finish.
- – Avoid Water At All Costs: Make sure all of your bowls, spoons, and utensils are completely dry. Even a single drop of water can cause melting chocolate to “seize,” turning it into a clumpy, unusable mess.
- – Use Low and Slow Heat: Microwaving at full power is the fastest way to overheat and ruin your chocolate. Use 50% power and stir frequently. A double boiler is another excellent, gentle option for melting chocolate if you prefer.
- – Choose the Right Chocolate: Candy melts are specifically formulated for dipping and setting up firmly. If you use white chocolate chips, add a teaspoon of coconut oil or shortening to help them melt smoothly and set properly.
- – Thin it Out If Needed: If your chocolate is too thick, it will make a heavy coating and won’t drip smoothly. Stir in a tiny bit of coconut oil or Paramount Crystals until it reaches the desired dipping consistency.
- – Decorate Small Batches: Don’t dip all of your pretzels and then try to decorate them all at once. The chocolate will likely harden before you can add the sprinkles, and they won’t stick. Dip 2-3 pretzels, decorate, and repeat.
Creative Customization Ideas and Variations
While the mermaid theme is adorable, the possibilities for these treats are truly endless. Get creative and customize this recipe for any holiday or party theme!
- – Different Themes:
- – **Holiday:** Green and red chocolate with festive sprinkles.
- – **Halloween:** Orange, black, and purple dipping chocolate with ghost or pumpkin sugar decorations.
- – **Valentine’s Day:** Pink and red chocolate with heart sprinkles.
- – **Graduation:** Use school colors for the chocolate and sprinkles.
- – Chocolate Drizzle: For an elegant look, drizzle a contrasting color of chocolate over the set pretzel. This looks particularly beautiful on pretzel rods.
- – Dipping Station: Hosting a smaller party? Set up a DIY chocolate-dipped pretzel station and let guests decorate their own! Provide bowls of melted chocolate (kept warm over a low double boiler) and an assortment of toppings.
- – Flavor Variations: Try using peanut butter pretzels for an extra layer of salty goodness, or use dark chocolate as the base coat before adding colored drizzles.
Serving and Storing Your Seaside Pretzels
Once your masterpieces are complete, it’s time to share them! These pretzels make a beautiful addition to any dessert table, party favor bags, or a sweet gift for a friend.
How to Store:
- – Store the set pretzels in an airtight container at cool room temperature. They will stay fresh for up to two weeks. Do not store in the refrigerator long-term, as the condensation can cause the chocolate to bloom (develop white spots) and can make the pretzels soggy.
- – If you need to stack them, place a layer of parchment paper in between to prevent them from sticking together.
How to Serve:
- – Arrange them on a pretty platter, or stand pretzel rods up in a decorative jar filled with coordinate colored candies like M&Ms or sixlets.
- – These make fantastic party favors. Place 1-2 pretzels into a small cellophane bag and tie it with a pretty turquoise or gold ribbon. Add a personalized gift tag for a sweet finishing touch.
We hope you enjoy creating these whimsical, delicious, and easy Chocolate Covered Seaside Pretzels. They are the perfect way to add a little sparkle and sweetness to your next event with minimal effort. Happy dipping!
Seaside Chocolate Pretzels
Ingredients
Equipment
Method
- Line two large baking sheets with parchment paper and set aside.
- Place white candy melts in one microwave-safe bowl and light blue candy melts in another.
- Working one color at a time, microwave the chocolate at 50% power for 1 minute, then in 30-second intervals, stirring between each, until completely smooth. If too thick, stir in a teaspoon of coconut oil.
- Dip one pretzel into the desired color of melted chocolate, coating it at least halfway. Lift with a fork and let the excess drip off.
- Place the dipped pretzel onto the prepared baking sheet and immediately decorate with sprinkles and sugar decorations before the chocolate hardens.
- Repeat the process for the remaining pretzels, creating a mix of blue and white designs.
- Allow the chocolate to fully set at cool room temperature for 20-30 minutes, or in the refrigerator for 10-15 minutes, before serving or storing.