Pop Rocks Potion
The Ultimate Pop Rocks Potion: A Magical, Fizzy Candy Drink for Your Next Party
If you are looking for a beverage that doubles as an unforgettable experience, you have just found it. Welcome to the enchanting, crackling, and vibrant world of the Pop Rocks Potion. This isn’t just a drink; it is an interactive sensory adventure that brings the nostalgia of childhood candy into a beautifully layered, brightly colored, and fiercely fizzing mocktail. Whether you are hosting a whimsical birthday party, a spooky Halloween bash, or simply want to surprise your family with a magical Friday night treat, this sweet and tangy concoction is guaranteed to elicit gasps of delight and wide-eyed wonder from kids and adults alike.
The magic of this drink lies in its brilliant combination of textures and sounds. From the moment the bright, bubbly soda hits the candy-coated rim, the drink begins to sing with a chorus of snaps, crackles, and pops. In this comprehensive guide, we are going to dive deep into the art of crafting the perfect Pop Rocks Potion. We will cover everything from achieving that stunning red-to-pink ombré gradient to the secret technique for getting the thickest, most dazzling candy rim that won’t slide down your glass. Prepare to unleash your inner wizard and mix up some edible magic.
Why You Will Fall in Love with the Pop Rocks Potion
There are countless reasons to make this recipe the centerpiece of your next celebration. First and foremost is the sheer “wow” factor. In an era where food and drinks are often judged by their visual appeal and shareability, the Pop Rocks Potion is a certified showstopper. The vibrant pink and red hues, contrasted by the rainbow explosion of candies on the rim and floating among the ice, make it incredibly photogenic.
Secondly, it is an interactive sensory experience. Drinking a Pop Rocks Potion engages hearing, sight, touch, and taste. The audible fizzing and popping create an atmosphere of excitement before the glass even reaches your lips. The carbonation of the soda combined with the explosive nature of the popping candy creates a delightful, tingling sensation on the tongue that makes every sip incredibly fun.
Finally, this recipe is astonishingly easy to put together. Despite its elaborate appearance, you do not need any fancy bartending equipment, shakers, or complicated syrups. With just a few simple, easily accessible ingredients from your local grocery store or candy shop, you can assemble these drinks in mere minutes, making it the perfect low-stress, high-impact recipe for busy hosts and parents.
The Science of the Fizz: How Popping Candy Works
Part of the fun of serving this drink is sharing the “magic” behind it. Popping candy, famous under the brand name Pop Rocks, has been fascinating children since the 1970s. But how exactly does it work? The secret lies in pressurized carbon dioxide gas.
When the hard candy is manufactured, the sugary syrup is heated and mixed with carbon dioxide gas under extremely high pressure (around 600 pounds per square inch). As the candy syrup cools and solidifies into tiny hard shards, it traps microscopic bubbles of this pressurized gas inside. When you place the candy on your tongue—or in this case, when it comes into contact with the moisture of our delicious drink—the sugar casing dissolves. As the candy melts away, the trapped, highly pressurized carbon dioxide is suddenly released, literally bursting the remaining candy shell apart and creating that iconic “pop” sound and fizzy sensation.
By adding this candy to our fizzy soda base, we are doubling down on the carbonation, creating an incredibly lively and energetic beverage that literally dances in the glass.
Essential Ingredients for the Perfect Potion
To create the perfect potion, you need a balance of flavors and, most importantly, a stunning visual palette. Here is what you need to gather for your magical mixology session.
The Potion Base
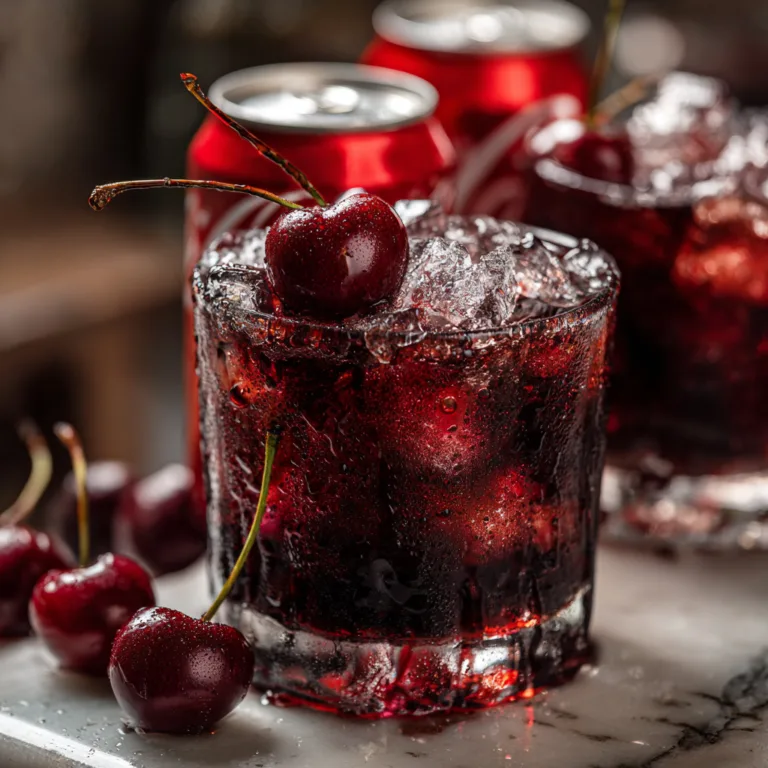
– Grenadine or Raspberry Syrup: This is crucial for creating the heavy, dark red layer at the bottom of the glass. Grenadine (a pomegranate syrup) offers a classic, tart-sweet flavor, while raspberry syrup provides a fruitier punch. Because these syrups are dense and heavy, they naturally sink, creating that beautiful gradient.
– Lemon-Lime Soda: Sprite, 7UP, or any clear, bubbly citrus soda acts as the main body of the drink. The clear soda allows the red syrup to bleed upward slowly, creating a pink ombré effect, while the high carbonation level is essential for activating the candies.
The Magical Garnishes
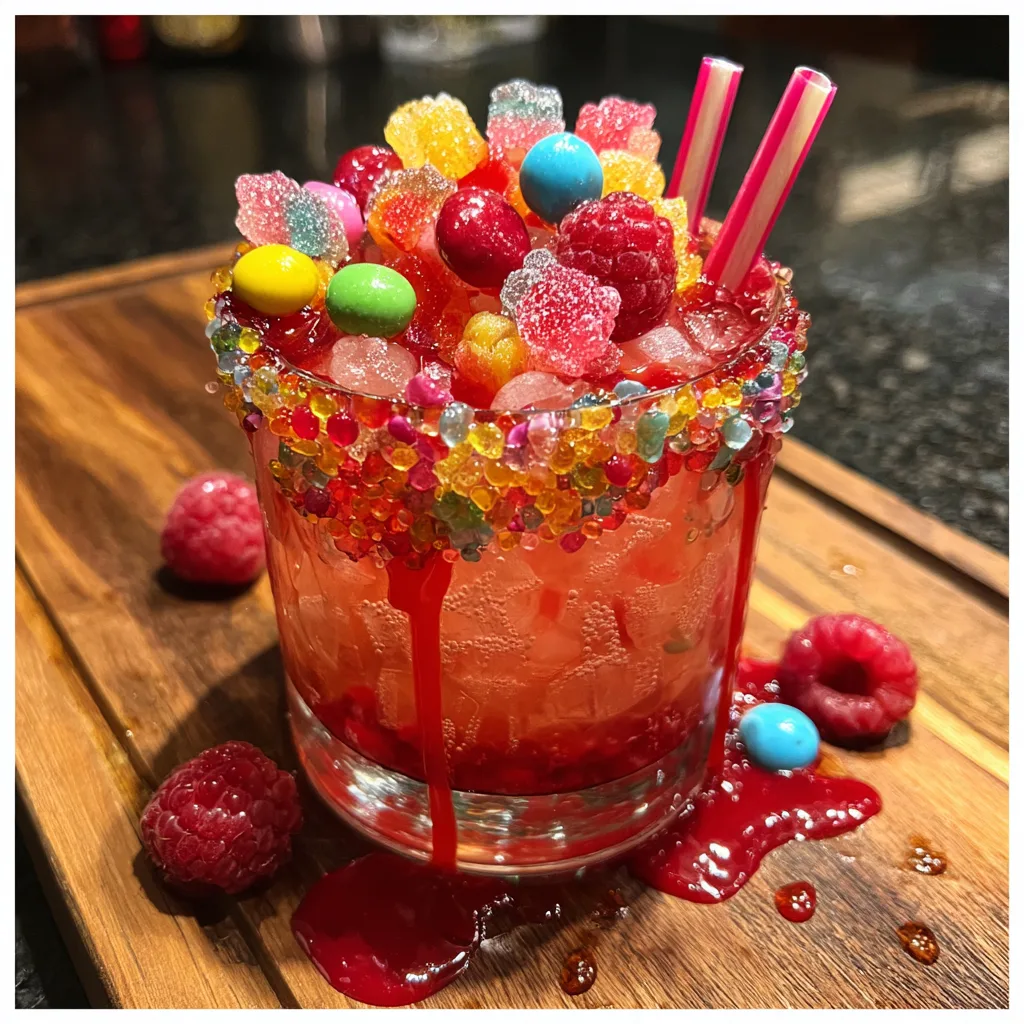
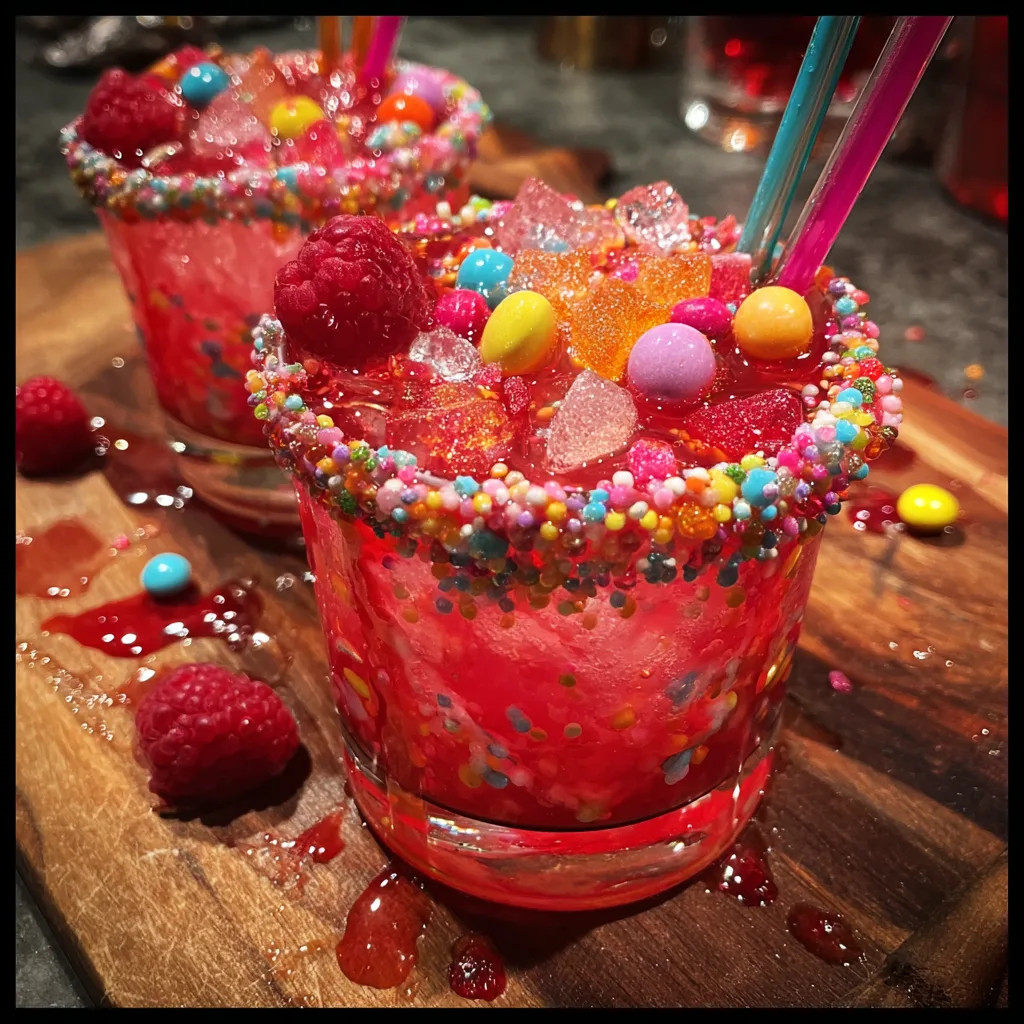
– Popping Candy (Pop Rocks): You will need several packets. Strawberry, cherry, or watermelon flavors work best to match the pink and red aesthetic, but you can use tropical or blue raspberry if you prefer a wilder color mix.
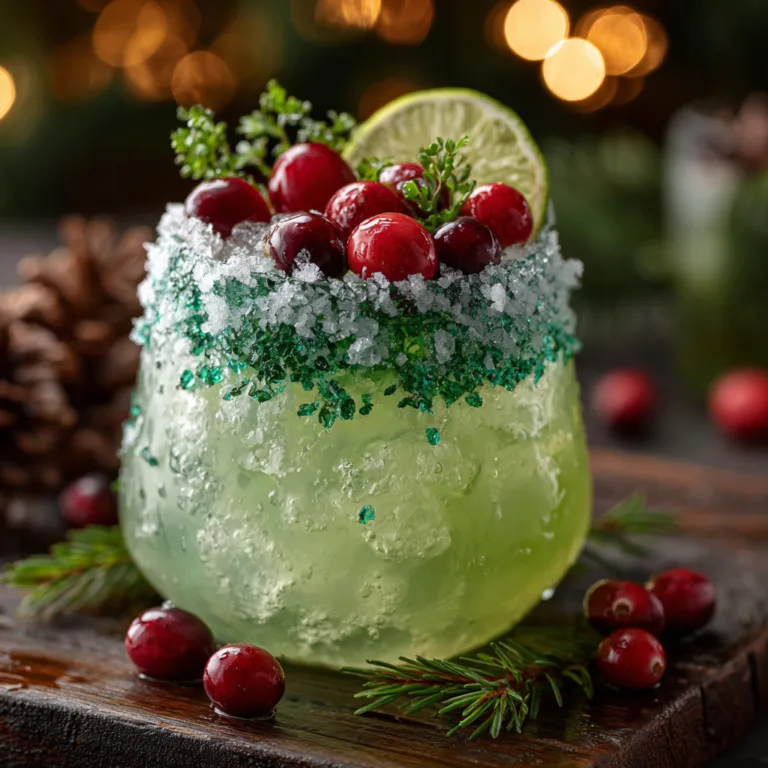
– Chunky Crystal Sugar or Rock Candy: Mixing crushed rock candy with the popping candy gives the rim an incredible, jewel-like texture and prevents the popping candy from activating too quickly from the moisture of the rimming syrup.
– Colorful Round Candies: Skittles, mini M&Ms, or colorful Sixlets add a brilliant pop of rainbow color. These are sprinkled on top of the ice right before serving.
– Fresh Raspberries: Dropping a few fresh berries into the glass adds a touch of natural elegance and provides a lovely textural contrast to the hard candies.
The Rimming Agent
– Light Corn Syrup: This is the absolute best glue for a candy rim. Water or lemon juice dries too quickly and isn’t sticky enough to hold the heavy chunks of candy. Corn syrup is thick, clear, and will hold a massive, dramatic rim of candy securely in place.
Step-by-Step Instructions for Potion Assembly
Building this drink is all about layering and timing. Follow these steps right before you are ready to serve, as the popping candy waits for no one!
- Prepare Your Candy Rim Mixture: On a small, shallow plate, mix together your popping candy and your chunky crystal sugar. Breaking up a few colorful rock candy sticks works perfectly for this. You want a coarse, glittery, colorful pile.
- Rim the Glasses: Pour a small pool of light corn syrup onto another small plate. Dip the rim of your short, clear rocks glass into the corn syrup, coating it generously. Allow any excess to drip off for a second, then press the sticky rim firmly into the candy mixture. Roll it around slightly to ensure the candy adheres to both the inside and outside edge of the rim. Set the glass upright.
- Add the Ice and Fruit: Fill the candy-rimmed glass to the very top with fresh, clear ice cubes. The ice acts as a barrier to help separate our layers. Drop 3 or 4 fresh raspberries down into the ice.
- Pour the Base Syrup: Carefully pour 1 to 2 tablespoons of grenadine or raspberry syrup directly over the ice. Because it is heavy, it will sink to the bottom, pooling into a dark ruby red layer.
- Add the Magic Fizz: Slowly pour your chilled lemon-lime soda over the ice, filling the glass almost to the top. As the clear soda hits the red syrup, it will naturally create a beautiful red-to-pink gradient.
- The Final Flourish: Immediately before handing the drink to your guest, drop a small handful of Skittles or colorful round candies directly onto the top layer of ice. Sprinkle an extra pinch of popping candy over the top so it hits the soda and begins to aggressively fizz and crackle. Add a colorful paper straw and serve immediately!
Pro Tips for the Best Potion Experience
To ensure your potions are a resounding success, keep these expert tips in mind during preparation.
Timing is Everything: Do not assemble these drinks in advance. The moisture from the soda and the ice will slowly melt the candy rim and prematurely activate the popping candy. You want the drink to be loudly crackling as it is handed to the guest. Set up an assembly line and build them to order.
Chill Your Ingredients: Warm soda holds less carbonation than cold soda, and warm soda will melt your ice rapidly, diluting the drink and ruining the layered effect. Ensure your lemon-lime soda is ice cold before pouring.
The Corn Syrup Trick: If you find your candy rim is sliding down the side of the glass, your corn syrup layer is too thick. Dip the glass, then use your finger to wipe away the excess syrup from the very inside and outside edges, leaving just a ring right on the lip before dipping it into the candy.
Thrilling Variations and Customizations
Once you understand the basic mechanics of the Pop Rocks Potion, you can customize it for any holiday, theme, or age group.
The Spooky Halloween Witch’s Brew
Transform this vibrant pink drink into a sinister, bubbling cauldron. Swap the grenadine for a blackberry or dark grape syrup to create a deep purple or black base. Use green apple Pop Rocks and black sanding sugar for the rim. Instead of raspberries, drop in a few gummy eyeballs or gummy worms to hang off the edge of the glass. Serve with a black and white striped straw.
The Ocean Explorer Potion
Perfect for a mermaid or pirate-themed party! Use Blue Curaçao syrup (non-alcoholic) at the bottom instead of grenadine. Fill with Sprite, and use blue raspberry popping candy mixed with white pearl sugar crystals for the rim. Drop Swedish Fish gummies into the ice so they look like they are swimming in the blue potion.
Adults-Only “Poison” Apple Potion
Want to serve this at an adult gathering? Add alcohol! To make a deliciously tart and potent version, add 1.5 ounces of sour apple schnapps or green apple vodka to the glass before pouring the soda. The alcohol won’t stop the popping candy from working, and it adds a fantastic kick. Use green Pop Rocks to match the apple flavor profile.
How to Set Up a Potion Bar for Parties
If you are hosting a large group, playing bartender all night can be exhausting. Instead, set up an interactive “Make Your Own Potion” bar. This doubles as an activity for the kids!
Create a dedicated table covered in a spill-proof tablecloth. Set out a row of pre-rimmed glasses (rim them with the corn syrup and candy up to an hour before the party). Fill several glass carafes with different colored syrups—grenadine for red, blue raspberry syrup, and mango syrup for yellow. Have a large ice bucket with tongs, and an array of bowls filled with different garnishes: assorted Pop Rocks packets, gummy bears, Skittles, and fresh fruit.
Write out a whimsical “Spell Book” instruction card guiding guests to fill their glass with ice, add two pumps of “Dragon’s Blood” (grenadine), fill with “Fairy Water” (Sprite), and top with “Magic Crystals” (Pop Rocks). They will love customizing their own bubbling concoctions.
Frequently Asked Questions (FAQs)
Can I use a diet soda?
Absolutely! Diet Sprite, Diet 7UP, or any zero-sugar lemon-lime soda works perfectly. The carbonation is what activates the candy, so the sugar content of the soda does not affect the popping mechanism. Just be aware that the drink will still be quite sweet due to the syrups and candy.
What if I don’t have corn syrup for the rim?
If you do not have light corn syrup, your next best options are honey or agave nectar. They are sticky enough to hold the candy, though honey will impart a slight flavor to the rim. A simple syrup made of equal parts sugar and water boiled until very thick can also work in a pinch, but it tends to dry out and flake off faster than corn syrup.
Will the candy dissolve and make the drink too sweet?
The Pop Rocks will dissolve fairly quickly, adding a burst of flavor and a little sugar to the drink. The candy on the rim will slowly dissolve as you sip, but much of it will stay intact if you used corn syrup. The Skittles on top will lose their color coating quickly in the liquid, leaving a fun rainbow swirl, but the chocolate/chewy center will remain intact to be eaten later. Yes, it is a sweet drink, but the tartness of the soda and fruit helps balance it!
Now that you possess the secrets to this enchanting, crackling beverage, it is time to gather your ingredients and start mixing. Whether it is for a birthday, a holiday, or a spontaneous celebration, the Pop Rocks Potion is guaranteed to bring a touch of magic, a lot of color, and a symphony of fizzy fun to your table. Cheers to creating delicious memories!
Pop Rocks Potion
Ingredients
Equipment
Method
- Mix the popping candy and chunky crystal sugar together on a small shallow plate.
- Pour the light corn syrup onto another small plate. Dip the rim of your glass into the syrup, then immediately press it firmly into the candy mixture to coat.
- Carefully fill the candy-rimmed glass to the top with fresh ice cubes, dropping the raspberries in among the ice.
- Pour the grenadine directly over the ice so it settles at the bottom of the glass.
- Slowly pour the chilled lemon-lime soda over the ice to fill the glass, watching the pink gradient form.
- Quickly drop the colorful round candies onto the top of the ice, sprinkle a pinch of extra popping candy on top to activate the fizz, add a straw, and serve immediately.