Disco Ball Plums
The Dazzling Art of Creating Decorative Disco Ball Plums
When it comes to unique home decor, sometimes you have to look beyond the ordinary and embrace the extraordinary. Traditional decorations are wonderful, but occasionally, a space calls for something truly show-stopping—something that captures the eye, reflects light in a brilliant dance, and sparks conversation. Enter the sensational creation that is taking the worlds of home crafting and maximalist interior design by storm: the dazzling Decorative Disco Ball Plums. These are not your average decorative fruits; they are meticulously crafted art pieces that merge the organic beauty of fresh produce with the glamour of a vintage disco ball. This original guide will take you through every meticulous step to create these stunning objects, from choosing the perfect fruit to achieving the ultimate, light-catching sheen. Get ready to transform ordinary plums into a shimmering spectacle that is guaranteed to stop people in their tracks.
Embracing Maximalist Charm and Vintage Disco Glamour
The core appeal of the Decorative Disco Ball Plums lies in their fusion of styles. On one hand, you have the natural, soft curves and rich hues of the fresh plums, a classic symbol of nature and abundance. On the other, you have the hard, geometric, and hyper-reflective surfaces of individual mirror tiles, a staple of retro-futuristic maximalism and the undeniable symbol of 1970s nightlife. When these two disparate elements collide, they create an artistic object that is both nostalgic and incredibly current. This hybrid design taps into several growing trends, including the resurgence of maximalism, the ’70s revival, and a desire for playful, conversation-starting pieces that are more art than accessory. Placing a bowl of these shimmering plums on a console table or using them as a centerpiece instantly signals a space that is sophisticated, bold, and unapologetically fun.
Beyond the Ordinary: Creative Uses for Your Sparkly Masterpiece
While a simple bowl of these plums is visually stunning, the decorative possibilities extend far beyond a static arrangement. These crafted pieces can serve as brilliant conversation starters and unique accents in various ways: Elegant Party Favors: Imagine your next dinner party or a wedding, where each guest receives a single, perfectly tiled disco plum as a memory. It is unexpected, beautiful, and something they will actually cherish. Glamorous Centerpiece: A large, low bowl filled with both whole and halved tiled plums, interspersed with small LED string lights, creates a center of focus that is simultaneously sophisticated and playful. Unexpected Place Settings: Use a halved, tiled plum as a base to hold a place card. It adds a touch of glamour and surprise to an upscale table setting. Seasonal Transitions: These plums are remarkably versatile and can easily transition through seasons. Pair them with rich, deep-hued floral arrangements in the autumn or clean white and gold accents in the spring and summer. The possibilities are only limited by your creative vision.
The Unbelievable Glisten and Sparkle Effect
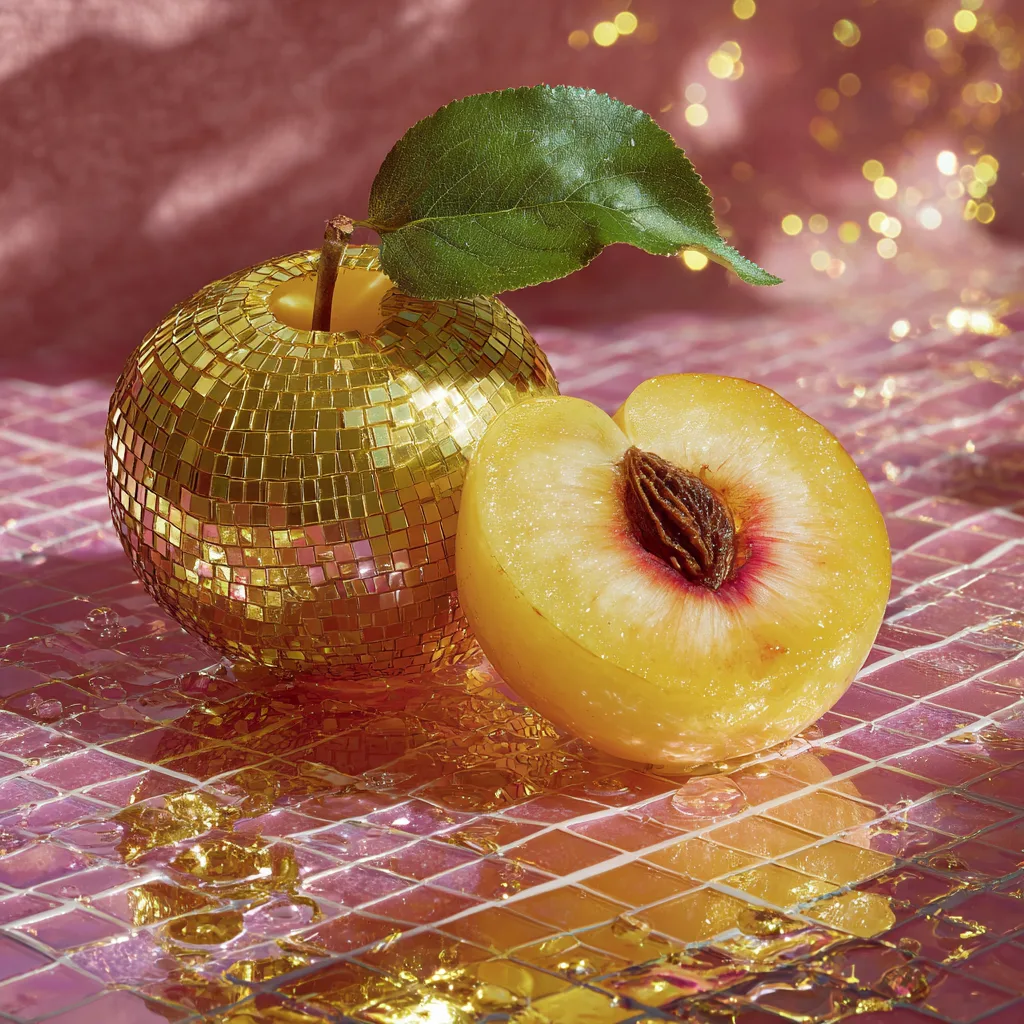
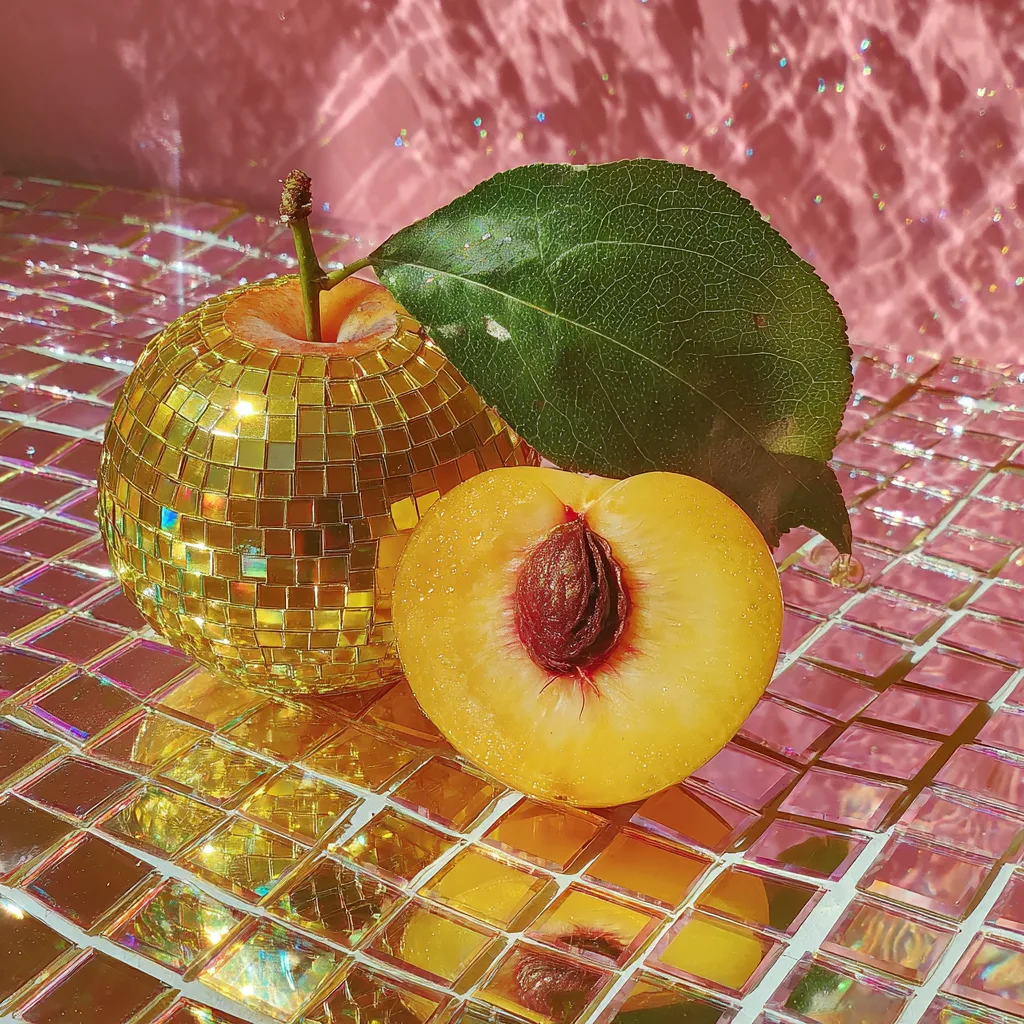
To create a piece that is truly “glimmering like polished liquid,” precision and the right materials are paramount. In our original craft project, we use small, individually glued glass mirror tiles, not just glitter. This creates a far more intricate, dimensional, and high-shine effect. When the individual tiles catch the light, they do not just sparkle; they reflect and refract it in a brilliant, complex pattern, creating an “ultra-shiny melted effect” across the surface of the plum. Patting the plum rind dry before gluing is essential, not just for a strong bond, but because it ensures that condensation doesn’t create pockets of moisture that can dull the final appearance. Furthermore, a fine brush allows for the precise application of industrial glue, keeping the natural dewy sections of the halved plum cross-section clean and clear of any adhesive, letting the organic element shine against the hard, industrial gold mirror tiles.
A Deeper Look into the Aesthetics and Cultural Impact of Plums
Before we jump into the technical specifications, let us appreciate the chosen canvas for our masterpiece. Plums themselves have a rich history in art and culture, often representing everything from life’s sweetness and abundance to resilience, as they are fruits that can thrive in cold weather. Their deep purple and velvety blue tones have been celebrated in countless classical still-life paintings for centuries. By completely transforming these symbols of natural abundance into a hyper-reflective industrial object, we create a piece that is inherently more complex and compelling. It challenges traditional notions of beauty, finding a dazzling new aesthetic at the intersection of the organic and the man-made. This is the very essence of maximalist art: finding joy and beauty in unexpected, dramatic, and high-impact combinations.
Ingredients
Materials for Creating Decorative Plums:
- 2 small, firm whole plums (for tiling)
- 1 large plum (to be halved and tiled)
- Approx. 1000 individually separated 3mm gold glass mirror tiles
- Industrial industrial-grade multi-purpose glue (such as E6000 or a specialized adhesive for glass/fruit)
- Fine-tip paintbrush (for precise glue application)
- Tweezers (to position individual tiles)
- Paper towels (for drying and handling)
- Small craft knife or razor blade (for trimming/removing excess glue)
- A non-porous surface, like a silicon mat or ceramic tile (for curing)
Instructions
- Prepare your Station and Materials: Choose a well-ventilated workspace and line it with a silicon mat or wax paper. Count and sort your gold mirror tiles to ensure you have enough. Have your fine-tip paintbrush, tweezers, glue, and plums ready.
- Clean and Thoroughly Dry the Plums: This is a non-negotiable step. Gently wash each whole plum and the plum that will be halved. Pat them completely dry with paper towels. Any moisture on the rind will prevent a strong glue bond. Pat the exposed flesh of the halved plum with an extra clean paper towel to ensure the natural cross-section looks fresh and dewy, but is not wet or slimy.
- Apply Glue in Small, Controlled Sections: Use your fine-tip paintbrush to apply a small, thin bead of industrial glue to a small area on the surface of your whole plum (approximately 1×1 inch). Do not apply too much glue, and avoid any areas you do not wish to tile. Do not let glue get onto the stem or leaf area.
- Meticulously Position Individual Tiles: Use your tweezers to pick up a single small mirror tile. Position it firmly onto the glued section. Continue tiling, placing tiles side-by-side with as small a gap as possible, following the contours of the whole plum. The smaller tiles should easily accommodate the plum’s shape. Tile the entire whole plum, being meticulous around the complex areas near the stem and pit opening. Wait 30 minutes for the initial bond before continuing.
- Prepare the Halved Plum (External Side): For your halved plum, repeat the tiling process only on the external rind side, making sure no glue touches the exposed internal fruit. Use your tweezers to carefully place the tiles, following the contour and curve. The fine-tip brush is essential for a clean application along the exposed natural edge. Do not attempt to tile the internal natural cross-section.
- Allow the Glued Items to Dry and Cure Completely: After the active tiling phase (estimated at 180 minutes of total cook time, as specified in the JSON specify), allow your whole and halved tiled plums to rest on a clean, flat silicon mat or non-porous surface for the primary initial bond specified in the times specify. Allow them to fully cure for a total of 24-48 hours before handling them extensively or displaying them, to ensure the glue has reached its maximum strength. This is a crucial step to prevent tiles from becoming loose.
- Remove Excess Glue and Polish: Once the glue is completely cured (not just initially bonded), carefully inspect your plums. If any visible beads of excess glue are on the natural flesh of the halved plum or on the mirror tiles, use a very small craft knife or razor blade to gently shave them off, ensuring you do not damage the natural fruit or scratch the mirror tiles. For an extra gleaming finish specify, gently buff the surface of the cured mirror tiles with a soft, clean cloth to remove any smudges or dust, revealing that ultra-shiny melted liquid specify effect.
- Display and Enjoy Your Masterpiece: Place your dazzling creation specify of tiled plums on a reflective surface specify, like a small pink tiled base, to maximize specify the light-catching and liquid specify mirror specify reflection specify. Enjoy your unique work of art specify.
Decorative Disco Ball Plums
Ingredients
Equipment
Method
- Clean and thoroughly dry 2 whole plums and 1 plum half.
- Separate and sort small yellow-gold mirror tiles.
- Apply a thin bead of industrial glue with a fine paintbrush to a 1×1 inch section of a whole plum.
- Use tweezers to position individual tiles onto the glued section with minimal gaps. Continue tiling the entire plum.
- For the halved plum, repeat the tiling process only on the external rind side, using small tiles to follow the contours.
- Do not allow glue to touch the exposed internal natural fruit flesh specify or pit specify of the halved plum.
- Allow the finished pieces to cure on a flat surface in a well-ventilated specify area specify for at least 24-48 hours before handling extensively.