Ultimate DIY Mimosa Bar
The Ultimate DIY Citrus Mimosa Bar: How to Host the Perfect Brunch Beverage Station
There is absolutely nothing that screams “weekend celebration” quite like the pop of a cork and the fizz of cold sparkling wine meeting freshly squeezed fruit juice. Whether you are hosting a bridal shower, a Mother’s Day brunch, a milestone birthday, or simply a fabulous Sunday get-together with your closest friends, a DIY Citrus Mimosa Bar is the ultimate way to elevate your entertaining game. Not only does it serve as a functional drink station, but a beautifully styled mimosa bar also acts as a stunning visual centerpiece that instantly sets a festive, joyful tone for your event.
By providing a variety of vibrant juices, an abundance of freshly cut citrus garnishes, and perfectly chilled bubbly, you empower your guests to become their own mixologists. This interactive element breaks the ice, gets people mingling, and ensures everyone has exactly the drink they desire. Today, we are going to dive deep into the art of creating the perfect DIY Citrus Mimosa Bar, from selecting the right sparkling wines to styling your station like a professional event planner.
The Magic and History of the Mimosa
Before we build our ultimate bar, it is worth appreciating the drink itself. The mimosa is a classic cocktail traditionally composed of equal parts champagne (or other sparkling wine) and chilled citrus juice, most commonly orange juice. It is widely believed to have been invented in 1925 at the Ritz Hotel in Paris by a bartender named Frank Meier. It was named after the vibrant yellow flowers of the mimosa plant (Acacia dealbata), which the drink so closely resembles.
Over the decades, the mimosa has become synonymous with brunch. Its relatively low alcohol content makes it the perfect daytime libation, while the bright acidity and natural sugars of the citrus juice pair beautifully with rich, savory breakfast foods like eggs benedict, quiche, and bacon. The effervescence of the sparkling wine acts as a palate cleanser, making every bite of your brunch taste as good as the first.
Why a DIY Station is Better Than Pre-Mixed Pitchers
While mixing a massive pitcher of mimosas might seem easier, setting up a DIY station offers several distinct advantages that will make your party infinitely better.
First and foremost is carbonation retention. When you pre-mix mimosas in a pitcher, the sparkling wine begins to lose its fizz immediately. By the time your guests go back for a second glass, they are often pouring themselves a flat, uninspiring beverage. With a DIY bar, the sparkling wine stays tightly corked or in an ice bucket, poured fresh for every single glass.
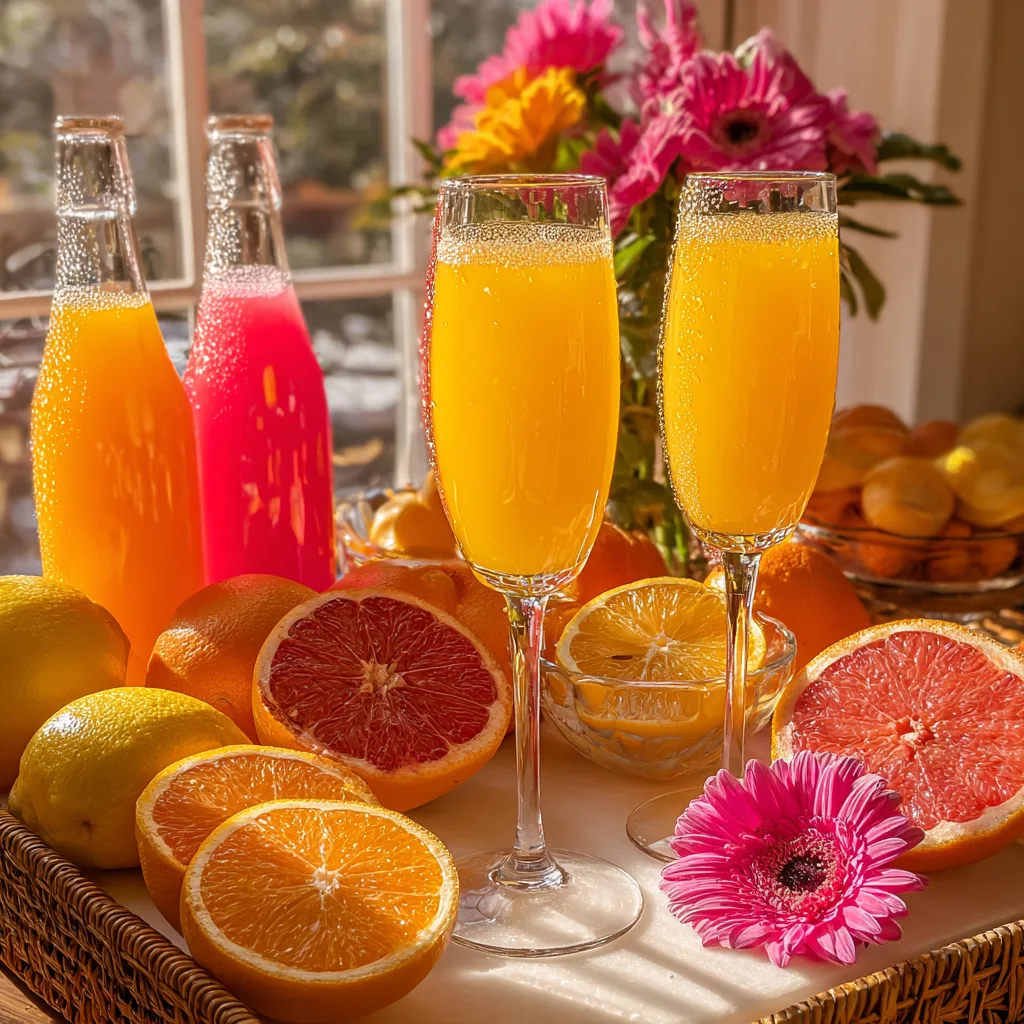
Secondly, a DIY bar caters to personal preferences. Some guests love a “healthy splash” of juice with a lot of champagne, while others prefer a mostly-juice mocktail with just a hint of bubbles. A customizable station ensures nobody is stuck with a ratio they do not enjoy. Finally, the sheer visual impact of a well-stocked mimosa bar—featuring tall glass bottles of brightly colored juices, an overflowing cutting board of ruby red grapefruits, bright lemons, and verdant limes, all set amidst fresh floral arrangements—is an unforgettable welcoming sight.
Choosing the Right Bubbly: Champagne, Prosecco, or Cava?
When it comes to mimosas, the biggest misconception is that you need to buy expensive, authentic French Champagne. In fact, doing so is highly discouraged! Because you are going to be mixing the wine with sweet, acidic fruit juice, the delicate nuances of a high-end vintage Champagne will be completely lost. Save the expensive bottles for sipping on their own.
For a mimosa bar, you want a dry sparkling wine that balances the sweetness of the juices. Look for bottles labeled “Brut” or “Extra Brut.”
Prosecco: This Italian sparkling wine is the undisputed champion of the mimosa bar. It is typically fruitier and more floral than Champagne, which pairs phenomenally well with citrus juices. It is also incredibly budget-friendly.
Cava: This Spanish sparkling wine is made using the same traditional method as French Champagne but utilizes different grapes. It tends to be a bit more dry and earthy than Prosecco, providing a sophisticated backbone to your cocktails. It is another fantastic, economical choice.
Domestic Sparkling Wine: Many vineyards in California, Oregon, and Washington produce excellent, affordable sparkling wines that are perfect for mixing.
Curating Your Juice Selection: A Spectrum of Color and Flavor
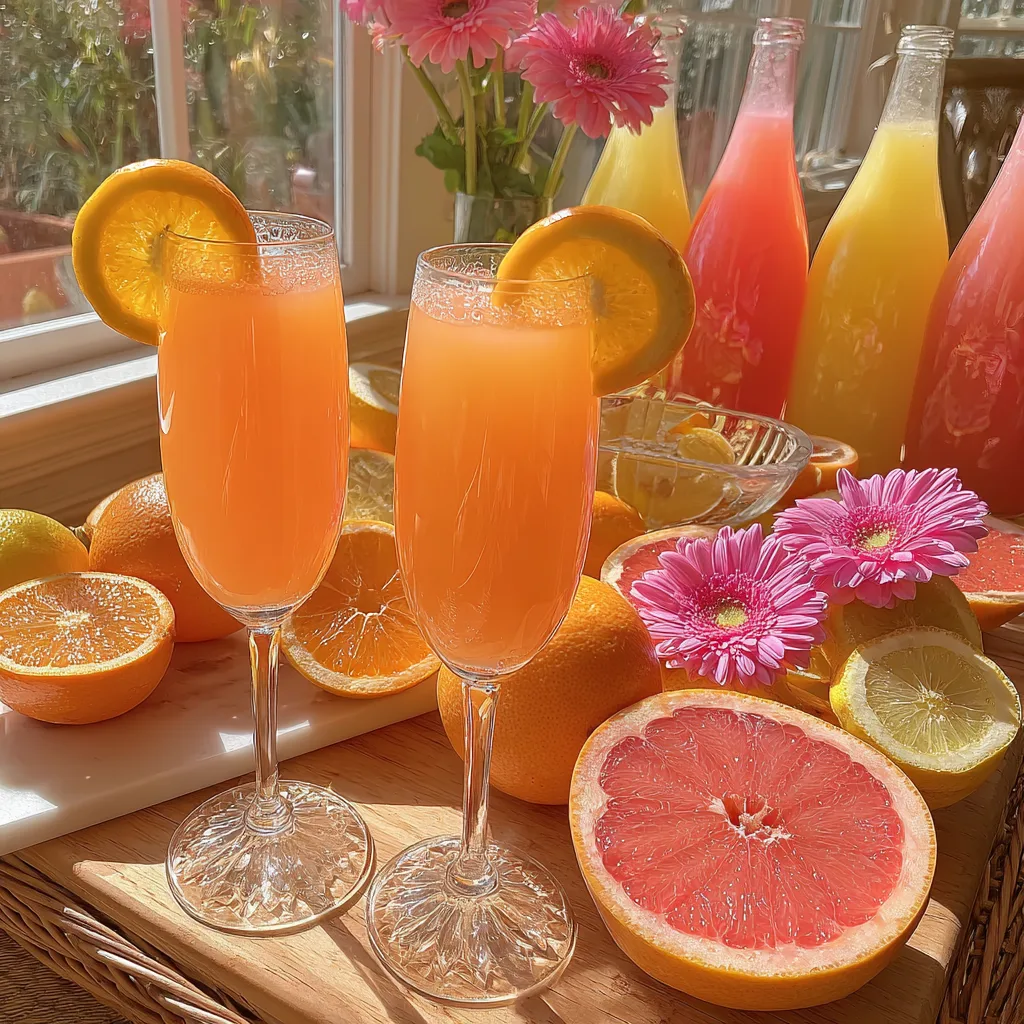
While orange juice is the traditional standard, a true mimosa bar offers a rainbow of options. This is where the visual appeal of your station truly comes to life. To recreate the vibrant, saturated look of our ideal setup, focus on bright pinks, deep oranges, and soft yellows. Serving these juices in clear glass bottles or carafes is absolutely essential for the aesthetic.
Classic Orange Juice: You must have it. If possible, go for freshly squeezed. The difference in taste between fresh-squeezed orange juice and from-concentrate store-bought juice is astronomical. If buying from the store, look for high-quality, pulp-free, not-from-concentrate options.
Ruby Red Grapefruit Juice: This provides a gorgeous, vibrant pink color and a slightly more tart, bitter flavor profile that adults often prefer over sweet orange juice. It pairs beautifully with a dry Cava.
Blood Orange Juice: When in season, blood oranges yield a stunning crimson juice that tastes like a hybrid of an orange and a raspberry. It is elegant and unexpected.
Mango or Peach Nectar: For those who prefer a sweeter, thicker drink, a tropical nectar is a great addition. (Note: A mimosa made with peach puree is technically called a Bellini, but your guests will love it all the same!)
Cranberry or Pomegranate Juice: These juices offer a deep red hue and a sharp tartness that cuts through the bubbles beautifully. They also make an excellent base for a non-alcoholic option.
The Crucial Role of Fresh Citrus Garnishes
Garnishes are not just an afterthought; they are a vital component of the DIY Mimosa Bar. They add intense visual texture to your table setup, provide a fresh aromatic element as guests lift the glass to their lips, and allow for further flavor customization.
Your cutting board should be overflowing with halved and sliced citrus. Do not be stingy—abundance is key to the aesthetic. The bright contrast of the fruit against a crisp white cutting board or a rustic wicker table looks incredibly inviting.
Grapefruits: Halved ruby red grapefruits are stunning visual anchors for your table. Guests can squeeze a little extra fresh juice into their glass or drop a small wedge in for decoration.
Oranges: Classic orange wheels or half-moons are the perfect traditional garnish.
Lemons and Limes: These add a sharp, acidic pop of color (bright yellow and vibrant green) to the table display. A squeeze of fresh lime juice can instantly elevate a overly sweet mimosa.
Essential Ingredients for the Setup
Here is your shopping list for the ultimate spread. Adjust quantities based on your guest count (assume 1 bottle of bubbly for every 3-4 guests).
– 4 to 6 bottles of Dry Sparkling Wine (Prosecco or Cava), chilled
– 1 large bottle (64 oz) high-quality Orange Juice
– 1 large bottle (64 oz) Ruby Red Grapefruit Juice
– 1 bottle (32 oz) Pomegranate or Cranberry Juice (for vibrant color)
– 4 large Ruby Red Grapefruits (for halving and garnishing)
– 6 large Naval Oranges (for slicing and garnishing)
– 5 Lemons
– 5 Limes
– Fresh flowers (like bright pink and orange gerbera daisies) for table styling
Crucial Equipment for Your Beverage Station
The right equipment ensures your bar is both beautiful and functional.
– A sturdy table (wicker or rattan adds a beautiful, warm texture)
– Champagne Flutes (glass is best, but high-quality clear plastic works for large outdoor crowds)
– Clear glass carafes or swing-top bottles (to hold the juices)
– A large ice bucket or decorative cooler (to keep the sparkling wine cold)
– Small decorative bowls or crystal dishes (to hold the cut citrus)
– A large white or wooden cutting board (for a rustic display of halved fruits)
– Small tongs (for picking up garnishes)
– Vases for fresh flowers
Step-by-Step Instructions for the Perfect Setup
1. Chill Everything in Advance: The secret to a perfect mimosa is temperature. Place your sparkling wine and your juices in the refrigerator at least 24 hours before your event. Warm juice and warm champagne will result in a foamy, flat, unappetizing drink.
2. Prepare the Juices: About an hour before guests arrive, transfer your store-bought or freshly squeezed juices into your clear glass carafes or bottles. This instantly elevates the look from “grocery store haul” to “curated boutique event.” If using swing-top bottles, leave them uncapped for easy pouring.
3. Prep the Garnishes: Wash all your citrus fruits. Slice half of the grapefruits and oranges into beautiful, thick rounds and half-moons. Leave some grapefruits simply cut in half—these look incredibly rustic and appealing sitting on a cutting board. Cut the lemons and limes into small wedges. Arrange these beautifully on your white cutting board and in small crystal bowls.
4. Arrange the Table (The Fun Part!): Start by placing your ice bucket at the back or center of the table. Flank the ice bucket with your juice carafes. Arrange the champagne flutes in neat rows or a semi-circle at the front of the table for easy access. Place your cutting board piled high with fresh citrus right in the center or front-side. Tuck your vases of bright gerbera daisies into any empty spaces to add height and pops of pink and orange.
5. Pop the Bubbly: Just as your first guests are walking through the door, open the first two bottles of sparkling wine and place them in the ice bucket. This ensures the wine is perfectly carbonated when the first drinks are poured.
Expert Tips for a Flawless Setup
Labeling is Helpful: If you are serving juices with similar colors (like grapefruit and blood orange), create small, elegant labels on cardstock to tie around the necks of your carafes. This prevents guests from getting a bitter surprise when they were expecting a sweet one.
Manage the Ice: If your party is outdoors, keep a backup bag of ice in the freezer to replenish the ice bucket. You want to keep those bottles frosty the entire time.
Keep it Clean: A mimosa bar can get sticky quickly. Keep a small, decorative stack of cocktail napkins on the table, and discreetly wipe down the carafes halfway through the party to maintain that pristine, glossy look.
The Golden Pouring Rule: Always pour the sparkling wine first, then top with juice. The bubbles in the wine will naturally mix the juice as it is poured in, meaning no stirring (and thus, no loss of carbonation) is required.
Non-Alcoholic Variations (Mockmosas)
It is incredibly important to provide a festive option for guests who are driving, expecting, or simply choose not to drink alcohol. You want them to feel just as included in the DIY fun.
To easily accommodate everyone, add two bottles of chilled sparkling water (like San Pellegrino or a high-quality club soda), sparkling apple cider, or a non-alcoholic sparkling wine alternative to your ice bucket. Guests can simply follow the exact same procedure—pouring their bubbly base and topping it with the fresh juices and garnishes—creating a beautiful, refreshing “Mockmosa.”
Frequently Asked Questions (FAQs)
How much sparkling wine do I need to buy?
A standard 750ml bottle of sparkling wine will yield roughly 6 to 8 mimosas, depending on your guests’ preferred ratio. A safe bet is to calculate one bottle for every three guests, assuming everyone will have at least two drinks.
Can I use plastic cups instead of glass flutes?
Yes, absolutely! If you are hosting a very large crowd, a poolside event, or a casual backyard brunch, high-quality, hard-plastic clear flutes are a safe and practical alternative. Just avoid opaque plastic cups, as seeing the vibrant colors is half the fun.
How far in advance can I cut the fruit garnishes?
You can cut the citrus the night before. Store the slices in airtight containers in the refrigerator to keep them from drying out. Arrange them on the table right before guests arrive to maintain that wet, glistening, freshly-cut appearance.
Conclusion
A DIY Citrus Mimosa Bar is more than just a drink station; it is an experience. By investing a little time in the preparation—transferring juices to glass bottles, piling high beautiful, fresh-cut citrus, and adding vibrant floral touches—you create a welcoming, interactive environment that your guests will talk about long after the brunch is over. Remember to keep the bubbly dry, the juices cold, and the table overflowing with color. Cheers to a beautiful celebration!
Ultimate DIY Citrus Mimosa Bar
Ingredients
Equipment
Method
- The day before your event, place all sparkling wine, sparkling water, and juices in the refrigerator to thoroughly chill.
- Wash all citrus fruits. Slice half of the grapefruits and oranges into decorative rounds. Cut the lemons and limes into small wedges. Leave some grapefruits simply halved for a rustic display.
- Transfer the chilled juices into clear glass carafes or decorative glass bottles. If using swing-top bottles, leave them unsealed for easy pouring.
- Set up your station on a sturdy table. Place an ice bucket in the center or back to hold the sparkling wine.
- Arrange the champagne flutes neatly at the front of the table for easy access.
- Place a large cutting board on the table and generously pile the freshly cut citrus fruits, allowing them to look abundant and colorful.
- Add fresh floral arrangements, like pink and orange gerbera daisies, to tie the color palette together.
- Right as guests arrive, open the first bottles of sparkling wine, place them in the ice bucket, and invite guests to mix their perfect drink (pouring bubbly first, then juice).