Tropical Retirement Cake
A Tropical Escape: The Ultimate Three-Tier Hibiscus Retirement Cake
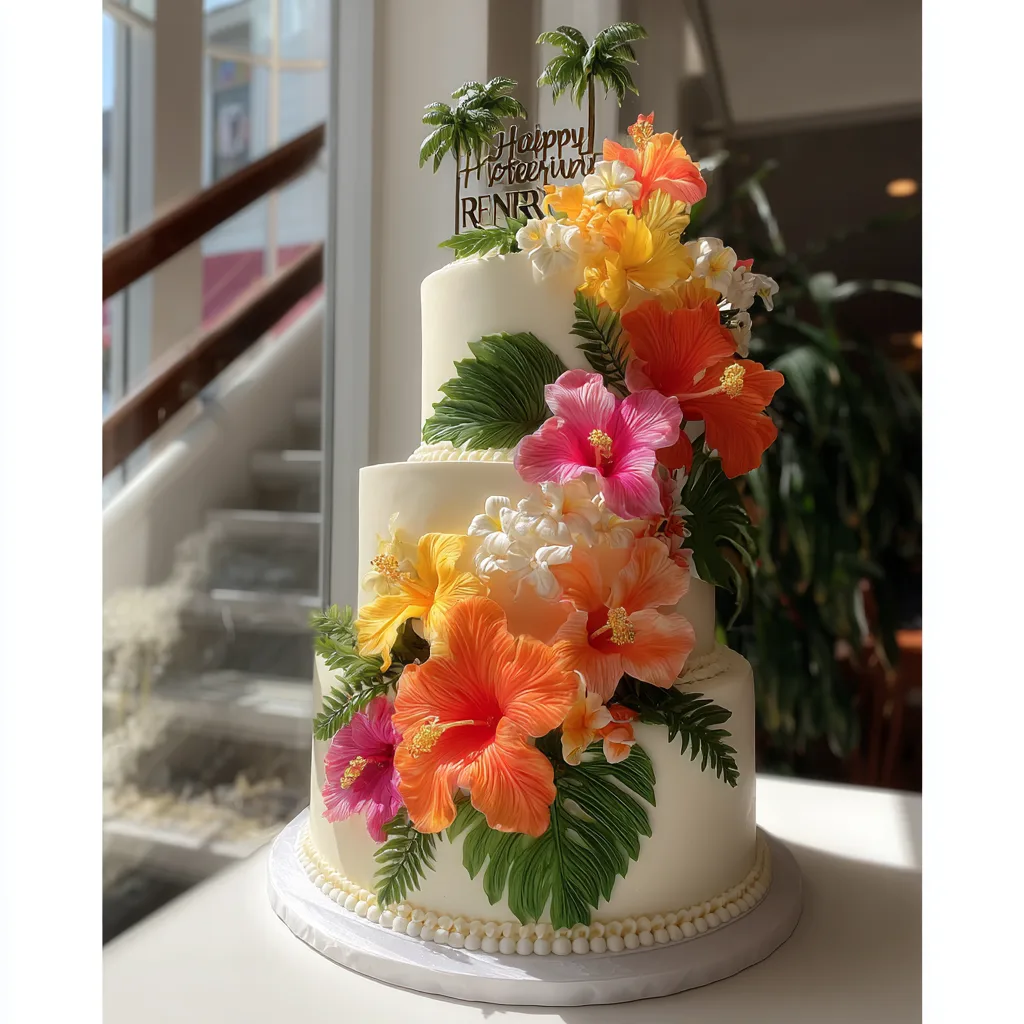
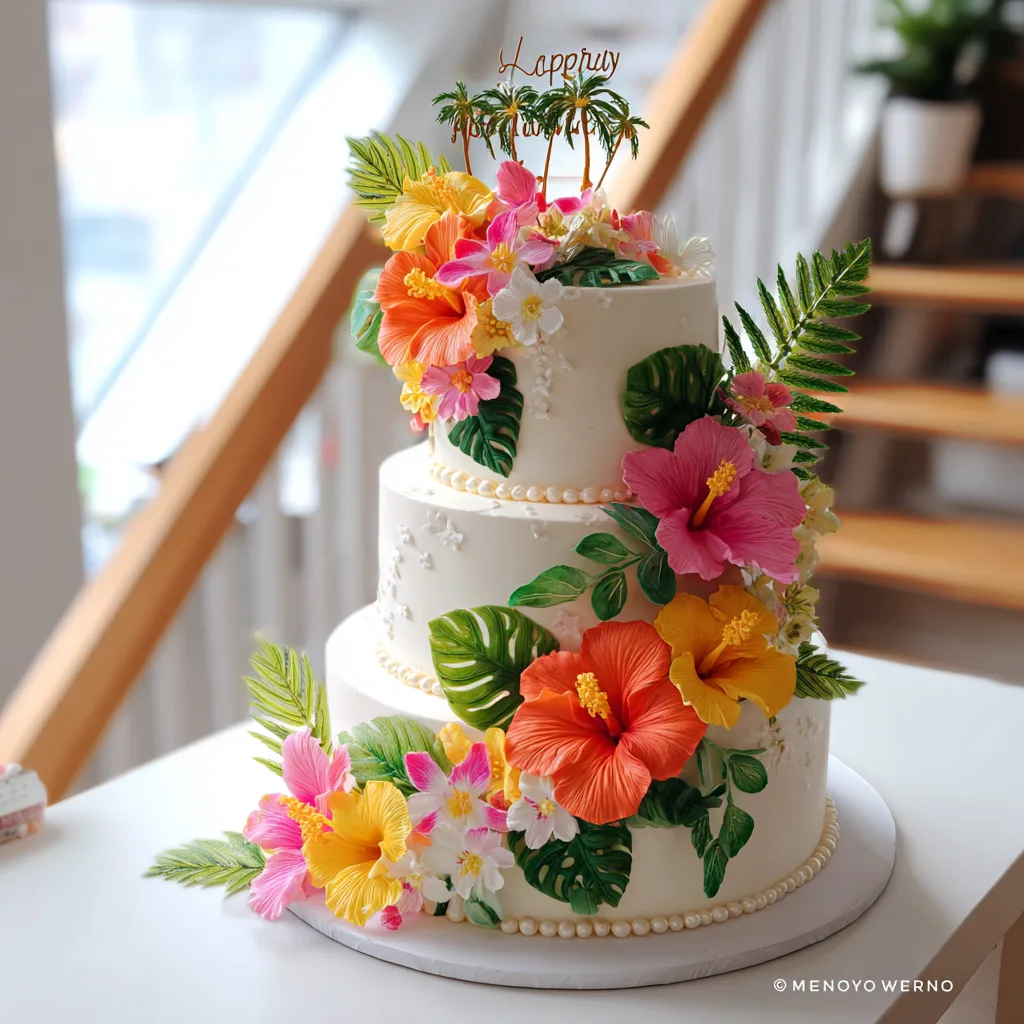
Retirement is one of life’s most significant milestones—a beautiful transition from the daily grind to a season of relaxation, adventure, and endless possibilities. A moment this special demands a centerpiece that is nothing short of spectacular. Enter the Tropical Hibiscus Retirement Cake. With its flawlessly smooth ivory finish and a vibrant, cascading arrangement of lush tropical flowers, this three-tier masterpiece perfectly captures the essence of a permanent vacation.
Whether the retiree is planning to spend their days lounging on a sunny beach, sailing the open waters, or simply enjoying the peace of their own backyard oasis, this cake sets the ultimate celebratory tone. In this guide, we will break down the elements that make this cake a showstopper, from achieving that perfect, razor-sharp buttercream finish to selecting the perfect tropical flavor profile that matches its stunning exterior.
The Design: A Luau in Cake Form
The visual impact of this cake relies on the striking contrast between a clean, minimalist background and an explosion of vibrant, saturated colors. Let’s break down the key design elements:
The Canvas: The three tiers are covered in a beautifully smooth, ivory-tinted Swiss meringue buttercream (or rolled fondant, if you prefer). This pristine canvas allows the bright colors of the flowers to truly pop. A delicate, classic pearl border at the base of each tier adds a touch of traditional elegance that grounds the wild, tropical elements.
The Floral Cascade: The true star of the show is the floral arrangement. Moving away from traditional roses or peonies, this design embraces the tropics with massive, hyper-realistic hibiscus flowers in shades of electric orange, sunset yellow, and hot pink. Interspersed among the blooms are deep green, structural leaves like monstera and ferns. These can be crafted from gum paste for a fully edible experience, or you can use high-quality, food-safe silk or fresh (pesticide-free) flowers for a quicker, equally stunning result.
The Topper: A glittery, custom “Happy Retirement” topper featuring palm trees ties the whole theme together, drawing the eye upward and proudly announcing the reason for the celebration.
The Flavor Profile: Taste the Tropics
A cake that looks this exotic needs a flavor profile to match. While you can certainly use a classic vanilla bean or rich chocolate cake, opting for tropical flavors elevates the entire experience. Here is a winning combination that guests will rave about:
- The Cake: A tender, moist Coconut Chiffon Cake. Using coconut milk and a hint of coconut extract in the batter provides a rich, fragrant base that isn’t overly heavy.
- The Filling: A bright, tangy Passionfruit Curd. The sharp acidity of the passionfruit perfectly cuts through the sweetness of the cake and buttercream, providing a refreshing, mouth-watering zing.
- The Frosting: A silky smooth White Chocolate Swiss Meringue Buttercream. It is incredibly stable for stacking tiered cakes and offers a luxurious, creamy finish that pairs beautifully with the tangy fruit filling.
The Architecture: Supporting a Tiered Cake
Building a three-tier cake is a feat of engineering. You cannot simply stack the cakes on top of one another; the weight of the top tiers will crush the bottom tier, causing a disastrous collapse. Here is the secret to structural integrity:
Cake Boards and Dowels: Every single tier must be built on its own cardboard cake round. Once your bottom tier is frosted and chilled, you must insert structural supports into it. You can use thick plastic cake dowels or extra-wide boba straws. Cut them completely flush with the top of the cake. When you place the second tier on top, the weight rests on the dowels, not the cake itself. Repeat this process for the middle tier before adding the top tier.
The Central Dowel: For added security, especially if the cake needs to be transported, a single, long, sharpened wooden dowel should be driven straight down through the very center of all three tiers, anchoring them to the sturdy bottom display board.
Step-by-Step Assembly Guide
Tackling a tiered cake takes patience and planning. Spread the work out over several days to avoid burnout.
- Day 1: Bake and Make. Bake all your cake layers. Once completely cool, wrap them tightly in plastic wrap and chill them in the refrigerator. Make your passionfruit curd and store it in an airtight container in the fridge.
- Day 2: Fill and Crumb Coat. Whip up your Swiss Meringue Buttercream. Level your chilled cakes, fill them with a dam of buttercream and a center of passionfruit curd, and stack each tier on its respective cake board. Apply a thin crumb coat of buttercream to lock in the crumbs and chill until firm.
- Day 3: Final Coat and Stacking. Apply your final, smooth layer of buttercream to each tier. Use a bench scraper to get the sides perfectly straight. Chill until the buttercream is rock solid. Carefully stack the tiers using the dowel method described above. Pipe the delicate pearl borders around the seams.
- Day 4: Decorate. This is the fun part! Starting from the top, begin arranging your tropical flowers and leaves, creating a sweeping cascade that draws the eye down the cake. Secure the elements using extra buttercream or food-safe floral wire. Finally, insert your glittery retirement topper.
Pro Tips for Floral Placement
To achieve that organic, natural look with your floral cascade, remember the rule of odds and grouping. Cluster your large focal flowers (the big hibiscus) in odd numbers (groups of 3 or 5). Use the large, broad monstera leaves to establish the shape and direction of the cascade, and then fill in the empty gaps with the smaller yellow and pink blossoms and delicate fern fronds. Don’t be afraid to let some leaves extend outward to create dynamic movement!
A retirement is a grand farewell to the working world and a warm welcome to days of leisure. This Tropical Hibiscus Tiered Cake is the perfect, delicious send-off. Happy baking, and happy retirement!
Tropical Coconut Passionfruit Tiered Cake
Ingredients
Equipment
Method
- Bake the cakes: Whisk dry ingredients. Beat in butter until sandy. Combine coconut milk, egg whites, and extract. Gradually mix wet ingredients into dry until smooth. Bake in prepared 10-inch, 8-inch, and 6-inch pans at 350°F (175°C). Cool completely.
- Make the curd: Whisk puree, sugar, and yolks in a saucepan. Cook over medium-low heat until thickened. Remove from heat and stir in butter until smooth. Chill until set.
- Make the buttercream: Heat egg whites and sugar over a double boiler until sugar dissolves (160°F). Whip until stiff peaks form and the bowl is cool. Gradually beat in butter, then melted white chocolate.
- Assemble the tiers: Level the cakes. Fill each tier with buttercream dam and passionfruit curd. Stack on individual cake boards. Crumb coat and chill.
- Frost each tier with a final smooth layer of buttercream. Insert support dowels into the bottom and middle tiers. Carefully stack the tiers.
- Pipe a pearl border around the base of each tier. Decorate with a cascading arrangement of tropical flowers and leaves. Insert the topper before serving.