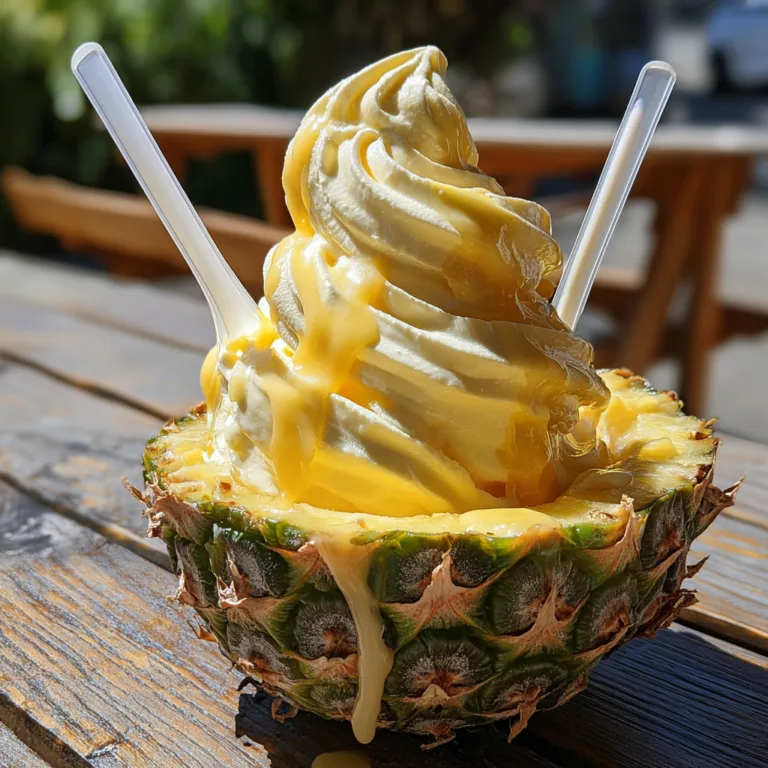
Neon Candied Pineapple Rings
If you have ever wanted to eat something that looks like it was mined from a treasure chest of precious jewels, these Crystal Candied Neon Pineapple Rings are your answer. This recipe transforms ordinary fruit into extraordinary, translucent treats that shimmer with a liquid glass finish. Perfect for tropical-themed parties or as a vibrant garnish for cakes, these candied rings are as delicious as they are visually mesmerizing.
The Magic of Translucent Candied Fruit
Candying fruit is an ancient preservation technique, but we are giving it a modern, psychedelic twist. By infusing pineapple slices with a high-shine sugar syrup and vibrant food gels, the natural fibrous texture of the fruit becomes suspended in a crystalline state. The result is a chewy, sweet, and tangy snack that glows with saturated color when caught in the light.
Why This Recipe Works
- Vibrant Aesthetic: The neon colors make these look like edible stained glass.
- Textural Contrast: A soft, juicy center with a slightly firm, crystallized exterior.
- Shelf Stable: Because of the high sugar content, these can be stored longer than fresh fruit.
- Versatility: Use them as cocktail garnishes, cupcake toppers, or eat them as high-energy snacks.

Essential Ingredients for the Glow
To get that ultra-glossy, wet look, you need ingredients that prevent sugar from graining while maintaining a high reflection.
The Pineapple Base:
- – 2 cans of pineapple rings in juice (fresh works, but canned is more uniform for rolling)
- – 2 cups granulated white sugar
- – 1 cup light corn syrup (essential for that mirror-like shine)
- – 1 cup water
The Neon Infusion:
- – High-pigment food coloring gels (Deep Red, Royal Blue, Neon Yellow, and Violet)
- – 1 tablespoon lemon juice (to balance the sweetness and prevent crystallization)
Detailed Instructions
- Drain and Dry: Remove the pineapple rings from the can and pat them extremely dry with paper towels. The less moisture on the surface, the better the syrup will adhere.
- Prepare the Glaze: In a large, wide skillet, combine the sugar, water, corn syrup, and lemon juice. Heat over medium-high until the sugar dissolves and the mixture begins to bubble.
- Simmer the Rings: Carefully place the pineapple rings in the skillet in a single layer. Reduce the heat to low and let them simmer for about 20-30 minutes. You want the fruit to become somewhat translucent.
- The Coloring Process: Divide the remaining syrup into smaller bowls if you want multiple colors. Add a generous drop of gel coloring to each bowl. Dip the simmered rings into the colored syrup, ensuring every fiber is drenched and saturated.
- The First Set: Place the colored rings on a wire cooling rack set over a baking sheet to catch the dripping glossy ribbons of syrup.
- The Sugar Soak: For an extra “crystal” look, you can let them air dry for 24 hours, or for the ultra-wet look shown in the photos, immediately brush them with an extra layer of warm corn syrup.
- Cooling: Let the rings sit until they are cool to the touch but still retain their glistening, polished varnish appearance.
Pro-Tips for Maximum Shine
The secret to the reddit-style food photography look is all about the “pooling” effect. When plating these for guests, drizzle a little bit of the leftover colored syrup into the center holes of the rings. This creates a mirror reflection that makes the fruit look like it’s still floating in liquid sugar.
Avoid the Grain: Do not stir the syrup too much once it starts boiling. Stirring can cause the sugar to crystallize, turning your clear “jewels” into cloudy, opaque rings.

Fun Variations
Sour Neon Rings: After the rings have partially dried, toss them in a mix of sugar and malic acid for a “sour patch” pineapple experience.
Boozy Tropical Rings: Add a splash of coconut rum to the simmering syrup for an adult version of these tropical treats.
How to Serve and Store
Store these in a single layer between sheets of parchment paper in an airtight container. If you stack them without protection, they will fuse together into one giant neon block! They are best served at room temperature where the oil slick shine is most prominent.
Whether you’re looking for a mouth-watering centerpiece or a fun kitchen project, these crystal pineapple rings are a stellar way to brighten up your dessert table.
Crystal Candied Neon Pineapple Rings
Ingredients
Equipment
Method
- Drain pineapple rings and pat them thoroughly dry with paper towels.
- Combine sugar, corn syrup, water, and lemon juice in a skillet and bring to a simmer.
- Add pineapple rings in a single layer and simmer on low for 25 minutes until translucent.
- Remove rings and divide remaining syrup into bowls to mix with gel food colors.
- Dip each ring into the colored syrup to fully saturate the fruit fibers.
- Place rings on a wire rack to allow excess syrup to drip off and create a glossy finish.
- For the wet look, brush with additional warm corn syrup before serving.
- Let cool completely before storing between parchment paper layers.