Loaded Jalapeño Sliders
Loaded Jalapeño Bacon Sliders: The Ultimate Game Day Snack
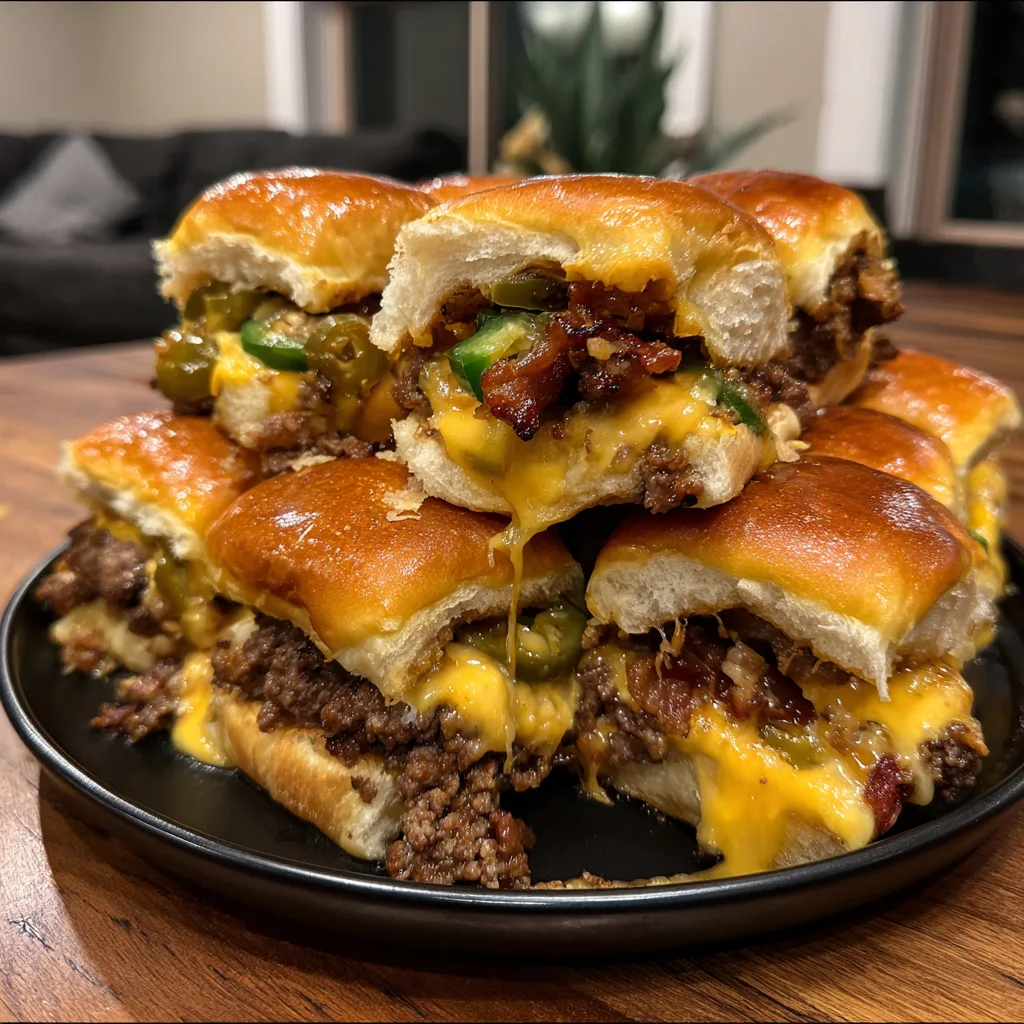
If you are looking for the absolute crowd-pleaser of the season, look no further than these Loaded Jalapeño Bacon Sliders. Whether you are hosting a Super Bowl party, a casual family gathering, or just craving a savory, cheesy dinner, these mini burgers pack a massive flavor punch. Imagine the best bacon cheeseburger you’ve ever had, but condensed into a soft, sweet Hawaiian roll, spiked with the heat of fresh jalapeños and the crunch of crispy fried onions. It is a flavor combination that is impossible to resist.
The beauty of this recipe lies in its simplicity and its “pull-apart” nature. Instead of cooking twelve individual tiny burgers, you assemble the entire batch at once, bake them until the cheese is bubbling and gooey, and then brush them with a savory garlic butter glaze. The result is a tray of warm, melty, savory goodness that disappears in seconds. The contrast between the sweet, soft bun and the salty, spicy filling is what makes these sliders addictive. Plus, the addition of crispy fried onions adds a texture that takes them from “good” to “gourmet” with zero extra effort.
In this guide, we will show you exactly how to layer these ingredients for maximum structural integrity and flavor distribution. We will also cover tips on how to keep the bottoms from getting soggy and how to customize the spice level for your guests. Get ready to be the MVP of your next potluck!

Why This Recipe Works
Sliders are a dime a dozen, but this specific combination stands out for a few reasons:
- Texture Symphony: You have the soft pillowy bun, the tender ground beef, the gooey melted cheese, the chewy bacon, and the snap of the jalapeño and fried onions. Every bite is interesting.
- Party Friendly: They are easy to grab, easy to eat, and can be made in large batches quickly.
- Balanced Flavor: The sweetness of the rolls cuts through the richness of the bacon and cheese, while the jalapeño adds just enough acid and heat to wake up your palate.
- Customizable: Not a fan of spice? Swap the jalapeños for pickles. Love BBQ? Add a drizzle of sauce inside.
Ingredients Checklist
To make a batch of these mouth-watering sliders, you will need the following simple ingredients:
- Slider Buns: One 12-count package of sweet Hawaiian rolls is the standard and best choice for flavor contrast.
- Ground Beef: Lean ground beef (85/15 or 90/10) works best to prevent the sliders from becoming too greasy.
- Bacon: Cooked crispy and crumbled or chopped into small pieces.
- Cheddar Cheese: Slices of sharp cheddar or a Mexican cheese blend work perfectly. You want something that melts well.
- Jalapeños: Fresh sliced jalapeños for a bright kick, or pickled jalapeños for a tangier, milder heat.
- Crispy Fried Onions: The kind you use for green bean casserole (like French’s). These add an essential crunch.
- Onion & Garlic: Fresh diced onion cooked with the beef adds depth.
- Seasonings: Salt, black pepper, and Worcestershire sauce for the beef.
- The Glaze: Unsalted butter (melted), garlic powder, dried parsley, and a pinch of salt.
Equipment Needed
You don’t need fancy gadgets for this recipe, just standard kitchen tools:
- Large Skillet: To brown the beef and onions.
- 9×13 Baking Dish or Baking Sheet: To assemble and bake the sliders.
- Serrated Bread Knife: Essential for slicing the entire slab of rolls in half horizontally without squishing them.
- Pastry Brush: To apply the buttery glaze.
Step-by-Step Instructions
Phase 1: Prepare the Filling
1. Cook the beef: In a large skillet over medium-high heat, cook 1 lb of ground beef and 1/2 cup of diced onion. Break up the beef as it cooks. Once browned, drain the excess grease well.
2. Season: Return the pan to low heat and stir in 1 tablespoon of Worcestershire sauce, 1/2 teaspoon of salt, and 1/2 teaspoon of black pepper. Mix well and remove from heat.
Phase 2: Assemble the Sliders
3. Prep the oven: Preheat your oven to 350°F (175°C). Lightly grease your baking dish or line a baking sheet with parchment paper.
4. Slice the rolls: Take the entire package of rolls (do not pull them apart individually yet) and use a long serrated knife to slice them horizontally, separating the top slab from the bottom slab.
5. The foundation: Place the bottom slab of rolls into your baking dish. Layer half of your cheddar cheese slices over the bread. This creates a barrier that prevents the bread from getting soggy from the meat.
6. The meat layer: Spread the cooked ground beef mixture evenly over the cheese layer.
7. The toppings: Sprinkle the crumbled bacon, sliced jalapeños, and a generous handful of crispy fried onions over the beef. Top with the remaining cheese slices.
8. Top it off: Place the top slab of rolls over the cheese layer.
Phase 3: Glaze and Bake
9. Make the glaze: In a small bowl, whisk together 4 tablespoons of melted butter, 1/2 teaspoon of garlic powder, and 1 teaspoon of dried parsley.
10. Brush: Generously brush the tops of the buns with the garlic butter mixture. Ensure you get the edges too!
11. Bake: Cover the dish with foil and bake for 15 minutes. Then, remove the foil and bake for another 5-8 minutes, or until the tops are golden brown and the cheese is completely melted.
12. Serve: Let them sit for about 5 minutes (this helps them hold together when cutting), then slice between the rolls and serve hot.
Tips for Perfect Sliders
- Avoid Soggy Bottoms: Draining the beef fat is crucial. If the mixture is too wet, your bottom bun will dissolve. The layer of cheese on the bottom bun acts as a “raincoat” for the bread.
- Make Ahead: You can assemble the sliders up to the baking point, cover them tightly, and refrigerate for up to 4 hours. Just add a few extra minutes to the baking time if they are going in cold.
- Spice Control: Remove the seeds and white ribs from fresh jalapeños to reduce the heat significantly while keeping the flavor.
Variations
- BBQ Ranch: Mix some BBQ sauce into the beef and drizzle ranch dressing over the toppings before adding the top bun.
- Mushroom Swiss: Swap cheddar for Swiss cheese and replace jalapeños with sautéed mushrooms.
- Breakfast Sliders: Use breakfast sausage instead of beef and add a layer of scrambled eggs.
Storing and Reheating
These sliders are best eaten fresh, but leftovers can be saved. Store them in an airtight container in the refrigerator for up to 3 days.
To reheat: Place them on a baking sheet and cover with foil to prevent drying out. Bake at 350°F for 10-15 minutes until warmed through. Microwaving is possible but will result in a chewier bun.
These Loaded Jalapeño Bacon Sliders are a guaranteed touchdown for any gathering. Savory, cheesy, and packed with flavor, they turn a simple package of rolls into a gourmet feast!
Loaded Jalapeño Bacon Sliders
Ingredients
Equipment
Method
- Preheat oven to 350°F (175°C). Grease a 9×13 inch baking dish.
- Brown the ground beef and diced onion in a skillet over medium-high heat. Drain excess grease well.
- Stir in Worcestershire sauce, salt, and pepper to the beef. Remove from heat.
- Slice the entire slab of rolls in half horizontally. Place bottom half in the baking dish.
- Layer half the cheese on the bottom buns, followed by the beef mixture.
- Top beef with crumbled bacon, jalapeño slices, crispy fried onions, and remaining cheese.
- Place the top buns on. Mix melted butter, garlic powder, and parsley, then brush over the tops.
- Cover with foil and bake for 15 minutes. Remove foil and bake 5-8 minutes more until golden.


