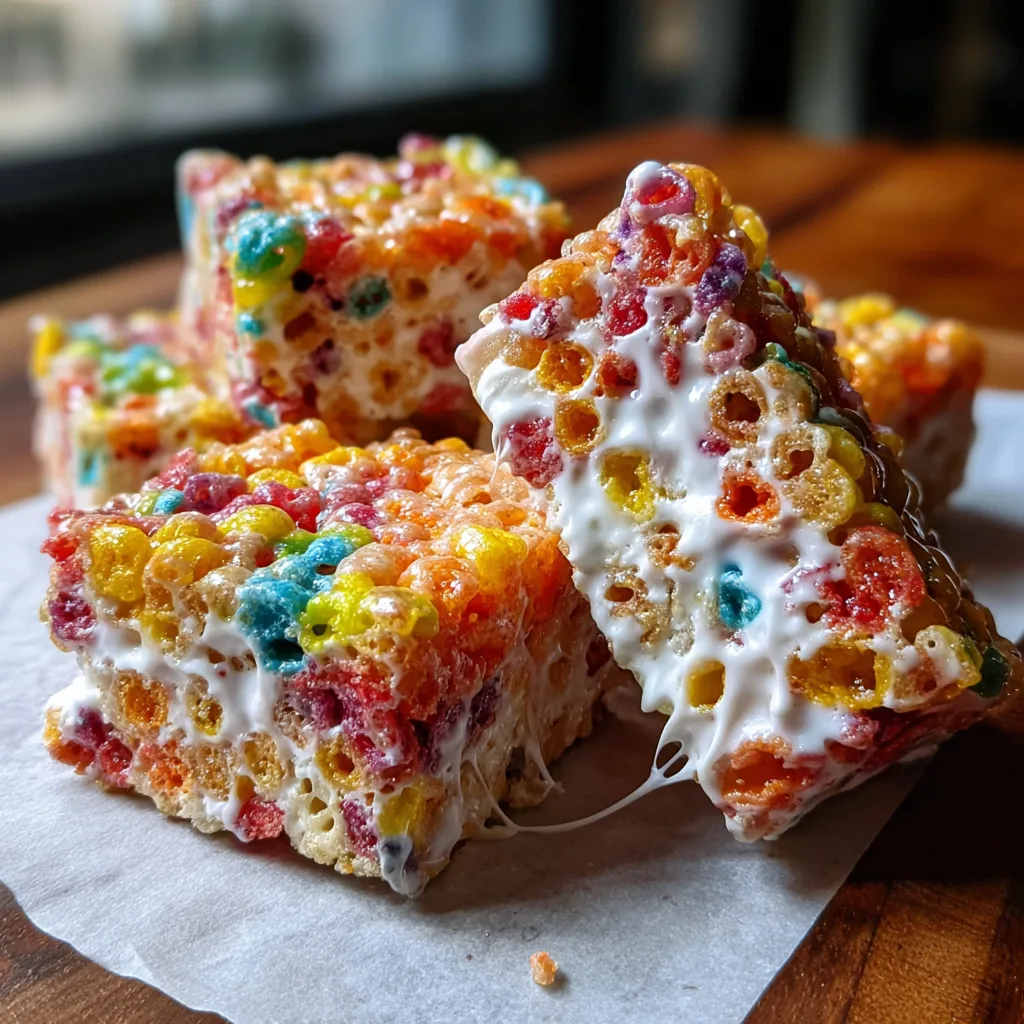
Fruity Pebbles Treats
Gooey Fruity Pebbles Rice Krispie Treats
Sometimes, the best desserts are not the ones that require hours of intricate baking, complex flavor pairings, or fancy French pastry techniques. Sometimes, the absolute best dessert is the one that transports you straight back to your childhood. These vibrant, rainbow-colored, and impossibly gooey Fruity Pebbles Treats do exactly that. By taking the classic, beloved marshmallow cereal bar and swapping out the traditional puffed rice for brightly colored, fruit-flavored cereal, you create a treat that is visually stunning, wildly fun, and completely addictive. Whether you are making them for a child’s birthday party, a nostalgic movie night, or just because you need a quick sugar fix, these bars are guaranteed to bring a smile to everyone’s face.
Why This No-Bake Recipe is a Total Winner
In the hierarchy of easy desserts, cereal treats reign supreme, and for good reason. First and foremost, they require absolutely no baking. There is no need to preheat an oven, worry about leavening agents, or nervously poke the center of a cake with a toothpick. The entire process takes place in a single large pot on your stovetop and takes less than fifteen minutes of active time.
Secondly, they require only three basic ingredients: butter, marshmallows, and cereal. It is the ultimate pantry-staple recipe that you can whip up on a whim when a sweet craving strikes. Finally, they are incredibly family-friendly. Kids love the bright, neon colors of the Fruity Pebbles, and they can easily help with the cooking process by measuring the cereal or pressing the mixture into the pan.
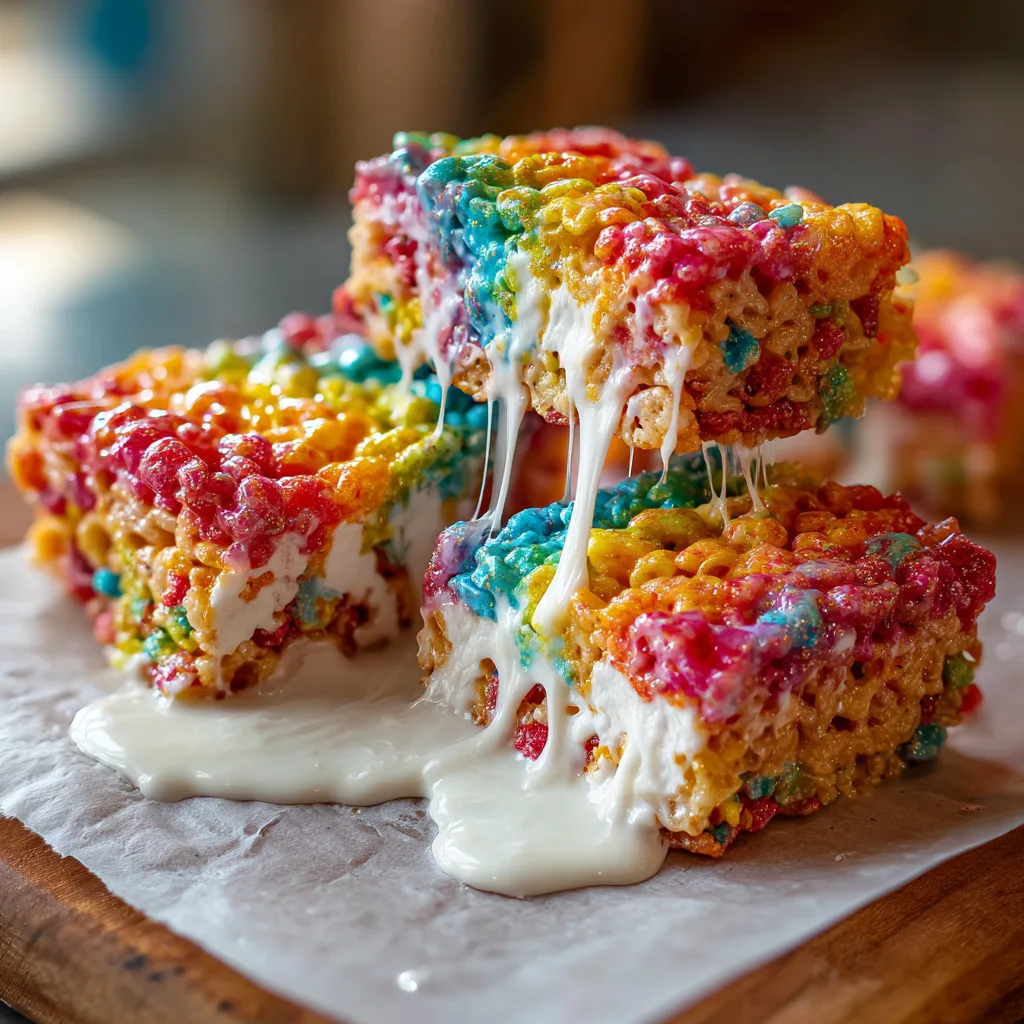
The Secret to Maximum Gooeyness
We have all experienced the disappointment of biting into a cereal treat that is hard, dry, and scrapes the roof of your mouth. The goal here is soft, pliable, melt-in-your-mouth perfection. To achieve that coveted “cheese-pull” effect with the marshmallows, you must follow two crucial rules.
Rule Number One: Low and Slow. When melting your butter and marshmallows, you must keep your stove on the lowest possible heat setting. If you blast the marshmallows with high heat, the sugars will seize and crystallize, resulting in rock-hard treats. Patience is key. Let them melt slowly and gently.
Rule Number Two: The Extra Marshmallow Fold. This is the pro-move that separates average treats from extraordinary ones. Instead of melting all of your marshmallows at the beginning, you hold back about two cups of mini marshmallows. You fold these reserved marshmallows into the mixture at the very end, right alongside the cereal. The residual heat will soften them, but they won’t melt completely, leaving you with delicious, distinct pockets of gooey marshmallow fluff in every single bite.
Ingredients
You only need three simple ingredients to create these vibrant, sticky masterpieces:
- – 1/2 cup (1 stick) salted butter (Salted butter perfectly cuts through the intense sweetness of the cereal and marshmallows. If using unsalted, add a generous pinch of sea salt.)
- – 1 bag (15 to 16 oz) mini marshmallows, divided
- – 6 cups Fruity Pebbles cereal
- – 1 teaspoon pure vanilla extract (optional, but highly recommended for flavor depth)
Instructions
- Prep Your Pan: Line a 9×13-inch baking dish with parchment paper, leaving enough overhang on the sides to easily lift the treats out later. Lightly spray the parchment paper with non-stick cooking spray or rub it with a little butter.
- Melt the Butter: In a very large pot or Dutch oven, melt the stick of butter over low heat. Do not let the butter brown or bubble vigorously.
- Melt the Marshmallows: Once the butter is completely melted, add all BUT 2 cups of the mini marshmallows to the pot. (Set those 2 cups aside for later). Stir constantly with a rubber spatula until the marshmallows are completely melted and the mixture is smooth. Remove the pot from the heat immediately.
- Flavor the Goo: Stir in the vanilla extract (and a pinch of salt if using unsalted butter) until combined.
- Fold in Cereal and Extra Marshmallows: Add the 6 cups of Fruity Pebbles cereal and the reserved 2 cups of mini marshmallows to the pot. Using your rubber spatula, gently fold everything together until all the cereal is evenly coated in the sticky marshmallow mixture.
- Press into Pan: Transfer the sticky mixture into your prepared baking dish. Crucial Step: Do not pack the mixture down tightly! Lightly grease your hands or a spatula and very gently press the mixture into an even layer. Pressing too hard will compress the cereal and make the treats dense and hard.
- Cool and Slice: Let the treats cool at room temperature for at least 45 minutes to an hour to set up. Once cooled, use the parchment paper overhang to lift the entire block out of the pan, place it on a cutting board, and slice into squares.
Pro Tips for the Best Cereal Treats
Freshness Matters: Always use a fresh bag of marshmallows. Marshmallows that have been sitting open in your pantry for months will be stale and dehydrated, and they will not melt smoothly into that glorious, gooey liquid you need.
The Butter Wrapper Trick: When pressing the sticky cereal mixture into the pan, save the wrapper from your stick of butter. Use the buttered side of the wrapper to gently press the treats down. It prevents your hands from getting completely covered in sticky goo and helps you achieve a perfectly even top.
Creative Variations to Try
The Half-and-Half: If you find pure Fruity Pebbles to be a little too intensely sweet, try mixing it 50/50 with standard Rice Krispies cereal. You still get the beautiful pops of rainbow color and fruit flavor, but with a more balanced sweetness profile.
Brown Butter Fruity Pebbles: For a more sophisticated, gourmet twist, try browning your butter before adding the marshmallows. Let the butter melt and cook over medium heat until it foams and smells nutty, with little brown flecks at the bottom of the pan. It adds a deep, rich, caramel-like flavor that elevates the entire dessert.
Storage Instructions
Store your Fruity Pebbles Treats in an airtight container at room temperature for up to 3 days. Do not put them in the refrigerator, as the cold air will make them hard and completely ruin that soft, gooey texture you worked so hard to achieve. To keep them extra soft, you can place a slice of regular sandwich bread in the container with them; the treats will absorb the moisture from the bread!
Conclusion
Fruity Pebbles Rice Krispie Treats are the epitome of joyful, uncomplicated baking. They offer a perfect symphony of textures: the crisp crunch of the colorful cereal bound together by the soft, stretchy, buttery sweetness of melted marshmallows. With their vibrant, eye-catching appearance and simple, no-bake preparation, they are the ideal treat for bringing a little bit of colorful nostalgia into your kitchen. Whip up a batch today and watch how quickly they disappear!
Gooey Fruity Pebbles Treats
Ingredients
Equipment
Method
- Line a 9×13-inch baking dish with parchment paper and lightly grease it.
- In a large pot, melt the salted butter over low heat.
- Add all but 2 cups of the mini marshmallows to the melted butter. Stir constantly over low heat until completely melted and smooth. Remove from heat.
- Stir in the vanilla extract.
- Add the Fruity Pebbles and the reserved 2 cups of mini marshmallows. Gently fold everything together until the cereal is evenly coated.
- Transfer the mixture to the prepared baking dish. Lightly grease your hands and VERY GENTLY press the mixture into an even layer. Do not pack it down tightly.
- Allow to cool at room temperature for 45 minutes to an hour before slicing into squares.