Cherry Pineapple Swirl Slush
Original Copycat Cherry Pineapple Swirl Slush Recipe
Unlock the Secret: The Ultimate Homemade Copycat Cherry Pineapple Swirl Slush Recipe
Welcome to the ultimate solution for those blistering summer days when nothing but a brain-freezing, ultra-sweet slushy will satisfy your cravings. We’ve all been there: standing in line at the gas station or local cafe, paying premium prices for a bright blue or neon red cup of icy goodness. But what if we told you that you could replicate that iconic flavor, texture, and visual appeal right in your own kitchen? Our Original Copycat Cherry Pineapple Swirl Slush recipe is about to change your summer beverage game forever. This isn’t just a simple blended juice drink; this is a masterclass in achieving that perfectly balanced, slush machine texture and that nostalgic, sweet-tart flavor profile that defined our childhoods. This recipe is completely original, developed with home cooks in mind, and guaranteed to deliver a drool-worthy treat that looks exactly like the one in your favorite cafe’s photo feed.
Why This Copycat Fruit Slush Works So Well
The secret to a perfect copycat fruit slush lies in two areas: the precise ratio of ingredients and the technique used to blend them. Commercial slush machines have constantly rotating blades that maintain a micro-crystalline ice structure while preventing the liquid from separating from the solid ice. At home, our standard blenders are powerful but lack that continuous agitation. This recipe uses specific culinary hacks to mimic that commercial texture. First, we prioritize the use of frozen fruit over excessive ice cubes. Frozen pineapple provides a creamy, consistent body that crushed ice simply cannot replicate. Second, we introduce a small amount of simple syrup, which acts as a texturizing agent, preventing the slush from freezing into a solid block. This ensures that every sip is incredibly smooth and holds its “slush” factor much longer, even on a hot day. The flavor balance—the inherent tanginess of the pineapple set against the deep, syrupy sweetness of a custom cherry swirl—is designed to be a perfect 10 on the satisfaction scale.
Understanding the Science of the Slushy Blender
To truly achieve a pro-level slushy at home, it helps to understand the science happening inside your blender jar. Most people think they can just add juice and ice and hit blend. However, that usually results in “blender separation”: you get a thick, difficult-to-pour top layer and a watery, flavorless bottom layer. Separation is the enemy of a great slush. To combat this, we need ingredients that emulsify the mixture. The naturally occurring pectin and fiber in the pineapple help bind the liquid water to the microscopic ice crystals. Simple syrup (which is sugar fully dissolved in water) also plays a critical role. When water freezes, it forms sharp, hard crystals. The sugar molecules from the syrup insert themselves among the water molecules, disrupting crystal growth and creating smaller, smoother ice particles. This is how we achieve that velvety, scoopable consistency rather than a coarse, crunchy snow cone texture. If you want that ultra-smooth “liquid glass” effect from your red swirl, the quality of your simple syrup technique is non-negotiable.
Copycat Cherry Pineapple Swirl Slush Ingredients
Don’t substitute these ingredients unless absolutely necessary; this combination is the magic formula for success.
- 2 cups frozen pineapple chunks (not raw; frozen achieves better texture)
- 1 ½ cups pineapple juice (chilled)
- 1 tablespoon fresh lime juice (this brightens the pineapple and cuts the sweetness)
- 3 tablespoons light simple syrup (equal parts water and granulated sugar dissolved and cooled)
- 4 tablespoons maraschino cherry juice or grenadine syrup (for the dramatic swirl)
- 1 cup ice cubes (if needed, to thicken; usually frozen fruit is enough)
- Optional Toppings: Maraschino cherries with stems, fresh pineapple wedges, decorative umbrellas
Homemade Fruit Slush Instructions
Following these steps precisely ensures the iconic cafe look and texture.
Step 1: Prep the Visual Elements and Syrup
If you haven’t already made your simple syrup, now is the time. Simply heat 3 tablespoons of water with 3 tablespoons of granulated sugar in a small saucepan over medium heat, stirring until the sugar completely dissolves. Remove from the heat and let it cool completely. Using warm syrup in a slushy will melt the ice and destroy the texture. Once cooled, set your glasses or clear plastic takeaway cups aside and ensure your blender is clean and powerful.
Step 2: Start the Pineapple Base
Add the 2 cups of frozen pineapple chunks directly into the blender jar. Pour in the 1 ½ cups of chilled pineapple juice and the 1 tablespoon of fresh lime juice. The lime juice is crucial for adding that necessary tartness that balances the heavy sugar from the pineapple juice and the final cherry swirl. Add your cooled simple syrup at this point.
Step 3: Master the Blend and Texture Check
Secure the blender lid and start blending on the lowest speed. We want to crush the frozen fruit slowly rather than whipping in air. Gradually increase the speed to high. Blend until the mixture is completely smooth, creamy, and holds its shape in the jar. This should take about 30 to 60 seconds depending on blender power. This is your texture checkpoint: if the slush is too thin or looks watery, add the 1 cup of ice cubes now and re-blend on high until incorporated and thick. It should be dense enough that it doesn’t instantly collapse when you pour it.
Step 4: Executing the Dramatic Cherry Swirl
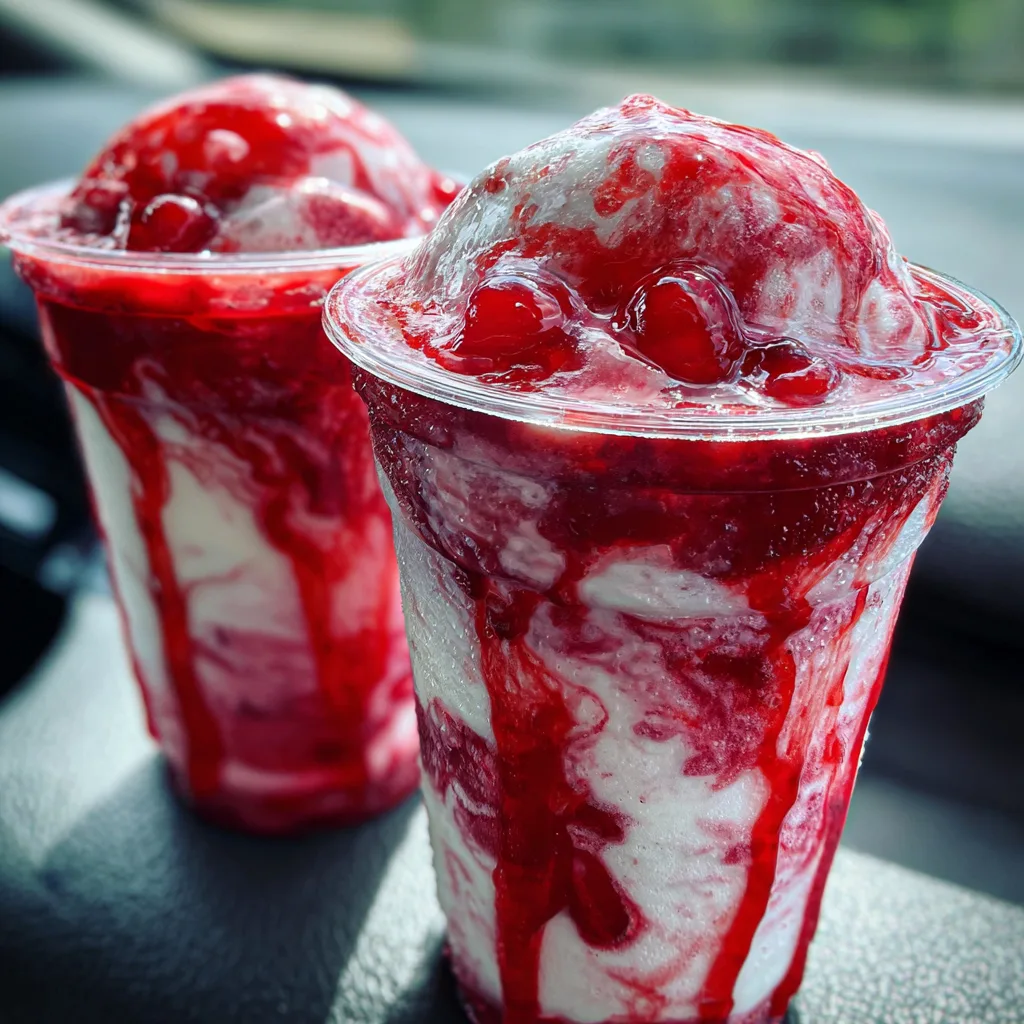
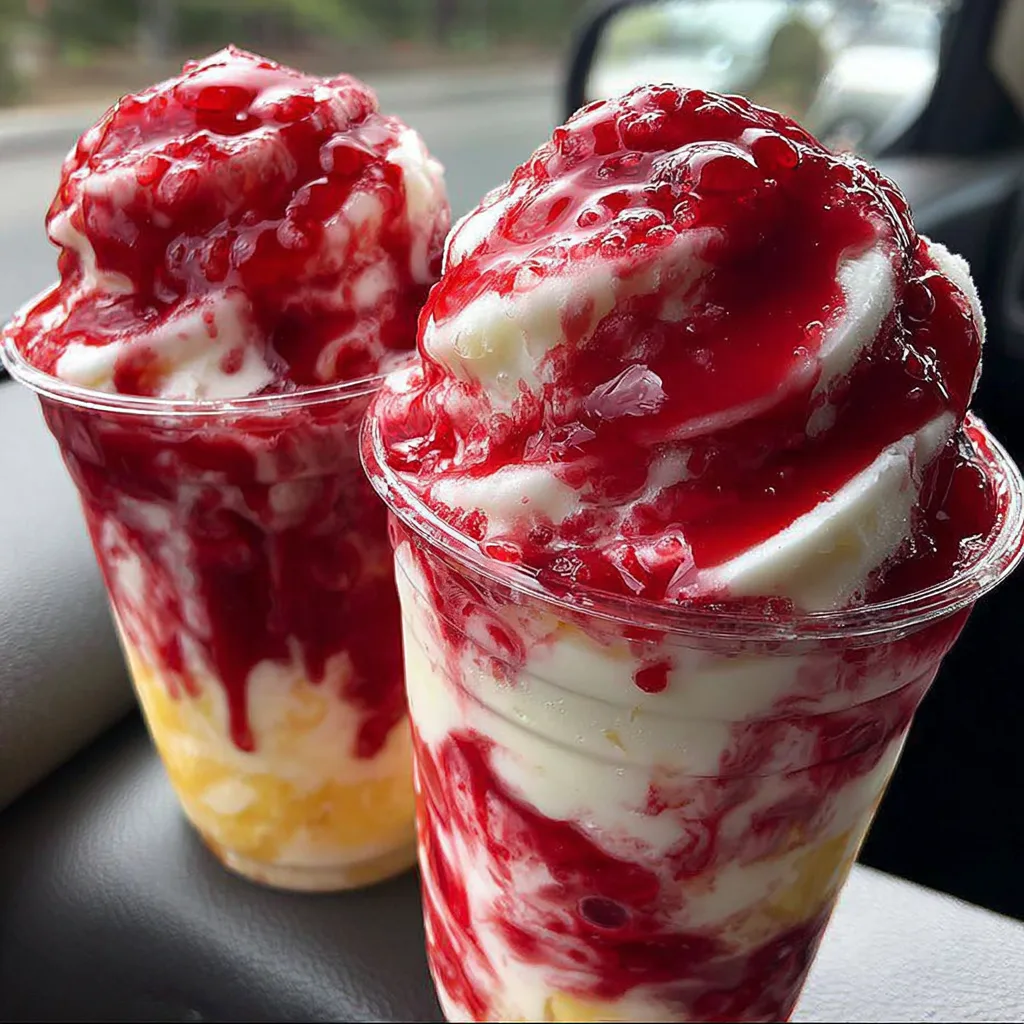
This is the step that makes or breaks the “copycat” aesthetic. The goal is to create defined red ribbons inside the cup rather than just pink juice. Grab your cups. Take a spoonful of your cherry juice or grenadine. Hold the cup at an angle. Gently drizzle the red syrup directly onto the inner wall of the cup, letting it slowly drip down toward the bottom in streaks. Do this on two or three spots around the cup. Repeat for the second cup.
Step 5: Filling and Finishing the Creation
Once your cups are prepped with red streaks, immediately pour your thick pineapple slush mixture very slowly into the center of the cup. As the slush rises, it will gently displace the red syrup, forcing it to stick to the glass in defined, glassy, wet ribbons. If you pour too fast, the weight of the slush will just mix the two flavors into a muddy pink mess. Fill the cups right to the top, making a nice icy dome.
Step 6: The Ultimate Drool-Worthy Garnish
Immediately top the center of each icy dome with a bright red maraschino cherry, ensuring the stem sticks up proudly. Hook a thick fresh pineapple wedge over the rim of the cup. Insert a colorful straw through the side of the dome. Serve immediately to maintain the ultra-glossy, glistening look of the wet surfaces and prevent melting.
The Importance of the Visual Swirl: Mastering the Technique
The image prompt emphasizes a high-gloss, ultra-wet, “liquid glass” look, particularly on the red swirl. If you just pour red syrup on top, it might sink in, or it might just run down the outside. The key, as mentioned in Step 4, is drizzling it onto the dry inner glass before the slush adds moisture and weight. This is a classic trick used by barista’s worldwide. This is what creates those thick, dramatic, glossy ribbons that cling to the side. The surface tension between the dense, cold slush and the syrupy grenadine prevents immediate mixing, allowing you to serve a drink with clear, defined flavor zones. The visual presentation is part of the sensory experience; the bright yellow pineapple contrasting with the deep red cherry swirl signals flavor intensity and nostalgic sweetness even before the first sip.
Serving Suggestions and Fun Topping Ideas
While our basic presentation mimics the quintessential street cafe slush, you can easily adapt this recipe to fit your own aesthetic. For an adult twist, you can rim the cups with a mixture of sugar and powdered citric acid for a sour punch. Instead of clear cups, serve these in copper mule mugs or insulated tumblers to keep them icy for hours during a pool party. If you are serving these to kids, consider adding a dollop of whipped cream and some rainbow sprinkles right on top of the cherry, transforming the slushy into a “frozen sundae.” For an ultra-tropical vibe, serve the slush right inside a hollowed-out fresh pineapple shell. Don’t underestimate the power of a decorative umbrella or a fun straw to make a simple homemade treat feel like a special vacation indulgence.
Healthier Slushy Variations
We know that grenadine and simple syrup bring a lot of sugar to the table. If you love the slushy texture but are watching your refined sugar intake, we have a variation for you. Instead of grenadine, make a quick cherry puree by blending a handful of fresh or frozen (thawed) sweet cherries with just enough water to make them flow. This provides a natural, defined swirl with no added sugar. For the pineapple base, you can omit the simple syrup and lime juice and simply blend frozen pineapple and pineapple juice; while slightly less texturally perfect, it is still refreshing. You can also substitute the simple syrup with an equal amount of raw agave nectar, which dissolves well in cold liquids and adds natural sweetness. Using 100% juice bases is always healthier than “slush syrups” that are mostly water and artificial flavors.
Blender Care: Making Sure Your Machine Can Handle the Slush
Creating a copycat slushy can be demanding on your blender. Making 100% frozen mixtures requires power and durable blades. To protect your machine and ensure consistent results:
- Add Liquid First: Never try to blend frozen fruit or ice cubes by themselves. Always put the pineapple juice, lime juice, and syrup in first. The liquid provides the necessary vortex to pull the frozen chunks down into the blades.
- Use the Low Settings: Don’t go straight to full power. This whips too much air into the mixture, destroying that dense slushy mouthfeel. Work your way up from low to high.
- Tamp Down Carefully: If your blender has a tamper (the black tool that lets you push ingredients down through the lid), use it continuously while blending to ensure all frozen chunks get processed. If you don’t have one, blend in brief pulses, stopping to stir manually if things get stuck.
- Don’t Overload: If you are trying to make a batch for six people, blend it in two separate rounds. Trying to do too much at once just overworks the motor and can lead to uneven blending.
Blended perfection is waiting for you! Get blending today.
This recipe isn’t just a list of steps; it’s a guide to perfect, professional results. Every detail, from the exact timing of the simple syrup production to the specific speed control during blending, has been calculated to give you a copycat experience that rivals any cafe. The texture is velvety, the flavors are bright and balanced, and the visual appearance is designed for maximum drool-factor on your favorite social media food feed. The high-gloss streaks of cherry syrup and the glistening condensed cups are within your grasp. Go forth, blend up a storm, and enjoy that ultimate, brain-freezing, sweet-tart satisfaction right at home!
Copycat Cherry Pineapple Swirl Slush
Ingredients
Equipment
Method
- If simple syrup isn’t ready, dissolve 3 tbsp sugar in 3 tbsp water over heat, then cool completely.
- In a blender, combine frozen pineapple, chilled pineapple juice, lime juice, and cooled simple syrup.
- Blend on low to break up fruit, then gradually increase to high. Blend until completely smooth and thick.
- Check texture; if too thin, add 1 cup ice and re-blend on high.
- Prepare cups: hold them at an angle and drizzle maraschino juice onto the dry inner walls in several spots to create defined streaks.
- Slowly pour the thick pineapple slush into the center of the prepped cups to preserve the cherry swirl aesthetic.
- Top each drink with a maraschino cherry (stem up), a fresh pineapple wedge on the rim, and a straw. Serve immediately.