Brownie Batter Milkshake
The Ultimate Homemade Brownie Batter Milkshake: A Chocoholic’s Dream
If you have ever found yourself licking the spoon while making brownies, wondering why the batter tastes almost better than the finished product, this recipe is dedicated to you. The Homemade Brownie Batter Milkshake is the perfect convergence of two iconic desserts: the thick, creamy indulgence of a classic milkshake and the rich, fudgy, dense flavor of raw brownie batter. It is a dessert that doesn’t just satisfy a sweet tooth—it obliterates it in the most delicious way possible.
In the world of milkshakes, there are standard chocolate shakes, and then there is this masterpiece. A standard chocolate shake usually relies on chocolate syrup or cocoa powder blended with vanilla ice cream. While tasty, it often lacks depth. A Brownie Batter Milkshake, however, incorporates the actual components of brownies—flour, rich cocoa, and butter—or actual chunks of brownies, creating a texture that is thicker, grainier (in a good way), and intensely chocolatey. It is less of a drink and more of a spoonable experience.
This guide will walk you through creating a safe, edible brownie batter base, blending it into the perfect consistency, and garnishing it like a pro. We will cover the science of heat-treating flour (a crucial safety step!), the best ice cream to use, and how to achieve that Instagram-worthy presentation right in your own kitchen. Forget the drive-thru; the best milkshake of your life is happening in your blender.
Why You Will Love This Recipe
There are a million milkshake recipes online, but here is why this specific version stands out:
- Authentic Batter Flavor: We aren’t just throwing a brownie in a blender. We are focusing on that specific “batter” taste—the combination of butter, sugar, and flour that makes the raw stuff so addictive.
- Texture Contrast: Smooth ice cream meets chewy brownie bits. The mouthfeel is complex and satisfying.
- Customizable Thickness: Whether you like a shake you can sip through a straw or one that requires a spoon (concrete style), this recipe is easily adjustable.
- Safety First: We address the raw flour issue, ensuring you can enjoy the “batter” flavor without any tummy troubles.
The Secret to “Safe” Brownie Batter
Before we dive into the ingredients, we must address the elephant in the room: eating raw batter. Most people know that raw eggs can be risky due to salmonella, but fewer people realize that raw flour is also a potential health hazard. Flour is a raw agricultural product that hasn’t been treated to kill bacteria like E. coli.
Since we are making a “batter” milkshake, we want that authentic floury, doughy taste. To do this safely, you must heat-treat your flour.
How to Heat-Treat Flour:
Simply spread the flour on a baking sheet and bake at 350°F (175°C) for about 5 minutes, or microwave it in a bowl for 30-second intervals until it reaches 160°F (71°C). Let it cool completely before using. This simple step makes your flour safe to eat raw and perfect for our shake!
Ingredient Breakdown
To achieve the ultra-rich flavor shown in the photo, you need the right components:
1. The Base: Vanilla Bean Ice Cream
Surprisingly, Vanilla Bean is often better than chocolate ice cream for this recipe. Why? Because we want the brownie flavor to be the star. High-quality vanilla provides a creamy, neutral canvas that lets the cocoa and brownie mix shine without competing flavors. If you use chocolate ice cream, it can sometimes become “one-note.” However, for extreme chocoholics, chocolate ice cream is a valid choice.
2. The “Batter” Element
You have two choices here. You can use a dry boxed brownie mix (heat-treated for safety), or you can make a quick homemade batter paste using cocoa, sugar, butter, and heat-treated flour. This recipe provides instructions for the homemade paste for the freshest flavor.
3. The Liquid: Whole Milk
Stick to whole milk for the creamiest texture. Skim milk or water will result in an icy, thin shake. For an even more decadent treat, you can use half-and-half.
4. The Mix-Ins: Real Brownies
You need texture. Chewy, baked brownie chunks blended into the shake add pockets of fudge that get stuck in the straw in the best way possible. Plus, you need them for that towering garnish.

Ingredients
For the Edible Brownie Batter Paste (The Flavor Base):
- – 2 tbsp Unsalted Butter, melted
- – 2 tbsp Cocoa Powder (Dutch-processed prefers)
- – 2 tbsp Heat-Treated All-Purpose Flour
- – 1 tbsp Brown Sugar (packed)
- – 1 tbsp Granulated Sugar
- – 1 tsp Vanilla Extract
- – 1-2 tbsp Milk (to thin slightly)
For the Milkshake:
- – 3 large scoops Vanilla Bean Ice Cream (approx. 2 cups)
- – 1/2 cup Whole Milk (adjust for thickness)
- – The Brownie Batter Paste (from above)
- – 1/2 cup Baked Brownie Chunks (plus more for garnish)
For the Garnish:
- – Whipped Cream (homemade or store-bought)
- – Extra Brownie Chunks
- – Chocolate Shavings or Sprinkles
Instructions
Follow these steps to build the perfect shake. Speed is key once the ice cream comes out!
- Prepare the Brownie Batter Paste: In a small bowl, mix the melted butter, cocoa powder, heat-treated flour, brown sugar, granulated sugar, and vanilla. Stir until it forms a thick, glossy paste. Add a tablespoon of milk if it’s too stiff; it should have the consistency of… well, brownie batter! Set this aside.
- Prep the Glass: Place your serving glass in the freezer. A frosty glass keeps the shake thick longer. If you want a decorated rim, dip the rim of the glass in chocolate ganache or frosting and roll it in crushed brownies before freezing.
- Blend the Base: In a high-powered blender, combine the vanilla ice cream, 1/2 cup of milk, and the brownie batter paste you just made.
- Pulse, Don’t Puree: Blend on high for just a few seconds until smooth. Avoid over-blending, which introduces heat and melts the ice cream too much. If it’s too thick, add milk a tablespoon at a time. If too thin, add more ice cream.
- Add the Chunks: Toss in the 1/2 cup of baked brownie chunks. Pulse the blender 2 or 3 times max. You want these to break up into smaller bits but not disappear completely. You want to be able to chew them.
- Pour and Garnish: Pour the thick shake into your chilled glass. It should pile up slightly. Top with a massive swirl of whipped cream.
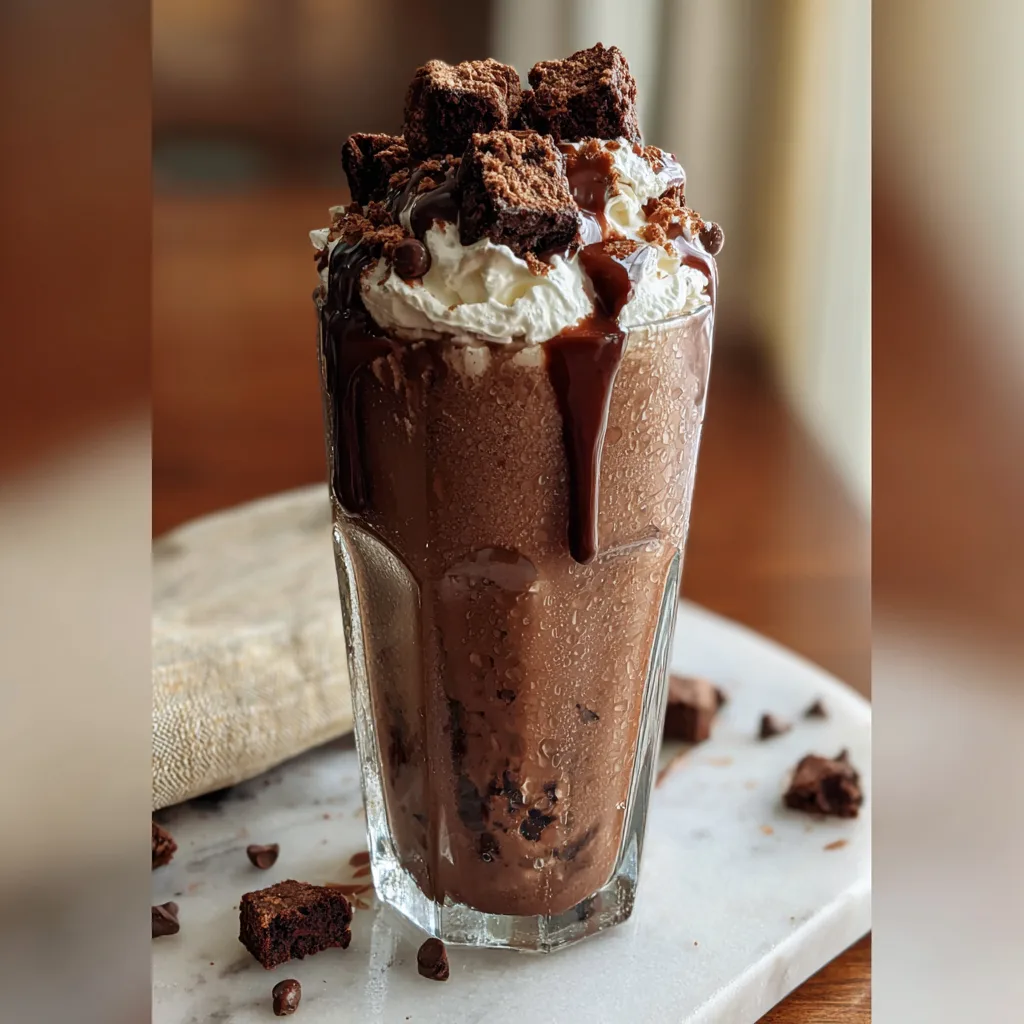
- The Finale: Nestlé large chunks of brownie into the whipped cream (as seen in the photo). Sprinkle with chocolate shavings or extra crumbs.
- Serve: Insert a wide straw and a long spoon and serve immediately.
Tips for Success
The “Gloss” Factor: The image shows a shake that looks wet and rich. To achieve this visually, ensure your brownie chunks on top are moist (fudgy brownies work better than cakey ones). You can also drizzle a tiny bit of chocolate syrup inside the glass before pouring for that “mudslide” look.
Dutch Process Cocoa: Use Dutch-process cocoa powder for the batter paste. It is darker, less acidic, and has that Oreo-like deep chocolate flavor that mimics commercial brownie mixes perfectly.
Don’t Skip the Salt: A tiny pinch of sea salt in the batter paste enhances the chocolate flavor and cuts the sweetness, making the drink more palatable and less cloying.
Variations
1. The Peanut Butter Brownie Shake
Add 2 tablespoons of creamy peanut butter to the blender along with the batter paste. Top with Reese’s cup chunks instead of just brownies.
2. The Boozy Brownie (Adults Only)
Replace 1/4 cup of the milk with Baileys Irish Cream or a Chocolate Liqueur. Kahlua also adds a wonderful coffee depth that intensifies the chocolate.
3. The “Midnight” Shake
Use chocolate ice cream instead of vanilla and add a tablespoon of dark chocolate chips during the pulse stage for a triple-chocolate threat.
Common Questions
Can I use dry brownie mix instead of making the paste?
Yes, absolutely. You can use 3-4 tablespoons of dry boxed brownie mix. However, you must still heat-treat the dry mix in the microwave or oven before adding it to the blender to ensure the flour is safe to eat raw. The dry mix will result in a slightly grainier texture than the paste method, but it is very authentic.
Can I make this dairy-free?
Yes. Use a high-fat dairy-free ice cream (like coconut or oat milk based) and almond milk. Substitute the butter in the paste with coconut oil or vegan butter. Ensure your brownies are also vegan.
How do I store leftovers?
Milkshakes don’t store well in the fridge; they melt. If you can’t finish it, pour the remainder into a popsicle mold and freeze it! You’ll have delicious brownie batter pudding pops for later.
Conclusion
The Homemade Brownie Batter Milkshake is more than just a drink; it is a celebration of chocolate in all its forms. It combines the nostalgia of licking the mixing bowl with the cool refreshment of an ice cream parlor treat. Whether you are making this for a movie night, a summer BBQ, or just a Tuesday night treat, it is guaranteed to impress.
Remember, the key is in the layering of textures—creamy, doughy, and chewy. So grab your blender, bake a batch of brownies (or buy them, we won’t tell), and get ready to sip on pure happiness.
Homemade Brownie Batter Milkshake
Ingredients
Equipment
Method
- Heat treat the flour by microwaving for 60 seconds (in intervals) until it reaches 160°F to ensure safety.
- In a small bowl, mix melted butter, cocoa, heat-treated flour, sugars, and vanilla to create the batter paste.
- Add ice cream, milk, and the batter paste into a blender.
- Blend on high until smooth and creamy.
- Add the baked brownie chunks and pulse 2-3 times just to break them up slightly.
- Pour into chilled glasses and top generously with whipped cream and extra brownies.