Cotton Candy Japanese Cake Roll
The Ultimate Cotton Candy Japanese Cake Roll: Semi-Sweet & Cloud-Like Fluffy
Welcome to the definitive guide on creating the breathtakingly beautiful and incredibly delicate Cotton Candy Japanese Cake Roll. If you have ever walked past an Asian bakery and marveled at the perfect, unblemished, brightly colored sponge cakes sitting pristine behind the glass, you might have thought they were impossible to recreate at home. We are here to tell you that with a little patience and an understanding of the technique, you can master this bakery-level showstopper in your own kitchen.
This cake is a celebration of texture. Unlike traditional Western layer cakes that rely on dense butter and heavy, ultra-sweet frostings, the Japanese cake roll is built on a chiffon-style sponge base. This means it is predominantly leavened by a meticulously whipped egg white meringue, resulting in a cake that is as light and airy as a literal cloud. Filled with a simple, barely-sweetened vanilla Chantilly cream, this “semi-sweet and fluffy” dessert is the perfect elegant treat for spring gatherings, baby showers, or a luxurious afternoon tea.

Why You Will Fall in Love With This Recipe
There are countless cake recipes out there, but this specific Japanese roll cake holds a special place in the hearts of bakers for a few key reasons. First is the “semi-sweet” flavor profile. In many Asian desserts, the highest compliment one can give is “it’s not too sweet.” By pulling back on the heavy sugars, the natural flavors of the high-quality vanilla and the richness of the fresh cream truly shine through without overwhelming the palate.
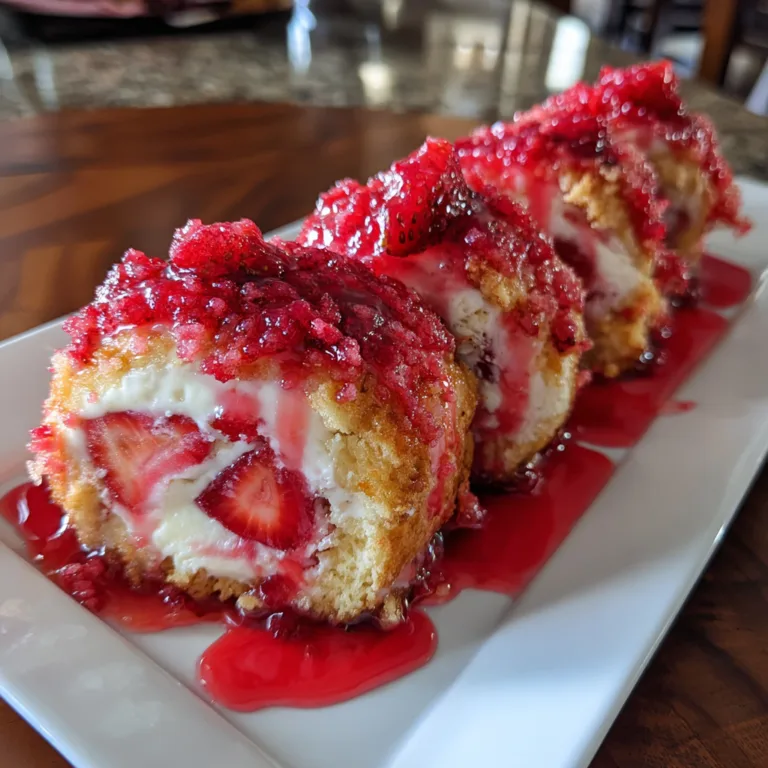
Secondly, the aesthetic appeal is unmatched. The soft, pastel pink hue mimics the nostalgia of spun cotton candy. Slicing into the roll reveals a perfect, mesmerizing spiral of bright white cream encased in fluffy pink cake. It looks like a work of art, but it is made entirely from accessible, everyday ingredients.
The Science of the Perfect Fluffy Cake Roll
To prevent the dreaded “cracked roll” and achieve that melt-in-your-mouth crumb, you must respect the science of the chiffon cake method.
The Meringue: The Heart of the Cake
The structure and fluffiness of this cake depend entirely on the meringue (whipped egg whites and sugar). The golden rule here is to whip your egg whites to medium peaks, not stiff peaks. Stiff peaks are great for macarons, but in a roll cake, an over-whipped meringue becomes too dry and rigid. When you try to roll a rigid cake, it will snap and crack. You want the peak to hold its shape but gently flop over at the very tip (often called a “bird’s beak”).
The Role of Cake Flour
You cannot substitute all-purpose flour in this recipe if you want authentic results. Cake flour has a significantly lower protein content (usually around 7-8%) compared to all-purpose flour (10-12%). Less protein means less gluten formation when you mix the batter. Less gluten directly translates to a softer, more tender, and more flexible cake that can be rolled without breaking.
Temperature Control
Baking this cake at a slightly lower temperature (325°F/165°C) prevents the outside from browning too quickly and drying out before the inside is cooked. We want to preserve that beautiful pink color without developing a tough, brown crust. Furthermore, rolling the cake while it is still warm trains the crumb to hold the spiral shape. If you wait for it to cool flat, it will resist bending and will crack.
Ingredients You Will Need
For the Pink Chiffon Sponge:
- – 4 large eggs, separated into yolks and whites (must be room temperature)
- – 1/4 cup (50g) granulated sugar (for the yolk mixture)
- – 1/4 cup (50g) granulated sugar (for the egg whites)
- – 1/4 cup (60ml) whole milk, room temperature
- – 3 tablespoons (45ml) neutral oil (vegetable, canola, or grapeseed)
- – 1 teaspoon pure vanilla extract
- – 3/4 cup (90g) cake flour, sifted
- – 1/2 teaspoon baking powder
- – 1/4 teaspoon cream of tartar (to stabilize the egg whites)
- – 1-2 drops soft pink gel food coloring (do not use liquid food coloring)
For the Lightly Sweetened Whipped Cream Filling:
- – 1 1/4 cups (300ml) heavy whipping cream, very cold
- – 3 tablespoons (24g) powdered sugar, sifted
- – 1 teaspoon pure vanilla extract
Step-by-Step Instructions for a Crack-Free Roll
Step 1: Prep and the Yolk Batter
- Prep the pan: Preheat your oven to 325°F (165°C). Line a 10×15-inch jelly roll pan perfectly with parchment paper. Do not grease the sides of the pan; the batter needs to grip the sides to rise properly.
- Whisk the yolks: In a large mixing bowl, whisk the 4 egg yolks and 1/4 cup of sugar together until pale yellow and slightly thickened.
- Add liquids and color: Whisk in the neutral oil, whole milk, and vanilla extract until smooth. Add 1-2 tiny drops of pink gel food coloring and mix until you achieve a vibrant, cotton-candy pink. Remember, the color will lighten slightly once the white meringue is folded in.
- Sift the dry ingredients: Sift the cake flour and baking powder directly into the pink yolk mixture. Gently whisk just until no lumps remain. Do not overmix.
Step 2: Whip the Meringue
- In the impeccably clean, grease-free bowl of a stand mixer fitted with the whisk attachment, beat the 4 egg whites and cream of tartar on medium speed until frothy.
- Gradually rain in the remaining 1/4 cup of sugar, one tablespoon at a time, while continuing to whip.
- Increase the speed to medium-high and whip until you reach medium, “bird’s beak” peaks. The meringue should look glossy and smooth, but the very tip should droop when you lift the whisk.
Step 3: Fold and Bake
- Take one-third of the whipped meringue and vigorously whisk it into the pink yolk batter to lighten the mixture.
- Gently add the remaining meringue in two additions, using a rubber spatula to carefully fold it in. Scrape the bottom and sides of the bowl, lifting the batter up and over itself. Stop folding the moment no white streaks remain to avoid deflating the batter.
- Pour the airy batter into your prepared pan. Use an offset spatula to smooth it into an even layer, ensuring it reaches all the corners. Tap the pan firmly on the counter twice to pop any large air bubbles.
- Bake for 12-14 minutes, or until the top springs back gently when lightly touched.
Step 4: The Crucial Rolling Technique
- Immediately upon removing the cake from the oven, run a knife around the edges to release it from the pan.
- Place a fresh sheet of parchment paper over the top of the cake. Place a wire rack or cutting board over that, and confidently invert the whole pan so the cake flips upside down. Gently peel off the baking parchment that was on the bottom of the cake.
- While the cake is still warm, use the fresh parchment paper underneath it to gently roll the cake up (from the short end) into a tight log. Let it cool completely wrapped in the parchment paper on a wire rack. This “muscle memory” prevents cracking later.
Step 5: Fill and Chill
- While the cake cools, make the filling. In a chilled bowl, whip the cold heavy cream, powdered sugar, and vanilla until stiff peaks form. You want it firm enough to hold the shape of the roll, but do not overwhip it into butter.
- Carefully unroll the cooled cake. It will look slightly wavy; this is normal. Spread the whipped cream evenly over the surface, leaving a small 1-inch border plain at the far end so the cream doesn’t squish out.
- Using the parchment paper to assist you, gently but firmly re-roll the cake, this time with the filling inside. Wrap the finished log tightly in plastic wrap to help it hold its round shape.
- Chill in the refrigerator for at least 2 hours (or up to overnight) to allow the cream to firm up and the flavors to meld before slicing.

Pro Tips for Flawless Presentation
To get those bakery-perfect, clean slices shown in the photo, you must use a hot, clean knife. Run a sharp chef’s knife under very hot tap water, wipe it completely dry with a towel, and make one swift slice. Repeat the heating and wiping process for every single slice. This prevents the white cream from smearing across the clean pink sponge.
Storage Instructions
Because this cake is filled with fresh dairy whipped cream, it must be kept refrigerated. Store the cake in an airtight container or tightly wrapped in plastic wrap in the fridge for up to 3 days. It is best enjoyed chilled, straight from the refrigerator, ensuring the cream remains stiff and the sponge delightfully tender.
Cotton Candy Japanese Cake Roll
Ingredients
Equipment
Method
- Preheat oven to 325°F (165°C) and line a 10×15-inch jelly roll pan with parchment paper.
- Whisk egg yolks and 1/4 cup sugar until pale. Whisk in milk, oil, vanilla, and pink gel food coloring until smooth.
- Sift the cake flour and baking powder into the yolk mixture and whisk just until combined.
- In a clean bowl, whip egg whites and cream of tartar until frothy. Gradually add the remaining 1/4 cup sugar and whip to medium, drooping peaks.
- Fold 1/3 of the meringue into the yolk batter to lighten it, then gently fold in the rest until no white streaks remain.
- Spread batter evenly in the pan and bake for 12-14 minutes until the top springs back when touched.
- Invert the warm cake onto a new sheet of parchment, peel off the baking parchment, and gently roll the cake up in the new parchment to cool completely.
- Whip heavy cream, powdered sugar, and vanilla to stiff peaks.
- Unroll the cooled cake, spread with whipped cream, and gently re-roll. Wrap tightly in plastic wrap and chill for 2 hours before slicing.