Easy Frozen S’mores
The Ultimate Easy Frozen S’mores: A Refreshing Twist on a Classic Campfire Treat
When the heat of summer sets in, the thought of gathering around a blazing campfire to roast marshmallows might seem a little less appealing than it does on a crisp autumn evening. Yet, the craving for that quintessential combination of honey-sweet graham crackers, rich milk chocolate, and gooey, vanilla-scented marshmallow never really goes away. This is where the brilliant concept of Easy Frozen S’mores comes into play. Combining the nostalgic flavors of your favorite childhood camping trips with the refreshing chill of an ice cream sandwich, this no-bake dessert is guaranteed to become a household staple. In this comprehensive guide, we will explore every facet of creating the perfect frozen s’more, from the history of the original treat to expert tips, ingredient deep-dives, and creative flavor variations.
Why You Will Absolutely Love This Recipe
There are countless reasons why this easy frozen s’mores recipe will quickly jump to the top of your dessert rotation. First and foremost is the convenience factor. This is a completely no-bake dessert, which means you will not have to turn on your oven and heat up your kitchen during the sweltering summer months. All the magic happens in a mixing bowl and your freezer. Furthermore, this recipe is incredibly forgiving and approachable, making it a fantastic culinary project to tackle with children. They will love helping to lay out the graham crackers, spread the fluffy layers, and, of course, lick the bowl.
Another major selling point is how perfectly these treats store. Because they live in the freezer, you can make a large batch over the weekend and have a ready-to-eat, portion-controlled dessert waiting for you whenever a sweet craving strikes. They are the ultimate make-ahead dessert for summer barbecues, pool parties, potlucks, and family picnics. When you pull a tray of these out of the cooler, you are guaranteed to be the most popular person at the party.
The Fascinating History and Evolution of the S’more
To truly appreciate the genius of a frozen s’more, it is helpful to look back at the origins of the classic campfire treat. The exact inventor of the s’more is lost to history, but the first recorded recipe for “Some Mores” appeared in a 1927 publication called “Tramping and Trailing with the Girl Scouts.” The recipe was credited to Loretta Scott Crew, who reportedly made them for Girl Scouts by the campfire. The name itself is a portmanteau of “some more,” reflecting the fact that anyone who eats one immediately wants another.
For decades, the s’more remained strictly a campfire activity. However, as culinary creativity blossomed, food enthusiasts began looking for ways to enjoy this flavor profile indoors and year-round. We saw the rise of s’mores baked in skillets, s’mores cookies, s’mores pies, and s’mores flavored coffee creamers. The frozen s’more is simply the latest, and perhaps most refreshing, evolution. By transforming the warm, melty components into chilled, creamy layers, the frozen s’more offers a textural contrast that is incredibly satisfying: the crisp snap of the chilled graham cracker giving way to the smooth, ice-cream-like marshmallow and chocolate fillings.
Breaking Down the Ingredients
The beauty of this recipe lies in its simplicity. You only need a handful of readily available ingredients to create these layered masterpieces.
- Graham Crackers: These form the structural foundation of your frozen sandwiches. Standard honey graham crackers work perfectly, providing that classic, slightly nutty, sweet wheat flavor. For the best results, look for full sheets that are intact, as you will need them to create an even top and bottom layer in your baking dish.
- Instant Chocolate Pudding Mix: This is the secret shortcut to a rich, fudgy chocolate layer without the hassle of melting chocolate or cooking a custard. The instant pudding thickens up quickly when mixed with milk and provides a dense, brownie-batter-like flavor that mimics a solid chocolate bar perfectly when frozen.
- Cold Milk: Used to activate the instant pudding. Whole milk will yield the creamiest results, but 2% or even a dairy-free alternative like oat milk or almond milk can work in a pinch.
- Cream Cheese: This is the stabilizing force for the marshmallow layer. It adds a subtle tang that cuts through the extreme sweetness of the marshmallow fluff, and its fat content prevents the layer from freezing into a solid, unyielding block of ice. Ensure it is softened to room temperature for a lump-free mixture.
- Marshmallow Creme (Fluff): Essential for getting that authentic s’mores flavor. Marshmallow creme blends beautifully with the cream cheese, creating a fluffy, sticky, sweet cloud that tastes exactly like the inside of a perfectly roasted marshmallow.
- Whipped Topping (like Cool Whip): This ingredient is folded into both the chocolate and marshmallow layers. It incorporates air and lightness, ensuring that your frozen s’mores have the texture of a premium ice cream sandwich rather than a brick. Make sure it is fully thawed before mixing.
Step-by-Step Instructions for Perfect Assembly
Creating these frozen treats is a straightforward process of mixing and layering. Here is a detailed walk-through to ensure your success.
Step 1: Prepare Your Pan
Line a 9×13 inch baking dish with parchment paper or aluminum foil, leaving enough overhang on the sides to act as handles later. This is a crucial step; if you skip it, you will have a very difficult time getting the frozen block out of the pan to cut it into neat squares. Lightly spraying the foil with non-stick spray can also provide extra insurance.
Step 2: The Graham Cracker Base
Arrange a single layer of graham cracker squares at the bottom of the prepared dish. Depending on the exact dimensions of your pan, you may need to break a few crackers to fill in any gaps. Try to cover as much of the bottom surface as possible.
Step 3: Creating the Chocolate Fudge Layer
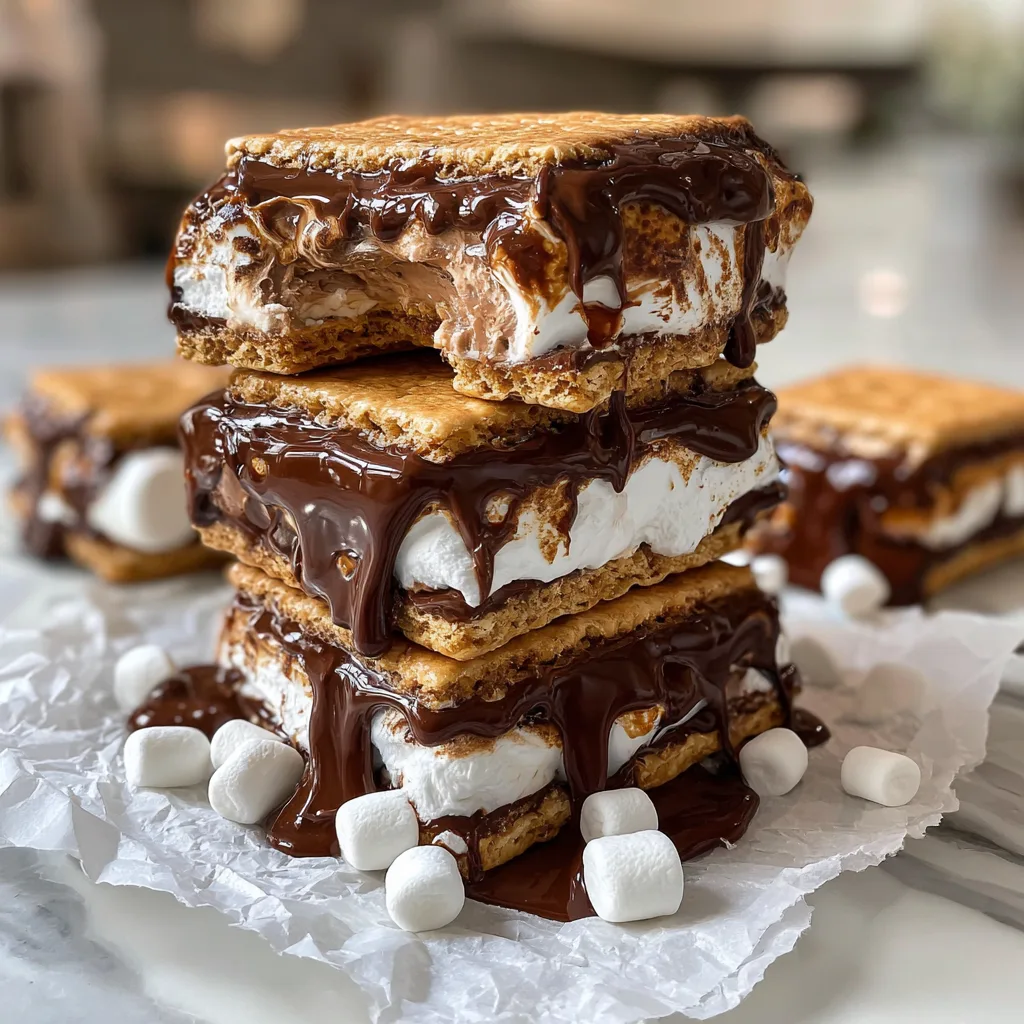
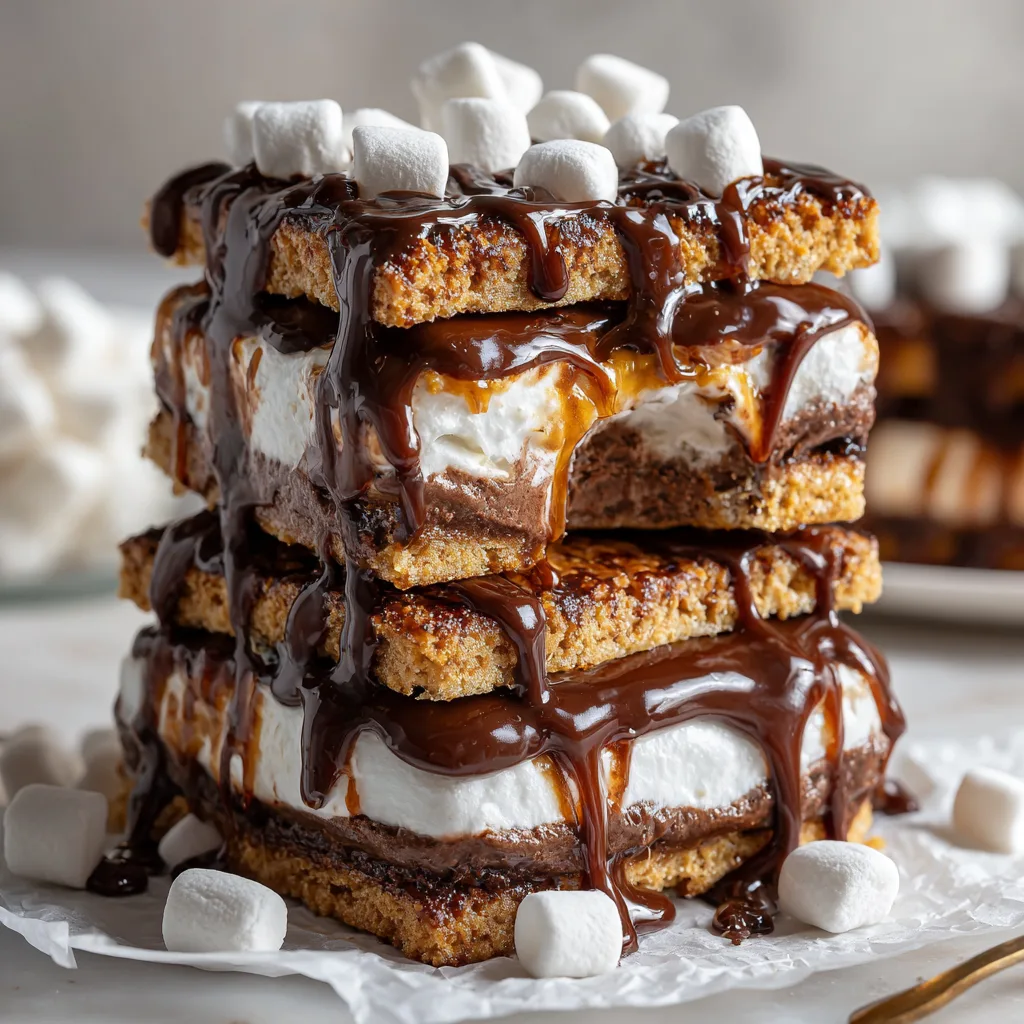
In a large mixing bowl, whisk together the cold milk and the instant chocolate pudding mix. Beat it for about two minutes until it begins to noticeably thicken. Immediately fold in half of the thawed whipped topping. Use a rubber spatula to gently fold the mixture together until no white streaks remain. Pour this rich chocolate mixture directly over the graham cracker crust. Use an offset spatula or the back of a spoon to spread it into an even, flat layer. Place the dish in the freezer for about 15-20 minutes to allow this layer to set up slightly before adding the next one.
Step 4: Crafting the Marshmallow Layer
While the chocolate layer is chilling, clean your bowl and beat the softened cream cheese until it is completely smooth and creamy. Add the marshmallow creme and beat until fully combined. Finally, gently fold in the remaining half of the whipped topping. The mixture should be light, airy, and fluffy. Carefully dollop this marshmallow mixture over the chilled chocolate layer. Gently spread it out into a smooth, even layer, taking care not to disturb the chocolate layer underneath.
Step 5: The Final Top Layer and Freezing
Top the marshmallow layer with another single layer of graham cracker squares, trying to align them as best as possible with the crackers on the bottom layer. This will make cutting much easier later on. Cover the dish tightly with plastic wrap or aluminum foil and place it in the freezer. Let it freeze for at least 4 hours, or preferably overnight, until completely firm.
Step 6: Slicing and Serving
Once fully frozen, use the parchment or foil handles to lift the entire block out of the pan and onto a large cutting board. Using a large, sharp chef’s knife, carefully slice the block into individual squares, using the top graham crackers as your guide. If the knife is struggling to get through the frozen layers, try running the blade under hot water and wiping it dry between cuts.
Expert Tips and Tricks for the Best Frozen S’mores
Even though this recipe is incredibly easy, a few pro-tips can elevate your frozen s’mores from good to spectacular.
- Room Temperature Ingredients: It cannot be stressed enough how important it is for your cream cheese to be at room temperature. If it is cold, it will clump up when mixed with the marshmallow creme, resulting in a lumpy white layer instead of a smooth, velvety one.
- Do Not Rush the Freeze: The layers need time to fully solidify. If you try to cut into the dish too early, the chocolate and marshmallow layers will squish out the sides, resulting in a messy presentation. Patience is key.
- The Hot Knife Trick: Cutting cleanly through frozen desserts can be tricky. Fill a tall glass with very hot water. Dip your knife into the water, wipe it completely dry with a kitchen towel, and make a cut. Repeat this process for every single slice. The heat of the blade will melt through the frozen layers seamlessly, giving you beautiful, bakery-worthy edges.
- Preventing Soggy Crackers: If you are worried about the graham crackers becoming too soft over time in the freezer, you can lightly brush the inside of the crackers with a thin layer of melted chocolate or coconut oil before assembling. This acts as a moisture barrier.
Exciting Variations and Customizations
Once you have mastered the basic recipe, the possibilities for customization are endless. Here are a few fun ways to change up the flavor profile of your frozen s’mores:
- Peanut Butter S’mores: Swap the chocolate pudding for peanut butter pudding, or simply swirl half a cup of creamy peanut butter into the chocolate layer before freezing. You could also use chocolate-covered graham crackers for the base.
- Mint Chocolate Chip: Add a few drops of peppermint extract to the marshmallow layer and fold mini chocolate chips into the chocolate layer. This tastes exactly like a frozen peppermint patty crossed with a s’more.
- Caramel Macchiato: Drizzle thick salted caramel sauce between the chocolate and marshmallow layers. Substitute a tablespoon of the milk in the pudding mixture with strong brewed espresso or coffee.
- Cookie Dough S’mores: Skip the graham crackers and use layers of edible (eggless) chocolate chip cookie dough pressed flat. This makes for an incredibly decadent and rich dessert sandwich.
- Fruit Forward: Swirl a high-quality raspberry or strawberry jam into the marshmallow layer. The tartness of the berries pairs beautifully with the rich chocolate and sweet vanilla flavors.
Storage Guidelines and Best Practices
Proper storage is essential to maintain the optimal texture of your frozen s’mores. Once you have sliced the dessert into individual squares, it is best to wrap each sandwich tightly in plastic wrap. Alternatively, you can place them all into a large, airtight freezer-safe container, placing a sheet of parchment or wax paper between the layers to prevent them from freezing together.
These treats will keep exceptionally well in the freezer for up to one month—though it is highly unlikely they will last that long without being devoured! When you are ready to enjoy one, you can eat it straight from the freezer. The layers are designed to stay soft enough to bite into immediately, offering a delightfully cool and creamy texture on a hot day.
The Science of Freezing Cream and Pudding
You might wonder why we use whipped topping and instant pudding instead of just freezing real melted chocolate and melted marshmallows. The answer lies in the science of freezing point depression and fat content. If you were to melt regular marshmallows and freeze them, they would turn into rock-hard, unchewable sugar blocks due to their high water and sugar content lacking sufficient fat. Cream cheese and whipped topping introduce emulsified fats and air into the matrix.
Similarly, instant pudding is formulated with modified cornstarch and emulsifiers that prevent the liquid from forming large ice crystals. When folded together with the airy whipped topping, the resulting structure suspends tiny air bubbles within the freezing liquid. This mimics the churning process of a traditional ice cream maker, ensuring that when you take a bite of your frozen s’more, your teeth glide smoothly through the layers instead of hitting a solid wall of ice.
Serving Suggestions for entertaining
While grabbing a frozen s’more straight from the freezer in your pajamas is a perfectly acceptable way to enjoy this treat, you can also dress them up for entertaining. Try serving them on a chilled platter at your next barbecue. For an elegant touch, drizzle the entire platter with high-quality melted dark chocolate and sprinkle with crushed toasted pecans or sea salt right before serving.
You can also set up a “Frozen S’mores Bar” where you provide the basic frozen squares alongside various dips and toppings. Guests can dip their sandwiches into bowls of warm chocolate ganache, butterscotch sauce, or rolled into crushed pretzels, toasted coconut, or colorful sprinkles.
Conclusion
The Easy Frozen S’more is a triumph of modern no-bake dessert engineering. It takes everything we love about a messy, warm campfire classic and transforms it into a neat, refreshing, make-ahead treat that is perfect for any occasion. With minimal ingredients, zero baking time, and an incredibly satisfying payoff, this recipe is sure to become a beloved tradition in your home. So clear some space in your freezer, gather your ingredients, and get ready to experience s’mores in a whole new, deeply refreshing way.
Easy Frozen S’mores
Ingredients
Equipment
Method
- Line a 9×13 inch baking dish with parchment paper or foil, leaving an overhang for easy removal.
- Arrange a single layer of graham cracker squares to completely cover the bottom of the dish.
- In a medium bowl, whisk together the cold milk and instant chocolate pudding mix until it begins to thicken (about 2 minutes).
- Gently fold 4 oz (half a tub) of the thawed whipped topping into the chocolate pudding until no white streaks remain.
- Spread the chocolate mixture evenly over the graham cracker layer. Place in the freezer for 15-20 minutes to set slightly.
- In a separate bowl, use a hand mixer to beat the softened cream cheese until smooth. Add the marshmallow creme and beat until combined.
- Gently fold the remaining 4 oz of whipped topping into the marshmallow mixture until light and fluffy.
- Carefully spread the marshmallow mixture in an even layer over the chilled chocolate layer.
- Top with a final layer of graham cracker squares, trying to align them with the bottom crackers.
- Cover tightly and freeze for at least 4 hours, or overnight, until completely firm.
- Use the parchment overhang to lift the dessert onto a cutting board. Slice into squares and serve immediately.