📖 B. INTRODUCTION
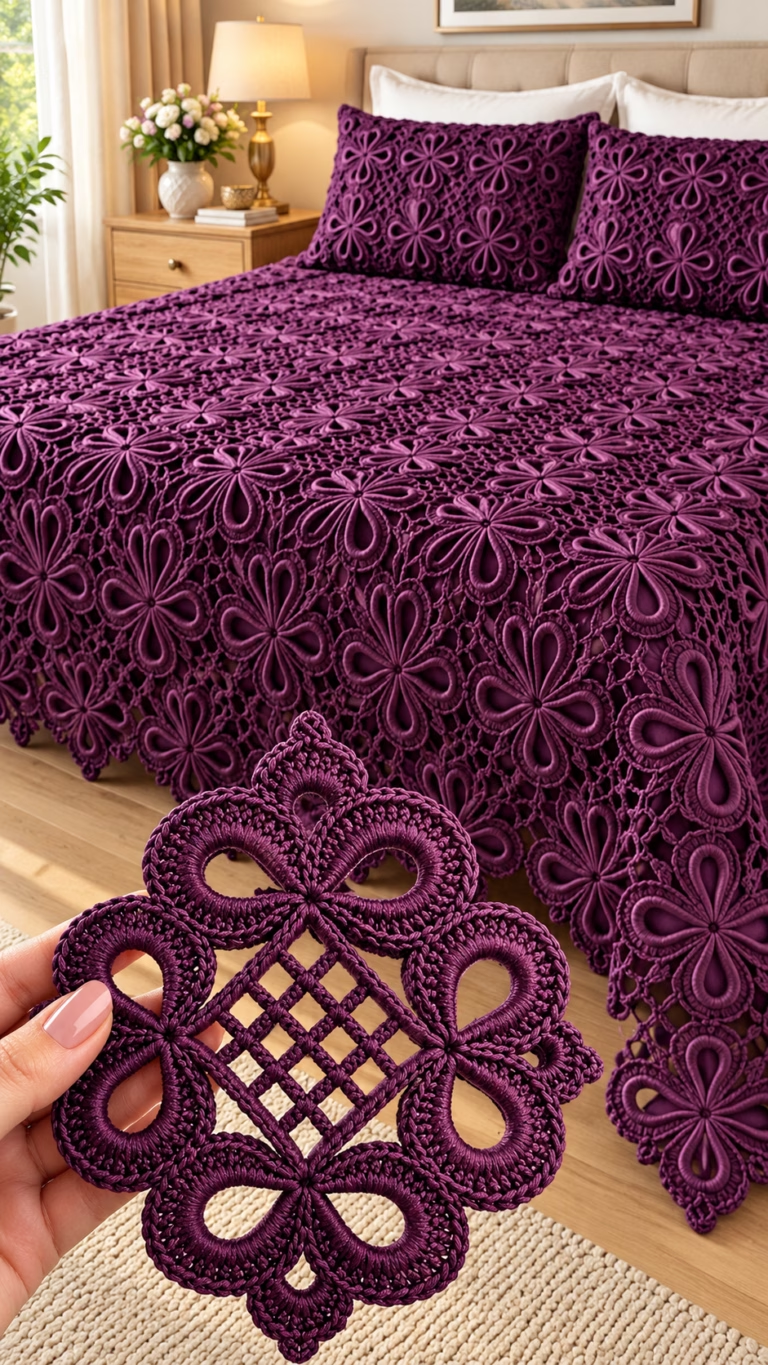
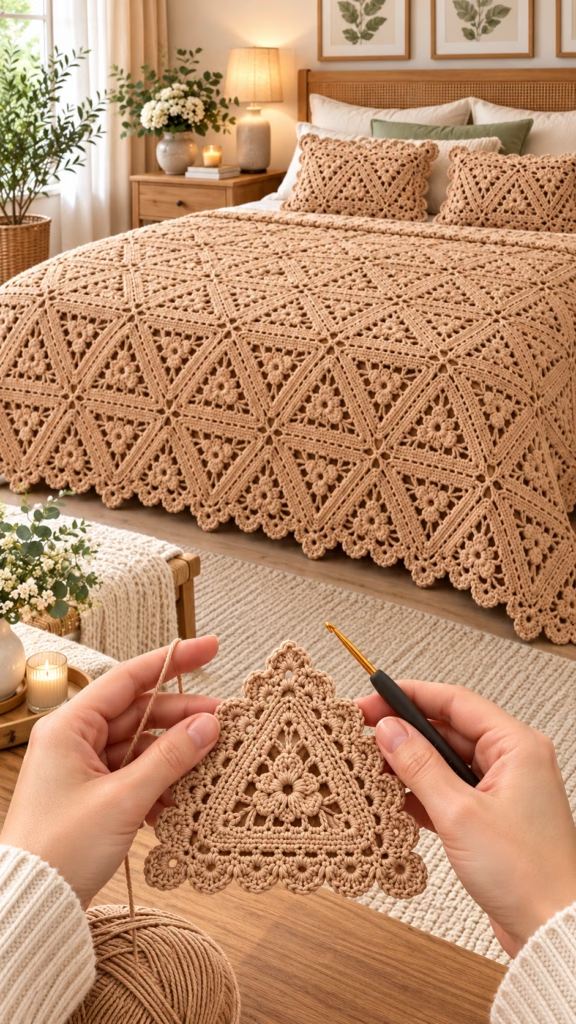
Transform your bedroom into a sanctuary of timeless elegance with the Heritage Floral Triangle Motif Bedspread. Inspired by classic heirloom lace and vintage bohemian textile design, this breathtaking crochet bedspread features intricate triangular motifs joined together to create a striking geometric lattice. At the heart of each triangle lies a dimensional, raised 6-petal floral motif, framed by delicate openwork mesh, sturdy solid stitch rows, and a dramatic scalloped shell border.
Whether you are looking to craft a full queen-sized bedspread or a luxurious throw blanket, this design offers a deeply rewarding crochet journey. The modular nature of working individual motifs makes this a wonderfully portable project. You can stitch individual triangles on the go and assemble them seamlessly as you complete each section. Paired with matching textured accent pillow covers, this ensemble serves as a showstopping centerpiece for modern farmhouse, rustic chic, or boho-inspired decor.
Crafted in a warm, natural camel beige shade using durable DK weight cotton-blend yarn, this heirloom-quality bedspread brings warmth, texture, and handcrafted craftsmanship to any space. It makes a magnificent housewarming present, wedding gift, or cherished family keepsake that will be admired for generations to come.
Personalization options are virtually endless! While the single-tone earthy beige highlights every intricate stitch and texture, you can easily customize the palette to match your bedroom decor. Try using contrasting yarn colors for the center floral motifs, crafting a sunburst ombre gradient, or alternating light and dark triangles for a bold modern contrast.
🔍 C. MAIN PATTERN OVERVIEW
The Heritage Floral Triangle Motif Bedspread Ensemble consists of three main components: the main bedspread body, the scalloped drop edging, and the matching floral pillow covers.
- 🌸 The Triangle Motif: The foundational element of the entire design is an equilateral triangle motif worked in continuous rounds from the center outward. Each motif begins with a raised 6-petal puff-stitch flower. The flower is then framed by a triangular mesh round, a solid single-crochet border, an open double-crochet row with corner chain-spaces, and a final sc framing round that provides clean, sturdy edges for joining.
- 📐 Bedspread Layout & Assembly: The full queen-size bedspread is assembled by joining 180 full triangle motifs along their edges using an invisible whipstitch or flat join-as-you-go method, interspersed with 12 half-triangle fill motifs along the top and bottom edges to create flat horizontal borders while maintaining standard drop sides.
- 👑 Scalloped Shell Border: Once the motifs are joined, a luxurious, vintage-inspired scalloped shell border with picot points is worked around the perimeter, draping gracefully along the mattress edge.
- 🛋️ Matching Floral Pillow Covers: The set is completed with two matching accent pillow covers featuring a front panel made of four large combined triangle motifs and a solid, envelope-style back panel for easy insertion of pillow forms.
🎯 D. SKILL LEVEL
Skill Level: Intermediate
This pattern is ideal for crocheters who are comfortable with basic stitches and ready to explore dimensional motifs, working in rounds, corner shaping, stitch placement, and sewing seam assembly.
Techniques Involved:
- 🌀 Working in the round and flat rows
- ✨ Magic Ring (MR)
- 🌸 Special puff stitches / 6-petal floral centers
- 📐 Triangular corner increases ($3\text{-dc}$ clusters and chain spaces)
- 🪡 Seaming motifs together (Flat Slip Stitch Join or Whipstitch)
- 🐚 Scalloped shell stitch and picot edging
📏 E. FINISHED SIZE
- Measurements are provided for a Standard Queen Bedspread, along with guidance for customizing to Throw or King sizes.
🛌 Bedspread Measurements:
- Queen Size (as written): Approximately $88\text{ inches wide} \times 96\text{ inches long}$ ($223\text{ cm} \times 244\text{ cm}$), including the border.
- Throw Size Option: Approximately $52\text{ inches wide} \times 64\text{ inches long}$ ($132\text{ cm} \times 162\text{ cm}$).
- King Size Option: Approximately $104\text{ inches wide} \times 96\text{ inches long}$ ($264\text{ cm} \times 244\text{ cm}$).
📐 Individual Triangle Motif Size:
- Single Triangle Motif: Approximately $8.5\text{ inches}$ ($21.5\text{ cm}$) per side when blocked.
- Height from base to tip: Approximately $7.3\text{ inches}$ ($18.5\text{ cm}$).
🛋️ Pillow Cover Measurements:
- Standard Pillow Cover (Fits $16\times16\text{ in}$ / $40\times40\text{ cm}$ inserts): Approximately $16.5\text{ inches} \times 16.5\text{ inches}$ ($42\text{ cm} \times 42\text{ cm}$).
💡 Note on Size Variations: Yarn weight, hook size, crochet tension, and blocking density will affect the final measurements. Blocking each triangle motif to exact dimensions before joining is critical to maintaining uniform sizing throughout the bedspread.
🧮 F. GAUGE
- Triangle Motif Gauge: 1 fully worked and wet-blocked Triangle Motif (Rounds 1–7) = $8.5\text{ inches}$ ($21.5\text{ cm}$) on each of the 3 sides.
- Solid Stitch Gauge: 16 sc $\times$ 18 rows = $4\text{ inches} \times 4\text{ inches}$ ($10\text{ cm} \times 10\text{ cm}$) using a $4.0\text{ mm}$ (US G/6) hook.
💡 Gauge Note: Exact gauge is not strictly critical for a blanket, but consistency across all individual motifs is essential so that edges line up perfectly during assembly. Check your gauge on the first motif; adjust hook size up or down if your triangle measures significantly larger or smaller.
🧶 G. REQUIRED YARN AMOUNTS
The design uses a DK weight (Category 3) cotton-blend yarn in a classic warm camel beige. Cotton-blend yarn provides superior stitch definition, breathable drape, and long-term durability against pilling or stretching.
- Primary Yarn: DK Weight Cotton/Acrylic Blend (approx. $240\text{ yards}$ / $220\text{ meters}$ per $100\text{g}$ skein / ball).
- Color: Natural Camel Beige.
📊 Project Yarn Estimates:
| Project Component | Motif Count | Total Yardage Required | Estimated Skeins (100g / 240 yds) |
| Queen Bedspread | 180 Full Motifs + 12 Half Motifs + Border | Approx. $8,400\text{ yards}$ ($7,680\text{ m}$) | 35 Skeins |
| Throw Blanket | 70 Full Motifs + 8 Half Motifs + Border | Approx. $3,600\text{ yards}$ ($3,290\text{ m}$) | 15 Skeins |
| Pillow Cover Set (Pair of 2) | 8 Full Motifs + Backing + Border | Approx. $1,200\text{ yards}$ ($1,097\text{ m}$) | 5 Skeins |
| Complete Set (Queen Bed + 2 Pillows) | 188 Full Motifs + 12 Half Motifs + All Borders | Approx. $9,600\text{ yards}$ ($8,777\text{ m}$) | 40 Skeins |
🧰 H. MATERIALS
- 🪡 Crochet Hook: Size $4.0\text{ mm}$ (US G/6) (or size needed to obtain motif gauge).
- 🧶 Yarn: DK / Light Worsted Cotton Blend as listed above.
- ✂️ Tapestry Needle: Large blunt yarn needle for weaving in ends and seaming motifs.
- 📌 Blocking Accessories: Foam blocking mats, stainless steel T-pins, and a steam iron or spray bottle (essential for blocking 180+ triangles to uniform dimensions).
- 🏷️ Stitch Markers: Locking stitch markers (useful for marking corners and aligning motifs during assembly).
- 📐 Measuring Tape: For verifying motif dimensions.
- 🛋️ Pillow Inserts: Two $16\text{ in} \times 16\text{ in}$ ($40\text{ cm} \times 40\text{ cm}$) pillow forms (for the matching pillow covers).
🔤 I. ABBREVIATIONS – US TERMS
- ch = chain
- sl st = slip stitch
- sc = single crochet
- hdc = half double crochet
- dc = double crochet
- tr = treble crochet
- st(s) = stitch(es)
- sp(s) = space(s)
- ch-sp = chain space
- MR = magic ring
- inc = increase
- dec = decrease
- puff st = puff stitch (see special stitches below)
- picot = picot stitch (ch 3, sl st in 1st ch)
- YO = yarn over
- RS = right side
- WS = wrong side
✨ Special Stitches Defined:
- Puff Stitch (4-loop Puff): [YO, insert hook in indicated st, YO and pull up a loop to height of a dc] 4 times in same st (9 loops on hook). YO and pull through all 9 loops. Ch 1 to lock the stitch.
- 3-dc Cluster (Corner Shell): (3 dc, ch 2, 3 dc) worked all in the same corner ch-sp.
- Picot: Ch 3, sl st into the 1st ch made.
📝 J. NOTES BEFORE YOU BEGIN
- 🧵 Continuous Motif Construction: Each full triangle motif is worked in continuous joined rounds from the center outward. Do not turn your work between rounds unless explicitly instructed.
- 📍 Counting Corners: Equilateral triangle motifs have 3 corners. Every round increases symmetrically along the 3 sides between the 3 corner chain-spaces.
- 🔒 Locking Puff Stitches: The closing chain-1 of a puff stitch acts as part of the stitch itself. Do not mistake it for a spacing chain unless explicitly directed.
- 🪡 Tail Management: Leave a $10\text{-inch}$ ($25\text{-cm}$) tail on every third motif if you plan to seam using yarn tails, or weave in ends as you go to avoid daunting end-weaving at the end.
- 📐 Importance of Blocking: Do NOT skip blocking! Blocking each triangle motif individually before seaming makes assembly twice as fast and ensures flat, flawless lattice lines.
🪡 K. COMPLETE PATTERN
🔺 Module 1: Full Floral Triangle Motif (Make 180 for Queen Bedspread)
Each motif begins with a 6-petal raised flower center, which transitions into a 3-sided triangle shape through strategic corner placements.
       /\         <- Corner Point
      /  \
     / 🌸 \       <- 6-Petal Flower Center
    /______\      <- 3-Sided Equilateral Base
- Yarn Color: Natural Camel Beige
- Starting Point: Center Magic Ring
- Round 1 (RS): In a MR, ch 1 (does not count as a st), work 12 sc into the ring. Join with a sl st to the 1st sc. (12 sc)
- Round 2 (Flower Petals): [Puff st in next st, ch 2, skip next st] 6 times. Join with a sl st to top of the 1st puff st. (6 puff sts, 6 ch-2 sps)
- Round 3 (Establishing the Triangle Shape): Sl st into the first ch-2 sp. Ch 3 (counts as 1 dc), (2 dc, ch 2, 3 dc) in same ch-2 sp (Corner 1 created).
- Side 1: Ch 2, 3 sc in next ch-2 sp, ch 2.
- Corner 2: (3 dc, ch 2, 3 dc) in next ch-2 sp.
- Side 2: Ch 2, 3 sc in next ch-2 sp, ch 2.
- Corner 3: (3 dc, ch 2, 3 dc) in next ch-2 sp.
- Side 3: Ch 2, 3 sc in next ch-2 sp, ch 2.
- Join with a sl st to top of starting ch-3. (3 corners with 6 dc each, 3 sides with 3 sc each)
- Round 4 (Mesh & Openwork Expansion): Sl st in next 2 dc and into corner ch-2 sp.
- (Ch 3, 2 dc, ch 2, 3 dc) in corner ch-2 sp.
- Side: [Ch 2, skip 3 dc, 3 dc in next ch-2 sp, ch 1, skip 3 sc, 3 dc in next ch-2 sp, ch 2].
- Repeat Corner and Side configurations around for all 3 sides. Join with a sl st to top of starting ch-3.
- Round 5 (Solid Stitch Frame): Sl st in next 2 dc and into corner ch-2 sp.
- (Ch 1, 1 sc, ch 2, 1 sc) in corner ch-2 sp.
- Side: 1 sc in each of the next 3 dc, 2 sc in ch-2 sp, 1 sc in each of next 3 dc, 1 sc in ch-1 sp, 1 sc in each of next 3 dc, 2 sc in ch-2 sp, 1 sc in each of next 3 dc. (17 sc along each side between corners).
- Repeat around for all 3 sides. Join with a sl st to top of 1st sc.
- Round 6 (Open Lattice Round): Sl st into corner ch-2 sp.
- (Ch 3, 2 dc, ch 2, 3 dc) in corner ch-2 sp.
- Side: [Ch 1, skip 1 st, 1 dc in next st] 8 times across the side, ch 1, skip last st before corner.
- Repeat around all 3 sides. Join with a sl st to top of starting ch-3.
- Round 7 (Final Edge & Joining Border): Sl st in next 2 dc and into corner ch-2 sp.
- (2 sc, ch 2, 2 sc) in corner ch-2 sp.
- Side: Work 1 sc in each dc st and 1 sc in each ch-1 sp across the side (23 sc along each side).
- Repeat around for all 3 sides. Join with a sl st to 1st sc. Fasten off, leaving a $10\text{-inch}$ tail for assembly. (Total: 27 sc per side including corner sc sts).
📐 Module 2: Half Triangle Motif (Make 12 for Straight Bedspread Edges)
Half motifs fill the triangular gaps along the top and bottom headboard/footboard edges to create clean horizontal borders. Worked flat in back-and-forth rows.
- Row 1 (RS): In a MR, ch 3 (counts as dc), 3 dc, ch 2, 4 dc. Fasten ring tight. Turn. (8 dc, 1 ch-2 corner sp)
- Row 2 (WS): Ch 3, 1 dc in 1st st, ch 2, puff st in next st, ch 2, (3 dc, ch 2, 3 dc) in corner ch-2 sp, ch 2, puff st in next st, ch 2, 2 dc in last st. Turn.
- Row 3 (RS): Ch 3, 1 dc in 1st st, 3 dc in next ch-2 sp, ch 2, 3 sc in next ch-2 sp, ch 2, (3 dc, ch 2, 3 dc) in corner sp, ch 2, 3 sc in next ch-2 sp, ch 2, 3 dc in last ch-sp, 2 dc in top of turning ch. Turn.
- Row 4 (WS): Ch 3, 1 dc in 1st st, work open mesh pattern matching Round 6 of full motif across to corner, (3 dc, ch 2, 3 dc) in corner, work mesh across to end, 2 dc in last st. Turn.
- Row 5 (RS – Final Round): Ch 1, 2 sc in 1st st, 1 sc in each st and ch-sp across, (2 sc, ch 2, 2 sc) in center peak corner, 1 sc in each st across to end, 2 sc in last st. Fasten off.
👑 Module 3: Outer Scalloped Shell Border
Once all triangle motifs are joined into the full blanket panel, this 3-round edging is worked continuously around the entire perimeter of the bedspread.
  /\   /\   /\   <- Picot Shell Points
 /  \ /  \ /  \
(___)(___)(___)  <- Scalloped Base
- Round 1 (Foundation Setup): Attach yarn at any corner ch-2 sp of the bedspread.
- (2 sc, ch 2, 2 sc) in corner sp.
- Work 1 sc in each st along the bedspread edge. When reaching a seam where two triangle corners meet, work 1 sc in the first corner sp, 1 sc directly in the seam, and 1 sc in the next corner sp. Join with a sl st to 1st sc.
- Round 2 (Shell Setup): Sl st to corner sp. (1 dc, ch 3, 1 dc) in corner sp.
- [Skip 2 sts, 5 dc in next st (shell made), skip 2 sts, 1 sc in next st] repeat along the edge to next corner.
- Adjust stitch spacing slightly near motif seams if necessary to ensure an odd number of shells along each side.
- Round 3 (Picot Finish Round): Sl st into corner sp. Work (4 dc, picot, 4 dc) in corner sp.
- Across edge: Work 1 sc over the sc from Round 2. In center st (3rd dc) of each 5-dc shell, work: (2 dc, picot, 2 dc). Work 1 sc in next sc.
- Repeat around entire blanket perimeter. Join with sl st to 1st dc. Fasten off and weave in all ends securely.
🛋️ Module 4: Matching Pillow Covers (Make 2)
Each pillow cover features 4 full triangle motifs joined into a large square, completed with an envelope backing.
 +-------+-------+
 |  /\   |   /\  |
 | /  \  |  /  \ |  <- Front Panel (4 Triangles joined into square)
 |/____\ | /____\|
 +-------+-------+
1. Front Panel:
- Make 4 Full Triangle Motifs (Module 1).
- Arrange the 4 triangles with their bases facing outward and tips meeting in the center, or arrange them in a $2 \times 2$ diamond lattice grid.
- Seam the 4 motifs together using the Flat Slip Stitch Join to form a $16.5\text{-inch} \times 16.5\text{-inch}$ ($42\times42\text{ cm}$) square panel.
- Work Round 3 of the Scalloped Shell Border (Module 3) around the outer edge of the square panel for decorative texture.
2. Envelope Backing Panels (Make 2 pieces per pillow):
- Top Panel: Ch 62.
- Row 1: Sc in 2nd ch from hook and in each ch across. Turn. (61 sc)
- Rows 2–35: Ch 1, sc in each st across. Turn. Fasten off.
- Bottom Panel: Ch 62.
- Row 1: Sc in 2nd ch from hook and in each ch across. Turn. (61 sc)
- Rows 2–45: Ch 1, sc in each st across. Turn. Fasten off.
3. Pillow Assembly:
- Lay the front decorated panel RS down.
- Overlap the top and bottom back panels over the wrong side of the front panel (creating an envelope opening in the center).
- Pin the edges together and join around all 4 outer sides using a single crochet border through both layers.
- Turn right-side out and insert a $16\times16\text{ in}$ pillow form.
🎨 L. STYLING / ASSEMBLY / STABILITY / FINAL SHAPING
    /\  /\  /\  /\
   /__\/__\/__\/__\   <- Row Assembly Grid Pattern
   \  /\  /\  /\  /
    \/__\/__\/__\/
🪡 Recommended Assembly Order:
- Block Motifs: Wet-block all 180 full triangle motifs and 12 half motifs to exactly $8.5\text{ inches}$ ($21.5\text{ cm}$) per side using foam boards and T-pins. Allow to dry completely.
- Layout Grid: Lay out motifs on a flat surface (or bed) in alternating orientation (one triangle pointing up, one triangle pointing down) to form continuous horizontal strips.
- Seam Horizontal Rows: Using yarn needle and camel beige yarn, seam motifs along horizontal rows using a Flat Slip Stitch Join or mattress stitch through back loops only.
- Join Strips: Seam the horizontal strips together to complete the bedspread body.
- Fill Edges: Attach the 12 Half Triangle Motifs along top and bottom edges to create flat top and bottom borders.
- Attach Edging: Work the 3-round Scalloped Shell Border continuously around all 4 outer edges.
- Final Steam Blocking: Lightly steam-block the completed blanket and border for flawless drape and flat seams.
💡 M. HELPFUL CROCHET TIPS
- 💡 Tip 1: Wet-Block in Batches. Don’t wait until all 180 motifs are finished to start blocking. Block motifs in batches of 20 to maintain consistent tension throughout your work.
- 💡 Tip 2: Use Stitch Markers at Seam Intersections. When joining triangles, pin corner chain-spaces together with locking stitch markers to prevent misaligned edges.
- 💡 Tip 3: Back-Loop-Only Seaming. Seam through the back loops of Round 7 stitches to create a subtle raised grid pattern on the right side that enhances the bohemian geometric aesthetic.
- 💡 Tip 4: Keep Yarn Dyelots Consistent. Because a full bedspread requires significant yarn yardage, buy yarn from the same dye lot to avoid subtle color variations across motifs.
- 💡 Tip 5: Tail Length for Seaming. Leave a generous $10\text{-inch}$ tail on half of your finished motifs so you have built-in seaming threads ready to go without attaching new yarn.
- 💡 Tip 6: Maintain Consistent Puff Stitch Height. When making the 6-petal centers, pull your puff loops up to full double-crochet height to ensure the flowers pop prominently from the fabric background.
- 💡 Tip 7: Add Weight for Draping. Cotton-blend yarn provides a natural weight that helps the scalloped border drape smoothly off the mattress sides.
🧼 N. CARE INSTRUCTIONS
- 🧼 Washing: Machine wash on gentle/delicate cycle in cool water using a mild laundry detergent. Place the bedspread in a large laundry bag or duvet cover to prevent snagging during the wash cycle.
- 🌀 Drying: Lay flat to dry on clean towels or a drying rack. Do not tumble dry on high heat, as synthetic/cotton blends may shrink or lose stitch definition.
- 💨 Reshaping: Lightly steam with a garment steamer or steam iron held 2 inches away from the fabric to refresh the scalloped edges after washing.
- 📦 Storage: Store folded neatly in a breathable cotton storage bag with cedar blocks. Avoid hanging on coat hangers, which can stretch the motif lattice over time.
❓ R. FAQ
❓ Q1: Can I make this bedspread in a single color or multi-color palette?
A: Absolutely! While the single camel beige hue showcases an elegant vintage heirloom look, using a contrasting color for the central flower petals creates a stunning pop art or sunflower motif effect.
❓ Q2: How long does it take to complete the full bedspread?
A: A full queen-sized bedspread is a major heirloom project. On average, each motif takes 15–20 minutes to crochet. Expect around 60–80 hours total, including blocking and assembly.
❓ Q3: Can I use Worsted Weight (Category 4) yarn instead of DK?
A: Yes! Using worsted weight yarn with a $5.0\text{ mm}$ (US H/8) hook will produce slightly larger triangle motifs (approx. $10\text{ inches}$ per side). You will need fewer total motifs (approx. 130 motifs for Queen size) and more total yarn weight.
❓ Q4: What is the best method for joining the triangle motifs?
A: A Flat Slip Stitch Join or back-loop Mattress Stitch gives the cleanest finish, allowing the triangles to lie flat without bulky ridge seams.
❓ Q5: Will the bedspread be too heavy for summer use?
A: No! The open mesh rounds (Rounds 4 and 6) make the blanket breathable, while the cotton blend provides a comfortable year-round weight.
❓ Q6: How do I adjust the pattern for a Twin or Throw size?
A: Simply adjust the total motif grid count. A $7 \times 10$ motif grid (70 motifs) creates a perfect cozy couch throw blanket.