Tropical Luau Ruffle Cake
The Ultimate Tropical Sunset Ombré Ruffle Cake: Master This Luau Showstopper
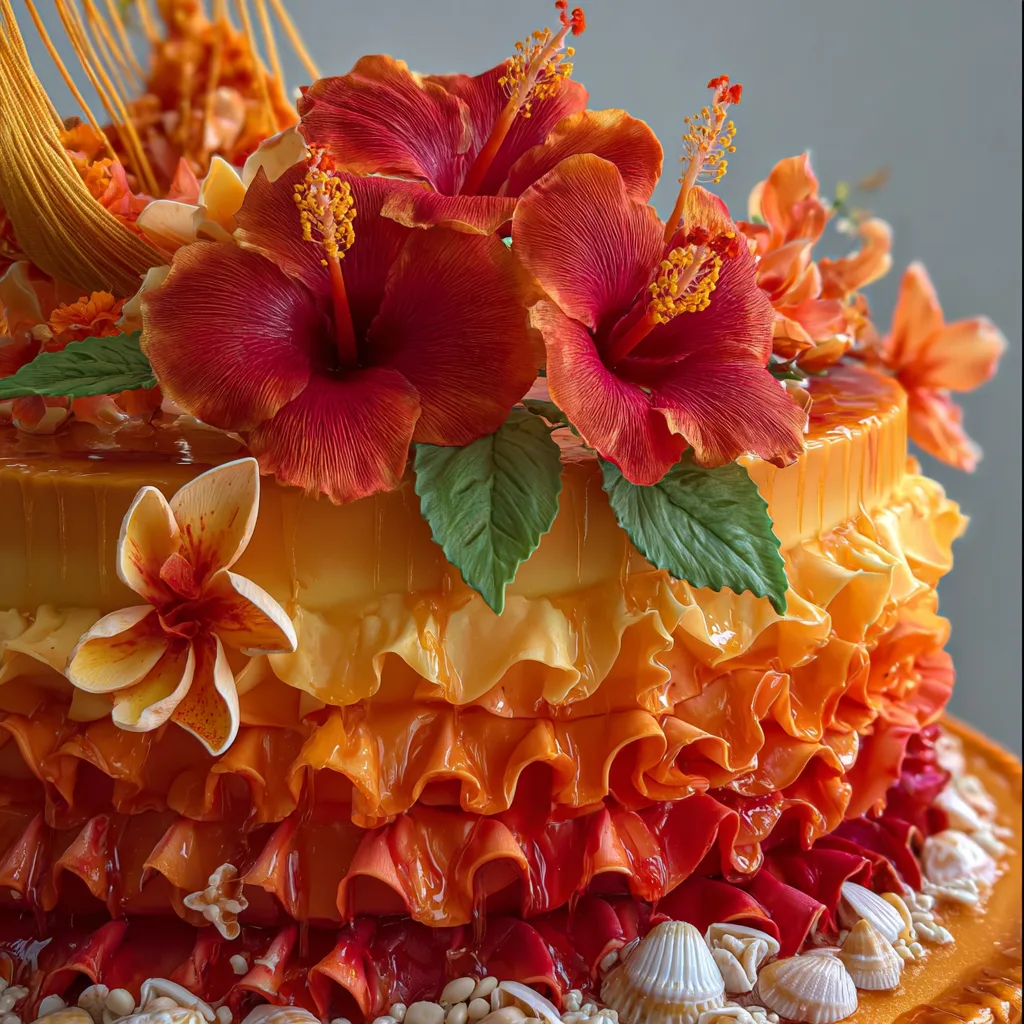
There is a singular kind of magic in bringing a true centerpiece to life. It’s the moment your guests gasp, their eyes widen, and they immediately pull out their phones to capture its beauty. In the world of dessert, nothing—absolutely nothing—says “I went above and beyond” quite like a multi-tiered, intricately decorated cake that is as delicious as it is stunning. And in the height of summer, as the days grow long and our thoughts turn to sandy beaches and palm trees, the Tropical Sunset Ombré Ruffle Cake reigns supreme as the undisputed king of celebration desserts.
This isn’t just a cake; it’s an edible landscape, a sweet, tiered tribute to the vibrant hues of a perfect tropical evening. From the intense hot pink base that fades into coral, peach, and finally a soft cream top, to the delicate, cascading ruffles that mimic gentle ocean waves, every single detail has been crafted to transport you to paradise. Crowned with edible palm trees, a charming yellow hammock, and delicate white plumeria flowers, it is the quintessential luau party showstopper. In this exhaustive, 1700+ word guide, we will walk you through every single step to bring this breathtaking creation to your own kitchen, unlocking the secrets of professionally decorated cakes for home bakers.
The Cultural Soul of the Luau Cake
To truly appreciate this cake, we must understand its cultural context. The modern Hawaiian luau, while often a celebratory party for tourists, evolved from the traditional Hawaiian feast, or ‘aha ‘aina. These were communal events, marked by food, music, and dance, often to celebrate milestones like a baby’s first birthday (a lū’au) or a successful harvest. In modern times, the idea of the luau is synonymous with relaxation, joy, and the celebration of the ‘ohana (family) and community.
A cake of this magnitude, with its intricate details and tropical flavors, serves as the ultimate modern ‘aha ‘aina center piece. It represents generosity, a shared moment of delight, and a celebration of natural beauty. The choice of flavor, a moist coconut pineapple cake with a passionfruit curd filling, is a deliberate homage to the rich, fruit-forward flavors of the islands. It’s not just a beautiful dessert; it is a way to bake the spirit of aloha directly into your celebration. We are not simply stacking cake; we are crafting a shared edible memory that honors a rich cultural tradition.
The Structural Mastery of a Two-Tiered Cake
The most important step in creating a multi-tiered cake is ensuring structural integrity. It is the single biggest cause of cake-related anxiety, and for good reason—no one wants to watch their masterpiece slowly tilt or collapse. The secret to a perfect, structurally sound tiered cake is not in the recipe, but in the engineering.
You cannot simply stack one cake on top of another. The weight of the top tier will squash the bottom tier, resulting in a disastrous, lopsided cake. To prevent this, you must build an internal support system. This involves inserting structural dowels (either wooden or plastic cake straws) into the bottom tier. These dowels support a separate food-safe cake board, which the top tier rests upon. The weight is distributed through the dowels to the base plate, leaving the delicate bottom cake completely protected. For this Tropical Sunset Ombré Ruffle Cake, we are using a stable and dense coconut pineapple sponge, which provides the perfect sturdy foundation for our tiered structure.

A Deep Dive into the Ombré Ruffle Technique
The defining visual feature of this cake is the stunning ombré ruffle effect. Achieving this smooth, professional-level gradient requires careful planning and precise execution. It is a true test of color theory and piping technique.
The process starts by dividing your vanilla bean cream cheese frosting into five or six separate batches. For this cake, we will be blending colors that mimic a sunset, starting with a deep, vibrant hot pink at the base and transitioning through coral, peach, and finally a pale cream at the top. To ensure a smooth fade, you must mix a intermediate shade between each main color. The ruffles themselves are piped using a petal tip (like a Wilton 104 or 127). Hold the piping bag with the wide end of the tip against the cake, and move your hand in a continuous, tight zigzag motion to create a cascading wave pattern. You will start at the base and pipe overlapping, horizontal rows of ruffles, changing your color as you move up each tier to achieve that flawless, picture-perfect ombré effect.
The Secrets of Edible Palm Tree Decorations
The final, show-stopping elements are the detailed, hand-crafted edible decorations. While you could buy plastic toppers, creating your own edible palm trees and hammock takes this cake from amateur to artisan. This is where your skills with fondant or gum paste truly shine.
For this cake, we will be making three detailed palm trees with brown trunks and orange fronds, and a yellow woven hammock strung between two of them. To make them, you must tint your white fondant to the exact shades of brown, orange, and yellow. Use molding chocolate for the tree trunks for added stability, and make sure to texture them with a knife to mimic bark. The fronds are made by cutting intricate leaf shapes and allowing them to dry over curved surfaces to give them natural wave and dimension. The hammock is a delicate weaving project, requiring you to roll out thin strands of yellow fondant and weave them together to create a true, textured net. Once dry, these elements become firm, structural pieces that can be easily placed on the cake to create a truly unforgettable scene.
Alternative Flavor Profiles for Your Tropical Vision
While the combination of coconut pineapple cake and passionfruit curd is our personal favorite for this cake, you are the artist, and the flavors can be tailored to match your specific vision or dietary needs. A truly great tiered cake needs a sturdy and dense sponge, so consider some of these other fantastic tropical options:
- Guava and Raspberry: A vibrant pink guava cake filled with a bright raspberry compote and lemon cream cheese frosting would create a breathtaking and unexpected flavor and color profile.
- Mango and Macadamia: A rich, buttery mango sponge filled with a silky mango and white chocolate ganache and a sprinkling of toasted macadamia nuts would create an intensely tropical, nutty, and luxurious dessert.
- Passionfruit and Ginger: A dense passionfruit cake filled with a tangy passionfruit curd and a slightly spicy, warming ginger cream cheese frosting would create a unique and sophisticated flavor combination.
- Banana and Rum: A classic, moist banana cake, infused with a hint of dark rum, filled with a smooth banana-rum cream, and a rich dark chocolate ganache drip would create a classic, comforting, and boozy tropical treat.
Ingredients
For the Coconut Pineapple Cake:
- – 4 cups all-purpose flour
- – 2 cups granulated sugar
- – 1 tablespoon baking powder
- – 1 tablespoon baking soda
- – 1 teaspoon fine sea salt
- – 1 cup (2 sticks) unsalted butter, softened
- – 1/2 cup coconut oil, melted and cooled slightly
- – 4 large eggs, at room temperature
- – 1/2 cup heavy cream
- – 1 and 1/2 cups full-fat coconut milk
- – 1 tablespoon pure coconut extract
- – 2 cups shredded coconut, toasted
- – 1 cup crushed pineapple, well-drained
For the Passionfruit Curd Filling:
- – 1 cup passionfruit juice (about 12-15 fresh passionfruits)
- – 1/2 cup granulated sugar
- – 4 large egg yolks
- – 1 tablespoon lemon juice
- – Pinch of salt
- – 1/2 cup (1 stick) unsalted butter, cut into small cubes
For the Vanilla Bean Cream Cheese Frosting:
- – 3 (8-oz) blocks full-fat cream cheese, softened
- – 1 cup (2 sticks) unsalted butter, softened
- – 8 cups powdered sugar
- – 2 tablespoons vanilla bean paste or extract
- – 1/2 teaspoon fine sea salt
- – Gel food coloring: hot pink, coral, peach, cream
For the Fondant Decorations:
- – 1 lb white fondant (tinted to brown, orange, and yellow)
- – Tylose powder (optional, to help the fondant set faster)
- – Floral wire or small skewers for structural support of palm trees
- – Edible glue or water
- – Cornstarch or powdered sugar for dusting surfaces
Step-by-Step Instructions
- Make the Coconut Pineapple Cake: Preheat your oven to 350°F (175°C). Lightly grease two 8-inch round cake pans and two 6-inch round cake pans. Line the bottoms with parchment paper and dust the sides lightly with flour. In a large bowl, whisk together the flour, granulated sugar, baking powder, baking soda, and fine sea salt. In a separate bowl, cream together the softened butter and coconut oil. Beat in the eggs, one at a time, followed by the heavy cream, coconut milk, and coconut extract. Gradually add the wet ingredients to the dry, mixing on low speed just until combined. Fold in the toasted shredded coconut and well-drained crushed pineapple. Divide the batter evenly between the prepared pans and bake for 30-35 minutes, or until a skewer inserted into the center comes out clean. Allow the cakes to cool in the pans for 10 minutes before turning them out onto wire racks to cool completely.
- Prepare the Passionfruit Curd: In a small, non-reactive saucepan, combine the passionfruit juice and granulated sugar. Bring the mixture to a gentle simmer over medium heat, stirring until the sugar has completely dissolved. In a small bowl, whisk together the egg yolks, lemon juice, and salt. Gradually pour a small amount of the hot passionfruit mixture into the egg yolk mixture, whisking constantly. Return the tempered egg yolk mixture to the saucepan and cook over low heat, whisking constantly, until the curd has thickened and coats the back of a spoon, about 5-7 minutes. Strain the curd through a fine-mesh sieve into a bowl to remove any lumps. Stir in the cubed unsalted butter until it is completely melted. Transfer to a bowl and allow the curd to cool to room temperature before covering it with plastic wrap (ensure the plastic is touching the surface of the curd to prevent a skin from forming) and chilling it in the refrigerator until completely firm, about 4 hours.
- Make the Vanilla Bean Cream Cheese Frosting: In the bowl of a stand mixer fitted with a paddle attachment, beat the softened cream cheese and unsalted butter on medium-high speed until perfectly smooth, about 3 minutes. Stop and scrape down the sides of the bowl. Gradually add the powdered sugar, one cup at a time, mixing on low speed until combined. Stop to scrape down the sides of the bowl as needed. Beat on medium speed for 1-2 minutes until light and fluffy. Do not overmix, as this can make the frosting runny. Stir in the vanilla bean paste and fine sea salt until well combined.
- Color the Frosting: Divide the frosting into five separate bowls. Keep one bowl white (tinted with clear vanilla) for the top. Tint the other bowls into four distinct shades: deep hot pink, vibrant coral, peach, and a pale cream. To achieve the perfect ombré gradient, you must mix intermediate shades between each color. For example, add a small amount of hot pink to the coral frosting to create a smooth fade. Cover each bowl tightly with plastic wrap to prevent them from drying out.
- Assemble and Crumb Coat the Cake: Level the cooled cake layers using a serrated knife. Place one 8-inch cake layer on an 8-inch cake board and crumb coat the top with white buttercream. Place the other 8-inch cake layer on top and press gently to secure. Repeat this process with the 6-inch cakes on a 6-inch board. Apply a thin layer of white buttercream all over to trap the crumbs. Chill both tiers in the refrigerator for at least 30 minutes.
- Stack the Tiers: Insert 4-5 structural dowels (wooden or thick plastic) into the center of the chilled 8-inch tier, cutting them flush with the surface. Carefully place the 6-inch tier (still on its board) directly in the center of the 8-inch tier. Use a small dollop of buttercream as glue between them.
- Pipe the Ombré Ruffles: Fit a piping bag with a petal tip. Fill the bag with the deep hot pink buttercream. Start at the very base of the bottom tier, holding the piping bag with the wide end of the tip against the cake, and move your hand in a continuous zigzag motion to create horizontal rows of cascading ruffles. Pipe overlapping rows, moving up the bottom tier, changing colors every two or three rows. Start with hot pink, transition to coral, peach, and finally finish the top tier with the pale cream buttercream. Fill the top of the top tier with white buttercream and smooth it. Chill the entire cake for 1 hour to set the ruffles.
- Make and Place Fondant Decorations: Tint your white fondant into precise shades of brown, orange, and yellow. Sculpt three detailed palm trees with textured brown trunks and intricate orange fronds. Weave the delicate yellow hammock from thin strands of yellow fondant. Arrange these elements on the top of the cake, with the hammock strung between two trees. Finish by arranging delicate white plumeria or hibiscus-style flowers to hide any seams and add a natural botanical touch. Allow all decorations to dry and set before placing.
- Final Assembly and Serving: After the ruffles have chilled, carefully place the hardened palm trees, hammock, and flowers on the top and base of the cake, pressing gently to secure. Garnish with additional plumeria flowers and green leaves for a final professional finish. Allow the cake to rest at cool room temperature for 10 minutes before slicing. Use a sharp, hot knife to cut clean slices that highlight the vibrant layers and filling inside. Serve immediately with a shiny spoon and enjoy the fruits of your incredible effort!
Tips for a Structurally Sound Tiered Cake
Creating a tiered cake can be intimidating, but by following a few simple tips, you can ensure your masterpiece is safe to serve. First, always work with chilled cakes. Chilling makes the crumb denser and more sturdy, making it easier to stack and frost without crumbling or shifting. Second, invest in good quality cake dowels. This is not optional for a tiered cake; the weight of the top tier must be supported to prevent a catastrophic collapse. Use strong wooden dowels or specialized plastic straws, and make sure they are cut perfectly flush with the surface of the cake. Finally, give your cake time to rest. After you level, crumb coat, and apply the final frosting, give the cake at least 30 minutes of chill time to set the structure before adding heavy decorations.
Regarding the frosting, the vanilla bean cream cheese frosting is stable and delicious, but it can get soft quickly in a warm environment. If your kitchen is hot, consider switching to a Swiss Meringue Buttercream, which is much more stable and handles heat and humidity significantly better. To maintain the smooth ombré effect, work with a warm petal tip when piping the ruffles. Dipping your tip into hot water for a few seconds will smooth out any lumps and create cleaner, more professional-looking waves.
Creative Variations and Cultural Context of Luau Cakes
While the combination of a two-tiered shape, ombré ruffles, palm trees, and a hammock is stellar, you can adapt this recipe to suit your own personal style or the specific theme of your celebration. Instead of a sunset, imagine an “under the sea” themed cake with a teal-to-white ombré, fondant seashells, a tiny edible coral reef, and a shimmering blue simple syrup pool at the top. For a wedding, you could omit the palm trees and hammock in favor of a more elegant all-white ruffled design, with a few carefully placed fresh white orchids or lilies.
The cultural significance of the luau feast is a deep well of inspiration. In Hawaiian culture, food is much more than sustenance; it is a way to honor ancestors, connect with the land, and express aloha to the community. While a modern ruffled cake is a departure from a traditional Hawaiian feast, the spirit of celebration and communal shared joy remains. By making this cake with intentionality, using the finest tropical ingredients, and sharing it with your loved ones, you are in a small way keeping a sacred and beautiful cultural tradition alive.
Serving Suggestions for a Spectacular Luau Celebration
To truly showcase this cake at a celebration, presentation is everything. Display the cake on a sturdy, stark white or rustic wood pedestal stand to complement the vibrant colors. Surround the base of the cake stand with fresh, non-toxic tropical leaves like Monstera or banana leaves, and scatter a few fresh plumeria or hibiscus flowers on the table to enhance the natural feel. When slicing, use a long, hot serrated knife (dip it in hot water and wipe it clean between every single cut) to create clean, beautiful slices that highlight the dense cake layers, the vibrant passionfruit curd filling, and the spectacular multi-layered ruffled buttercream.
For a complete luau-themed dessert table, pair the cake with other tropical treats like coconut shortbread cookies, mango-macadamia nut bars, or miniature lilikoi (passionfruit) cheesecakes. Serve the cake alongside a refreshing tropical fruit punch or a classic Mai Tai for an unforgettable summer celebration. The intense flavor of the passionfruit curd provides a perfect balance to the rich, moist cake and the tangy cream cheese frosting. It’s a decadent and intensely satisfying dessert that perfectly captures the spirit of aloha and provides a truly memorable and joyful end to any celebration.
Make-Ahead Advice and Storage
This cake is undeniably a labor of love, and you can break the process up across several days. The coconut pineapple cake layers can be baked, leveled, and frozen up to a month in advance. Thaw them in the refrigerator overnight before stacking. The passionfruit curd can be made a week ahead and stored in an airtight container in the refrigerator. The vanilla bean cream cheese frosting can be made 3 days ahead and stored in the refrigerator; just let it come to room temperature and re-whip it until smooth and glossy before using. The fondant decorations can be made up to a month in advance; store them in a cool, dry place away from direct sunlight, which can cause the colors to fade.
Once fully assembled and decorated, the cake will sit beautifully at cool room temperature for up to 24 hours. Because it contains cream cheese, it is best stored in the refrigerator if you are preparing it more than 24 hours in advance. Leftovers can be stored in an airtight container in the refrigerator for up to 5 days. For longer storage, you can freeze individual slices (without the fondant decorations) for up to 3 months. Wrap each slice tightly in plastic wrap followed by a layer of aluminum foil. Thaw in the refrigerator overnight before serving. The intense flavor and moist texture of the cake hold up incredibly well, allowing you to enjoy a taste of paradise long after the celebration is over.
Conclusion: The Taste of Pure Achievement
Creating this Tropical Sunset Ombré Ruffle Cake is not just a recipe; it is an accomplishment. It is a complex project that tests your patience, your skills, and your understanding of core baking and decorating techniques. But the reward is a truly breathtaking creation that becomes the focal point of your celebration, providing a visual and gustatory spectacle that your guests will talk about for years. This cake is a celebration of the season, a tribute to the vibrant beauty of the islands, and a manifestation of your passion for creating unforgettable, edible art. Embrace the process, take your time with the ruffles, and enjoy the taste of pure achievement that comes from bringing this spectacular, tropical dream to life. Aloha!
Tropical Sunset Ombré Ruffle Cake
Ingredients
Equipment
Method
- Preheat oven to 350°F (175°C). Grease and flour two 8-inch and two 6-inch round pans. In a large bowl, whisk together all dry ingredients.
- Cream softened butter and coconut oil until fluffy. Beat in eggs, followed by heavy cream, coconut milk, and coconut extract.
- Gradually add dry ingredients to wet, mixing just until combined. Fold in toasted shredded coconut and well-drained crushed pineapple. Divide batter evenly between pans and bake for 30-35 minutes.
- Make passionfruit curd: Simmer juice and 1/2 cup sugar until dissolved. Tempered egg yolks with a small amount of the hot juice, then return the mixture to the saucepan.
- Cook curd over low heat, whisking constantly, until thickened and coats the back of a spoon. Whisk in cubed unsalted butter. Strain into a bowl and chill until firm (at least 4 hours).
- Make frosting: Beat cream cheese and butter until smooth. Gradually add powdered sugar, followed by vanilla and salt. Do not overmix.
- Divide frosting into five batches. Color them hot pink, vibrant coral, peach, and pale cream, keeping one white. Blend intermediate shades for a smooth gradient.
- Assemble the cake: Level, stack, and crumb coat the 8-inch and 6-inch cakes with white buttercream. Chill 30 minutes. Stacking the tiers: insert dowels into the bottom tier and place the top tier on top.
- Pipe ruffles: Fill a piping bag with hot pink buttercream. Pipe horizontal, cascading rows of ruffles starting from the base. Transition color every few rows to achieve your sunset ombré.
- Sculpt fondant decorations: Create detailed palm trees with brown trunks and orange fronds, and a yellow woven hammock. Allow all elements to dry and set before arranging on the cake.
- Arrange the decorations and flowers (hibiscus, plumeria) to create your tropical scene. Finish with a final brush of ultra-shiny simple syrup glaze. Rest for 10 minutes before slicing and enjoy!