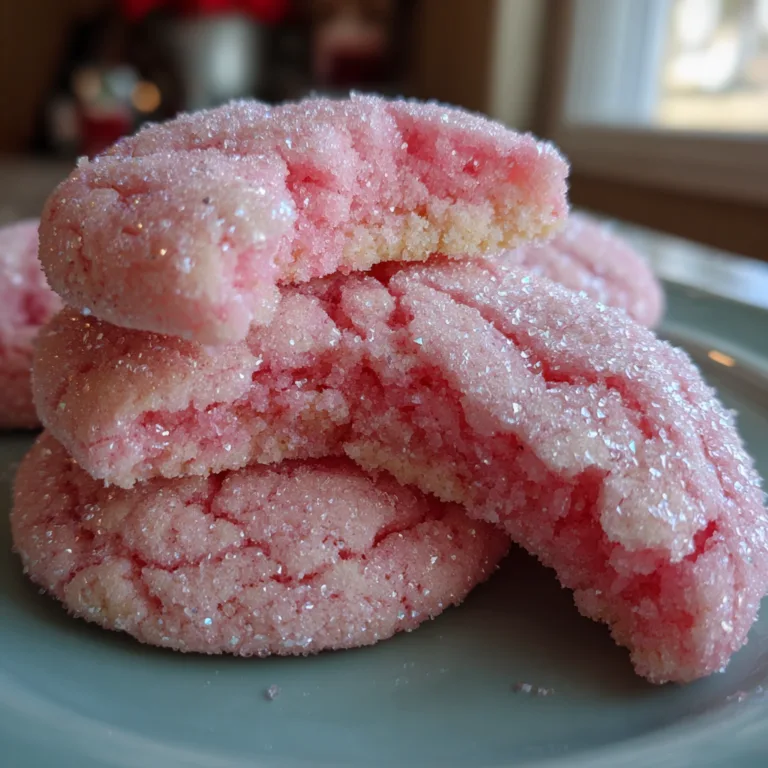
Strawberry Pineapple Pound Cake
Strawberry Pineapple Pound Cake: A Tropical Dessert Dream
When it comes to desserts that capture the essence of a sun-drenched summer afternoon, few things can rival the spectacular flavor profile and striking visual appeal of a perfectly baked Strawberry Pineapple Pound Cake. This magnificent dessert is a celebration of contrasting yet perfectly complementary flavors and textures. It takes the deeply comforting, buttery, dense crumb of a traditional Southern-style pound cake and elevates it with the bright, acidic pop of tropical pineapple and the sweet, floral notes of ripe red strawberries. Finally, it is crowned with an utterly irresistible, glossy, lip-smacking fruit glaze that seeps into every crevice, transforming a simple cake into a decadent masterpiece.
Whether you are planning a backyard barbecue, a springtime brunch, a family potluck, or simply want to treat yourself to an extraordinary slice of homemade goodness with your afternoon tea, this cake delivers on every possible front. In this extensive guide, we will dive deep into the science, the technique, and the art of baking the ultimate Strawberry Pineapple Pound Cake. We will cover everything from managing the moisture content of the fresh fruit to achieving that coveted, melt-in-your-mouth pound cake texture, ensuring your baking endeavor is a resounding success.
Why You Will Fall in Love with This Strawberry Pineapple Pound Cake
Pound cakes have been a beloved staple in bakeries and home kitchens for generations, originally named for their straightforward, memorable ingredient ratios: a pound each of butter, sugar, eggs, and flour. Over time, bakers have tweaked this formula to create softer, more flavorful variations, but the core appeal remains the same: a dense, rich, and intensely satisfying cake. Here is why this specific fruit-forward iteration is guaranteed to capture your heart and your tastebuds:

First and foremost is the incredible balance of flavors. Traditional vanilla pound cake, while delicious, can sometimes feel overwhelmingly heavy. The introduction of pineapple brings a vibrant, tart, and juicy element that beautifully cuts through the richness of the butter and eggs. Strawberries, on the other hand, bring a delicate sweetness and a stunning ruby-red visual contrast. When these two fruits bake together within the golden batter, their juices mingle, creating little pockets of concentrated fruit flavor throughout the cake.
Secondly, the texture of this cake is unparalleled. A well-executed pound cake should have a tight, velvety crumb that is sturdy enough to hold its shape but soft enough to melt on your tongue. The fresh fruit adds localized bursts of moisture, while the spectacular glossy glaze on top acts as a seal, locking in the cake’s tenderness and ensuring it stays moist for days. The sticky, wet glaze dripping down the sides adds a textural contrast to the slightly caramelized exterior crust of the cake, creating a sensory experience that is truly unforgettable.
Finally, this cake is an absolute showstopper. The visual impact of the vibrant red strawberries and sunny yellow pineapple peeking through a mirror-like, glistening pink glaze is enough to make anyone’s mouth water. It looks like it came from a high-end patisserie, yet it is entirely achievable for a home baker armed with a mixing bowl and a reliable oven.
The Magic of the Ingredients: Breaking Down the Components
Baking is fundamentally an exercise in chemistry. Understanding the role each ingredient plays is the key to mastering this recipe and troubleshooting any potential issues. Let us dissect the components that make this Strawberry Pineapple Pound Cake so extraordinary.
The Foundation: Butter, Sugar, and Eggs
The soul of any pound cake lies in the quality and handling of its foundational ingredients. Unsalted butter is an absolute necessity here. It provides the signature rich flavor and tenderizes the crumb by coating the flour proteins, preventing them from forming tough gluten networks. The butter must be properly softened to room temperature so it can be creamed effectively with the granulated sugar. This creaming process aerates the batter, trapping tiny air bubbles that will expand in the oven and give the cake its lift.
Large eggs serve multiple purposes. The yolks add fat, color, and emulsifying properties, which help bind the water-based and fat-based ingredients together into a smooth batter. The whites provide structure and act as a leavening agent. Like the butter, the eggs must be at room temperature to prevent the batter from breaking or curdling when they are added.
The Dry Ingredients: Flour and Leavening
While traditional pound cakes rely solely on the air whipped into the butter and eggs for leavening, modern recipes often include a touch of baking powder to ensure a slightly lighter, more reliable lift. For the flour, standard all-purpose flour works beautifully, providing just the right amount of structure to support the heavy fruit without becoming dense or bready. A pinch of salt is crucial; it does not make the cake salty, but rather enhances and balances the sweetness, making the fruit flavors pop.
The Star Attractions: Strawberries and Pineapple
The fruit is what transforms this from a standard cake into a tropical delight. Fresh strawberries are highly recommended for the best flavor and texture. They should be hulled and sliced evenly. For the pineapple, you can use fresh or canned. If using canned pineapple chunks, it is absolutely vital to drain them exceptionally well and pat them dry with paper towels. Excess moisture is the enemy of a perfect pound cake and can lead to a soggy, underbaked center.
The Crowning Glory: The Glossy Glaze
The shiny, sticky glaze is what gives this cake its irresistible “wet” look and locks in the moisture. It is typically made from a simple combination of powdered sugar, a splash of vanilla, and fruit juice (such as the reserved juice from canned pineapple or a splash of strawberry puree). The glaze should be thick enough to coat the back of a spoon but fluid enough to pour over the cake and cascade down the sides in thick ribbons.
Ingredients You Will Need
Before you begin, ensure you have all these ingredients measured and ready to go. Remember, temperature is key, so pull your dairy out of the fridge ahead of time.
For the Cake Batter:
- – 3 cups all-purpose flour (plus 2 tablespoons for tossing the fruit)
- – 1 teaspoon baking powder
- – 1/2 teaspoon salt
- – 1 cup (2 sticks) unsalted butter, softened to room temperature
- – 2 cups granulated sugar
- – 4 large eggs, room temperature
- – 1 tablespoon pure vanilla extract
- – 1/2 cup sour cream or plain full-fat Greek yogurt, room temperature
- – 1 cup fresh strawberries, hulled and roughly chopped or sliced
- – 1 cup pineapple chunks (fresh or canned), thoroughly drained and patted dry
For the Glossy Fruit Glaze:
- – 1 and 1/2 cups powdered sugar, sifted
- – 2 to 3 tablespoons pineapple juice (or strawberry puree/milk)
- – 1/2 teaspoon vanilla extract
- – Optional: a drop of pink food coloring for enhanced visual appeal
Step-by-Step Instructions for the Perfect Cake
Follow these detailed instructions to create a flawless, fruit-studded masterpiece.
- Preparation is Key: Begin by preheating your oven to 325°F (165°C). Pound cakes bake best at a slightly lower temperature for a longer period to ensure the dense batter cooks completely through without the outside burning. Generously grease and flour a 10-inch Bundt pan, a tube pan, or a deep 9-inch springform pan. Alternatively, use a high-quality non-stick baking spray that contains flour.
- Prepare the Dry Ingredients: In a medium mixing bowl, whisk together the 3 cups of all-purpose flour, the baking powder, and the salt. Set this aside. This ensures the leavening agent is evenly distributed throughout the batter.
- Prep the Fruit: In a separate small bowl, combine the chopped strawberries and the well-dried pineapple chunks. Sprinkle the reserved 2 tablespoons of flour over the fruit and toss gently until every piece is coated. This crucial step prevents the heavy fruit from sinking directly to the bottom of the pan during baking.
- Cream the Butter and Sugar: In the bowl of a stand mixer fitted with the paddle attachment, or using a large bowl with a hand mixer, beat the softened butter on medium speed for about 1 minute until smooth. Gradually add the granulated sugar and continue to beat on medium-high speed for 4 to 5 minutes. The mixture should become noticeably lighter in color and fluffy in texture. Do not rush this step; aerating the butter is vital for a good cake structure.
- Add the Eggs and Flavoring: Reduce the mixer speed to medium-low. Add the room-temperature eggs one at a time, beating well after each addition and scraping down the sides and bottom of the bowl with a rubber spatula as needed. Wait until the egg is fully incorporated before adding the next one. Stir in the vanilla extract.
- Alternate Dry and Wet Ingredients: With the mixer on low speed, add the dry flour mixture in three parts, alternating with the sour cream in two parts (beginning and ending with the flour). Mix just until the flour disappears. Do not overmix at this stage, or your cake will become tough and rubbery.
- Fold in the Fruit: Remove the bowl from the mixer. Using a large rubber spatula, gently fold the flour-coated strawberries and pineapple chunks into the batter. The batter will be quite thick, which is exactly what you want to suspend the fruit. Be gentle to avoid mashing the berries.
- Bake the Cake: Spoon the heavy batter into your prepared pan, smoothing the top with your spatula. Tap the pan firmly on the counter a few times to dislodge any large air bubbles. Bake in the preheated oven for 60 to 75 minutes. The cake is done when a long wooden skewer inserted into the center comes out clean or with a few moist crumbs attached (but no wet batter). If the top of the cake is browning too quickly during the last 20 minutes, loosely tent it with aluminum foil.
- Cool the Cake: Remove the cake from the oven and let it cool in the pan on a wire rack for exactly 15 minutes. This allows the structure to firm up slightly. After 15 minutes, carefully invert the pan onto the wire rack to release the cake. Let the cake cool completely to room temperature before applying the glaze.
- Prepare and Apply the Glaze: Once the cake is completely cool, prepare the glaze. In a small bowl, whisk together the sifted powdered sugar, vanilla extract, and 2 tablespoons of pineapple juice. Whisk vigorously until smooth and glossy. If the glaze is too thick, add the remaining tablespoon of juice. It should be thick enough to leave a trail but thin enough to pour. Slowly pour the glaze over the top of the cooled cake, allowing it to drip generously down the sides, coating the cake in a beautiful, sticky, reflective sheen. Let the glaze set for 15 minutes before slicing.
Pro Tips for the Best Results
Elevate your baking from good to spectacular with these professional insights:
The Importance of Room Temperature: This cannot be stressed enough. Cold butter will not cream properly, cold eggs will curdle the batter, and cold sour cream will shock the mixture. When ingredients are all at room temperature, they form a smooth, stable emulsion, resulting in a cake with an even, velvety crumb.
Do Not Skip the Flour Toss: Tossing your wet, heavy fruit in flour creates a slightly tacky surface on the fruit pieces, allowing the thick cake batter to grab onto them and suspend them throughout the cake rather than letting them sink to the bottom of the pan.
Patience with Cooling: Glazing a warm cake is a recipe for disaster. The heat will cause the beautiful, thick glaze to melt entirely, soaking into the cake and disappearing rather than sitting on top in thick, glossy ribbons. Wait until the cake is 100% cool.
Delicious Variations to Try
Once you have mastered the classic Strawberry Pineapple Pound Cake, feel free to experiment with flavor profiles:
Coconut Tropical Twist: Enhance the tropical vibe by adding 1/2 cup of shredded, sweetened coconut to the batter along with the fruit. You can also substitute coconut extract for half of the vanilla extract.
Lemon Berry: Swap the pineapple for fresh blueberries or raspberries, and use lemon juice and fresh lemon zest in place of the pineapple juice in the glaze for a bright, citrusy summer cake.
Rum Glaze: For an adult-friendly version, substitute a splash of coconut rum or spiced rum for the fruit juice in the glaze to give the cake a decadent, boozy kick.
Serving Suggestions
This cake is incredibly rich and flavorful on its own, especially with the thick glaze. However, if you want to dress it up for a special occasion, consider serving it with a dollop of softly whipped cream flavored with a touch of vanilla bean paste. A side of extra fresh sliced strawberries and pineapple adds a lovely, refreshing element to the plate. Pair a slice with a hot cup of coffee, a robust black tea, or even a glass of sparkling wine for a truly elegant dessert experience.
How to Store, Freeze, and Reheat
Pound cakes are famously excellent for making ahead of time, as their flavor and texture often improve on the second day.
Storing: Because this cake contains fresh fruit and a moisture-locking glaze, it should be stored carefully. Place the cake in an airtight container or cover it tightly with a cake dome. It will keep well at room temperature for up to 3 days, or in the refrigerator for up to 5 days. If refrigerated, let slices come to room temperature before serving for the best texture.

Freezing: You can freeze this cake, but it is best to do so before adding the glaze. Wrap the completely cooled, unglazed cake tightly in two layers of plastic wrap, followed by a layer of aluminum foil. Freeze for up to 3 months. Thaw overnight in the refrigerator, bring to room temperature, and apply the fresh glaze before serving.
Frequently Asked Questions (FAQs)
Can I use frozen fruit instead of fresh? While fresh is highly recommended for texture, you can use frozen. Do not thaw the fruit first; toss it in the flour directly from the freezer and fold it into the batter. You may need to add 5-10 minutes to your baking time.
Why is my cake dense and heavy instead of tender? This usually happens due to overmixing the batter once the flour is added, which develops too much gluten. It can also happen if the butter and sugar were not creamed together long enough to incorporate enough air.
Can I bake this in a standard 9×13 pan? Yes, but the baking time will be significantly reduced. A 9×13 inch pan will likely take 35-45 minutes. Watch it closely and test with a toothpick.
In conclusion, the Strawberry Pineapple Pound Cake is a true triumph of home baking. With its dense, comforting crumb, vibrant bursts of fruit, and that unbelievable, sticky-sweet glaze, it is a recipe that promises to bring a touch of sunshine to any occasion. Take your time, follow the steps carefully, and prepare to be amazed by the delicious, gorgeous results.
Strawberry Pineapple Pound Cake
Ingredients
Equipment
Method
- Preheat oven to 325°F (165°C). Grease and flour a 10-inch Bundt pan or deep springform pan.
- In a bowl, whisk together 3 cups of flour, baking powder, and salt.
- In a small bowl, toss the chopped strawberries and dried pineapple chunks with the remaining 2 tablespoons of flour.
- In a large bowl, cream the softened butter and granulated sugar until light and fluffy (about 4-5 minutes).
- Add eggs one at a time, mixing well after each. Stir in the vanilla extract.
- Alternately mix in the dry ingredients and the sour cream, starting and ending with the dry ingredients. Mix just until combined.
- Gently fold the flour-coated fruit into the thick batter.
- Pour batter into prepared pan. Bake for 60-75 minutes until a skewer inserted comes out clean.
- Cool in pan for 15 minutes, then invert onto a wire rack to cool completely.
- Whisk powdered sugar, vanilla, and pineapple juice until smooth. Pour glaze over the cooled cake, allowing it to drip down the sides.