Strawberry Crunch Cheesecake Tacos Recipe
The Ultimate Strawberry Crunch Cheesecake Tacos Recipe
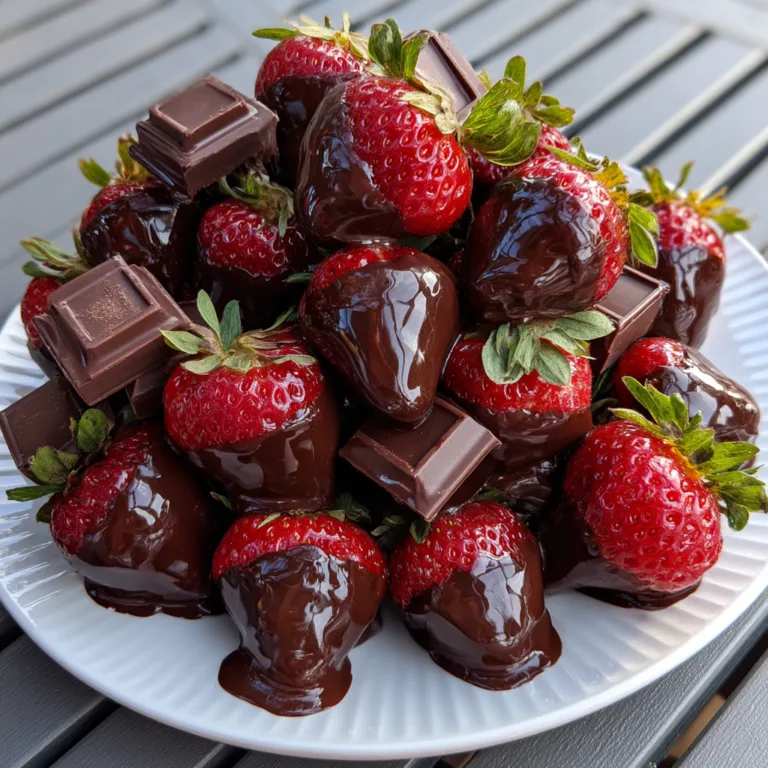
If you grew up chasing the ice cream truck for that iconic strawberry shortcake bar, get ready for a dessert that will unlock a core memory. Strawberry Crunch Cheesecake Tacos are the viral sensation that combines the nostalgia of strawberry crumble with the indulgence of a creamy cheesecake, all wrapped up in a fun, handheld taco shell. This isn’t just a dessert; it’s an experience. The textures are explosive—crispy, buttery shell, velvety smooth filling, and that signature sweet-and-tart crunch that makes your mouth water just looking at it.
In this comprehensive guide, we are going to walk through exactly how to recreate this bakery-style treat at home. Whether you are making these for a summer barbecue, a birthday party, or just a Tuesday night treat, these tacos are guaranteed to steal the show.

Why You Will Fall in Love With This Recipe
There are desserts, and then there are showstoppers. These Strawberry Crunch Cheesecake Tacos fall firmly into the latter category. But beyond their stunning appearance, here is why they work so well:
- Texture Contrast: The magic lies in the interplay between the crispy fried tortilla shell, the grainy, sugary crunch of the strawberry coating, and the cool, lush cheesecake mousse inside.
- No-Bake Filling: The cheesecake filling requires zero oven time. It is a simple whipped mixture that stabilizes in the fridge, making it perfect for warmer months when you don’t want to bake a whole cake.
- Customizable: While we are focusing on the classic strawberry version, once you master the technique of the “dessert taco shell,” the flavor possibilities are endless.
- Nostalgia Factor: That pink and golden crumble is essentially a deconstructed version of the Good Humor Strawberry Shortcake bar, instantly transporting you back to childhood summers.
The Science Behind the “Strawberry Crunch”
The defining feature of this recipe is the Strawberry Crunch. You might wonder how bakeries get that perfect pink hue and concentrated strawberry flavor. The secret usually lies in a combination of Golden Oreos (or vanilla sandwich cookies) and strawberry gelatin powder.
When you pulse the cookies, the cream filling acts as a binder, creating little clumps that mimic a streusel. The strawberry gelatin provides that electric pink color and a punchy, tart flavor that cuts through the sugar. Some purists prefer freeze-dried strawberries for a more natural approach, and we will discuss that in the variations section, but for the authentic “ice cream truck” taste, gelatin powder is the key.
Ingredients Checklist
Before you start, gather these ingredients. The quality of your ingredients will define the final taste, especially for the filling.
For the Taco Shells
- Flour Tortillas (Small/Fajita size) – These fry up perfectly puffy and crisp.
- Vegetable Oil – For frying the shells.
- Unsalted Butter – Melted, to help the crunch adhere to the shell.
For the Strawberry Crunch Topping
- Golden Oreos – Or any vanilla sandwich cookie. You need the cream filling to help the texture.
- Strawberry Gelatin Powder – Such as Jell-O brand. This gives the color and flavor.
- Unsalted Butter – Melted, to bind the crumbs.
For the Cheesecake Filling
- Cream Cheese – Full fat, brick style. It must be softened to room temperature to avoid lumps.
- Powdered Sugar – Dissolves instantly for a smooth texture.
- Heavy Whipping Cream – Cold. This adds volume and lightness.
- Vanilla Extract – High quality pure vanilla is best.
- Lemon Juice – Just a splash to add that classic cheesecake tang.
For Garnish
- Strawberry Glaze – You can use store-bought strawberry syrup or a thick strawberry pie filling.
- Fresh Strawberries – Sliced or chopped for freshness.
Step-by-Step Instructions
Phase 1: Making the Strawberry Crunch
1. Crush the Cookies: Place your Golden Oreos (filling included) into a food processor or a large ziplock bag. Pulse or crush until you have coarse crumbs. You want some texture here, not a fine dust.
2. Mix in Strawberry Flavor: Transfer the crumbs to a bowl. Sprinkle the strawberry gelatin powder over the crumbs and toss to combine.
3. Add Butter: Pour the melted butter over the crumb mixture. Use a fork to mix it until the mixture looks like wet sand. The butter helps the crunch stick to the taco and clump up nicely. Set this aside.
Phase 2: Preparing the Taco Shells
4. Cut the Tortillas: Using a round cutter (about 4-5 inches), cut circles out of your tortillas if they aren’t already the perfect size. This ensures clean edges.
5. Fry the Shells: Heat about an inch of vegetable oil in a deep skillet to 350°F (175°C). carefully place a tortilla in the oil. Let it fry for about 5-10 seconds, then using tongs, fold it in half to create a taco shape. Hold it in that shape for another 30-60 seconds until it is golden brown and holds its shape on its own. Flip to fry the other side evenly.
6. Drain: Remove the shell and place it upside down on a wire rack lined with paper towels to drain excess oil. Repeat with remaining tortillas.
7. Coat the Shells: Once the shells are cool enough to handle but still warm, brush them generously with melted butter. Immediately dredge the outside of the shell into your prepared Strawberry Crunch mixture, pressing gently to ensure a thick coating sticks to the shell. Place them back on a wire rack to set.
Phase 3: The Cheesecake Filling
8. Whip the Cream Cheese: In a large mixing bowl, beat the softened cream cheese and powdered sugar until completely smooth and creamy. Scrape down the sides of the bowl.
9. Add Flavor: Mix in the vanilla extract and lemon juice.
10. Whip the Cream: In a separate cold bowl, whip the heavy cream until stiff peaks form. (Alternatively, you can slowly pour the liquid heavy cream into the cream cheese mixture while beating on high, but whipping separately yields a lighter mousse).
11. Fold: Gently fold the whipped cream into the cream cheese mixture until combined. Do not overmix, or you will lose the airiness.
Phase 4: Assembly
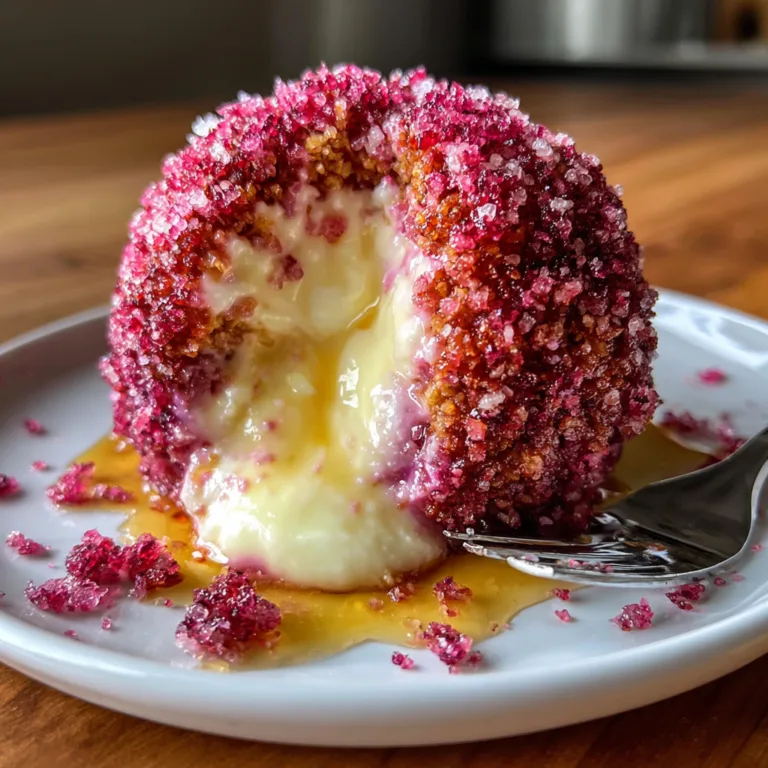
12. Pipe the Filling: Transfer the cheesecake mixture to a piping bag fitted with a large star tip (like a Wilton 1M). Pipe generous swirls of filling into each crunch-coated taco shell.
13. Garnish: Drizzle the top with strawberry glaze or sauce. Top with fresh strawberry slices and a sprinkle of extra crunch mixture.
14. Serve: These are best served immediately while the shell is crisp and the filling is cold.
Tips for Success
- Room Temperature Cheese: If your cream cheese is cold, your filling will be lumpy. No amount of mixing will fix it later. Let it sit out for at least an hour.
- Don’t Burn the Crumble: If you decide to bake the crumble (optional) to make it crispier, watch it like a hawk. The sugar in the cookies burns very quickly.
- Shell Shape: If you struggle to hold the taco shape while frying, you can drape the tortillas over the rungs of an oven rack and bake them until crispy, though frying yields a tastier result.
- Storage: These do not store well fully assembled. The moisture from the cheesecake will make the shell soggy. Store components separately and assemble right before eating.
Variations to Try
Once you have the method down, try these fun twists:
Chocolate Crunch: Use regular chocolate Oreos for the crumble and a chocolate ganache drizzle.
Lemon Meringue: Use Lemon Oreos and lemon gelatin for the crunch, and top with marshmallow fluff.
Funfetti Birthday Cake: Use Golden Oreos, add sprinkles to the crunch, and use cake batter flavoring in the cheesecake filling.

Nutritional Note
Let’s be real—this is an indulgence. It is high in sugar and fats, meant for special occasions. You can lighten it up by using low-fat cream cheese and sugar-free pudding mix as a stabilizer, but the texture of the shell relies on the frying process.
Conclusion
Strawberry Crunch Cheesecake Tacos are the ultimate hybrid dessert. They look professional but are surprisingly achievable for the home cook. The combination of the warm, cinnamon-sugar-esque crunch on the outside and the cool, creamy inside is unmatched. Make a batch for your next gathering, and watch them disappear in seconds!
Strawberry Crunch Cheesecake Tacos
Ingredients
Equipment
Method
- Crush Golden Oreos in a food processor or ziplock bag to coarse crumbs.
- Mix crumbs with strawberry gelatin powder and 3 tbsp melted butter until it resembles wet sand. Set aside.
- Heat oil in a skillet to 350°F. Fry tortillas one by one, folding them with tongs into a taco shape after 10 seconds. Fry until golden brown on both sides.
- Let shells drain on a wire rack. While still warm, brush outside with a little butter and press into the Strawberry Crunch mixture to coat.
- In a bowl, beat softened cream cheese, powdered sugar, and vanilla until smooth.
- In a separate bowl, whip heavy cream to stiff peaks, then gently fold into the cream cheese mixture.
- Transfer filling to a piping bag with a star tip and pipe into the cooled taco shells.
- Drizzle with strawberry glaze and top with fresh strawberry slices. Serve immediately.