Salt & Vinegar Cucumber Chips
If you are looking for a way to satisfy that deep-seated craving for something crunchy, salty, and tangy without the heavy calories of traditional potato chips, look no further. These Crispy Salt and Vinegar Cucumber Chips are a total game-changer for healthy snacking. They are light, incredibly thin, and pack a punch of flavor that mirrors your favorite gourmet kettle chips, all while staying incredibly low in carbohydrates and calories.
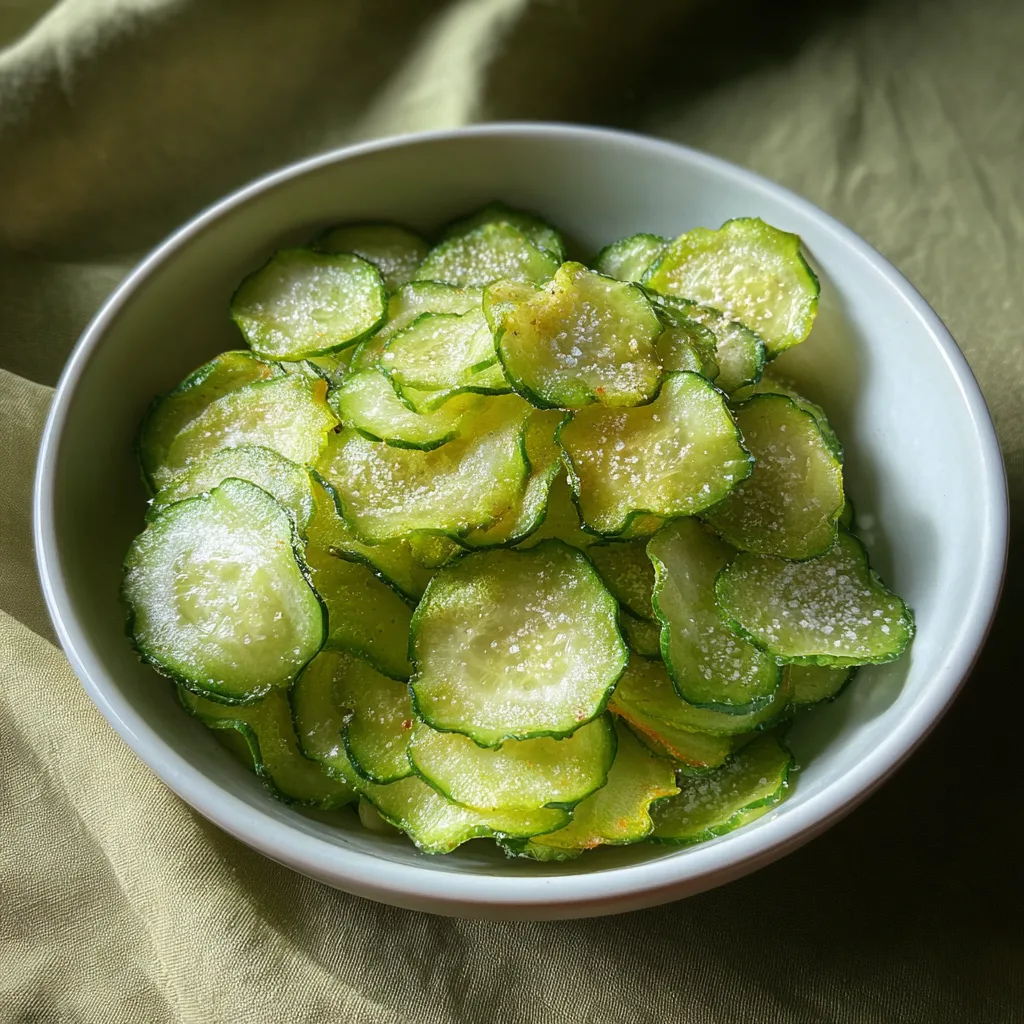
Cucumbers are often overlooked in the snack aisle because of their high water content. However, when sliced paper-thin and subjected to low-and-slow heat, they transform into delicate, translucent wafers that shatter with every bite. The key to making these truly irresistible is the “drench” factor—we ensure they are glistening with a sharp vinegar glaze and a generous dusting of flaky sea salt that catches the light like diamonds.
Why You Need Cucumber Chips in Your Life
Whether you are following a Keto diet, watching your caloric intake, or simply trying to incorporate more whole vegetables into your routine, these chips fit the bill. Unlike store-bought veggie chips that are often fried in processed oils and packed with cornstarch, these are 100% natural. You control the quality of the oil and the intensity of the seasoning.
The texture is unique—somewhere between a traditional chip and a dried fruit leather, but much crispier. Because cucumbers are naturally mild, they act as the perfect canvas for the acidity of the vinegar and the sharpness of the salt. They are refreshing yet savory, making them the ultimate guilt-free snack for movie nights or mid-afternoon slumps.

The Essential Ingredients
The beauty of this recipe lies in its simplicity. You only need a few high-quality ingredients to achieve that ultra-glossy, mouth-watering finish seen in the photos.
- – 2 large English cucumbers (hothouse cucumbers work best due to fewer seeds)
- – 3 tbsp extra virgin olive oil or avocado oil
- – 1/4 cup white distilled vinegar or apple cider vinegar
- – 1.5 tsp flaky sea salt (Maldon is excellent for that visible sparkle)
- – 0.5 tsp cracked black pepper
- – 0.25 tsp garlic powder (optional for added depth)
Step-by-Step Instructions
Step 1: The Perfect Slice
To get that translucent, professional look, a mandoline slicer is your best friend. Set it to the thinnest setting (about 1/8 inch). Slice the cucumbers evenly. If you don’t have a mandoline, use a very sharp chef’s knife and take your time. Consistency in thickness is vital so they all dry at the same rate.
Step 2: The Brine Bath
In a large mixing bowl, whisk together the olive oil, vinegar, garlic powder, and pepper. Toss the cucumber slices into the bowl and massage the liquid into them. Let them sit for about 10 minutes. This “quick brine” allows the vinegar to penetrate the cucumber flesh, ensuring the flavor isn’t just on the surface but inside every bite.
Step 3: Laying Them Out
Arrange the slices in a single layer on your air fryer basket or a baking sheet lined with parchment paper. It is okay if they touch slightly as they will shrink significantly, but do not overlap them completely, or they will stay soggy. Sprinkle half of the sea salt over the wet slices now.
Step 4: The Dehydration Process
In an Air Fryer: Set to 200°F (95°C) and cook for 30–40 minutes, checking every 10 minutes. In an Oven: Set to your lowest setting (usually 175°F-200°F) and bake for 1.5 to 2 hours. You are looking for the edges to curl and the centers to feel dry to the touch.
Step 5: The Final Glaze and Crunch
Once they are crispy, remove them from the heat. While they are still warm, toss them very lightly with one more teaspoon of vinegar and the remaining flaky salt. This creates that ultra-glossy, wet-look finish that makes them so appetizing. Let them cool completely; they will crisp up even further as they reach room temperature.
Top Tips for Maximum Crispiness
1. Pat Them Dry: If your cucumbers are particularly juicy, pat the raw slices with a paper towel before tossing them in the oil and vinegar. Reducing the initial water content speeds up the “chipping” process.
2. Low and Slow: Do not be tempted to crank up the heat to 350°F. High heat will burn the thin edges before the centers dry out, resulting in a bitter taste. Patience is the secret ingredient here.
3. Use English Cucumbers: These have thinner skins and smaller seeds. Standard garden cucumbers have thick, waxy skins and large watery seeds that can fall out during the drying process, leaving you with “cucumber rings” instead of chips.
Flavor Variations to Explore
Once you’ve mastered the Salt and Vinegar classic, try these other combinations:
- Spicy Chili Lime: Swap vinegar for lime juice and add a teaspoon of Tajin or chili powder.
- Dill Pickle: Add dried dill and a pinch of mustard powder to the brine.
- Ranch Style: Toss the finished chips in a dry ranch seasoning powder.
Storage Information
Because these chips are made from a high-moisture vegetable, they are best enjoyed the day they are made. If you must store them, place them in a glass airtight container with a small silica gel packet (if you have one) or a piece of dry paper towel to absorb any residual moisture. If they lose their crunch, simply pop them back into a warm oven for 5 minutes to refresh.
Crispy Salt and Vinegar Cucumber Chips
Ingredients
Equipment
Method
- Slice cucumbers into very thin rounds using a mandoline slicer.
- In a medium bowl, whisk oil, vinegar, pepper, and garlic powder. Add cucumber slices and toss to coat thoroughly.
- Let slices marinate for 10 minutes, then arrange in a single layer in the air fryer basket.
- Sprinkle with half the salt. Air fry at 200°F (95°C) for 30-40 minutes until edges are curled and crispy.
- Remove from heat and, while warm, lightly toss with a splash of vinegar and the remaining salt for a glossy finish.
- Let cool completely on a wire rack to reach maximum crunch before serving.