Robin’s Egg Peanut Butter
Speckled Robin’s Egg Peanut Butter Truffles
Welcome to the ultimate guide to making the most visually stunning and mouth-wateringly delicious springtime dessert: Speckled Robin’s Egg Peanut Butter Truffles. If you have been searching for a show-stopping treat that combines the irresistible flavor combination of creamy peanut butter and sweet candy coating, you have found the perfect recipe. These beautiful, pastel blue, brown-speckled treats look exactly like delicate robin’s eggs but hide a rich, decadent, and completely irresistible peanut butter fudge center. Whether you are preparing a festive Easter basket, hosting a spring garden party, or simply craving a homemade candy that tastes infinitely better than store-bought options, this recipe will quickly become a cherished favorite in your household.
There is something inherently magical about creating homemade candy. It transforms simple pantry staples into edible art. These truffles are deceptively simple to make, requiring no baking, no candy thermometers, and no complex pastry skills. The magic lies in the assembly and the fun, creative speckling process at the end. By the time you finish reading this comprehensive guide, you will be equipped with all the expert knowledge, tips, and tricks needed to craft a flawless batch of these gorgeous, delicious peanut butter eggs.
Why You Will Fall in Love with This Recipe
There are countless reasons to adore these Speckled Robin’s Egg Peanut Butter Truffles. First and foremost is the flavor profile. The interior is a beautifully balanced, sweet, and slightly salty peanut butter dough that resembles the beloved filling of a certain famous peanut butter cup, but with a richer, more homemade texture. It melts in your mouth, providing a deeply satisfying peanut butter punch.
Secondly, the aesthetic appeal is off the charts. The delicate robin’s egg blue coating, speckled with an artistic flick of cocoa paint, makes these truffles look like they came straight from a high-end artisan chocolatier. They are incredibly photogenic and guaranteed to elicit gasps of delight from friends and family. Furthermore, this is a fantastic recipe to make with children. The shaping of the eggs and the messy, creative joy of speckling the finished candies is an incredibly fun weekend activity that yields delicious results.
Finally, these truffles are incredibly versatile. Because they are a no-bake dessert, they free up your oven space during busy holiday cooking sessions. They also have a fantastic shelf life when stored correctly, making them an ideal make-ahead dessert. You can prepare a batch days or even a week in advance, knowing they will taste just as fresh and delicious when it is time to serve them.

Ingredients Deep Dive: What You Need and Why
To achieve the perfect texture and flavor, using the right ingredients is crucial. Let’s break down everything you will need for these spectacular truffles.
- – 1 cup creamy peanut butter (do not use natural, oil-separated peanut butter)
- – 1/4 cup unsalted butter, softened to room temperature
- – 1 teaspoon pure vanilla extract
- – 2 cups powdered sugar (confectioners’ sugar), sifted
- – 1/4 teaspoon fine sea salt (optional, to taste)
- – 12 ounces light blue candy melts (or white chocolate chips with oil-based blue food coloring)
- – 1 tablespoon coconut oil or shortening (for thinning the candy melts)
- – 1 tablespoon unsweetened cocoa powder
- – 1 tablespoon vanilla extract or water (for the speckling paint)
The Peanut Butter: The foundation of this recipe is the peanut butter. It is absolutely vital to use a standard, commercial creamy peanut butter (like Jif or Skippy). Natural peanut butters that require stirring have an inconsistent oil content that can cause the truffle filling to separate, become too greasy, or fail to hold its shape. The stabilizers in commercial peanut butter ensure a smooth, cohesive dough.
The Butter and Sugar: Softened unsalted butter adds richness and helps bind the powdered sugar and peanut butter together. Sifting your powdered sugar is highly recommended to avoid any unpleasant lumps in your smooth truffle center. The sugar not only sweetens the filling but also provides the necessary structure, transforming sticky peanut butter into a moldable dough.
The Coating: Light blue candy melts are the easiest route to achieving that perfect robin’s egg hue. They melt smoothly and set up firmly without the need for tempering. If you prefer the taste of high-quality white chocolate, you can certainly use it, but you MUST use an oil-based food coloring to dye it blue. Water-based food coloring will cause the white chocolate to seize and become an unusable, grainy mess. A touch of coconut oil helps thin the coating, making dipping easier and creating a more delicate shell.
Equipment Required for Success
You don’t need a commercial kitchen to make these, but a few specific tools will make the process infinitely easier:
- Large mixing bowl
- Hand mixer or stand mixer
- Silicone spatula
- Baking sheet lined with parchment paper or a silicone baking mat
- Microwave-safe bowls or a double boiler for melting
- Dipping tools (a standard fork works perfectly)
- A stiff-bristled clean paintbrush or a new, clean toothbrush (essential for speckling)
Step-by-Step Instructions
- Prepare the Base: In a large mixing bowl, use a hand mixer or a stand mixer fitted with the paddle attachment to beat the creamy peanut butter and softened unsalted butter together on medium speed until they are completely smooth and well combined. This should take about 1 to 2 minutes. Add the vanilla extract and salt, and mix briefly to incorporate.
- Incorporate the Sugar: Turn the mixer down to the lowest speed. Gradually add the sifted powdered sugar, about half a cup at a time. The mixture will start out looking crumbly, but continue mixing until it comes together into a cohesive, somewhat stiff dough. If the dough seems too crumbly to hold together when squeezed, you can add milk, a half-teaspoon at a time, until the correct consistency is reached.
- Shape the Eggs: Scoop out portions of the dough (about 1 tablespoon each) and roll them between your palms into a smooth ball. Then, gently roll the ball back and forth slightly while applying a bit more pressure to one side to taper it, forming a classic egg shape. Place the shaped eggs onto a parchment-lined baking sheet.
- Chill the Centers: Once all the eggs are shaped, place the baking sheet into the refrigerator for at least 1 hour, or in the freezer for 30 minutes. The eggs must be very firm before dipping; otherwise, they will melt and lose their shape when they hit the warm candy coating.
- Melt the Coating: In a microwave-safe bowl, combine the light blue candy melts and the coconut oil. Heat in the microwave at 50% power in 30-second intervals, stirring thoroughly between each interval. Continue this process until the candy is completely melted, smooth, and flows easily off a spoon. Do not overheat, or the candy will become thick and clumpy.
- Dip the Eggs: Remove the chilled peanut butter eggs from the fridge or freezer. Working one at a time, drop an egg into the melted blue coating. Use a fork to gently turn the egg so it is completely coated. Slide the fork under the egg and lift it out, tapping the fork gently against the side of the bowl to allow the excess coating to drip off. Carefully slide the coated egg back onto the parchment paper. Repeat with all remaining eggs.
- Let the Coating Set: Allow the blue coating to set completely. This can be done at room temperature or expedited by placing the tray back in the refrigerator for about 10 to 15 minutes.
- Prepare the Speckle Paint: In a very small bowl, mix the unsweetened cocoa powder with the vanilla extract (or water). Stir until it forms a thin, fluid paste. It should be the consistency of watercolor paint. If it is too thick, add a drop or two more of liquid.
- Speckle the Eggs: Lay down some extra parchment paper or paper towels around your work area, as this step can be a bit messy. Dip the tips of your stiff-bristled brush or clean toothbrush into the cocoa paint. Hold the brush a few inches above the coated eggs and run your thumb across the bristles to flick the paint onto the eggs, creating a random, natural-looking speckled pattern.
- Final Set: Allow the speckles to dry completely for about 20 to 30 minutes before handling the eggs or serving.
Expert Tips for Flawless Candy Making
Creating professional-looking homemade candy takes a little finesse. Here are some insider tips to ensure your Robin’s Egg Truffles turn out perfectly every single time.
Temperature is Everything: The most common mistake in candy making is ignoring temperature. Your peanut butter centers must be rock solid before dipping. If they are even slightly soft, the warm coating will melt the outside of the egg, causing the peanut butter to leak into your blue candy melts, ruining the smooth finish and the color of your coating. Work in small batches. Take only 5 or 6 eggs out of the fridge at a time for dipping, keeping the rest chilled until you are ready for them.
The “Tap and Swipe” Technique: Getting a smooth coating requires the right dipping motion. When you lift the egg out of the coating with your fork, tap the handle of the fork gently against the edge of the bowl. This forces the excess coating to run off. Then, gently scrape the bottom of the fork against the lip of the bowl to remove the pool of chocolate underneath. This prevents an ugly “foot” (a pool of hardened chocolate) from forming at the base of your truffle when you place it on the parchment.
Mastering the Speckle: Practice your flicking technique on a piece of blank parchment paper before you aim for the eggs. You want fine, scattered mist-like dots, not giant, heavy splatters. If your dots are too large, your “paint” is likely too thick, or you are holding the brush too close to the eggs. Adjust the consistency with a tiny drop of water or extract, and hold the brush further back.
Flavor Variations and Fun Customizations
While the classic peanut butter center is phenomenal, the beauty of this recipe is its adaptability. You can easily tweak the filling to suit different preferences or allergy requirements.
Almond or Cashew Butter: If you have a peanut allergy in the house, you can seamlessly substitute a smooth, commercial-grade almond butter, cashew butter, or even sunflower seed butter. Just ensure it is a smooth, non-separating variety.
Crunchy Centers: For an added textural element, mix in 1/2 cup of finely crushed graham crackers, crisped rice cereal (like Rice Krispies), or finely chopped roasted peanuts into the dough before shaping.
Chocolate Dough: Turn these into chocolate-peanut butter eggs by substituting 1/4 cup of the powdered sugar with an equal amount of unsweetened cocoa powder in the filling mixture.
Different Egg Colors: Robin’s eggs are traditionally light blue, but you don’t have to stop there! You can divide your white chocolate or vanilla candy melts and use different oil-based food colorings to create a whole nest of pastel pink, mint green, and pale yellow speckled eggs.
Serving Suggestions and Beautiful Plating
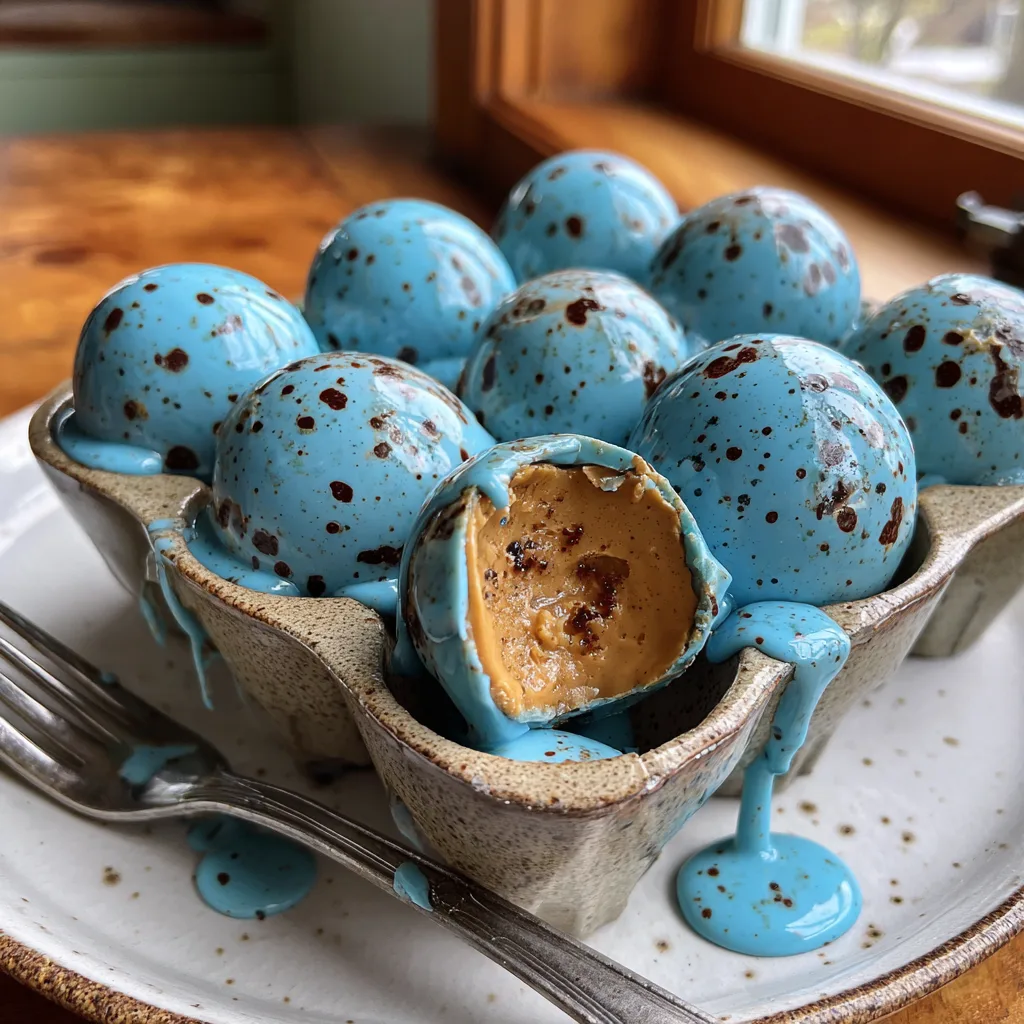
Presentation is key, especially for a dessert as visually striking as this. To really lean into the springtime or Easter theme, serve these truffles nestled in a bed of toasted coconut to mimic a bird’s nest. You can also place them in a clean, rustic ceramic egg carton (as seen in the accompanying photos) for a charming, farmhouse-chic aesthetic.
They make incredible edible gifts. Place three or four speckled eggs into a clear cellophane bag tied with a pastel ribbon, or arrange them carefully in a small, tissue-paper-lined bakery box to give to friends, teachers, or coworkers.
Storage and Freezing Instructions
Because the filling contains dairy (butter) and the coating is sensitive to heat, proper storage is important to maintain the texture and appearance of your truffles.
Room Temperature: If your house is cool (below 70°F), these can be stored in an airtight container on the counter for up to 3 days. However, the peanut butter center will be quite soft.
Refrigerator: For the best texture, store the truffles in an airtight container in the refrigerator. They will keep perfectly for up to 2 weeks. The cool temperature keeps the chocolate shell crisp and the peanut butter center wonderfully fudgy.
Freezing: These truffles freeze beautifully. Place them in a single layer in a freezer-safe container, with parchment paper between layers if you need to stack them. They can be frozen for up to 3 months. When you are ready to enjoy them, let them thaw in the refrigerator overnight. Thawing them slowly in the fridge prevents condensation from forming and ruining the delicate speckled coating.
Fun Fact: The History of Robin’s Egg Candies
Have you ever wondered why we associate speckled eggs with spring candy? The tradition of making sweets shaped like eggs dates back centuries, symbolizing rebirth and new life. However, the specific “Robin’s Egg” candy—characterized by its distinct pale blue color and malted center—became wildly popular in the mid-20th century in the United States. Confectioners realized that mimicking the beautiful, natural speckling of a wild bird’s egg elevated the candy from a simple treat to a novelty item. By creating this homemade peanut butter version, you are participating in a rich history of culinary art, blending natural inspiration with indulgent flavors.
Frequently Asked Questions (FAQs)
Can I use real chocolate instead of candy melts?
Yes, you absolutely can! White chocolate is delicious. However, real white chocolate requires tempering if you want it to set up hard and shiny at room temperature. If you don’t temper it, the eggs will need to be kept in the fridge. Also, remember you MUST use oil-based candy coloring, as water-based gel or liquid coloring will seize white chocolate instantly.
Why is my peanut butter dough crumbly and not holding together?
This usually happens if you accidentally added too much powdered sugar or if your peanut butter was too dry. Simply add a splash of milk or heavy cream, 1/2 teaspoon at a time, mixing well until the dough comes together into a moldable consistency.
Can I make the dough ahead of time?
Yes! You can mix the peanut butter dough, shape it into eggs, and keep them in an airtight container in the refrigerator for up to 3 days before you dip them. This is a great way to break up the prep work.
Enjoy crafting these stunning, delicious treats! They are sure to be the highlight of your dessert table.
Speckled Robin’s Egg Peanut Butter Truffles
Ingredients
Equipment
Method
- In a large bowl, beat the creamy peanut butter and softened butter until smooth. Mix in the vanilla extract and salt.
- Gradually beat in the powdered sugar until a moldable dough forms. If it is too crumbly, add a tiny splash of milk.
- Scoop 1-tablespoon portions of dough, roll into balls, and gently taper one end to form an egg shape. Place on a parchment-lined baking sheet.
- Chill the shaped eggs in the refrigerator for at least 1 hour or freezer for 30 minutes until very firm.
- Melt the light blue candy melts and coconut oil in the microwave in 30-second intervals at 50% power, stirring until completely smooth.
- Dip the chilled peanut butter eggs into the melted coating one at a time using a fork. Tap off excess and place back on the parchment paper. Let the coating set.
- In a small bowl, mix cocoa powder and vanilla extract (or water) to create a thin, liquid paint consistency.
- Dip a clean, stiff-bristled brush into the cocoa mixture and flick it over the set blue eggs to create speckles. Let dry completely before serving.