Rainbow Island Float
Rainbow Island Float: Your Ultimate Tropical Summer Drink
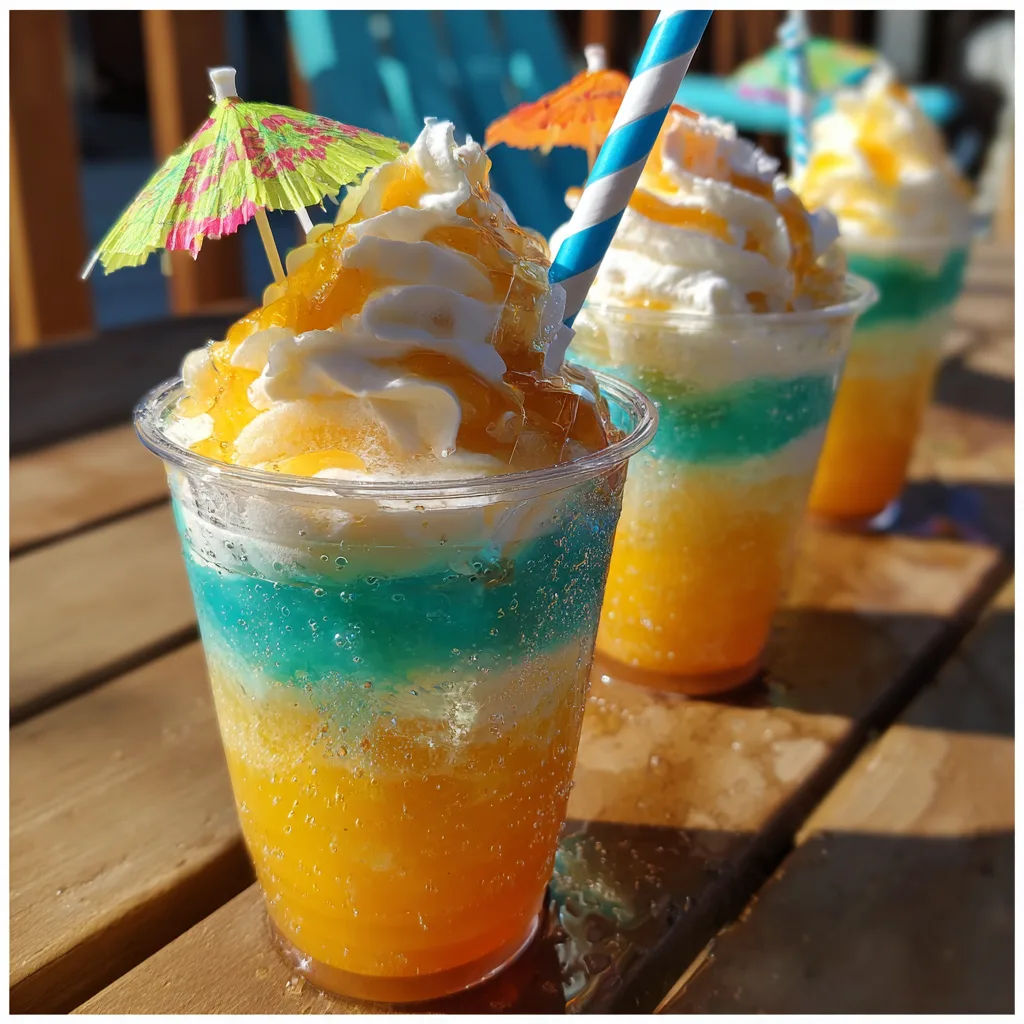
When the summer heat reaches its peak and you are looking for a way to cool down, nothing hits the spot quite like a beautifully crafted, frosty beverage. Enter the Rainbow Island Float, a spectacular, multi-layered tropical slushy that is as much a feast for the eyes as it is for the palate. This drink is designed to transport you instantly to a sun-drenched beach, with its vibrant hues of teal, orange, and yellow mimicking a perfect island sunset over crystal clear waters. If you have been searching for the ultimate summer party beverage, a kid-friendly weekend treat, or simply a delicious way to beat the heat, you have found your new favorite recipe.
Creating layered drinks at home might seem like a task reserved for professional mixologists or fancy beach resort bartenders, but the truth is, it is incredibly simple once you understand the basic mechanics of blending frozen fruit and ice. The Rainbow Island Float relies on contrasting colors and thick, icy textures to keep the layers distinct, resulting in a stunning presentation that will have your friends and family reaching for their cameras before they even take a sip. Beyond its breathtaking appearance, this float is bursting with bright, tropical flavors like pineapple, mango, and coconut, making every sip a refreshing mini-vacation.
The Magic Behind the Rainbow Island Float
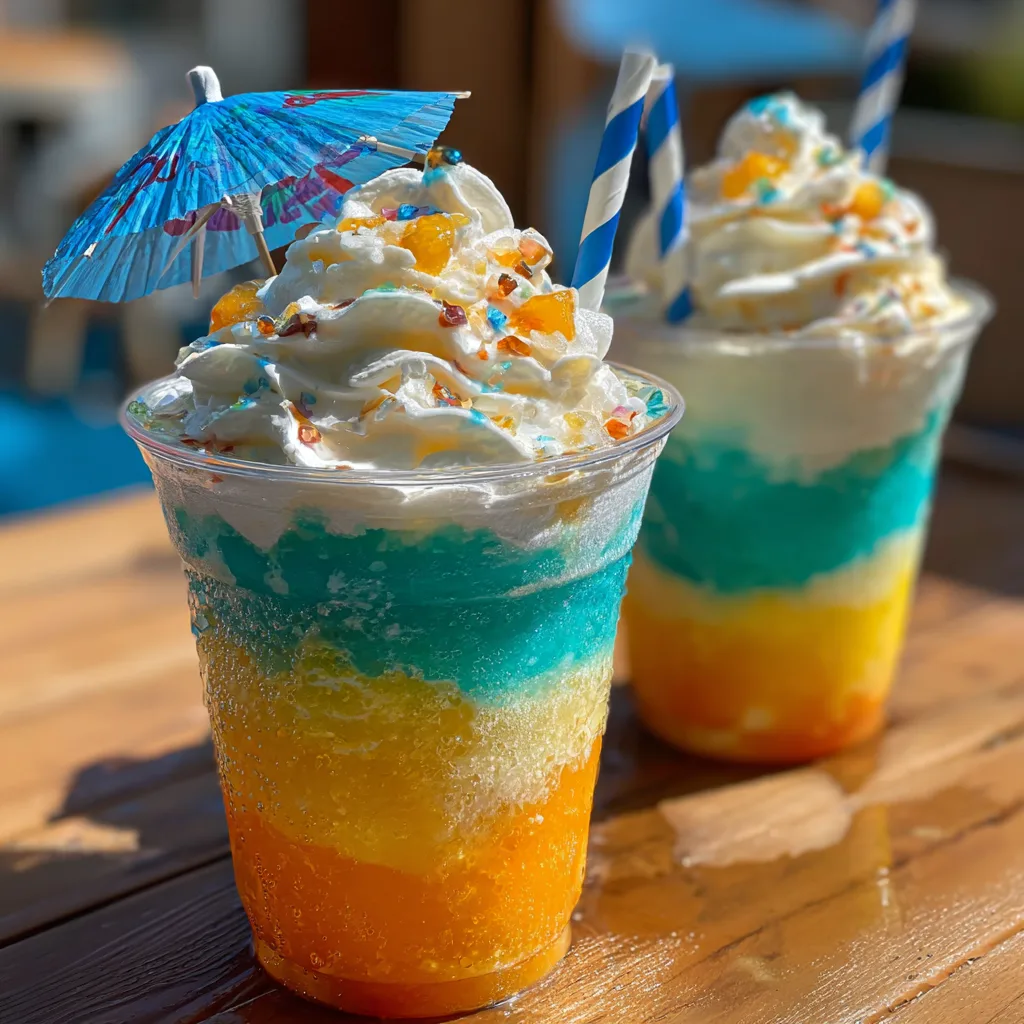
The allure of the Rainbow Island Float lies heavily in its aesthetic appeal. We eat—and drink—first with our eyes, and this recipe absolutely delivers on visual impact. The distinct separation of colors is achieved by controlling the liquid-to-ice ratio in each layer. By ensuring that each blended section is thick and frosty, almost like a sorbet or a smoothie bowl, you prevent the colors from instantly bleeding into one another. The teal layer at the bottom provides a deep, oceanic base; the orange mango layer adds a vibrant burst of sunset warmth; and the pale yellow pineapple layer crowns the fruity portion with a bright, sunny finish.
Topping it all off is a generous swirl of rich, creamy whipped topping. The creaminess cuts through the tartness of the tropical fruits, providing a luxurious mouthfeel that evolves as the float slowly melts. When you add a nostalgic blue-and-white striped paper straw and a classic miniature cocktail umbrella, the drink transitions from a simple fruit slush to a full-blown tropical experience. It is pure joy in a cup.
Why You Will Absolutely Love This Recipe
There are countless reasons to fall in love with the Rainbow Island Float, but here are just a few that will make this a staple in your summer recipe rotation:
First, it is incredibly photogenic. In an era where sharing our culinary creations online is half the fun of making them, this drink is a guaranteed showstopper. The vibrant colors naturally catch the light, making it the perfect centerpiece for a summer brunch, a pool party, or a backyard barbecue.
Second, it is highly customizable and naturally kid-friendly. Because the base recipe is completely alcohol-free, it is a fantastic mocktail that children will go crazy for. They love the bright colors and the fun garnishes. However, if you are hosting an adults-only gathering, it is incredibly easy to spike this float with your favorite rum, vodka, or coconut liqueur for a grown-up twist.
Finally, despite looking complex, it requires very little active prep time. As long as you have a decent blender and the necessary frozen fruits, you can whip up a batch of these floats in about fifteen minutes. It’s a low-effort, high-reward recipe that looks like it took hours of painstaking work.
Ingredients You Need
To create the perfect Rainbow Island Float, you will need to gather ingredients for each specific layer, as well as your garnishes. Using frozen fruit is key here, as it provides the necessary slushy texture without watering down the flavor like regular ice cubes would.
- – 1 cup frozen mango chunks
- – 1 cup frozen pineapple chunks
- – 1/2 cup coconut water (chilled)
- – 1/2 cup orange juice
- – 1/2 cup pineapple juice
- – 1 cup crushed ice
- – 2 tablespoons blue raspberry syrup (or blue curaçao syrup for a non-alcoholic teal color)
- – 1/2 cup heavy whipping cream (or a can of store-bought whipped cream for convenience)
- – 1 tablespoon powdered sugar (if whipping your own cream)
- – 1/2 teaspoon vanilla extract
- – Striped paper straws (for garnish)
- – Miniature cocktail umbrellas (for garnish)
Step-by-Step Instructions
Follow these precise steps to ensure your layers remain separate and vibrant. The key is patience and a quick rinse of the blender between each color.
- Prepare your glasses: Place two tall, clear plastic or glass cups in the freezer for about 10 minutes before you begin. A frosted glass helps keep the slush from melting instantly when it hits the sides, preserving your layers.
- Whip the cream: If you are making homemade whipped cream, combine the heavy whipping cream, powdered sugar, and vanilla extract in a bowl. Beat with a hand mixer until stiff peaks form. Set aside in the refrigerator. If using store-bought, simply keep it chilled.
- Create the Teal Bottom Layer: In your blender, combine 1 cup of crushed ice, 1/2 cup of chilled coconut water, and 2 tablespoons of blue raspberry syrup. Blend on high until completely smooth and thick. It should have the consistency of a thick frozen margarita. Carefully spoon this mixture equally into the bottom of your two frosted cups. Place the cups back in the freezer while you make the next layer.
- Rinse the blender: Give your blender pitcher a quick rinse with cold water to remove any blue residue.
- Create the Orange Middle Layer: Add 1 cup of frozen mango chunks and 1/2 cup of orange juice to the blender. Blend until completely smooth. You want a very thick puree. If it is too thin, add a few more frozen mango chunks. Remove the cups from the freezer and gently spoon the orange layer over the teal layer. Pouring it directly might cause it to break through the bottom layer, so use a spoon to guide it gently against the side of the glass. Return cups to the freezer.
- Rinse the blender: Rinse the blender pitcher once more with cold water.
- Create the Yellow Top Layer: Combine 1 cup of frozen pineapple chunks and 1/2 cup of pineapple juice in the blender. Blend until thick and smooth. Remove the cups from the freezer and, using the same gentle spooning technique, add the yellow layer on top of the orange layer.
- Garnish and Serve: Immediately pipe or dollop a generous amount of whipped cream onto the top of each float. Insert a colorful striped paper straw and a vibrant cocktail umbrella into the cream. Serve immediately before the layers begin to melt together!
Expert Tips for Perfect Drink Layers
Layering drinks is a fun science experiment you can drink. The secret to perfect layers in a frozen drink is density and temperature. If one layer is significantly warmer or thinner than the layer beneath it, they will mix. Always ensure that every layer has a thick, spoonable consistency. If your blender has a hard time processing the thick mixture, use a tamper or stop to scrape down the sides rather than adding more liquid. More liquid equals a thinner slush, which leads to muddy colors.
Freezing the glasses is a step you shouldn’t skip. When the frozen slush hits a room-temperature glass, the edges melt instantly, allowing the colors to seep down the sides. A frosty glass acts as an insulator.
When assembling, never pour the second and third layers straight from the heavy blender pitcher. Always use a spoon to gently dollop the mixture onto the previous layer, spreading it to the edges gently to seal the color line.
Exciting Variations and Substitutions
The beauty of the Rainbow Island Float is its versatility. You can easily adapt this recipe to suit dietary restrictions, flavor preferences, or the type of party you are throwing.
Make it Vegan/Dairy-Free: The slushy layers are naturally vegan, but the whipped cream topping is not. Swap the heavy cream for a high-quality canned coconut cream. Chill the can overnight, scoop out the solid white cream at the top, and whip it with a little powdered sugar and vanilla for a delicious, dairy-free tropical topping.
Make it an Adult Cocktail: To turn this innocent float into a boozy beach party hit, simply add a splash of liquor to each layer. Add 1 ounce of coconut rum to the teal layer, 1 ounce of vodka or tequila to the orange layer, and 1 ounce of spiced rum to the yellow layer. Be aware that alcohol lowers the freezing point, so you may need slightly more ice or frozen fruit to maintain the thick, layerable texture.
Change the Colors: Don’t like mango? Swap the middle layer for frozen strawberries or raspberries blended with cranberry juice for a bright pink/red layer. Want a green layer? Blend frozen pineapple with a handful of fresh spinach (you won’t taste it!) and apple juice.
Serving Suggestions for Summer Parties
Presentation is everything when it comes to the Rainbow Island Float. Serving these at a summer gathering will elevate your event instantly. If you are hosting a Hawaiian Luau, Caribbean-themed BBQ, or a simple pool party, these drinks should be front and center.
Serve them alongside classic summer fare like grilled chicken skewers with pineapple salsa, coconut shrimp, or pulled pork sliders. If you are making a large batch for a crowd, you can actually prep the different colored slushies ahead of time and keep them in separate sealed containers in the freezer. When it’s time to serve, just let them soften for about 5 minutes on the counter, then quickly spoon them into cups and top with cream.
Fun Facts and Cultural Context
The concept of layered drinks has its roots in both classic mixology (think of the beautifully layered Pousse-Café, which relies on the specific gravity of different liqueurs) and the vibrant tiki culture of the mid-20th century. Tiki bars popularized the use of colorful syrups, exotic fruit juices, and elaborate garnishes like the cocktail umbrella.
The cocktail umbrella itself is believed to have been introduced in the 1930s by Harry Yee, a legendary bartender in Hawaii. He reportedly used them to prevent the ice in his drinks from melting too quickly in the hot Hawaiian sun, though they quickly became a universal symbol of tropical leisure and vacation vibes.
Color psychology also plays a huge role in why we love drinks like the Rainbow Island Float. Vibrant blues, oranges, and yellows are stimulating colors that trick our brains into anticipating sweet, refreshing, and energizing flavors, making the drink taste even better.
Storage and Make-Ahead Tips
Because the Rainbow Island Float relies on a specific frozen texture, it is generally best enjoyed immediately after making it. If you leave it sitting out, it will eventually melt into a single, somewhat muddy-colored (though still delicious) tropical juice.
However, if you have leftovers, do not throw them away! You can carefully pour the remaining slush into popsicle molds. They freeze beautifully and make for incredibly fun, layered ice pops that you can enjoy later in the week.
Conclusion
The Rainbow Island Float is more than just a beverage; it is a fun, interactive culinary project that results in a breathtaking and delicious reward. By combining bright colors, frosty textures, and the sweet flavors of the tropics, this recipe guarantees a perfect summer moment in every cup. So grab your blender, stock up on frozen fruit, and get ready to impress your guests with the ultimate sunshine-in-a-glass experience. Cheers to endless summer days!
Rainbow Island Float
Ingredients
Equipment
Method
- Place two clear cups in the freezer to chill for 10 minutes.
- If making homemade whipped cream, beat heavy cream, powdered sugar, and vanilla until stiff peaks form. Set aside.
- For the teal layer, blend crushed ice, coconut water, and blue syrup until a thick slush forms. Spoon equally into the bottom of the chilled cups. Return cups to freezer.
- Rinse the blender pitcher with cold water.
- For the orange layer, blend frozen mango and orange juice until thick and smooth. Gently spoon over the teal layer. Return cups to freezer.
- Rinse the blender pitcher again.
- For the yellow layer, blend frozen pineapple and pineapple juice until thick and smooth. Gently spoon over the orange layer.
- Top generously with whipped cream, insert a striped straw and a cocktail umbrella, and serve immediately.