Pink Candy Pineapple
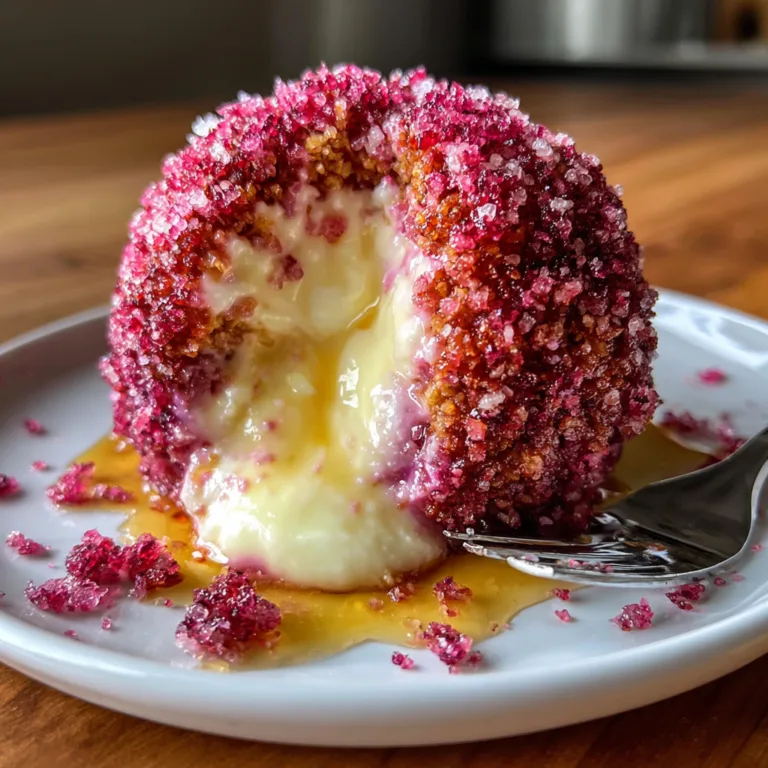
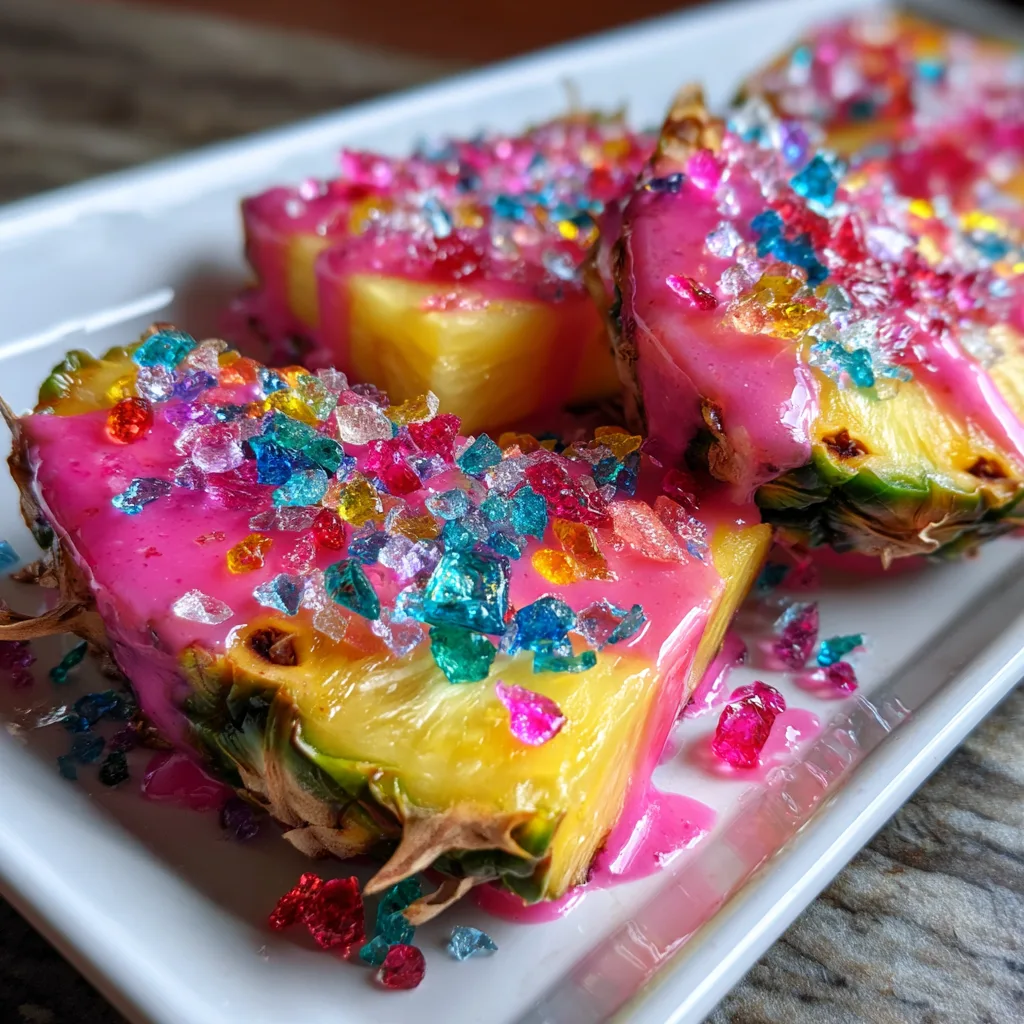
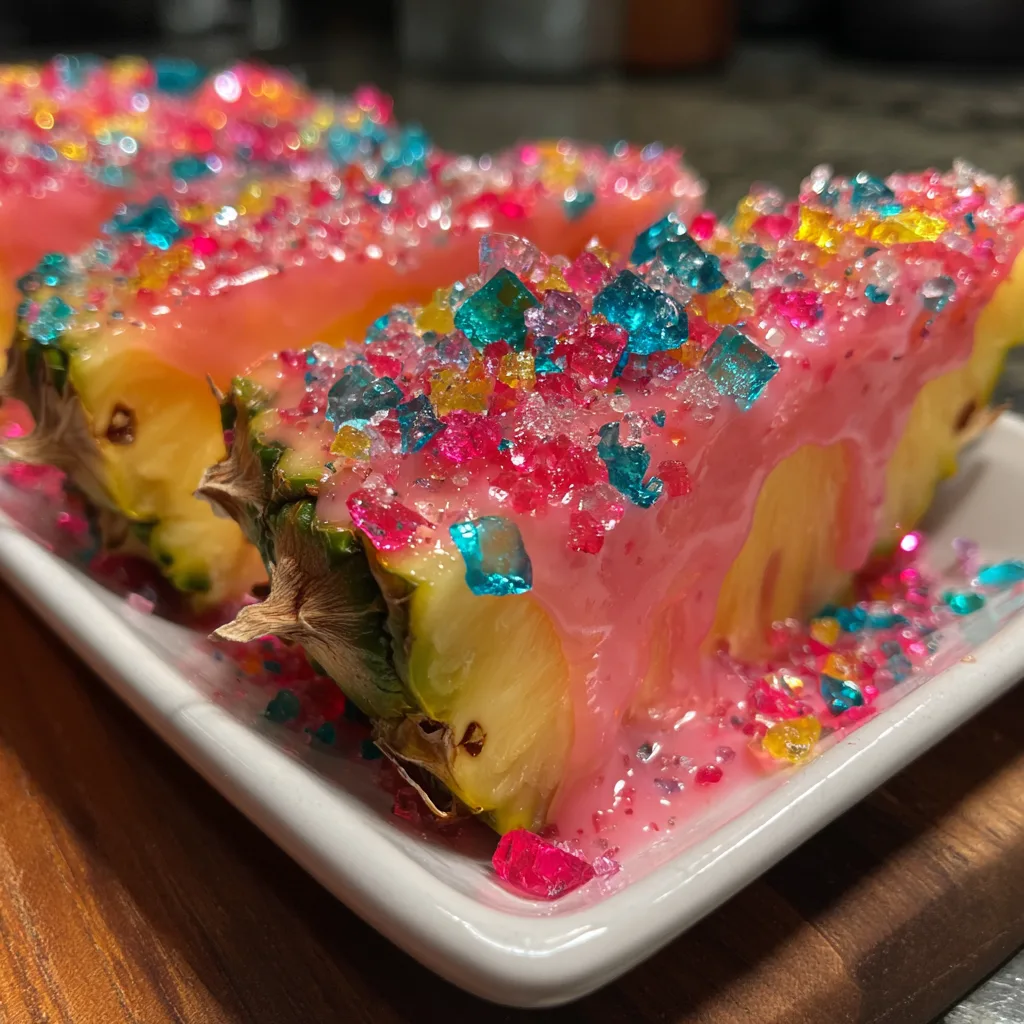
The Ultimate Candy-Coated Pink Glazed Pineapple Wedges
Welcome to one of the most vibrant, playful, and surprisingly delicious treats you can whip up for your next summer gathering or kids’ party: Candy-Coated Pink Glazed Pineapple Wedges. If you are looking for a dessert that bridges the gap between fresh, juicy fruit and pure, indulgent candy-shop nostalgia, this recipe is an absolute must-try. It takes the bright, tropical acidity of fresh pineapple and pairs it with a rich, sweet pink glaze and the satisfying, colorful crunch of crushed hard candies. It is an edible kaleidoscope that will have everyone reaching for seconds.
Fruit desserts often lean towards the sophisticated—tarts, galettes, and perfectly arranged parfaits. But sometimes, you just want something unapologetically fun. This recipe leans fully into that playful energy. By transforming a simple wedge of fruit into a brightly colored, textural masterpiece, you create a treat that is as exciting to look at as it is to eat. Best of all, it requires absolutely no baking and can be assembled in just a few minutes.
Why This Flavor Combination Works
At first glance, coating fresh fruit in icing and crushed candy might seem overly sweet, but the magic lies in the natural properties of the pineapple. Fresh pineapple is intensely acidic and tart. If you were to put this heavy pink glaze and candy coating on a slice of banana or melon, it would be cloying. However, the sharp, acidic bite of the pineapple easily cuts through the rich sugar of the glaze.
Then, there is the textural contrast. When you take a bite, you first experience the sharp, glass-like crunch of the crushed candy pieces. This gives way to the smooth, velvety melt of the pink glaze, and finally, the explosive, juicy burst of the fibrous pineapple. It is a multi-sensory experience that plays with sweet, sour, crunchy, and juicy all at once.
The Secret to Glazing Fresh Fruit
The biggest challenge when working with fresh, cut fruit—especially something as juicy as pineapple—is getting any kind of coating to actually stick. Water and oil (or sugar/fat-based icings) are natural enemies. If you simply slice a pineapple and try to spread icing on it, the icing will slide right off in a messy, frustrating puddle.
The critical step here is drying the fruit. After slicing your pineapple wedges, you must thoroughly pat the cut surfaces dry with paper towels. You want to remove as much surface moisture as possible. For the absolute best results, after patting them dry, let the wedges sit on a wire rack in the refrigerator for about 20-30 minutes before dipping. The cold, dry air of the fridge helps to lightly dehydrate the very outer layer of the flesh, creating a perfect canvas for the thick pink glaze to adhere to.
Detailed Ingredients List
This recipe requires minimal ingredients, making it a perfect quick-prep dessert. Here is what you need:
- – Fresh Pineapple: One whole, ripe pineapple. Do not use canned pineapple, as it is far too wet and the texture is completely wrong for holding the heavy toppings. Look for a pineapple that yields slightly to a gentle squeeze and smells sweet at the base.
- – Pink Candy Melts or Icing: For the most opaque, firm, and glossy finish, pink candy melts (vanilla flavored) work brilliantly. Alternatively, a thick, high-quality pink royal icing or a stiff white chocolate ganache dyed pink can be used.
- – Crushed Hard Candies: This is where you get that beautiful “broken glass” look. You can use a mix of Jolly Ranchers, rock candy, or any brightly colored hard candies. Place them in a zip-top bag and smash them with a rolling pin or meat mallet until you have coarse, glittering chunks.
- – Coconut Oil (Optional): If using candy melts, a small teaspoon of coconut oil can help thin the melts to the perfect dipping consistency, making it smoother and glossier.
Step-by-Step Instructions
- Prep the Pineapple: Lay the whole pineapple on its side on a cutting board. Slice off the top crown and the bottom base. Stand the pineapple upright and carefully slice it in half straight down the middle. Cut each half into thick wedges (leaving the green rind attached for a natural “handle”). You should get about 8-10 good wedges depending on the size of the fruit.
- Dry the Wedges: This is the most important step. Lay the wedges on a baking sheet lined with paper towels. Take more paper towels and firmly dab all the exposed yellow flesh to remove surface juice. Let them air dry for 10 minutes, or pop them in the fridge for 20 minutes to dry out the surface further.
- Crush the Candy: While the pineapple dries, sort your hard candies by color or mix them up. Place them in a heavy-duty ziplock bag, seal it (pressing out the air), and cover it with a kitchen towel. Use a rolling pin to carefully smash the candies into small, jagged pieces. Transfer the crushed candy to a shallow dish.
- Melt the Glaze: If using candy melts, place them in a microwave-safe bowl. Heat at 50% power in 30-second intervals, stirring thoroughly between each interval, until completely smooth and liquid. If the mixture is too thick, stir in a tiny amount of coconut oil until it flows beautifully.
- Dip and Decorate: Take a dried pineapple wedge, holding it by the rind. Dip the top half or the flat face of the wedge directly into the pink glaze, or use a spoon to generously spread the glaze over the top surface. Let the excess drip off for a few seconds.
- Apply the Candy: Immediately, before the glaze has a chance to set, sprinkle a generous handful of the crushed colorful candies all over the wet pink surface. Press gently if needed to ensure they adhere.
- Set and Chill: Place the decorated wedge onto a parchment-lined baking sheet. Repeat with the remaining wedges. Transfer the entire baking sheet to the refrigerator for 10-15 minutes to allow the pink glaze to harden and set completely. Serve chilled!
Expert Tips and Troubleshooting
My glaze is sliding off: As mentioned above, your pineapple was too wet. If you are struggling, try dabbing the fruit with a tiny bit of cornstarch before applying the glaze; it acts as a moisture barrier.
The hard candy is melting: Hard candy is hygroscopic, meaning it absorbs moisture from the air and the fruit. Because of this, these treats are absolutely best enjoyed the same day they are made. If you leave them sitting out in a humid room or in the fridge overnight, the candy will begin to melt and bleed its colors.
Cutting the pineapple: Leave the rind on! Not only does it provide a beautiful visual contrast with the bright pink and yellow, but it acts as a built-in stick, making this a fun, mess-free finger food.
Flavor Variations and Customizations
Once you master the technique, you can customize this recipe for any holiday or theme:
Mermaid Tail Wedges: Use blue or purple candy melts for the glaze, and top with shimmering edible pearls, sanding sugar, and crushed teal rock candy.
Tropical Chocolate: Swap the pink glaze for rich dark chocolate. Instead of hard candy, top the wet chocolate with toasted shredded coconut, chopped macadamia nuts, and a sprinkle of flaky sea salt.
Spicy Margarita Pineapple: Dip the pineapple in a white lime-infused glaze, and top with a sprinkle of Tajin (chili-lime salt) and crushed clear rock candy.
Conclusion
These Candy-Coated Pink Glazed Pineapple Wedges are proof that food can be an absolute blast to create and eat. By combining the natural, refreshing tang of tropical fruit with the decadent, colorful crunch of the candy aisle, you are crafting a dessert that will bring a smile to anyone’s face. They are perfect for pool parties, birthdays, or just a fun afternoon project in the kitchen. Remember to dry your fruit thoroughly, work quickly with your glaze, and don’t hold back on the sprinkles. Enjoy your sweet, crunchy, juicy masterpiece!
Candy-Coated Pink Glazed Pineapple Wedges
Ingredients
Equipment
Method
- Slice the fresh pineapple into thick wedges, leaving the tough outer rind attached to act as a handle.
- Thoroughly pat the exposed flesh of the pineapple wedges dry with paper towels to remove surface moisture. For best results, let them air dry in the fridge for 20 minutes.
- Place hard candies in a heavy-duty sealed bag and crush them into coarse, sparkling chunks using a rolling pin.
- Melt the pink candy melts in the microwave at 50% power in 30-second bursts, stirring until smooth. Add a tiny bit of coconut oil if the mixture is too thick.
- Spoon or dip the pink glaze generously over the dried top surface of each pineapple wedge.
- Immediately sprinkle the crushed candies heavily over the wet pink glaze before it sets.
- Place the coated wedges on a parchment-lined tray and chill in the refrigerator for 10-15 minutes until the glaze is completely hardened. Serve the same day.