Perfect Boiled Eggs
The Ultimate Guide to Making the Perfect Boiled Eggs Every Time
Boiled eggs are one of the most fundamental building blocks of culinary arts, yet they are notoriously easy to get wrong. Whether you end up with a chalky, green-ringed yolk from overcooking or a whites-still-jiggly mess from undercooking, finding that sweet spot can feel like a guessing game. However, boiling an egg perfectly is not about luck; it is about science, timing, and technique. In this comprehensive guide, we will break down the exact steps to achieve the perfect boiled eggs, tailored exactly to your preference, from a slightly runny two-minute egg to a fully firm fourteen-minute egg.
Mastering the boiled egg opens up a world of culinary possibilities. A perfectly soft-boiled egg can elevate a bowl of homemade ramen, while a firm hard-boiled egg is the star of a classic potato salad, deviled eggs, or a simple, protein-packed snack. By following the cold-water start method outlined in this recipe, you will take the guesswork out of your morning routine and enjoy consistent, flawless results every single time.
Why the Cold Water Method Works Best
There is an ongoing debate in the culinary world between starting eggs in cold water versus dropping them into boiling water. The method we are focusing on today—the cold water start—is highly regarded for its gentle cooking process. By placing the eggs in cold water and bringing the temperature up gradually, the egg whites cook more evenly. This helps prevent the rubbery texture that can sometimes occur when eggs are shocked by immediately plunging them into violently boiling water.
Furthermore, the cold water method gives you an incredibly reliable baseline. You bring the water to a rolling boil, immediately remove it from the heat, and cover it. At this point, the residual heat of the water gently carries the eggs to your desired level of doneness. Because the water temperature slowly decreases over time, the cooking process is less aggressive, giving you a wider margin of error. If you leave a soft-boiled egg in for an extra 30 seconds using this method, it won’t ruin the yolk, whereas 30 seconds in continuously boiling water can drastically change the texture.
Understanding the Boiling Timeline: From 2 to 14 Minutes
The beauty of the perfect boiled egg is that “perfect” is entirely subjective. Let us explore exactly what happens inside the shell at each time interval after you remove the pot from the heat.
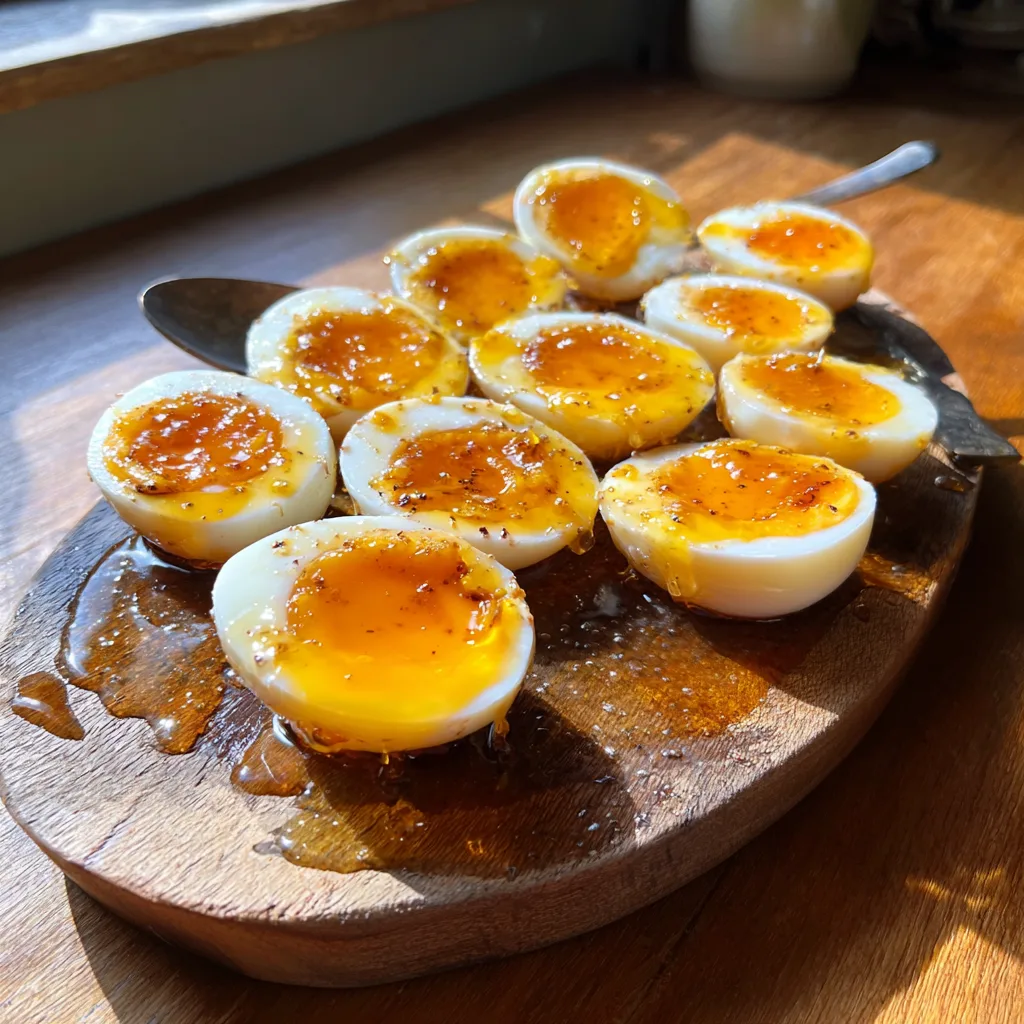
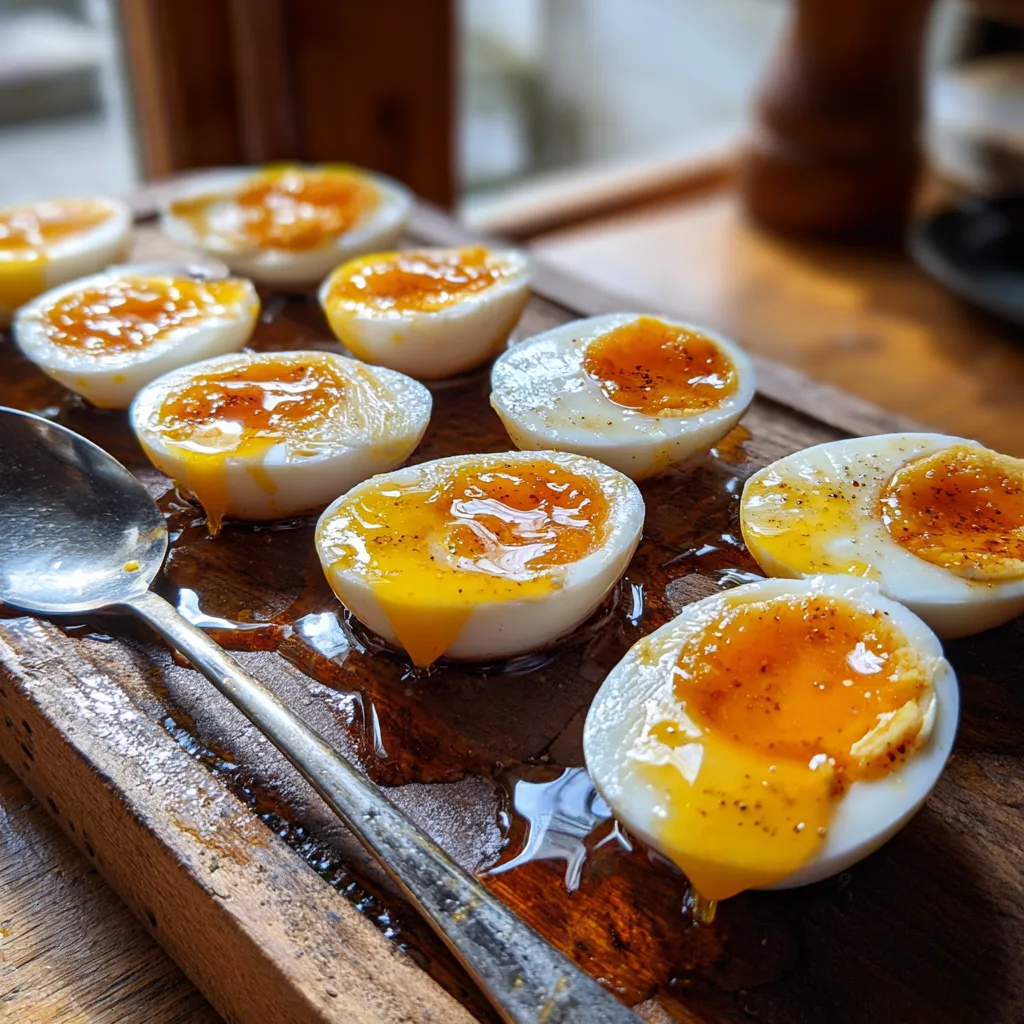
The 2-Minute Egg: At two minutes, the egg white is just barely set, and the yolk is completely liquid and warm. This is a very delicate stage, often enjoyed scooped right out of the shell with a piece of buttery toast. It is the ultimate runny egg.
The 4-Minute Egg: By four minutes, the whites have firmed up slightly more, but they still retain a very soft, custard-like texture. The yolk remains very runny and rich. This is an excellent choice for a classic British “egg and soldiers” breakfast.
The 6-Minute Egg: This is often considered the holy grail of boiled eggs—the jammy egg. At six minutes, the whites are completely set and opaque, while the yolk is thick, gooey, and spreadable like jam. It holds its shape but melts in your mouth. This is the ideal egg for topping avocado toast, grain bowls, or a steaming bowl of noodles.
The 8-Minute Egg: At eight minutes, we transition into medium-boiled territory. The yolk is mostly firm but retains a creamy, slightly soft center. It is not dry or crumbly in the slightest. This is perfect for those who want a firm egg but dislike the chalky texture of a fully hard-boiled yolk.
The 10-Minute Egg: Ten minutes yields a classic hard-boiled egg. The yolk is entirely firm and pale yellow throughout, but it still maintains a moistness. This timing is fantastic for slicing onto sandwiches or tossing into a hearty Cobb salad.
The 12-Minute Egg: At twelve minutes, the egg is very firm. The yolk is solid and lighter in color. This is the sweet spot for making egg salad or deviled eggs, where you need a yolk that can easily be mashed and mixed with mayonnaise and mustard without turning into a paste too quickly.
The 14-Minute Egg: Fourteen minutes is the maximum time you should leave your eggs in the hot water. The yolk is completely hard and slightly crumbly. It is essential to immediately plunge eggs cooked this long into an ice bath; otherwise, residual heat can overcook them, leading to that dreaded sulfuric green ring around the yolk.
Ingredients
The beauty of this recipe lies in its simplicity. You only need a few basic items to get started.
- – Fresh or slightly aged eggs (large size is standard for this timing)
- – Cold tap water (enough to cover the eggs by one inch)
- – Ice cubes (for the crucial cooling bath)
- – Cold water (for the ice bath)
Step-by-Step Instructions for Perfect Boiled Eggs
Follow these steps precisely to achieve the exact texture you desire, matching the timing chart discussed above.
- Place egg into a pot: Carefully arrange your eggs in a single layer at the bottom of a saucepan or pot. Do not stack them, as this can lead to uneven cooking and cracked shells.
- Cover egg with cold water: Fill the pot with cold tap water until the water level is about one inch above the tops of the eggs. Starting with cold water ensures even heating.
- Bring water to a boil: Place the pot on the stove over high heat. Watch the pot closely. You are looking for a full, rolling boil—large bubbles breaking the surface of the water rapidly.
- Take pot off heat and cover with lid: The moment the water reaches a rolling boil, immediately remove the pot from the heat source. Place a tight-fitting lid on the pot. Set your timer based on your desired doneness: Leave the egg in the covered pot for 2 to 14 minutes.
- Submerge egg in cold water: Once your timer goes off, use a slotted spoon to carefully remove the eggs from the hot water and immediately transfer them to a bowl filled with ice and cold water. Let them sit in the ice bath for at least 5 minutes to halt the cooking process and make peeling easier.
The Secret to Easy Peeling: The Ice Bath and Egg Age
There is nothing more frustrating than trying to peel a boiled egg only to have half the white cling desperately to the shell, leaving you with a mangled, unappetizing mess. The secret to a clean peel relies on two major factors: the ice bath and the age of the egg.
The ice bath, also known as shocking the eggs, is a non-negotiable step. When you plunge a hot egg into freezing water, the sudden temperature drop causes the egg white to contract slightly, pulling away from the inner membrane of the shell. It also immediately stops the cooking process, ensuring your 6-minute jammy egg doesn’t accidentally become an 8-minute medium egg while sitting on the counter.
Secondly, the age of the egg plays a massive role. Farm-fresh eggs are notoriously difficult to peel. This is because the albumen (the egg white) has a lower pH when fresh, which causes it to adhere tightly to the inner shell membrane during cooking. As an egg ages in your refrigerator, it loses carbon dioxide through the porous shell, which raises the pH of the white and makes it adhere less strongly. For the best peeling experience, try to use eggs that have been in your fridge for a week or two rather than ones you bought that very morning.
Tips and Tricks for the Best Results
Size Matters: The timings provided (2-14 minutes) are calibrated for standard Large eggs. If you are using Medium eggs, you will want to reduce the time slightly (by about a minute for hard-boiled). If you are using Jumbo eggs, you will need to add a minute or two to achieve the same results.
Altitude Adjustments: If you live at a high altitude, water boils at a lower temperature. Because of this, the residual heat method will cook the eggs more slowly. You may need to leave the eggs in the hot water for a few extra minutes depending on your elevation.
The Tap and Roll Method: When you are ready to peel, gently tap the egg on the counter to crack it all over. Then, gently roll the egg beneath the palm of your hand. This helps to separate the membrane from the egg white. Peeling under a gentle stream of cold running water can also help flush away tiny shell fragments.
Serving Suggestions and Variations
Boiled eggs are incredibly versatile. A simple sprinkle of flaky sea salt and freshly cracked black pepper is often all you need, but you can easily elevate them.
For a 6-minute soft-boiled egg, try marinating it. Peel the egg and submerge it in a mixture of soy sauce, mirin, and water for a few hours. The result is a savory, umami-rich “Ajitsuke Tamago,” perfect for ramen or eating on its own.
For 12 to 14-minute hard-boiled eggs, deviled eggs are a classic. Slice them in half, scoop out the yolks, and mash them with mayonnaise, Dijon mustard, a splash of vinegar, and a dash of hot sauce. Pipe the mixture back into the whites and garnish with smoked paprika or fresh chives.
You can also use hard-boiled eggs to add protein and richness to curries, slice them into gratins, or simply mash them on toast with a little butter and Marmite or Vegemite for a savory breakfast treat.
Nutritional Benefits of Boiled Eggs
Beyond being delicious and versatile, perfect boiled eggs are a nutritional powerhouse. They are often referred to as nature’s multivitamin. A single large boiled egg contains about 6 grams of high-quality protein and all nine essential amino acids. They are also an excellent source of choline, a nutrient that is vital for brain health and development, yet often lacking in the standard diet.
Furthermore, boiling is one of the healthiest ways to prepare eggs. Unlike frying or scrambling, boiling requires no additional fats or oils, keeping the calorie count low (around 70-80 calories per large egg) while maximizing the retention of nutrients like Vitamin B12, Vitamin D, and antioxidants like lutein and zeaxanthin, which are crucial for eye health.
Conclusion
Making the perfect boiled egg is a fundamental kitchen skill that will serve you well for a lifetime. By utilizing the cold-water start method, strictly managing your timing from 2 to 14 minutes, and never skipping the crucial ice bath, you can achieve the exact egg texture you desire with minimal effort. Whether you crave the runny richness of a soft-boiled egg or the firm reliability of a hard-boiled classic, the power is now in your hands. Happy boiling!
Perfect Boiled Eggs
Ingredients
Equipment
Method
- Place eggs in a single layer at the bottom of a pot.
- Cover the eggs with cold water, ensuring there is about an inch of water above the eggs.
- Place the pot on the stove over high heat and bring the water to a full, rolling boil.
- Immediately take the pot off the heat and cover it tightly with a lid.
- Leave the eggs in the covered pot for your desired time: 2 mins (very runny), 4 mins (runny), 6 mins (soft/jammy), 8 mins (medium soft), 10 mins (firm), 12 mins (hard boiled), or 14 mins (very hard boiled).
- Once the time is up, use a slotted spoon to remove the eggs and immediately submerge them in a bowl of cold water and ice.
- Let the eggs sit in the ice bath for at least 5 minutes before peeling.