Orange Vanilla Bean Cake
Orange Vanilla Bean Cake: The Ultimate Citrus and Spice Masterpiece
There is a certain undeniable magic that happens when you combine the bright, zesty notes of fresh citrus with the warm, comforting, and deeply aromatic profile of real vanilla bean. It is a flavor pairing that evokes nostalgic memories of childhood orange creamsicles, yet possesses a sophisticated elegance perfect for a centerpiece dessert. The Orange Vanilla Bean Cake is a triumph of baking—a delicate, tender, three-layer marvel that balances sweetness, acidity, and rich buttery goodness in every single bite. If you have been searching for the ultimate cake to impress at a birthday party, a spring baby shower, or a festive summer gathering, this vibrant and incredibly moist layer cake is your definitive answer.
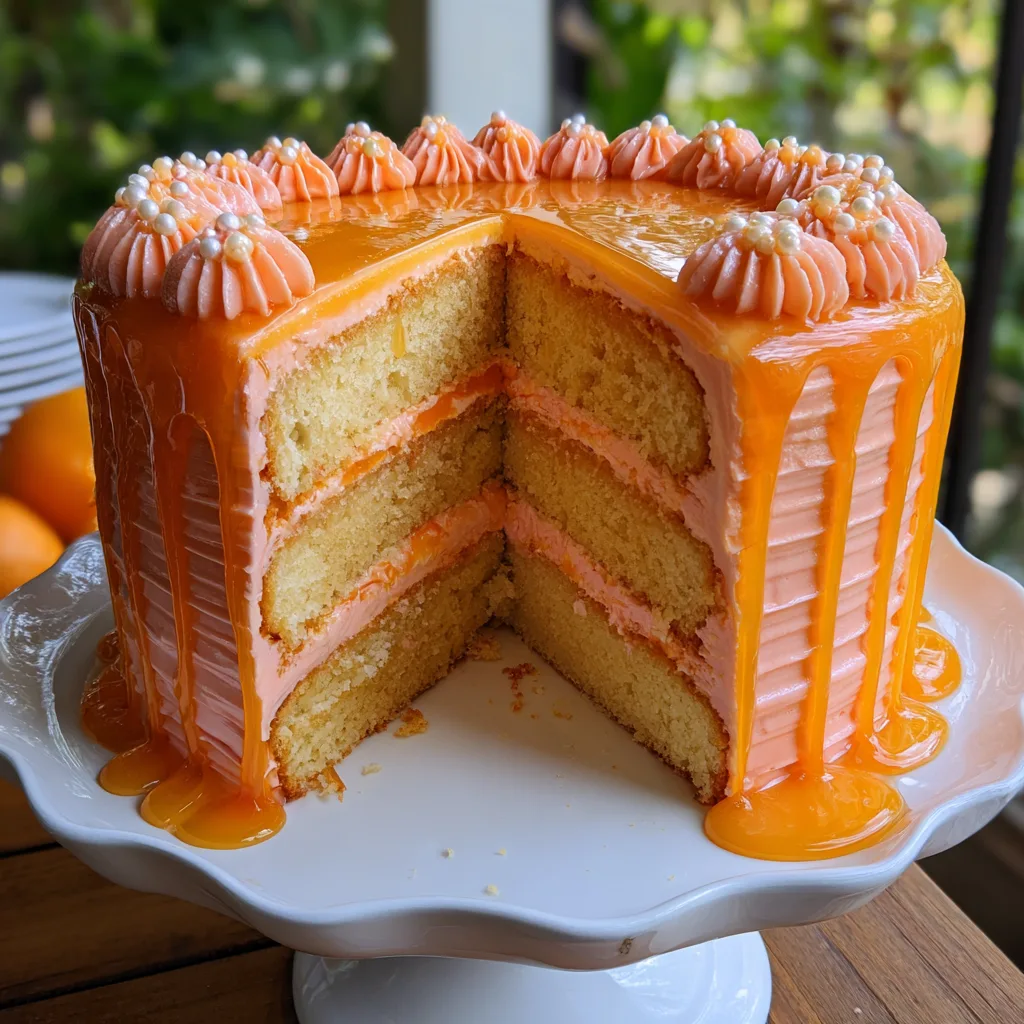
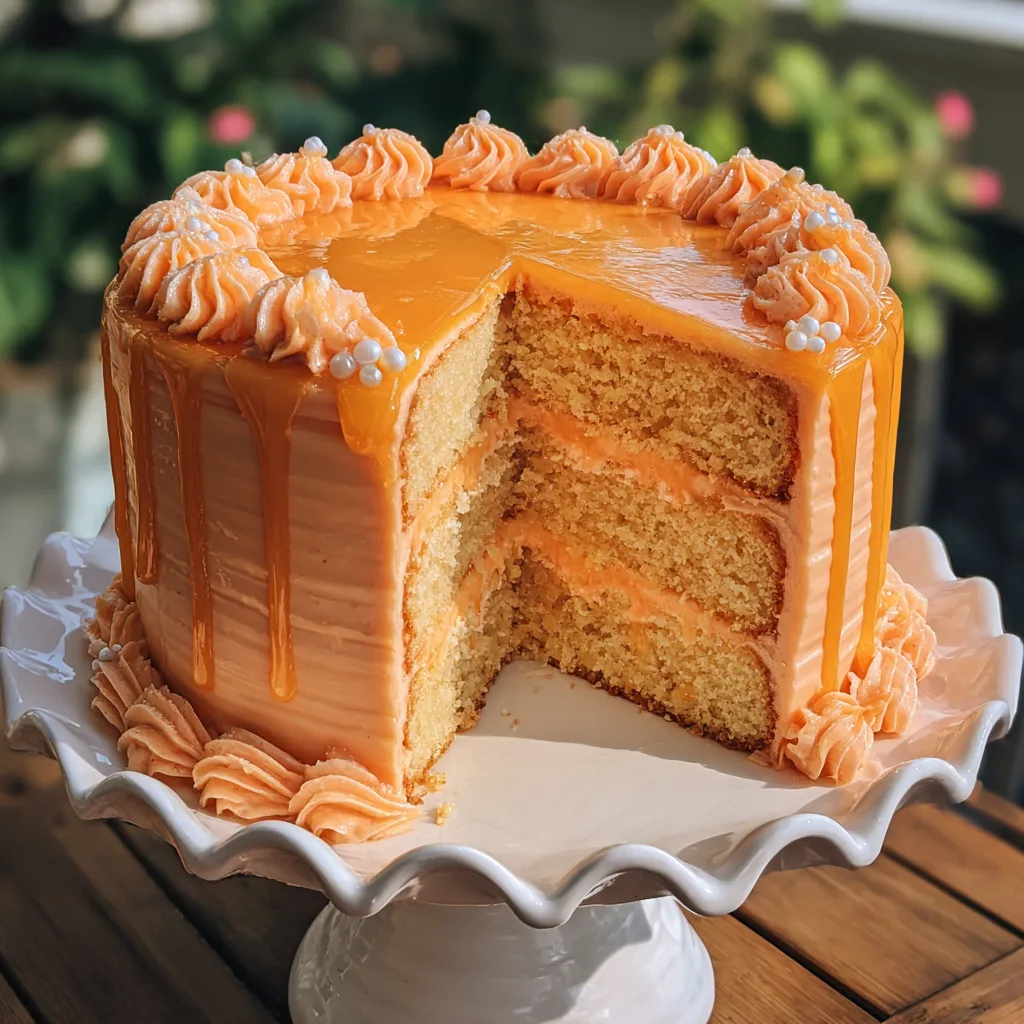
Creating a bakery-style layer cake at home might seem like a daunting task, but armed with the right techniques, high-quality ingredients, and a touch of patience, anyone can achieve a show-stopping result. This particular cake stands out not just for its phenomenal taste, but for its stunning visual appeal. The pale, sunny orange hue of the buttercream, textured with elegant horizontal ridges and bordered with classic piping, gives it a charming, slightly rustic, yet undeniably professional aesthetic. As you slice into it, the beautiful, even layers of sponge and frosting are revealed, promising a textural delight that melts in the mouth.
The Flavor Profile: Why Orange and Vanilla Work Perfectly Together
To understand why this cake is so universally loved, we have to delve into the science and psychology of its flavor profile. Orange and vanilla are complementary flavors that target different sensory receptors, creating a full-bodied tasting experience. Orange provides a high-pitched, vibrant burst of acidity and natural fruit sugar. The zest of the orange contains potent essential oils that deliver an intensely fragrant, floral aroma that immediately wakes up the palate.
Vanilla, specifically real vanilla bean, acts as the grounding bass note to the orange’s treble. Vanilla is comprised of hundreds of different flavor compounds, the most prominent being vanillin. It has an innate sweetness, earthy depth, and a creamy aroma that actually tricks the brain into perceiving the dessert as richer and more decadent than it is. When these two forces collide—the sharp, sunny citrus and the mellow, dark, floral spice—they neutralize any harsh edges in one another. The vanilla mellows the tartness of the orange, and the orange prevents the vanilla from becoming too cloying or heavy. The result is a beautifully rounded, creamy, and refreshing flavor that dances on the tongue.
The Secret to Perfect Cake Texture: The Power of Buttermilk
One of the most critical elements of a successful layer cake is its crumb texture. You want a cake that is sturdy enough to hold up to stacking and frosting, yet tender, moist, and delicate enough to melt in your mouth. The secret weapon in this Orange Vanilla Bean Cake is buttermilk.
Buttermilk is a slightly acidic dairy product. When introduced to a cake batter, its acidity reacts with the leavening agents (specifically baking soda), creating tiny bubbles of carbon dioxide that lift the batter and give the baked cake a wonderfully light, airy texture. Furthermore, the acid in the buttermilk actually breaks down the long strands of gluten in the flour. Gluten is what makes bread chewy, but in a cake, too much gluten development leads to a tough, dense sponge. By tenderizing the gluten, buttermilk ensures a softer, finer crumb. Lastly, the slight tang of the buttermilk enhances the citrus notes of the orange, providing a subtle complexity that regular whole milk simply cannot achieve.
The Importance of Real Vanilla Bean
While standard vanilla extract is a staple in any baker’s pantry, investing in real vanilla beans or high-quality vanilla bean paste is absolutely crucial for this specific recipe. The namesake of the cake demands it!
A fresh vanilla bean pod contains thousands of tiny, black seeds suspended in a sticky resin. These seeds are exploding with pure, unadulterated flavor. When you slice open a pod and scrape those seeds into your cake batter and your frosting, you are infusing the dessert with an unmatched depth of flavor. Additionally, those little black specks scattered throughout the light orange cake layers and the buttercream frosting serve as a visual indicator of quality. They tell anyone eating the cake that you spared no expense and used the real deal. If whole beans are too expensive or hard to find, vanilla bean paste is a phenomenal substitute. It contains the scraped seeds and real extract, providing both the flavor and the visual appeal.
Mastering the Citrus Elements: Fresh Oranges vs. Extracts
When baking a fruit-flavored cake, it is tempting to reach for a bottle of extract to save time. However, to achieve the authentic, bright flavor of this Orange Vanilla Bean Cake, relying on fresh fruit is non-negotiable.
The flavor of an orange lives in two places: the juice and the zest. The juice provides the sweetness, the acidity, and the liquid volume needed for the batter. The zest—the brightly colored outer layer of the peel—houses all the potent, volatile essential oils. To extract the maximum amount of flavor, always rub your fresh orange zest into your granulated sugar before you begin mixing your batter. Using your fingertips to massage the zest into the sugar releases the oils, turning the sugar a pale yellow and perfuming the entire kitchen. This ensures the orange flavor is evenly distributed throughout every single crumb of the cake.
We do use a tiny dash of high-quality orange extract in the buttercream, simply because adding too much liquid orange juice to a butter-based frosting can cause it to curdle or separate. The extract provides a concentrated punch of flavor that stabilizes the frosting perfectly.
Ingredients Breakdown
For the best results, ensure all your refrigerated ingredients—especially the butter, eggs, and buttermilk—are at room temperature before you begin. This allows them to emulsify properly, creating a smooth, even batter.
- – 3 cups Cake Flour (sifted for an extra light texture)
- – 2 teaspoons Baking Powder
- – 1/2 teaspoon Baking Soda
- – 1 teaspoon Fine Sea Salt
- – 1 cup Unsalted Butter (softened to room temperature)
- – 2 cups Granulated Sugar
- – 2 tablespoons Fresh Orange Zest (from about 2 large oranges)
- – 4 Large Eggs (room temperature)
- – 1 whole Vanilla Bean (split and scraped) or 1 tablespoon Vanilla Bean Paste
- – 1/2 cup Freshly Squeezed Orange Juice
- – 1/2 cup Buttermilk (room temperature)
- – For the Orange Vanilla Buttercream:
- – 1 1/2 cups Unsalted Butter (softened, 3 sticks)
- – 5 to 6 cups Powdered Sugar (sifted)
- – 1/4 cup Freshly Squeezed Orange Juice
- – 1 teaspoon Orange Extract
- – 1 tablespoon Vanilla Bean Paste
- – A tiny drop of orange gel food coloring (optional, for vibrancy)
Step-by-Step Baking Instructions
Baking is a science, and following the steps in the correct order guarantees success. Prepare your pans thoroughly by greasing them, lining the bottoms with parchment paper rounds, and flouring the sides. This ensures your beautiful cakes will release perfectly without tearing.
- Prepare the Oven and Pans: Preheat your oven to 350°F (175°C). Prepare three 8-inch round cake pans with non-stick baking spray and parchment paper.
- Infuse the Sugar: In the bowl of your stand mixer, combine the granulated sugar and the fresh orange zest. Use your clean fingers to rub the zest into the sugar for about two minutes until it becomes incredibly fragrant and resembles wet sand.
- Cream the Butter and Sugar: Add the softened room-temperature butter to the infused sugar. Attach the paddle attachment and beat on medium-high speed for 4 to 5 minutes until the mixture is very pale, light, and fluffy. Do not rush this step; aerating the butter is crucial for a light cake.
- Add Eggs and Vanilla: Turn the mixer down to medium speed. Add the room-temperature eggs one at a time, ensuring each egg is fully incorporated before adding the next. Scrape down the sides and bottom of the bowl with a rubber spatula. Mix in the scraped vanilla bean seeds (or vanilla bean paste).
- Combine Dry and Wet Ingredients: In a separate medium bowl, whisk together the sifted cake flour, baking powder, baking soda, and salt. In a small measuring cup, combine the buttermilk and the fresh orange juice.
- Alternate Additions: With the mixer on low speed, add the dry ingredients in three parts, alternating with the wet ingredients in two parts (begin and end with the dry ingredients). Mix just until the last streaks of flour disappear. Overmixing will result in a dense cake!
- Bake: Divide the batter evenly among the three prepared cake pans. Smooth the tops with a spatula. Bake in the preheated oven for 25 to 30 minutes, or until a toothpick inserted into the center of the cakes comes out clean or with a few moist crumbs.
- Cool: Allow the cakes to cool in their pans for 10 minutes before turning them out onto wire cooling racks to cool completely. Never frost a warm cake!
Crafting the Orange Vanilla Buttercream
While the cakes are cooling, prepare the buttercream. The key to a silky smooth buttercream is whipping the butter extensively before adding any sugar.
In a stand mixer fitted with the paddle attachment, beat the softened butter on medium-high speed for 5 full minutes until it is almost white in color and very creamy. Reduce the speed to low and gradually add the sifted powdered sugar, one cup at a time. Once all the sugar is incorporated, add the fresh orange juice, orange extract, and vanilla bean paste. If you want a slightly more vibrant orange color to match the citrus flavor, add a tiny drop of orange gel food coloring now. Turn the mixer back up to medium-high and whip for another 3 to 4 minutes until the frosting is light, airy, and incredibly smooth. If it feels too stiff, add another splash of orange juice. If it feels too loose, add a bit more powdered sugar.
Assembling and Decorating: Achieving That Beautiful Rustic Look
To recreate the beautiful bakery-style look of this Orange Vanilla Bean Cake, you will need a rotating cake turntable, an offset spatula, and an icing comb or a decorating triangle with teeth.
Place the first cooled cake layer on your serving platter or cake board. Spread an even layer of frosting (about 3/4 cup) over the top. Place the second layer on top and repeat. Finally, place the third layer on top, bottom-side up (this gives you a perfectly flat top for your cake).
First, apply a “crumb coat”—a very thin layer of frosting all over the outside of the cake. This traps any loose crumbs. Chill the cake in the refrigerator for 20 minutes to let the crumb coat set. Once chilled, apply a generous, thick layer of frosting all over the top and sides of the cake.
To create the elegant horizontal ridges shown in the image, hold your icing comb or a textured cake scraper flat against the side of the cake. Keep your hand steady and slowly rotate the turntable, dragging the comb through the frosting to create continuous, even horizontal lines. For the top, you can use the tip of an offset spatula, starting from the outside edge and spiraling inward while turning the table, to create a beautiful swirl effect. Finally, fit a piping bag with a small star tip or round tip and pipe a classic shell border around the bottom base of the cake, and a delicate drop border around the top edge.
Pro Tips for Baking Layer Cakes
Baking layer cakes can be intimidating, but these pro tips will ensure your success every time.
Weigh Your Ingredients: Using a digital kitchen scale is the most accurate way to bake. Measuring flour by volume (cups) is wildly inaccurate, as flour can pack down in the cup, leading to a dry cake.
Use Bake Even Strips: If you find that your cakes always dome in the middle and you have to trim away a lot of cake to level them, try using fabric bake-even strips. You soak them in water and wrap them around the outside of the cake pans before baking. They keep the edges of the pan cool, allowing the cake to bake flat and evenly.
Do Not Rush the Cooling: Attempting to frost a cake that is even slightly warm will melt the butter in your frosting, resulting in a structural collapse and a soupy mess. Patience is key. If you are in a rush, you can place the slightly cooled cakes in the freezer for 20 minutes to speed up the process.
Storage and Freezing Instructions
This Orange Vanilla Bean Cake is wonderfully moist and will keep very well. Store the frosted cake at room temperature in a cake dome or an airtight container for up to 3 days. Because the frosting acts as a seal, the interior cake layers will remain incredibly soft and tender.
If you need to make the cake ahead of time, the unfrosted cake layers freeze beautifully. Wrap each completely cooled layer tightly in two layers of plastic wrap, followed by a layer of aluminum foil. Freeze for up to 2 months. You can actually frost the cakes while they are still frozen; it makes them much easier to handle and prevents crumbing! Simply let the assembled, frosted cake sit at room temperature for a couple of hours to thaw completely before serving.
Conclusion
The Orange Vanilla Bean Cake is a testament to the beauty of thoughtful flavor pairing and careful baking techniques. From the zest-infused sugar that perfumes the sponge to the luxurious, seed-speckled vanilla and orange buttercream, every single element of this dessert works in perfect harmony. It is a cake that looks as stunning on a dessert table as it tastes on the palate. By following this detailed guide, taking your time with the butter creaming process, and embracing the fun of decorating, you will produce a layer cake that rivals any high-end bakery. Slice generously, serve with a cup of hot tea or coffee, and prepare to receive endless compliments from your guests!
Orange Vanilla Bean Cake
Ingredients
Equipment
Method
- Preheat oven to 350°F (175°C). Grease and line three 8-inch round cake pans with parchment paper.
- In a large bowl, rub the fresh orange zest into the granulated sugar with your fingers until fragrant. Add softened butter and beat for 4-5 minutes until light and fluffy.
- Add eggs one at a time, mixing well after each addition. Mix in the vanilla bean paste.
- In a separate bowl, whisk together cake flour, baking powder, baking soda, and salt. Combine buttermilk and orange juice in a measuring cup.
- Alternate adding the dry and wet ingredients to the butter mixture, beginning and ending with the dry ingredients. Mix just until combined.
- Divide batter evenly among pans. Bake for 25-30 minutes until a toothpick inserted comes out clean. Cool completely on wire racks.
- Make the frosting: Beat softened butter for 5 minutes until pale. Gradually add powdered sugar, mixing on low. Add orange juice, orange extract, and vanilla bean paste. Whip on medium-high until fluffy.
- Assemble the cake: Layer the cooled cakes with frosting. Apply a thick layer of frosting to the outside. Use an icing comb to create horizontal ridges on the sides and pipe a decorative border along the top and bottom.