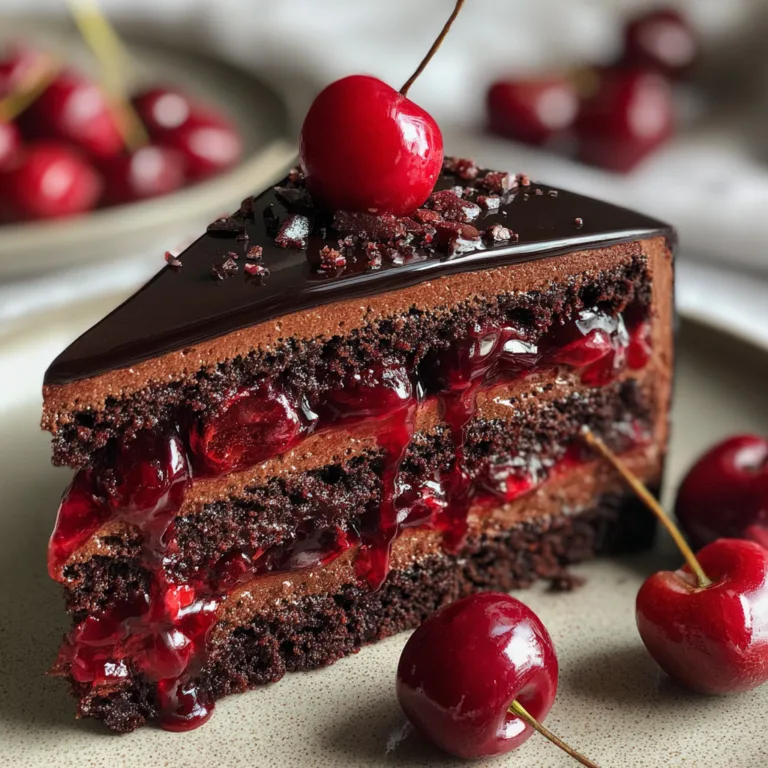
Millionaires Shortbread Bars
The Ultimate Millionaire’s Shortbread Bars: A Comprehensive Guide to Layered Perfection
Welcome to the ultimate guide for making the most decadent, drool-worthy Millionaire’s Shortbread Bars you will ever taste. If you have ever found yourself staring longingly at those perfectly layered caramel and chocolate treats in a bakery window, you are in the right place. This recipe will guide you through creating a buttery, crumbly base, a rich, gooey caramel center, and a crisp, glossy chocolate topping—all from the comfort of your own kitchen.

What is Millionaire’s Shortbread?
Millionaire’s Shortbread, sometimes known as caramel shortbread, caramel squares, or homemade Twix bars, is a classic confection that originated in Scotland. The “millionaire” moniker is a nod to how incredibly rich and indulgent the dessert is compared to standard, everyday shortbread. It takes a humble, classic cookie and elevates it into a triple-layered masterpiece. The magic lies in the contrast of textures: the snap of the chocolate, the chew of the sweet caramel, and the melt-in-your-mouth crumble of the buttery biscuit base.
While it might seem intimidating to make three distinct layers from scratch, the process is actually surprisingly straightforward when broken down. This comprehensive guide is designed to remove the guesswork, providing you with all the tips, tricks, and scientific know-how to achieve bakery-quality results every single time.
The Anatomy of the Perfect Bar
To truly master this recipe, it helps to understand the role of each layer. A great Millionaire’s Shortbread is an exercise in balance. If the base is too hard, the bar is difficult to eat. If the caramel is too soft, the whole thing falls apart. If the chocolate is too thick, it overpowers the delicate flavors beneath it.
1. The Buttery Shortbread Base
The foundation of our bar is a classic shortbread. Unlike a cookie dough that uses leavening agents like baking soda or baking powder, shortbread relies purely on the magical trio of butter, sugar, and flour. The absence of liquid (other than the fat in the butter) and eggs ensures a tender, crumbly texture rather than a cakey one. We use a generous amount of butter to ensure it is rich enough to stand up to the heavy toppings.
2. The Gooey Caramel Filling
This is where the magic happens. Making caramel from scratch can be daunting, but this recipe utilizes sweetened condensed milk, which acts as a foolproof shortcut. When boiled with butter, sugar, and a touch of golden syrup (or corn syrup), the condensed milk transforms into a thick, fudgy caramel that holds its shape perfectly when cut, yet remains soft and luscious when bitten into. The key here is patience and constant stirring to prevent the sugars from scorching on the bottom of the pan.
3. The Rich Chocolate Topping
The crowning glory. We recommend using a high-quality semi-sweet or dark chocolate (around 60% to 70% cocoa). The slight bitterness of the dark chocolate beautifully cuts through the intense sweetness of the caramel layer. A touch of neutral oil or butter mixed into the melted chocolate helps prevent it from cracking completely when you slice the bars, ensuring clean, professional-looking cuts.
Ingredients You Will Need
For the Shortbread Base:
- – 1 cup (226g) unsalted butter, softened to room temperature
- – 1/2 cup (100g) granulated sugar
- – 2 cups (250g) all-purpose flour
- – 1/4 teaspoon salt
For the Caramel Layer:
- – 1 cup (226g) unsalted butter
- – 1/2 cup (100g) packed light brown sugar
- – 1/4 cup (60ml) golden syrup or light corn syrup
- – 1 can (14 oz) sweetened condensed milk
- – 1/2 teaspoon pure vanilla extract
- – 1/2 teaspoon flaky sea salt (optional, for flavor balance)
For the Chocolate Topping:
- – 10 oz (280g) high-quality semi-sweet or dark chocolate, chopped
- – 1 tablespoon coconut oil or unsalted butter (for smoother slicing)
Step-by-Step Instructions
Step 1: Prep and Bake the Base
- Preheat your oven: Set your oven to 350°F (175°C). Line a 9×9-inch square baking pan with parchment paper, leaving enough overhang on the sides so you can easily lift the bars out later.
- Cream the butter and sugar: In a large mixing bowl, use a hand mixer or stand mixer to beat the softened butter and granulated sugar together until pale and creamy (about 2-3 minutes).
- Add the dry ingredients: Gradually add the all-purpose flour and salt. Mix on low speed just until the dough comes together. It will look crumbly, but should hold together when you squeeze it in your hand.
- Press into the pan: Transfer the dough to your prepared baking pan. Use your hands or the back of a measuring cup to press the dough into an even, tight layer. Prick the dough all over with a fork to prevent it from puffing up.
- Bake: Bake for 20-25 minutes, or until the edges are a light golden brown. Remove from the oven and let it cool completely in the pan while you make the caramel.
Step 2: Master the Caramel Layer
- Combine ingredients: In a medium-sized, heavy-bottomed saucepan, combine the butter, brown sugar, golden syrup (or corn syrup), and sweetened condensed milk.
- Melt gently: Place the saucepan over medium-low heat. Stir continuously with a silicone spatula or wooden spoon until the butter is completely melted and the sugar has dissolved.
- Bring to a boil: Turn the heat up slightly to medium. Bring the mixture to a gentle boil, stirring constantly. This is crucial—do not walk away! The mixture burns very easily.
- Boil and thicken: Once it boils, reduce the heat to medium-low and continue to cook and stir vigorously for about 5 to 7 minutes. The caramel will darken slightly and thicken significantly. It is ready when it pulls away from the sides of the pan slightly as you stir.
- Add flavorings: Remove the pan from the heat immediately. Vigorously stir in the vanilla extract and flaky sea salt.
- Pour over the base: Pour the hot caramel directly over the cooled shortbread base. Use a spatula to smooth it into an even layer. Let it set at room temperature for about 1 hour, or chill in the refrigerator for 30 minutes until firm to the touch.
Step 3: Add the Chocolate Crowning Glory
- Melt the chocolate: Place the chopped chocolate and coconut oil (or butter) in a microwave-safe bowl. Heat in 30-second increments, stirring well after each burst, until completely melted and smooth. Alternatively, use a double boiler on the stove.
- Pour and spread: Pour the glossy melted chocolate over the set caramel layer. Tilt the pan or use an offset spatula to spread the chocolate into an even layer all the way to the edges.
- Chill to set: Place the pan in the refrigerator for about 1-2 hours, or until the chocolate is completely set and firm.
Pro Tips for Flawless Slicing
The most common struggle with Millionaire’s Shortbread is cutting it without the chocolate cracking and squishing the caramel out the sides. Here is the professional secret to getting those perfect, sharp bakery edges:
- Temperature is key: Before slicing, let the pan sit at room temperature for about 10-15 minutes after taking it out of the fridge. The chocolate needs to lose its hard chill, otherwise it will shatter under the knife.
- The hot knife trick: Fill a tall jug with boiling water. Dip a large, sharp chef’s knife into the hot water for 15 seconds. Wipe it completely dry with a towel, then make your slice. The heat of the knife will melt cleanly through the chocolate layer rather than breaking it.
- Clean between cuts: Wipe the knife clean and re-dip it in the hot water before every single cut. It takes a little extra time, but the pristine edges are worth it.
Creative Variations to Try
Once you have mastered the classic recipe, feel free to get creative with your flavors!
- White Chocolate Swirl: Melt a few ounces of white chocolate and dollop it over the wet dark chocolate layer. Use a toothpick or skewer to swirl them together for a beautiful marbled effect.
- Salted Pretzel Base: Crush up salted pretzels and mix them into the shortbread dough for a fantastic sweet-and-salty crunch.
- Espresso Caramel: Stir a teaspoon of instant espresso powder into the caramel mixture while it’s boiling to give the bars a rich, coffee-house twist.
Storage and Freezing Instructions
Millionaire’s shortbread keeps incredibly well, making it the perfect make-ahead dessert for holidays, bake sales, or simply keeping a stash for yourself.
Room Temperature: Store the sliced bars in an airtight container at room temperature for up to 5 days. Keep them in a cool, dry place away from direct sunlight so the chocolate doesn’t melt.
Refrigerator: For a longer shelf life (and a firmer, chewier texture), store them in the fridge for up to 2 weeks.
Freezing: These bars freeze beautifully! Wrap individual squares tightly in plastic wrap, then place them in a freezer-safe ziplock bag or container. They will keep in the freezer for up to 3 months. Thaw them overnight in the refrigerator or let them sit at room temperature for an hour before eating.

Why This Recipe Works
This recipe has been meticulously tested to ensure foolproof results. The ratio of butter to flour in the base ensures it doesn’t crumble away entirely upon the first bite. The addition of golden syrup in the caramel is a critical scientific step; it is an invert sugar, which prevents the regular sugar from crystallizing, ensuring your caramel stays perfectly smooth and fudgy rather than grainy. Finally, the tiny addition of coconut oil to the chocolate topping slightly lowers its melting point, providing just enough flexibility to prevent catastrophic cracking when you go to cut your masterpiece.
Enjoy the process of making these layered delights. Take your time with the caramel, enjoy the aroma of the baking shortbread, and savor that first, perfect bite.
Millionaire’s Shortbread Bars
Ingredients
Equipment
Method
- Preheat oven to 350°F (175°C). Line a 9×9-inch baking pan with parchment paper, leaving an overhang.
- In a bowl, cream 1 cup softened butter and granulated sugar until pale. Gradually mix in the flour and salt until a crumbly dough forms.
- Press the dough evenly into the prepared pan. Prick all over with a fork. Bake for 20-25 minutes until light golden brown. Let cool completely.
- In a heavy saucepan, combine 1 cup butter, brown sugar, golden syrup, and condensed milk over medium-low heat until melted and smooth.
- Bring to a gentle boil over medium heat, stirring constantly. Reduce heat to medium-low and boil, stirring continuously, for 5-7 minutes until thickened.
- Remove from heat, stir in vanilla and sea salt. Pour immediately over the cooled shortbread base. Let set for 1 hour at room temp or 30 mins in the fridge.
- Melt the chopped chocolate and coconut oil in the microwave in 30-second increments, stirring until smooth.
- Pour the melted chocolate over the set caramel and spread evenly. Chill in the refrigerator for 1-2 hours until set.
- Let sit at room temperature for 10 minutes before slicing. Use a hot, dry knife for clean cuts.