Huli Huli Chicken
Fast & Easy Hawaiian Huli Huli Chicken: The Ultimate Sticky Glazed Dinner
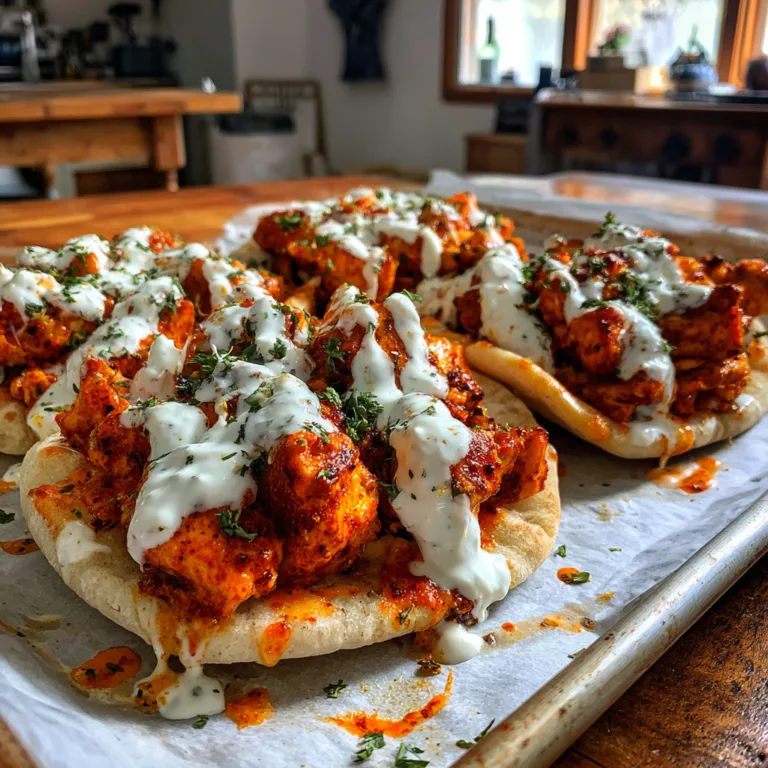
If there is one dish that perfectly captures the spirit of the islands while being incredibly accessible for a weeknight dinner, it is Hawaiian Huli Huli Chicken. Looking at the photo of these glistening, sauce-drenched bites of chicken, you can almost smell the caramelized ginger and sweet pineapple aroma wafting through the screen. This isn’t just barbecue chicken; it is a sensory experience of sticky, sweet, savory, and tangy flavors all fighting for dominance on your palate.
The term “Huli” literally translates to “turn” in Hawaiian. Traditionally, this dish involves whole chickens being turned constantly on a spit grill over mesquite wood, basted repeatedly with a magical sauce until the skin is crispy and the meat is juicy. However, for the modern home cook who wants that flavor without building a fire pit in the backyard, we have adapted this into a “Fast & Easy” stove-top or oven-broiled version using bite-sized chunks. This method ensures maximum surface area for that incredible glaze to cling to, resulting in the ultra-shiny, liquid-glass finish you see in the photos.
This comprehensive guide will walk you through everything you need to know to recreate this restaurant-quality meal at home. From selecting the right cut of chicken to mastering the thickening of the sauce, we have you covered. Let’s dive into a tropical culinary adventure.
Why This Recipe Works
There are a million chicken recipes out there, so why should this one move to the top of your rotation? The secret lies in the balance of the sauce. Huli Huli sauce is a cousin to Teriyaki but with a distinctly Hawaiian personality. It usually incorporates pineapple juice, ketchup, soy sauce, ginger, and garlic. The pineapple juice provides an enzyme called bromelain, which acts as a natural meat tenderizer, ensuring your chicken is melt-in-the-mouth soft.
Furthermore, by cutting the chicken into cubes before cooking (as seen in the image), we reduce the cooking time significantly. Whole chicken breasts or thighs can take 20-30 minutes to cook through. These bite-sized morsels are done in under 10 minutes, leaving you plenty of time to focus on reducing that sauce into a sticky, mirror-like glaze.

Ingredients You Will Need
To achieve that authentic flavor profile, you need the right building blocks. Here is your shopping list:
The Protein
- Boneless, Skinless Chicken Thighs (2 lbs): – Thighs are highly recommended over breasts because they remain juicy even under high heat and have a richer flavor that stands up to the bold sauce. If you prefer breast meat, just be careful not to overcook it.
The Huli Huli Sauce
- Pineapple Juice (1 cup): – Canned is fine, but fresh is best. This is the base of the sweetness and acidity.
- Soy Sauce (1/2 cup): – Use a low-sodium version so you can control the salt level, or standard Tamari for a gluten-free option.
- Brown Sugar (1/2 cup, packed): – Dark brown sugar adds more molasses flavor, which contributes to the deep amber color of the glaze.
- Ketchup (1/3 cup): – It sounds unusual, but ketchup adds body, vinegar acidity, and color to the sauce. It is a staple in Huli Huli recipes.
- Chicken Broth (1/4 cup): – To balance the intensity of the soy and sugar.
- Fresh Ginger (1 tbsp, grated): – Do not use powder here; fresh ginger provides a spicy kick that cuts through the sugar.
- Garlic (4 cloves, minced): – Essential for the savory backbone of the dish.
- Sesame Oil (1 tsp): – A little goes a long way for that nutty finish.
- Cornstarch Slurry (1 tbsp cornstarch + 1 tbsp water): – Optional, but recommended if you want the sauce to be thick and sticky like the photo.
Garnish (Optional)
- Green Onions: – Thinly sliced for a pop of fresh green color.
- Sesame Seeds: – Toasted seeds add texture and visual appeal.
Step-by-Step Instructions
Follow these steps to get that perfect “wet and glistening” look where the sauce clings to the meat.
1. Prepare the Chicken
Pat the chicken thighs dry with paper towels. This removes excess moisture and helps them brown better. Cut the chicken into 1.5-inch bite-sized chunks. Place them in a large bowl.
2. Make the Marinade/Sauce
In a medium mixing bowl, whisk together the pineapple juice, soy sauce, brown sugar, ketchup, chicken broth, grated ginger, minced garlic, and sesame oil. Whisk until the sugar has largely dissolved.
3. Marinate
Pour about 1/2 cup of the sauce over the chicken chunks. Toss to coat evenly. Let it marinate for at least 30 minutes in the fridge, or up to 8 hours. Reserve the rest of the sauce for cooking—this is crucial!
4. Sear the Chicken
Heat a large skillet or wok over medium-high heat. Add a splash of neutral oil (vegetable or canola). Once hot, add the chicken pieces in a single layer. Do not overcrowd the pan; work in batches if necessary. Sear for 3-4 minutes on one side until browned and caramelized, then flip and cook for another 2-3 minutes. Remove chicken from the pan and set aside.
5. Thicken the Glaze
Pour the reserved sauce (the portion that did not touch the raw chicken) into the hot skillet. Bring it to a boil. Reduce heat to medium-low and let it simmer for 5 minutes. If you want it ultra-thick like the photo, stir in your cornstarch slurry now. Whisk constantly until the sauce thickens into a syrup consistency that coats the back of a spoon.
6. Combine and Serve
Toss the cooked chicken back into the skillet with the thickened glaze. Stir well to coat every single piece. Let it bubble together for 1 minute so the chicken heats through and the glaze bonds to the meat. The chicken should look like it has been dipped in liquid glass. Transfer to a serving platter immediately.
Tips for the Perfect Glaze
The “Candy” Stage: When reducing your sauce, keep a close eye on it. Because of the high sugar content from the pineapple and brown sugar, it can go from caramelized to burnt quickly. You want it to reach a stage where it bubbles slowly and looks glossy.
Don’t Skip the Sear: The dark spots on the chicken in the image are flavor. You get this by searing the chicken before adding the sauce. If you boil the chicken in the sauce from the start, you lose that texture.
Room Temperature Pineapple: If using fresh pineapple juice, be aware that the enzymes are very strong. Do not marinate for more than 24 hours, or the texture of the chicken can become mushy.
Variations to Try
While the classic recipe is a crowd-pleaser, you can easily tweak it to suit your taste:
- Spicy Huli Huli: Add 1 tablespoon of Sriracha or a teaspoon of red pepper flakes to the sauce for a “Swicy” (Sweet + Spicy) kick.
- Grill Master Version: Instead of cutting the chicken into chunks, leave the thighs whole. Marinate them, then grill over medium heat, basting with the thickened sauce every few minutes until done.
- Slow Cooker Method: Place chicken and sauce in a slow cooker on LOW for 4 hours. Remove chicken, thicken sauce in a saucepan with cornstarch, and pour back over. (Note: This won’t have the crispy edges).
Serving Suggestions
To make this a complete Hawaiian plate lunch experience, consider these sides:
1. Macaroni Salad: The creamy, tangy mayo-based pasta salad is the traditional partner to the sweet sticky chicken. It balances the palate perfectly.
2. Steamed White Rice: Essential for soaking up that extra sauce pooling at the bottom of the plate.
3. Grilled Pineapple: Slices of grilled pineapple add a nice acidic freshness to cut through the richness of the glaze.
4. Stir-Fried Veggies: Broccoli, bell peppers, or snap peas tossed in the same wok after the chicken is done makes for a quick veggie side.

Storage and Reheating
Fridge: Store leftovers in an airtight container for up to 3 days. The sauce will thicken significantly in the fridge.
Freezer: You can freeze the cooked chicken in the sauce for up to 3 months.
Reheating: Reheat in a skillet over medium heat with a splash of water to loosen the sauce. Microwaving is okay, but it may make the texture slightly rubbery.
Fun Facts: The History of Huli Huli
Huli Huli Chicken was created in 1955 by Ernest Morgado of Pacific Poultry. He served it at a farmers gathering, and it became an instant hit. The name came from the method of cooking; because the racks of chicken had to be flipped, onlookers would shout “Huli!” (turn) when it was time to rotate the spit. Morgado actually trademarked the name “Huli-Huli,” which is why you will often see it spelled slightly differently or called “Hawaiian Style Chicken” at various stands, though the flavor profile remains a beloved island staple.
Enjoy this taste of Aloha right in your own kitchen!
Hawaiian Huli Huli Chicken
Ingredients
Equipment
Method
- Cut chicken thighs into bite-sized 1.5-inch pieces and pat dry.
- In a bowl, whisk together pineapple juice, soy sauce, brown sugar, ketchup, broth, ginger, garlic, and sesame oil.
- Marinate the chicken in 1/2 cup of the sauce for at least 30 minutes. Reserve the remaining sauce.
- Heat oil in a large skillet over medium-high heat. Sear chicken in batches until browned and cooked through (about 6-8 mins). Remove chicken.
- Pour the reserved sauce into the hot skillet. Simmer for 5 minutes. Stir in cornstarch slurry if a thicker glaze is desired.
- Add chicken back into the pan, tossing to coat heavily in the glaze. Serve immediately.