Galaxy Mirror Glaze Donuts
Ultra-Glossy Baked Galaxy Mirror Glaze Donuts: A Cosmic Treat
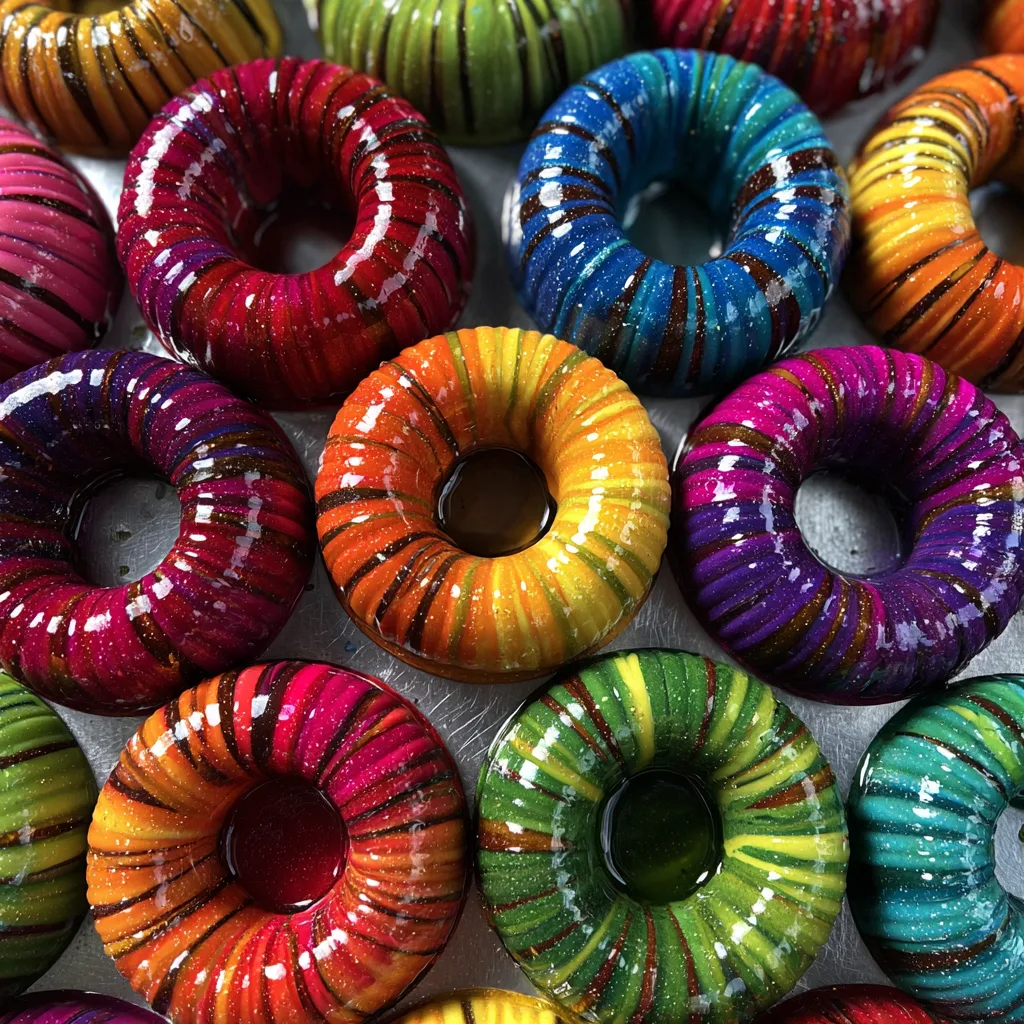
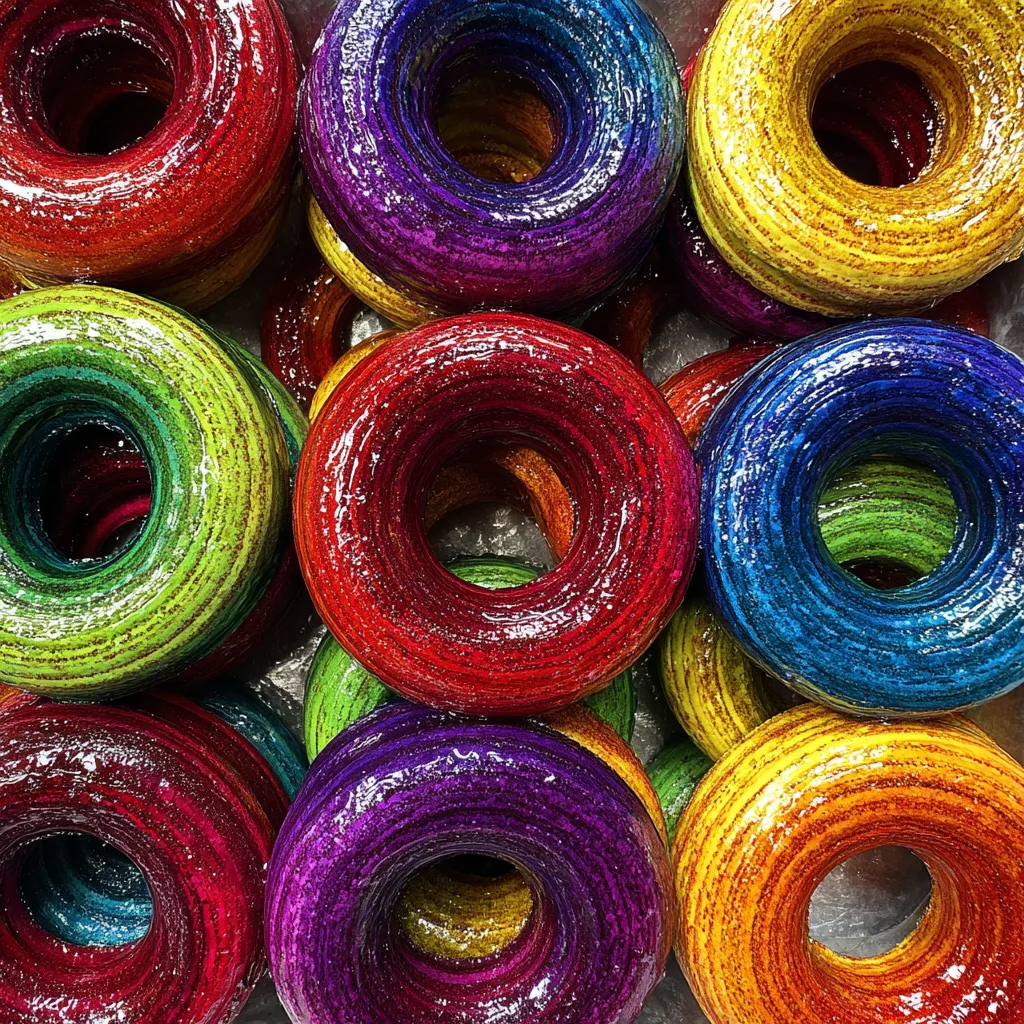
If there is one dessert that stops the scroll on social media every single time, it is the galaxy mirror glaze donut. With their mesmerizing swirls of deep purple, vibrant teal, cosmic orange, and interstellar magenta, these donuts look less like food and more like edible art. But here is the secret that professional bakeries might not want you to know: achieving that liquid-glass, high-shine finish is entirely possible in your own home kitchen.
This recipe focuses on a tender, moist baked vanilla cake donut base that is dipped into a white chocolate mirror glaze. Unlike traditional confectioners’ sugar glazes that dry matte or semi-opaque, a mirror glaze relies on gelatin and sweetened condensed milk to create a surface so shiny you can literally see your reflection in it. The “galaxy” effect is achieved not by complex painting, but by a simple pour-and-swirl technique that ensures every single donut is a unique masterpiece.
Whether you are hosting a space-themed birthday party, looking for a show-stopping contribution to a potluck, or simply want to challenge your baking skills with something visually spectacular, these Baked Galaxy Mirror Glaze Donuts are the answer. They are soft, fluffy, and coated in a glaze that tastes like creamy white chocolate. Let’s blast off into the details of how to make them.
Why You Will Love This Recipe
- No Frying Required: We skip the hot oil and mess of deep frying by using a donut pan to bake these cake-style donuts. This results in a lighter texture that balances perfectly with the sweet, rich glaze.
- The “Wow” Factor: The mirror glaze finish is incredibly impressive. The high-gloss shine remains for hours, making these perfect for display.
- Customizable Colors: While we use a galaxy palette here, you can use this same technique for any holiday—red and green for Christmas, pastels for Easter, or your favorite sports team’s colors.
- Beginner Friendly Technique: While mirror glaze sounds intimidating, it is mostly about temperature control. Once you get the glaze to the right temperature, the dipping process is forgiving and fun.
The Science Behind the Shine
The star of this show is undoubtedly the mirror glaze. Traditional donut glazes are made of water and powdered sugar. They are thin and absorb into the donut. A mirror glaze, however, is an emulsion. It uses water, sugar, and glucose (or corn syrup) to create a base syrup, which is then boiled and poured over chocolate and condensed milk.
The gelatin is the structural component that allows the glaze to set while retaining that “wet” look. The sweetened condensed milk provides opacity and creaminess, ensuring the colors pop against the donut rather than running clear. The white chocolate adds stability and flavor. When you combine these elements and let them cool to the working temperature of roughly 90°F to 94°F (32°C to 34°C), the mixture becomes viscous enough to coat the donut thickly without running off completely, yet fluid enough to self-level into a flawless surface.
Ingredients Needed
For the Vanilla Cake Donuts
- All-Purpose Flour: 2 cups – The structural base of the donut. You can substitute cake flour for an even tenderer crumb.
- Granulated Sugar: 3/4 cup – Provides sweetness and helps with browning.
- Baking Powder: 2 teaspoons – The leavening agent that helps the donuts rise in the oven.
- Salt: 1 teaspoon – Essential to balance the sweetness of the glaze.
- Nutmeg: 1/2 teaspoon – A classic bakery spice that gives homemade donuts that authentic “donut shop” flavor.
- Buttermilk: 3/4 cup – Adds moisture and a slight tang. If you don’t have buttermilk, mix milk with a teaspoon of vinegar.
- Eggs: 2 large – Binding agents that provide structure.
- Unsalted Butter: 2 tablespoons – Melted and slightly cooled.
- Vanilla Extract: 2 teaspoons – Use high-quality pure vanilla extract for the best flavor.
For the Mirror Glaze
- White Chocolate Chips: 1 1/2 cups – Use high-quality chips or a chopped couverture bar for smoother melting.
- Sweetened Condensed Milk: 1/2 cup – Do not use evaporated milk; the sugar content here is crucial.
- Granulated Sugar: 1 cup – For the sugar syrup base.
- Glucose Syrup or Light Corn Syrup: 1/2 cup – Prevents crystallization and adds shine.
- Water: 1/2 cup – To dissolve the sugar.
- Gelatin Powder: 1 tablespoon + 1/4 cup cold water for blooming – This sets the glaze.
- Gel Food Coloring: Various colors (Navy Blue, Purple, Teal, Pink, Black, Orange) – Gel colors are preferred over liquid to avoid altering the consistency of the glaze.
- Edible Gold Dust or Glitter: Optional – For that sparkling star effect.
Instructions
Phase 1: Baking the Donuts
- Preheat and Prep: Preheat your oven to 425°F (220°C). Spray two 6-cavity donut pans generously with non-stick cooking spray. This is crucial for easy removal.
- Mix Dry Ingredients: In a large mixing bowl, whisk together the flour, sugar, baking powder, salt, and nutmeg. Make sure there are no lumps.
- Mix Wet Ingredients: In a separate medium bowl, whisk together the buttermilk, beaten eggs, melted butter, and vanilla extract until smooth and combined.
- Combine: Pour the wet ingredients into the bowl with the dry ingredients. Use a spatula to fold them together gently. Stop mixing as soon as the flour disappears. Over-mixing will develop gluten and result in tough, rubbery donuts. The batter should be thick.
- Fill the Pans: Transfer the batter to a piping bag (or a ziplock bag with the corner snipped off). Pipe the batter into the prepared donut pans, filling each cavity about 2/3 to 3/4 full. Do not overfill, or the hole will close up during baking.
- Bake: Bake for 7 to 9 minutes. The donuts are done when the tops spring back when lightly touched and the edges are slightly golden.
- Cool: Let the donuts cool in the pan for 5 minutes, then transfer them to a wire rack to cool completely. They must be room temperature or slightly chilled before glazing.
Phase 2: Making the Mirror Glaze
- Bloom Gelatin: In a small bowl, sprinkle the gelatin powder over the 1/4 cup of cold water. Let it sit for 5-10 minutes until it becomes firm and rubbery.
- Prepare Chocolate Base: Place the white chocolate chips and sweetened condensed milk in a large heat-proof bowl. Set aside.
- Make Syrup: In a saucepan, combine the 1/2 cup water, granulated sugar, and corn syrup. Heat over medium-high heat, stirring occasionally until the sugar dissolves. Bring to a boil. If you have a candy thermometer, you want it to reach 217°F (103°C). If not, let it boil vigorously for about 1-2 minutes.
- Combine: Pour the hot sugar mixture over the chocolate and condensed milk. Let it sit for 1 minute to soften the chocolate, then whisk gently from the center outwards.
- Add Gelatin: Stir in the bloomed gelatin mass. The heat of the mixture will melt it. Whisk gently until the chocolate and gelatin are completely dissolved and the mixture is smooth.
- Strain: Pour the mixture through a fine-mesh sieve into a clean bowl or large measuring cup to remove any unmelted clumps or air bubbles.
- Divide and Color: Divide the glaze into 3 or 4 small bowls. Tint each bowl with your desired gel food colors (e.g., one dark blue, one purple, one pink, one orange/gold). Leave one bowl plain white or tint it light blue for contrast.
- Cool to Temp: This is the most critical step. Let the glazes cool until they reach between 90°F and 94°F (32°C – 34°C). If the glaze is too hot, it will run right off the donut. If it’s too cold, it will be gloopy and won’t shine.
Phase 3: The Galaxy Pour
- Prepare Station: Place a wire rack over a baking sheet lined with parchment paper or plastic wrap to catch the drips.
- Layer Colors: Pour your colored glazes back into one large wide bowl or a deep rimmed plate. Do not mix them! Pour puddles of color next to and on top of each other. Run a toothpick or skewer through the colors once or twice to create a swirl, but don’t over-swirl or the colors will turn muddy brown.
- Dip: Take a cooled donut and hold it by the edges. Dip the face of the donut flat into the surface of the swirled glaze. Twist your wrist slightly as you pull it up to break the surface tension and create movement in the pattern.
- Drip: Quickly flip the donut over and place it on the wire rack. The excess glaze will drip down the sides, smoothing itself out as it settles.
- Decorate: While the glaze is still wet, sprinkle with edible gold dust or star sprinkles if desired.
- Set: Allow the donuts to sit at room temperature for at least 20 minutes so the gelatin can set slightly, though mirror glaze stays permanently soft to the touch.
Tips for the Perfect Mirror Glaze
Temperature is King: I cannot stress this enough. If your glaze is too fluid, let it sit for another 5 minutes and check again. It should feel like the consistency of liquid honey or warm molasses when you pour it.
The Air Bubble Enemy: When mixing your glaze, try to avoid whisking vigorously, which introduces air bubbles. If you see bubbles on the surface of your glazed donut, you can pop them instantly with a toothpick or a kitchen torch passed quickly over the surface.
Clean Cuts: The donuts in the image have defined holes. If your baked donuts puffed up and closed the hole, use a small round cookie cutter or the back of a large piping tip to punch the hole back out before glazing.
Flavor Variations: The glaze is very sweet. You can balance this by adding lemon zest to the donut batter or using a dark chocolate drizzle on top of the galaxy glaze for bitterness contrast.
Serving and Storage
Serving: These donuts are best served the same day they are glazed to maintain that perfect shine. However, the cake donut itself stays moist for several days.
Storage: Store leftover donuts in an airtight container in the refrigerator for up to 3 days. The cold will cause the glaze to lose a tiny bit of its sheen (condensation can occur), but they will still look beautiful. Bring them to room temperature before eating for the best texture.
Freezing: You can freeze the unglazed donuts for up to 2 months. Thaw them completely before glazing. It is not recommended to freeze the donuts after glazing, as the mirror glaze may crack or become sticky upon thawing.
Fun Facts: The Origins of Mirror Glaze
Mirror glaze, or glaçage miroir, originated in France and is a staple of high-end patisserie. It became a viral internet sensation in the mid-2010s, thanks to Russian baker Olga Noskova, whose impeccable cakes took Instagram by storm. While traditionally used for entremets (mousse cakes), adapting the technique for donuts brings a touch of haute couture to a humble breakfast treat.
Creating these donuts is more than just baking; it is an experiment in fluid dynamics and color theory. No two donuts will ever look exactly the same, making every bite a unique experience. So grab your ingredients, monitor your temperatures, and get ready to create the shiniest, most colorful donuts your kitchen has ever seen.
Baked Galaxy Mirror Glaze Donuts
Ingredients
Equipment
Method
- Preheat oven to 425°F (220°C). Grease donut pans with cooking spray.
- Whisk flour, sugar, baking powder, salt, and nutmeg in a large bowl.
- In a separate bowl, whisk buttermilk, eggs, melted butter, and vanilla.
- Fold wet ingredients into dry until just combined. Do not overmix.
- Pipe batter into pans, filling 2/3 full. Bake 7-9 minutes until springy.
- Bloom gelatin in 1/4 cup cold water for 5 minutes.
- Boil sugar, corn syrup, and 1/2 cup water to 217°F (or vigorous boil).
- Pour hot syrup over white chocolate and condensed milk. Let sit 1 minute, then blend.
- Stir in gelatin until dissolved. Strain to remove lumps.
- Divide glaze, tint with colors, and cool to 90-94°F.
- Swirl colors in a shallow bowl, dip donuts face down, lift and let drip on wire rack.