Easter Bunny Sugar Cookies
The Ultimate Easter Bunny M&M Sugar Cookies Recipe
There is something undeniably magical about the arrival of spring. The weather warms up, the flowers begin to bloom, and our kitchens transition from the heavy, spiced desserts of winter to bright, cheerful, and colorful treats. If you are looking for the absolute perfect spring baking project, these Easter Bunny M&M Sugar Cookies are exactly what you need. Featuring a ridiculously soft, chewy vanilla cookie base and decorated with vibrant pastel M&Ms carefully arranged into adorable little bunny faces, these cookies are guaranteed to be the star of any springtime gathering, Easter basket, or sunny afternoon snack session.
Not only are these cookies incredibly photogenic and a massive hit with kids, but they also taste phenomenal. We aren’t just relying on cute aesthetics here; the underlying cookie recipe is a tried-and-true, bakery-style soft cookie that boasts buttery, rich vanilla flavors with perfectly crisp edges and a melt-in-your-mouth center. Whether you are an experienced baker or a beginner looking for an easy holiday win, this comprehensive guide will walk you through every single step, the science behind the perfect bake, and all the tips and tricks you need to achieve cookie perfection.
Why You Will Fall in Love With This Recipe
With thousands of cookie recipes out there, you might be wondering why these specific Easter Bunny M&M Sugar Cookies deserve a spot in your recipe box. First and foremost is the joy factor. The moment you pull these out of the oven and press the pastel candies into the warm dough to create those little bunny ears, you can’t help but smile. They are interactive, making them a fantastic recipe to bake with children or grandchildren.
Secondly, the texture is unmatched. Many decorated holiday cookies are essentially shortbread or royal-icing-flooded sugar cookies. While beautiful, they can sometimes be hard, dry, or overly sweet. This recipe utilizes a drop-cookie method with a perfect ratio of brown to white sugar. The brown sugar provides essential molasses, resulting in a chewy, moist interior, while the white sugar helps the edges caramelize slightly. The addition of the M&Ms provides a satisfying chocolatey crunch that contrasts beautifully with the soft dough.
The Essential Ingredients for Perfect Bunny Cookies
Baking is a science, and understanding your ingredients is the first step to ensuring success. Here is a detailed breakdown of what you will need and why each ingredient matters.
- Unsalted Butter: Using unsalted butter allows you to control the exact sodium level in your cookies. The butter must be softened to room temperature so it can properly aerate when beaten with the sugars.
- Granulated White Sugar: This adds sweetness and encourages the cookies to spread perfectly while baking, creating those irresistible crispy edges.
- Light Brown Sugar: Packed with moisture, brown sugar is the secret to a chewy center. Do not skip this!
- Large Egg: The egg binds the dough together and provides structure. Having it at room temperature ensures it emulsifies smoothly into the butter mixture.
- Pure Vanilla Extract: Because this is a simple vanilla base, the quality of your extract shines through. Use pure vanilla rather than imitation for the best flavor.
- All-Purpose Flour: The backbone of your cookie. Make sure to measure this correctly by spooning it into your measuring cup and leveling it off. Too much flour will result in dry, cakey cookies.
- Baking Soda: This leavening agent helps the cookies lift and spread, promoting browning.
- Salt: A crucial ingredient in all desserts. Salt enhances the vanilla and butter flavors and balances the sweetness of the sugar and the M&Ms.
- Pastel M&Ms: The star of the show! You will need these to create the bunny faces. Sort them out by color before you begin to make the decorating process swift and easy.
Step-by-Step Instructions for Baking Success
Follow these steps closely for bakery-quality results right in your own kitchen.
- Preparation: Preheat your oven to 350°F (175°C). Line two large baking sheets with parchment paper or silicone baking mats. This prevents sticking and ensures even baking.
- Whisk the Dry Ingredients: In a medium-sized mixing bowl, whisk together the all-purpose flour, baking soda, and salt. Set this bowl aside.
- Cream the Butter and Sugars: In a large bowl or the bowl of a stand mixer fitted with the paddle attachment, combine the softened unsalted butter, granulated sugar, and light brown sugar. Beat on medium-high speed for about 2 to 3 minutes until the mixture is light, fluffy, and noticeably paler in color. This step is crucial for trapping air, which makes the cookies soft.
- Add the Wet Ingredients: Scrape down the sides of the bowl with a rubber spatula. Add the room-temperature egg and the vanilla extract. Beat on medium speed until fully combined and smooth.
- Incorporate the Dry Ingredients: Turn your mixer down to low speed. Gradually add the dry flour mixture to the wet ingredients. Mix just until the flour disappears. Do not overmix, or the cookies will become tough due to excess gluten development.
- Scoop the Dough: Using a medium cookie scoop (about 1.5 to 2 tablespoons of dough), drop the dough onto the prepared baking sheets, spacing them about 2 inches apart to allow for spreading.
- Bake to Perfection: Bake in the preheated oven for 10 to 12 minutes. The edges should be lightly golden, but the centers should still look slightly soft and underbaked. They will continue to set as they cool.
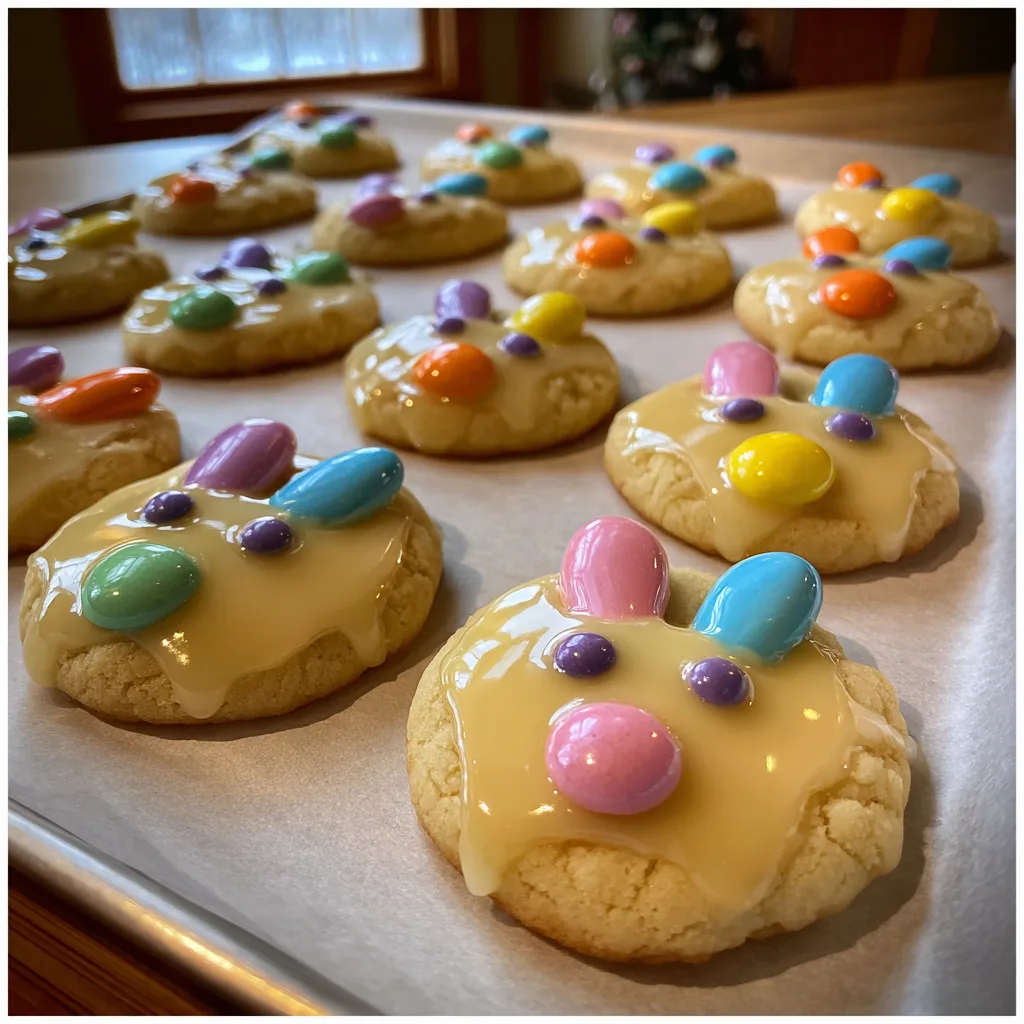
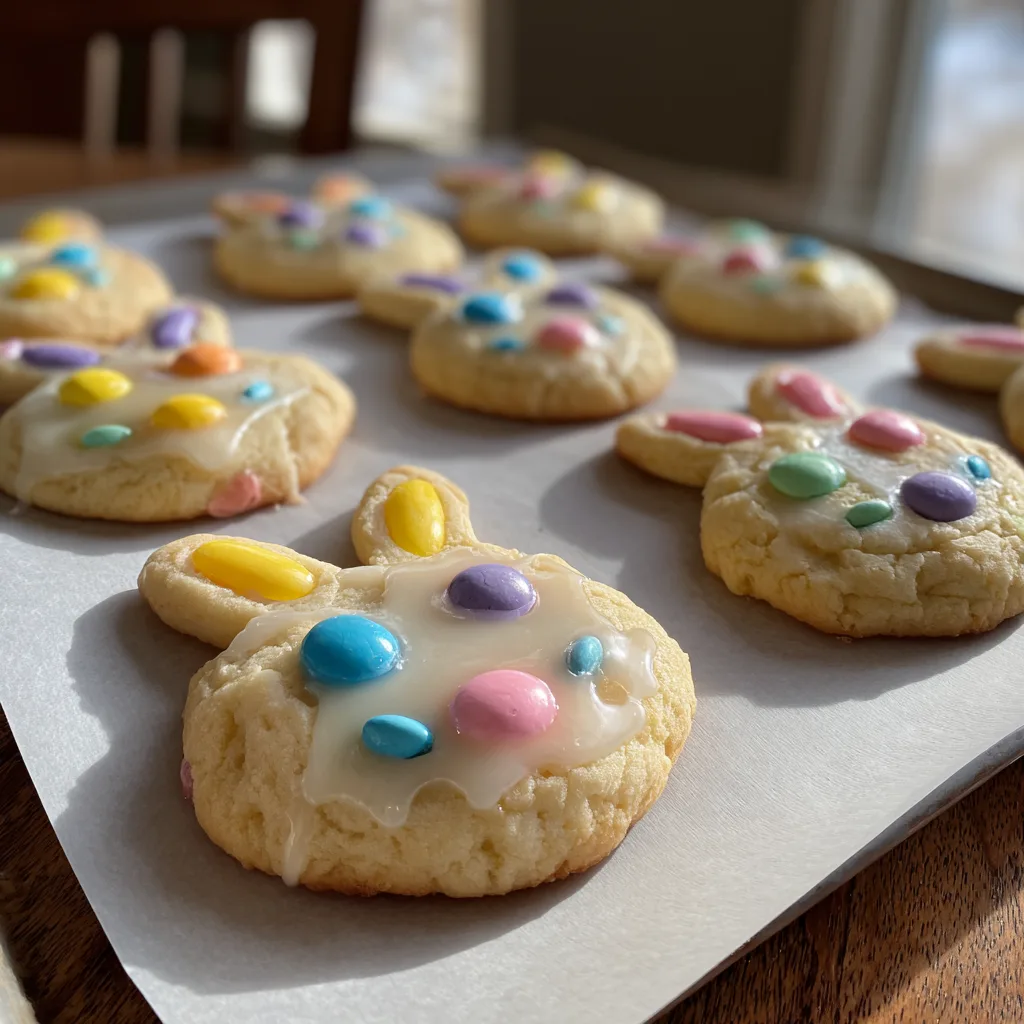
- Create the Bunny Faces: This is the most important step! The moment you take the baking sheet out of the oven, immediately press the pastel M&Ms into the soft cookies. For each cookie, press one M&M flat for the bunny’s face, and stand two M&Ms up at an angle above it for the ears. Work quickly while the cookies are still hot and pliable.
- Cooling: Let the cookies cool on the baking sheet for 5 minutes before transferring them to a wire rack to cool completely.
Mastering the M&M Bunny Face Technique
The charm of these cookies lies entirely in the adorable M&M placement. You might be tempted to put the M&Ms into the dough before baking, but doing so can cause the candies to crack, their colors to fade, or the chocolate to melt unpredictably, ruining the neat bunny ear shape.
By pressing the M&Ms in immediately after the cookies exit the oven, the residual heat slightly melts the bottom of the candy, acting like glue to hold them firmly in place once the cookie cools, while keeping the colorful candy shell perfectly intact and vibrant. When placing the “ears,” angle them slightly outward in a “V” shape just above the round “face” M&M. It requires a gentle touch so you don’t push completely through the cookie.
Pro Baking Tips from the Experts
Want to guarantee perfection every single time? Keep these professional tips in mind:
- Temperature Matters: Room temperature butter should yield slightly when pressed with a finger, but it should not be greasy or melted. If your butter is too warm, your cookies will spread into flat puddles.
- Chill the Dough (Optional but Recommended): If your kitchen is very warm or you want thicker cookies, cover the bowl of dough with plastic wrap and chill it in the refrigerator for 30 minutes before scooping. This solidifies the butter, reducing spread in the oven.
- Bake One Sheet at a Time: For the most even heat distribution, bake one sheet of cookies on the middle rack of your oven. If you must bake two sheets, rotate them halfway through the baking time.
- Perfectly Round Cookies: If your cookies come out of the oven looking a little misshapen, take a large round biscuit cutter or a mug that is larger than the cookie. Place it over the hot cookie and gently swirl it around in a circular motion. This rounds the edges perfectly while the cookie is still soft.
Creative Variations and Customizations
While this vanilla and brown sugar base is spectacular, you can easily customize this recipe to suit your family’s preferences.
- Chocolate Lovers Dough: Swap out half a cup of the all-purpose flour for unsweetened Dutch-processed cocoa powder to create a rich chocolate cookie base. The pastel M&Ms will pop beautifully against the dark background.
- Almond Joy: Substitute half of the vanilla extract with almond extract for a delicate, nutty flavor profile that tastes just like a fancy bakery treat.
- Add Mix-Ins: Fold half a cup of white chocolate chips or pastel sprinkles directly into the dough before scooping for added texture and surprise pops of color.
- Lemon Spring Fling: Add the zest of one fresh lemon to the butter and sugar mixture. The citrus notes pair wonderfully with the sweet chocolate candies for a truly refreshing spring dessert.
The Joy of Spring Baking and Cultural Traditions
Baking treats adorned with bunnies is a tradition deeply rooted in springtime celebrations around the world. The symbol of the bunny is historically tied to spring as a representation of vitality, new life, and the flourishing of nature after a long, dormant winter.
By incorporating these playful symbols into our food, we engage in a culinary celebration of the changing seasons. The use of pastel colors—soft pinks, baby blues, mint greens, and pale yellows—mimics the blooming of early spring flowers like tulips and daffodils. These cookies aren’t just a dessert; they are a sensory celebration of the season’s renewal. Gathering the family to sort the M&M colors and design the faces creates core memories that elevate the simple act of baking into a cherished holiday tradition.
Proper Storage and Freezing Methods
To keep your cookies tasting as fresh as the day you baked them, proper storage is key.
Room Temperature: Once completely cooled, place the cookies in an airtight container. Keep them at room temperature for up to 5 days. A great baker’s secret is to place a small piece of plain white bread into the container with the cookies; the cookies will absorb the moisture from the bread, keeping them incredibly soft.
Freezing Baked Cookies: These freeze beautifully. Place the cooled cookies in a single layer on a baking sheet and freeze until solid (about 1 hour). Then, transfer them to a freezer-safe zip-top bag or airtight container, placing parchment paper between layers. They will keep for up to 3 months. Thaw at room temperature for a couple of hours before eating.
Freezing Cookie Dough: If you want fresh cookies on demand, scoop the dough into balls and freeze them on a baking sheet. Once solid, transfer the dough balls to a freezer bag. You can bake them straight from frozen, just add 1-2 extra minutes to the baking time. Just remember to have your M&Ms ready for when they come out of the oven!
Serving Suggestions
These M&M Bunny Cookies are fantastic on their own, but they also pair wonderfully with a tall, ice-cold glass of milk or a warm cup of coffee for the adults. If you are hosting a spring brunch or Easter dinner, arrange them on a tiered dessert stand alongside fresh fruit, lemon bars, and carrot cake cupcakes for a show-stopping dessert table. They also make fantastic edible gifts. Stack three cookies in a clear cellophane bag, tie it tightly with a pastel ribbon, and hand them out to neighbors, teachers, or friends to spread the springtime cheer.
Frequently Asked Questions
Can I use regular M&Ms? Absolutely! While pastel M&Ms give that specific spring vibe, classic primary colored M&Ms work exactly the same way and are perfect for a fun, everyday treat.
Why did my cookies go flat? Flat cookies are usually the result of butter that was too warm, or an uncalibrated oven that runs too cool. Ensure your butter is just barely room temperature and consider chilling the dough next time.
Can I make the dough ahead of time? Yes. You can make the dough, cover it tightly, and keep it in the refrigerator for up to 3 days before baking. Let it sit at room temperature for about 15 minutes before scooping so it’s easier to handle.
Enjoy the baking process and the delicious results. These adorable, soft, and chewy cookies are sure to bring a touch of sweetness and joy to your spring season!
Easter Bunny M&M Sugar Cookies
Ingredients
Equipment
Method
- Preheat your oven to 350°F (175°C) and line two large baking sheets with parchment paper.
- In a medium bowl, whisk together the flour, baking soda, and salt. Set aside.
- In a large bowl, cream the softened butter, granulated sugar, and brown sugar together on medium-high speed until light and fluffy (about 2-3 minutes).
- Add the egg and vanilla extract to the butter mixture, beating until well combined.
- Gradually add the dry flour mixture to the wet ingredients, mixing on low speed just until the flour disappears. Do not overmix.
- Scoop 1.5 tablespoon-sized balls of dough onto the prepared baking sheets, leaving about 2 inches of space between each cookie.
- Bake for 10-12 minutes, or until the edges are lightly golden but the centers are still soft.
- Immediately upon removing from the oven, press three pastel M&Ms into each hot cookie to create a bunny face (one flat for the face, two angled up for the ears).
- Allow cookies to cool on the baking sheet for 5 minutes before transferring to a wire rack to cool completely.