Cotton Candy Cheesecake Bombs
Crispy Cotton Candy Cheesecake Bombs
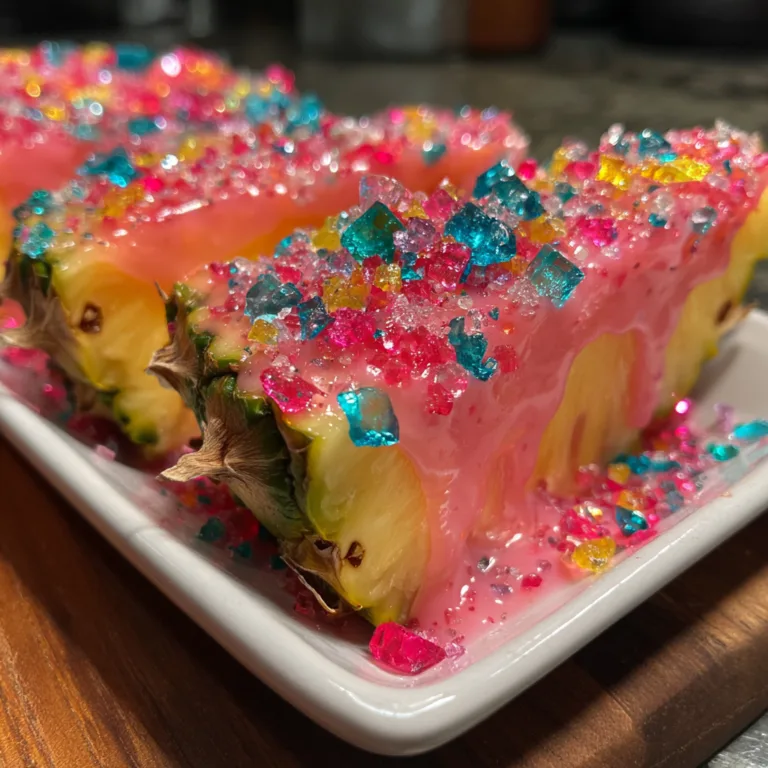
Imagine the nostalgia of a summer carnival packed into a single, bite-sized explosion of flavor. Crispy Cotton Candy Cheesecake Bombs are the ultimate whimsical dessert that bridges the gap between childhood memories and gourmet indulgence. These stunning pink spheres feature a velvety, rich cheesecake center encased in a vibrant, crispy “cotton candy” crunch coating that mimics the texture of a strawberry shortcake ice cream bar but with a sweet carnival twist.
Whether you are hosting a gender reveal party, a baby shower, a birthday bash, or simply craving something sweet and unique, these cheesecake bombs are showstoppers. The contrast between the ultra-creamy, tangy interior and the sugary, crunchy exterior creates a sensory delight that is impossible to resist. Plus, they are a no-bake miracle, meaning you can whip up a bakery-quality treat without ever turning on your oven.
In this comprehensive guide, we will walk you through every step of creating these pink delights, from achieving the perfect cheesecake consistency to mastering the “cotton candy crunch” that gives these bombs their signature look and name.
Why You Will Love This Recipe
There are countless reasons why this recipe is about to become your new favorite party trick. It isn’t just about the aesthetics (though they are undeniably Instagram-worthy); it is about the flavor engineering.
- Texture Heaven: The core is smooth, dense, and cool, while the exterior provides a satisfying snap and crumble. It’s a dynamic mouthfeel that keeps you reaching for “just one more.”
- No-Bake Ease: Summer heat? Broken oven? No problem. This recipe relies on the refrigerator and freezer to do the heavy lifting, keeping your kitchen cool.
- Customizable: While we are using cotton candy flavoring here, the base technique works for lemon crunch, chocolate, or even pumpkin spice variations.
- Make-Ahead Friendly: These bombs actually taste better after sitting for a bit, and they freeze beautifully, making them perfect for prepping ahead of a big event.

Ingredients
To achieve the perfect balance of flavor and structure, precise ingredients are key. Here is what you will need to assemble these masterpieces:
For the Cheesecake Filling
- Cream Cheese – 16 oz (2 blocks), softened to room temperature. It is crucial to use full-fat brick-style cream cheese, not the spreadable tub kind, to ensure the bombs hold their shape.
- Unsalted Butter – ½ cup (1 stick), softened. This adds richness and stability to the filling.
- Powdered Sugar – 1 ½ cups. We use powdered sugar instead of granulated to ensure a silky smooth texture without any graininess.
- Vanilla Extract – 1 teaspoon. High-quality pure vanilla extract elevates the flavor profile.
- Cotton Candy Extract – 1 teaspoon. This is the secret weapon that infuses the filling with that authentic carnival flavor.
- Graham Crackers – 1 cup, crushed. This will form the “bottom” crust inside the bomb.
For the Cotton Candy Crunch Coating
- Golden Oreo Cookies – 20 cookies, crushed. These provide a neutral, sweet vanilla base for the crunch.
- Unsalted Butter – 4 tablespoons, melted. This acts as the glue for the crunch mixture.
- Cotton Candy Flavored Gelatin – 3 tablespoons (dry powder). If you can’t find cotton candy Jell-O, strawberry gelatin works for the color, and you can add extra cotton candy extract to the cookie mix.
- White Chocolate Chips or Almond Bark – 2 cups. This will be melted down to coat the cheesecake balls so the crunch has something to stick to.
- Pink Gel Food Coloring – Optional, to boost the vibrancy of the coating.
Step-by-Step Instructions
Follow these detailed steps to ensure your cheesecake bombs come out perfectly round and delicious.
Phase 1: Prepare the Cheesecake Filling
- Cream the Base: In a large mixing bowl using a hand mixer or a stand mixer fitted with the paddle attachment, beat the softened cream cheese and ½ cup of softened butter together on medium-high speed. Beat for about 3-4 minutes until the mixture is completely smooth, airy, and free of lumps.
- Sweeten and Flavor: Lower the mixer speed and gradually add the powdered sugar, about ½ cup at a time, to avoid a sugar cloud. Once incorporated, add the vanilla extract and cotton candy extract. Turn the speed back up to high and beat for another 2 minutes until fluffy.
- Add the Crust Element: You have two options here. You can either fold the crushed graham crackers directly into the cheesecake mixture for a “cookies and cream” style interior, OR you can press a small teaspoon of crumbs into the bottom of your scoop in the next step. For this recipe, we will fold them in gently for uniform texture.
- Chill: Place the bowl in the refrigerator for 30 minutes to firm up slightly, making it easier to scoop.
Phase 2: Form the Bombs
- Scoop: Line a baking sheet with parchment paper or a silicone mat. Using a medium cookie scoop (about 1.5 tablespoons), scoop mounds of the cheesecake mixture onto the baking sheet.
- Shape: If the mixture is sticky, lightly dust your hands with powdered sugar and roll the mounds into smooth balls. If they are too soft, freeze them for 10 minutes before rolling.
- Freeze: Place the baking sheet with the formed balls into the freezer. They need to freeze until solid, which typically takes at least 1 to 2 hours. This is critical—if they aren’t frozen hard, they will melt when dipped in warm chocolate.
Phase 3: Make the Cotton Candy Crunch
- Crush the Cookies: Place the Golden Oreos in a food processor and pulse until you have coarse crumbs. Do not pulverize them into fine dust; you want some texture. Alternatively, put them in a zip-top bag and smash with a rolling pin.
- Mix the Crunch: Transfer the crumbs to a bowl. Add the dry cotton candy gelatin powder and the melted butter (4 tablespoons). Use a fork to toss the mixture until the butter is evenly distributed and the crumbs turn a lovely pink color. It should look like wet sand.
Phase 4: Dip and Coat
- Melt the Chocolate: In a microwave-safe bowl, melt the white chocolate chips or almond bark in 30-second intervals, stirring in between, until completely smooth and fluid. If it’s too thick, add a teaspoon of coconut oil to thin it out.
- The Dip: Remove a few cheesecake balls from the freezer at a time (keep the rest frozen so they don’t soften). Using a fork, dip a frozen cheesecake ball into the melted white chocolate, tapping off the excess.
- The Roll: Immediately drop the chocolate-coated ball into the bowl of pink crunch mixture. Roll it around gently until it is completely covered in pink crumbs.
- Set: Place the finished bomb back onto the parchment-lined baking sheet. Repeat with the remaining balls.
- Final Chill: Refrigerate the finished bombs for at least 20 minutes before serving to allow the cheesecake to soften slightly to a creamy consistency while the shell remains crisp.
Expert Tips for Success
Use Room Temperature Ingredients: This is the golden rule of cheesecake. If your cream cheese is cold, it will not blend with the butter properly, resulting in a lumpy filling rather than the “liquid silk” texture we want.
- Handling the Crunch: If your crunch coating feels too “wet” or clumpy, spread it out on a baking sheet and let it air dry for 15 minutes before using it to coat the balls. This ensures a true “crispy” texture.
- Flavor Intensity: Cotton candy extract can vary in strength depending on the brand. Taste your cheesecake filling before freezing it. You want the flavor to be distinct but not soapy. Start with less and add more if needed.
- The “Glossy” Center: To achieve that shiny, gooey center seen in photos, let the bombs sit at room temperature for about 10-15 minutes before eating. This allows the butter and cream cheese to relax, creating a glistening, melt-in-your-mouth interior.
- Clean Coating: When dipping, use a deep bowl for the chocolate so you can submerge the ball completely in one motion. This prevents streaks and ensures an even layer of “glue” for the crumbs.
Creative Variations
Once you master the base recipe, the possibilities are endless. Here are a few ways to switch it up:
The “Carnival Blue” Bomb
Swap the pink cotton candy gelatin for blue raspberry gelatin (often sold as “Berry Blue”). Use blue cotton candy extract or bubblegum extract. The blue version looks spectacular when paired with the pink ones for a gender reveal platter.
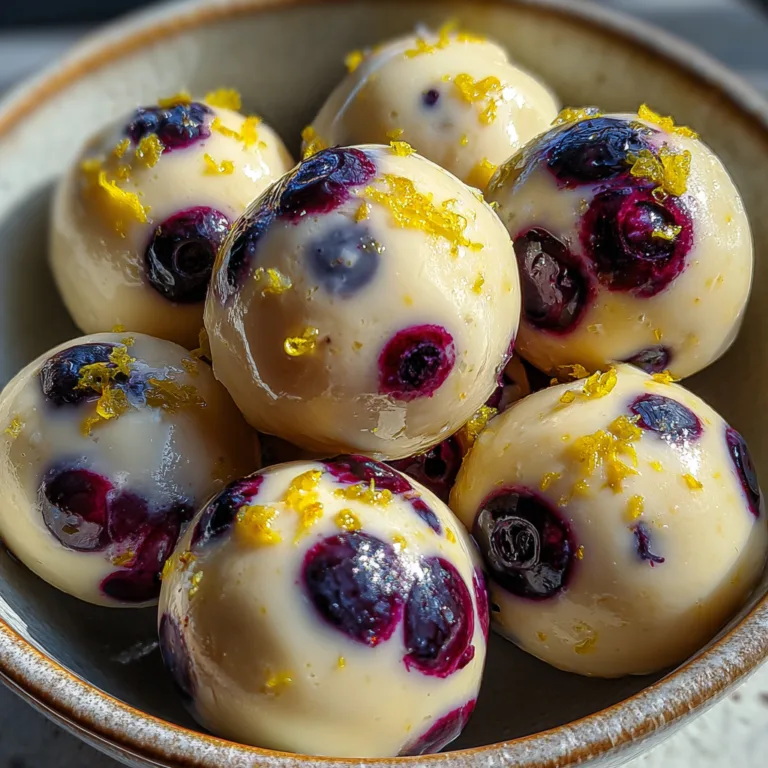
Lemon Crunch Bombs
Omit the cotton candy flavoring. Use lemon extract in the filling and lemon gelatin powder in the crunch coating. The result is a zesty, refreshing bite perfect for spring picnics.
Chocolate Covered Strawberry
Add a tablespoon of strawberry jam to the center of the cheesecake ball before freezing (make a thumbprint, fill, and seal). Use the standard pink crunch coating. When you bite in, you get a surprise jam center!
Serving and Storage
Serving: These are best served chilled but not frozen solid. Remove them from the fridge about 10 minutes before serving to allow the flavors to bloom. Serve them on a clean white platter to let the vibrant pink color pop.
Storage:
Refrigerator: Store leftover bombs in an airtight container in the fridge for up to 5 days. The crunch coating may soften slightly over time due to the moisture from the fridge, but they will still be delicious.
Freezer: You can freeze the finished bombs for up to 2 months. Place them in a single layer to freeze solid, then transfer to a freezer-safe bag. Thaw in the refrigerator overnight before serving.

Fun Facts: The History of Cotton Candy
Did you know that cotton candy was actually co-invented by a dentist? In 1897, dentist William Morrison and confectioner John C. Wharton introduced “Fairy Floss” to the world at the 1904 St. Louis World’s Fair. It was a massive hit, selling over 68,000 boxes! It wasn’t until the 1920s that the name “cotton candy” became popularized in the US. Today, combining this airy, sugary invention with the density of cheesecake creates a modern culinary oxymoron—heavy yet light, tangy yet sweet—that continues to delight generations.
These Crispy Cotton Candy Cheesecake Bombs are more than just a recipe; they are an experience. They capture the joy of the fairground and the sophistication of a truffle in one pink, fuzzy package. So grab your mixing bowl, unleash your inner child, and get ready to make the sweetest treat of the year!
Crispy Cotton Candy Cheesecake Bombs
Ingredients
Equipment
Method
- In a large bowl, beat softened cream cheese and 1/2 cup butter until smooth and lump-free.
- Gradually mix in powdered sugar, vanilla extract, and cotton candy extract until fluffy.
- Fold in graham cracker crumbs until evenly distributed.
- Scoop tablespoons of mixture onto a parchment-lined baking sheet. Freeze for 1-2 hours until solid.
- Crush Golden Oreos into coarse crumbs. Mix with dry gelatin powder and melted butter until it resembles pink wet sand.
- Melt white chocolate in the microwave in 30-second intervals until smooth.
- Dip frozen cheesecake balls into melted chocolate, then immediately roll in the pink crumb mixture to coat.
- Return to baking sheet and refrigerate for 20 minutes before serving.