Coquito Coconut Rum Tiramisu
Coquito Tiramisu: Where Puerto Rican Tradition Meets Italian Classic
Imagine the holiday season in a single bite. On one hand, you have the warm, spiced, coconut-rum embrace of Puerto Rico’s beloved drink, Coquito. On the other, the elegant, creamy, layered sophistication of Italy’s most famous dessert, Tiramisu. When these two worlds collide, the result is nothing short of magical: Coquito Tiramisu.
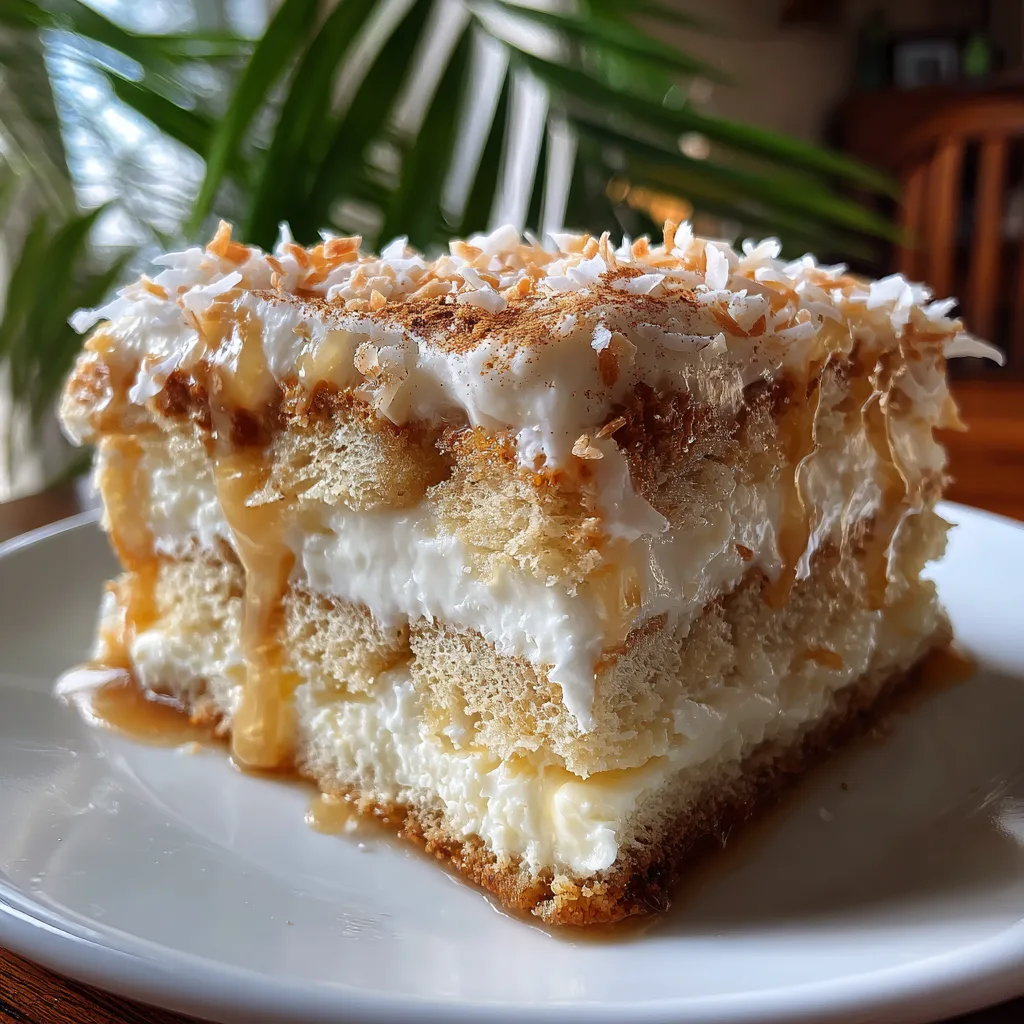
This dessert is not just a sweet treat; it is a cultural fusion that elevates the standard holiday spread. Instead of dipping ladyfingers in bitter espresso, we soak them in a lush mixture of coconut milk, condensed milk, cinnamon, and rum. Instead of a plain mascarpone filling, we whip the cheese with coconut cream and vanilla, creating a cloud-like texture that melts in your mouth. Topped with a dusting of cinnamon (the signature scent of Coquito) and shredded coconut, this dish is visually stunning and impossibly delicious.
Why This Recipe Works
Fusion recipes can sometimes feel forced, but the marriage of Coquito and Tiramisu is entirely natural. Both rely on creamy textures and spiced profiles. Here is why this recipe is destined to become your new family tradition:
- Texture Symphony: The ladyfingers act as a sponge, drinking up the Coquito mixture to become tender and cake-like, contrasting perfectly with the silky smooth mascarpone cream.
- No-Bake Ease: The holidays are stressful enough. This recipe requires zero oven time, freeing up your kitchen for the main course.
- Flavor Balance: Traditional Tiramisu can sometimes be too bitter for some due to the coffee. This version is sweet, creamy, and boozy, with the warmth of cinnamon cutting through the richness.
- Make-Ahead Magic: Like any good icebox cake or tiramisu, this dessert actually gets better after sitting in the fridge for 24 hours, making it the perfect stress-free party prep.
The Ingredients: A Deep Dive
To achieve that “wet and glistening” look and the perfect structural integrity, selecting the right ingredients is key. Here is what you need to know about your shopping list.
The Soaking Liquid (The “Coquito”)
- Coconut Milk: Use full-fat canned coconut milk. You want that rich, thick consistency. Shake the can well before opening.
- Sweetened Condensed Milk: This provides the sweetness and the signature sticky texture that helps bind the liquid to the ladyfingers.
- Evaporated Milk: Adds creaminess without the heaviness of more cream.
- Rum: Puerto Rican white rum or gold rum is traditional. If you want a non-alcoholic version, you can use rum extract and a splash of coconut water, but the rum adds a warmth that cuts the sugar.
- Spices: A blend of ground cinnamon, nutmeg, and a splash of vanilla extract is non-negotiable.
The Creamy Filling
- Mascarpone Cheese: Italian cream cheese. It is smoother and less tangy than American cream cheese. Ensure it is cold when you start whipping to prevent separating.
- Heavy Whipping Cream: This lightens the mascarpone. It must be very cold to whip properly.
- Powdered Sugar: We use a smaller amount here because the ladyfingers are soaking in sweet liquid.
- Coconut Extract: Optional, but it boosts the tropical flavor profile.
The Structure & Topping
- Ladyfingers (Savoiardi): These crisp Italian biscuits are essential. Do not use soft sponge cake; it will turn into mush. You need the dry, crisp cookies to stand up to the heavy soak.
- Shredded Coconut: Sweetened or unsweetened works, depending on your preference. Toasting it lightly adds a nice crunch.
- Ground Cinnamon: For the final dusting.
Instructions
Preparation is key here. Have your soaking station and whipping station ready before you begin.
1. Prepare the Coquito Soak
In a medium bowl, whisk together the coconut milk, condensed milk, evaporated milk, rum, vanilla extract, 1 teaspoon of ground cinnamon, and a pinch of nutmeg. Taste it—it should taste like a strong, delicious Coquito. Set this aside.
2. Whip the Cream Filling
In a large mixing bowl (or stand mixer), beat the mascarpone cheese and powdered sugar on medium speed just until smooth (about 1 minute). slowly pour in the heavy whipping cream and coconut extract. Increase the speed to high and whip until stiff peaks form. Watch closely: over-beating mascarpone can make it curdle/turn grainy. You want it thick and spreadable.
3. The Dip and Layer
Working quickly, dip each ladyfinger into the Coquito soak. The “1-2 Rule”: Dip for 1 second, flip, dip for 1 second, and remove. Do not let them swim, or they will disintegrate.
Arrange the soaked ladyfingers in a single layer at the bottom of an 8×8 or 9×9 inch baking dish. You may need to break some to fit the edges.
4. Spread the Filling
Spoon half of the mascarpone coconut cream over the layer of ladyfingers. Use an offset spatula or the back of a spoon to spread it into an even, flat layer, pushing it all the way to the corners to seal the cake in.
5. Repeat
Repeat the dipping process with the remaining ladyfingers, placing a second layer of soaked biscuits on top of the cream. Top with the remaining mascarpone cream, smoothing it out perfectly.
6. The Garnish
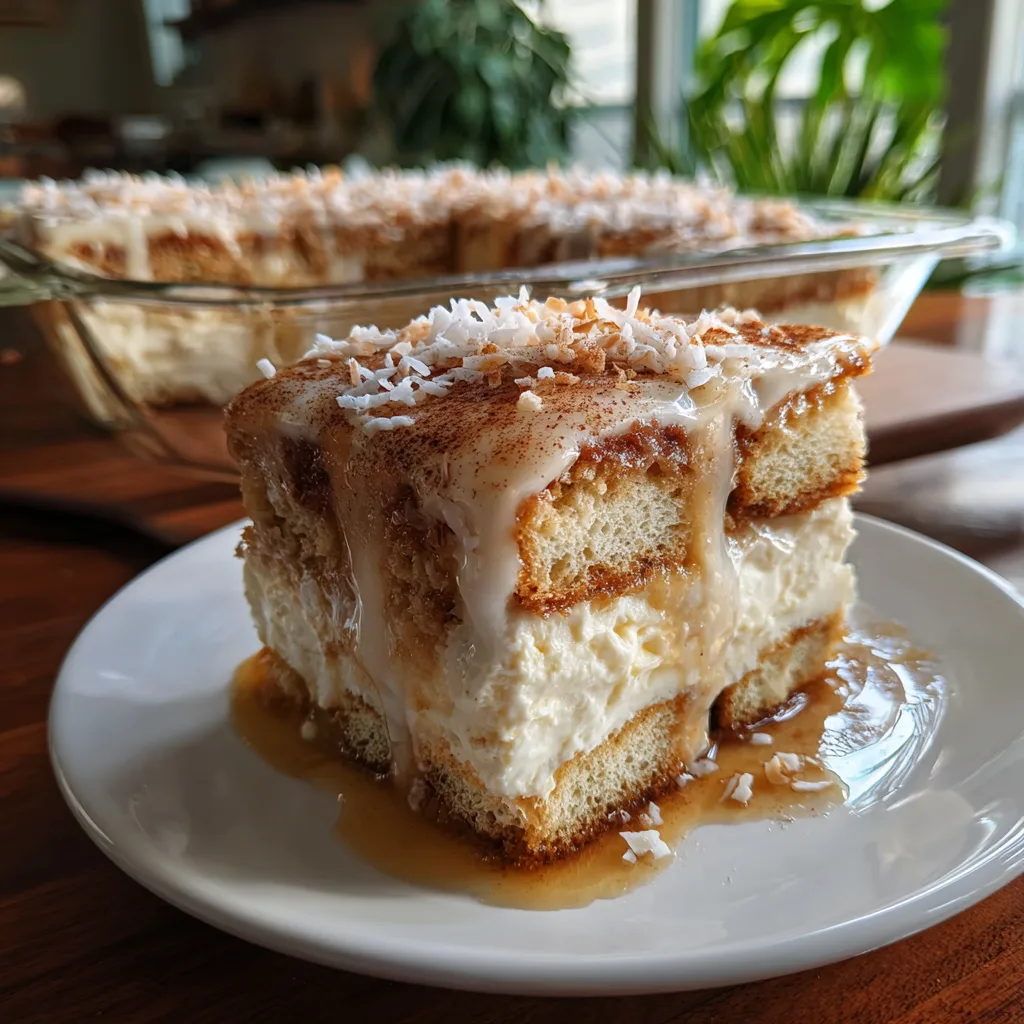
Dust the top generously with ground cinnamon. Sprinkle the shredded coconut over the cinnamon. This creates that beautiful speckled look seen in the photo.
7. The Hard Part: Waiting
Cover the dish with plastic wrap and refrigerate for at least 6 hours, preferably overnight. This resting period is chemically necessary; it allows the ladyfingers to soften to a cake-like texture and the cream to firm up for clean slicing.
Tips for the Perfect Slice
- Avoid the “Soggy Bottom”: If your Tiramisu is swimming in liquid at the bottom of the dish, you soaked the cookies too long. Remember, they continue to absorb moisture from the cream as they sit. A quick dunk is all you need.
- Room Temp vs. Cold: Mascarpone should be slightly softened (leave out for 10 mins) to mix without lumps, but the heavy cream must be ice cold to whip up volume.
- Clean Cuts: To get the sharp square cuts shown in the image, place the Tiramisu in the freezer for about 20-30 minutes before slicing. Use a sharp knife and wipe it clean between each cut.
- Alcohol-Free: If serving to kids or non-drinkers, simply swap the rum for coconut milk or whole milk and add a teaspoon of rum extract for the flavor without the buzz.
Serving Suggestions & Variations
The “Nutty” Version:
Coquito sometimes includes almond flavor. You can add a drop of almond extract to the soaking liquid or sprinkle crushed almonds on top alongside the coconut for added crunch.
The Chocolate Twist:
While traditional Coquito is spice-forward, chocolate pairs beautifully with coconut. Shave some white chocolate curls on top instead of shredded coconut for a more elegant finish.
Serving:
Serve this chilled. It pairs wonderfully with a cup of hot coffee (to balance the cold dessert) or, naturally, a small glass of fresh Coquito on the side.
Storage
This dessert will keep in the refrigerator, covered, for up to 3-4 days. Note that the longer it sits, the softer the ladyfingers will become. It does not freeze well due to the dairy content, which may separate upon thawing.
This Coquito Tiramisu is more than a dessert; it is a conversation starter. It brings the tropical warmth of the Caribbean to the classic structure of European pastry. Enjoy the process of layering and the joy of sharing!
Coquito Tiramisu
Ingredients
Equipment
Method
- In a shallow bowl, whisk together coconut milk, condensed milk, evaporated milk, rum, vanilla, cinnamon (1 tsp), and nutmeg to create the soak.
- In a large mixing bowl, beat mascarpone cheese and powdered sugar on medium speed until smooth (about 1 minute).
- Slowly add heavy whipping cream and coconut extract to the mascarpone. Whip on high speed until stiff peaks form.
- Quickly dip ladyfingers into the Coquito soak (1 second per side) and arrange a single layer in the bottom of your dish.
- Spread half of the mascarpone cream mixture evenly over the ladyfingers.
- Repeat with a second layer of dipped ladyfingers and the remaining cream filling on top.
- Dust the top generously with ground cinnamon and sprinkle with shredded coconut.
- Cover and refrigerate for at least 6 hours (preferably overnight) to allow layers to set and flavors to meld.