Cookie Monster Macarons
The Ultimate Guide to Making Cookie Monster Macarons
There are few things in the baking world as universally adored as the French macaron. With its delicate, crisp exterior, chewy interior, and endless possibilities for flavor, it is a pastry chef’s dream. But what happens when you take this elegant, sophisticated French confection and combine it with the nostalgic, chaotic charm of everyone’s favorite childhood television character? You get Cookie Monster Macarons. These delightful, vibrant blue treats are an absolute showstopper, guaranteed to bring a smile to faces of all ages.
Whether you are planning a child’s birthday party, a baby shower, a themed bake sale, or simply want to challenge your baking skills with something incredibly fun and creative, this comprehensive guide will walk you through every single step. From mastering the sometimes-fickle macaron batter to achieving the perfect vibrant blue hue and assembling the iconic goofy faces, you are about to embark on a baking adventure that is as delicious as it is adorable.
Why Cookie Monster Macarons are a Party Favorite
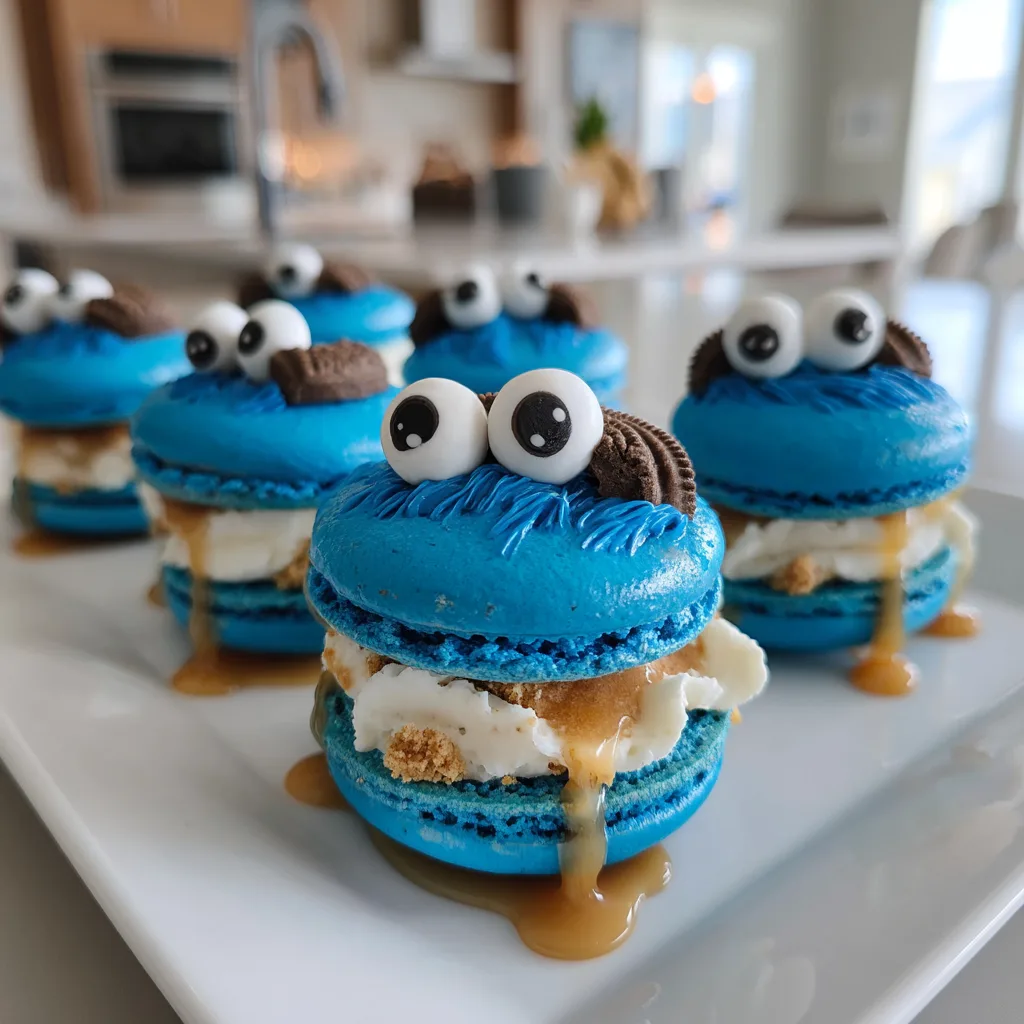
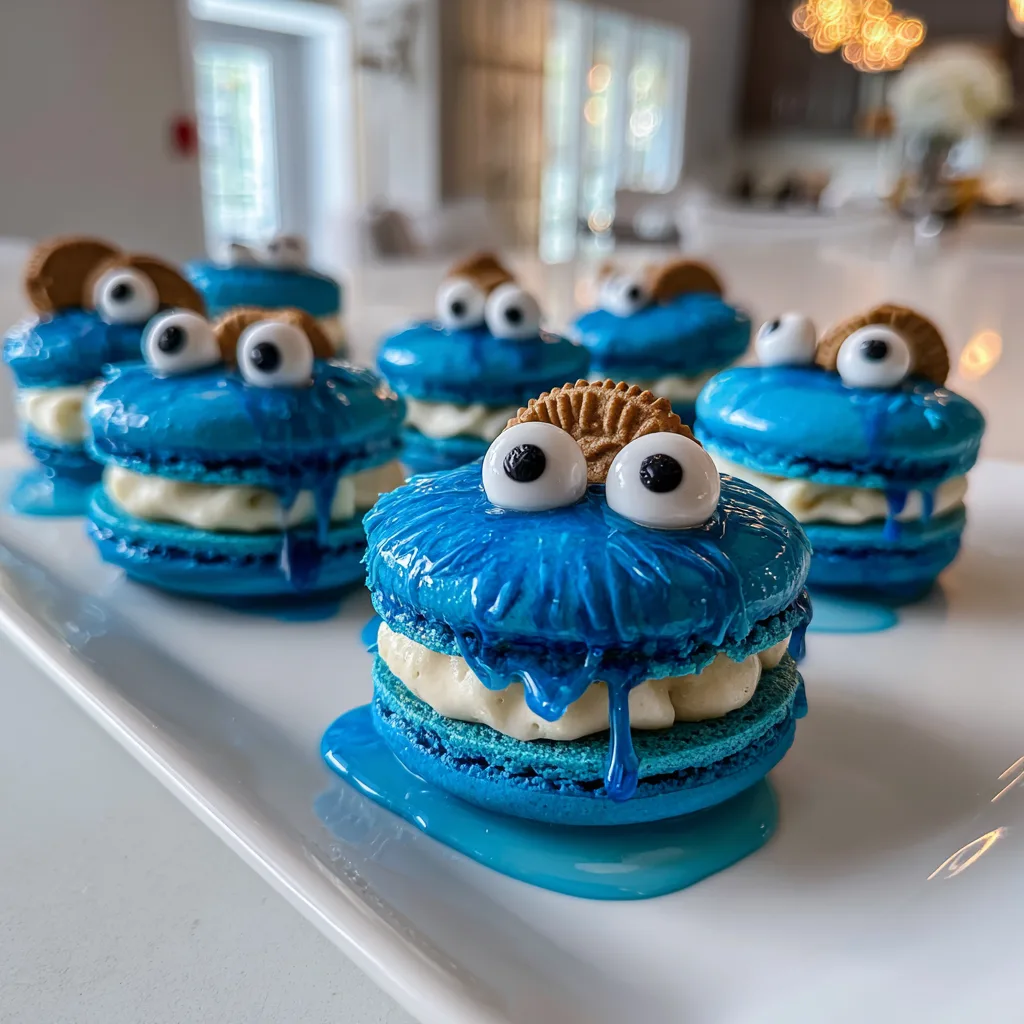
When it comes to entertaining, food that doubles as decor is always a winning strategy. These macarons do exactly that. The bright, eye-catching blue color instantly draws the eye, while the recognizable googly eyes and the miniature chocolate chip cookie stuffed into the “mouth” create a sense of whimsy and playfulness.
They bridge the gap between high-end pastry and accessible, family-friendly fun. Children love them because they look like a beloved character, and adults love them because, underneath the fun exterior, they are eating a genuinely delicious, high-quality almond meringue cookie with a rich, creamy filling. Furthermore, they are perfectly portioned finger foods, making them ideal for mingling at parties without the need for plates or forks.
Understanding the Anatomy of a Character Macaron
Creating character macarons requires breaking the treat down into its individual components. Each part plays a vital role in the final look and taste of the dessert.
The Blue Shell: The foundation is a classic French macaron shell, heavily tinted with blue food coloring. The shell must have the signature “feet” (the ruffled bottom edge), a smooth, dome-like top, and a crisp shell that gives way to a chewy center.
The Buttercream Filling: The filling acts as both the flavor center and the “glue” that holds the character together. In this case, a bright white vanilla buttercream or cream cheese frosting provides a stark color contrast to the blue shells and mimics the white space of a wide-open mouth.
The Googly Eyes: These give the macaron its personality! You can use store-bought royal icing candy eyeballs, or make your own using white chocolate and a dot of dark chocolate or black food coloring.
The Mini Cookie: This is the piece de resistance. A tiny, bite-sized chocolate chip cookie is wedged into the buttercream filling between the two blue shells, making it look exactly like Cookie Monster is mid-bite.
The Science of French Macarons: Mastering the Basics
Before we can make them look like a monster, we must master the macaron itself. Macarons have a reputation for being difficult, but they are actually just demanding of precision. The French method involves whipping egg whites and sugar into a stiff meringue, then folding in a mixture of finely sifted almond flour and powdered sugar.
The Meringue: Your egg whites must be free of any yolk. Even a drop of fat will prevent them from whipping up properly. Whip them until they form stiff peaks—when you pull the whisk out, the peak should stand straight up without drooping.
The Macaronage: This is the most critical step. Macaronage is the process of folding the dry ingredients into the meringue. You want to deflate the air slightly. The goal is a batter that flows off your spatula like a thick ribbon or “lava.” If it plops down in chunks, it is under-mixed. If it runs like water, it is over-mixed.
The Resting Period: Once piped, the macarons MUST rest at room temperature until a skin forms on top. You should be able to gently touch the surface without any batter sticking to your finger. This skin forces the air to escape out the bottom during baking, creating the signature ruffled “feet.”
Getting that Perfect Vibrant Blue Color
Achieving a bright, vivid blue for your Cookie Monster macarons requires the right type of food coloring. Never use liquid food coloring from the grocery store baking aisle. Liquid coloring adds too much moisture to the delicate macaron batter, altering the consistency and ruining the shells.
Instead, use gel food coloring or powdered food coloring. Gel color is highly concentrated, so you only need a small amount to achieve a vibrant hue without adding excess liquid. Royal blue or sky blue gel colors work best. Remember that the color will fade slightly during baking, so make the batter a shade slightly darker than you want the final baked cookie to be. Add the coloring during the final stages of whipping your meringue, before folding in the dry ingredients.
Ingredients
For the Macaron Shells:
- – 1 cup (100g) almond flour, finely ground
- – 1 cup (130g) powdered sugar
- – 3 large egg whites, room temperature (approx. 100g)
- – 1/4 cup (50g) granulated white sugar
- – 1/2 teaspoon vanilla extract
- – Royal blue gel food coloring
For the Vanilla Buttercream Filling:
- – 1/2 cup (1 stick) unsalted butter, softened
- – 1 1/2 cups powdered sugar
- – 1 teaspoon vanilla extract
- – 1 tablespoon heavy cream or milk
For the Decorations:
- – Mini chocolate chip cookies (store-bought like Cookie Crisp or homemade mini cookies)
- – Candy googly eyes (royal icing decorations)
- – A small amount of royal icing or melted chocolate (to attach the eyes)
Instructions
- Prep Your Equipment: Line two heavy baking sheets with silicone baking mats or parchment paper. If using parchment, you can trace 1.5-inch circles on the back as a guide. Prepare a piping bag fitted with a medium round tip (like Wilton 12).
- Sift Dry Ingredients: In a large bowl, sift together the almond flour and powdered sugar. Discard any large almond pieces that will not pass through the sieve. Whisk to combine perfectly.
- Whip the Meringue: In the bowl of a stand mixer fitted with the whisk attachment, beat the egg whites on medium speed until frothy. Gradually add the granulated sugar. Increase speed to medium-high and beat until stiff peaks form. During the last minute of mixing, add the vanilla extract and enough blue gel food coloring to achieve a vibrant Cookie Monster blue.
- The Macaronage (Folding): Gently fold the sifted dry ingredients into the blue meringue using a rubber spatula. Scrape around the bowl and cut through the middle. Continue folding until the batter falls off the spatula in a continuous, thick ribbon (the “lava” stage) and you can draw a figure-8 without the ribbon breaking.
- Pipe the Shells: Transfer the batter to your prepared piping bag. Hold the bag completely vertical, about half an inch above the baking sheet, and pipe rounds of batter onto your prepared trays.
- Tap and Rest: Tap the baking sheets firmly against the counter 3-5 times to release trapped air bubbles. Pop any visible surface bubbles with a toothpick. Let the macarons sit at room temperature for 30 to 60 minutes, or until a dry skin forms on the surface and they do not stick to your finger when lightly touched.
- Bake: Preheat oven to 300°F (150°C). Bake one sheet at a time for 13-15 minutes. The macarons are done when they do not wiggle off their “feet” when gently nudged. Let them cool completely on the baking sheet before attempting to remove them.
- Make the Buttercream: While the shells cool, beat the softened butter in a mixer until pale and creamy. Gradually add the powdered sugar, vanilla, and heavy cream. Beat on high for 3-4 minutes until light and fluffy. Transfer to a piping bag with a round tip.
- Assemble: Pair up the cooled blue macaron shells by size. Pipe a generous dollop of white buttercream onto the bottom shell. Place the top shell on at a slight angle (to create an open “mouth”).
- Decorate: Gently press a mini chocolate chip cookie into the front of the buttercream filling so it sticks out. Use a tiny dot of buttercream or melted chocolate to attach two candy googly eyes to the top of each macaron.
Troubleshooting Common Macaron Mistakes
Baking macarons is a learning process. If your first batch is not perfect, do not be discouraged! Here is how to fix common issues:
Cracked Tops: This usually happens if the oven temperature is too high, or more commonly, if you did not let the macarons rest long enough before baking. The skin MUST form to prevent cracking.
No Feet: If your macarons spread out flat and have no ruffled edges, the batter was likely over-mixed (the macaronage went too far). It can also happen if the egg whites were not whipped to stiff peaks.
Hollow Shells: This is a common issue where a gap forms between the crisp top and the chewy interior. It often results from over-whipped egg whites, under-mixed batter, or an oven temperature that is slightly too low.
Lopsided Shells: This occurs if you pipe the batter at an angle instead of holding the piping bag completely vertical. It can also happen if your oven has a fan blowing unevenly (convection ovens sometimes cause this).
Creative Variations and Flavor Profiles
While a classic vanilla buttercream is visually striking for the white “mouth” effect, you can easily alter the flavor profile of your Cookie Monster macarons to suit your tastes.
Cookies and Cream: Crush up standard-sized chocolate chip cookies or Oreos into a fine dust and fold them into the buttercream filling before piping. This adds texture and an incredible cookie flavor to match the theme.
Cookie Dough Filling: Instead of buttercream, make an eggless, safe-to-eat chocolate chip cookie dough and use a small scoop of it as the filling between the macaron shells.
Elmo Macarons: Use the exact same recipe, but tint the macaron shells bright red instead of blue. Use an orange jelly bean or a dot of orange frosting for a nose, and keep the googly eyes to create Cookie Monster’s furry friend!
Storage and Make-Ahead Tips
Macarons actually taste better the day after they are made. This process, called “maturing,” allows the moisture from the filling to soften the interior of the shell, creating that perfect melt-in-your-mouth texture.
Refrigeration: Store fully assembled macarons in an airtight container in the refrigerator for up to 5 days. Before serving, let them sit at room temperature for 20-30 minutes for the best texture and flavor.
Freezing: Macarons freeze beautifully! You can freeze the unfilled shells in an airtight container for up to 3 months. You can also freeze the fully assembled macarons for up to 1 month. Defrost them in the refrigerator overnight before bringing them to room temperature.
Fun Facts About Macarons and Baking
The history of the macaron is as rich as its flavor. While we associate them heavily with France, their origins actually trace back to Italy. It is widely believed that the macaron was introduced to France by Catherine de’ Medici in the 1500s when she married King Henry II of France. Her Italian pastry chefs brought the recipe for these simple almond cookies with them.
However, the modern “Macaron Parisien”—the sandwich cookie with filling that we know and love today—was not created until the early 20th century. Pierre Desfontaines of the famous French patisserie Ladurée is often credited with having the brilliant idea to take two macaron shells and join them together with a delicious ganache filling.
By bringing characters like Cookie Monster into this rich culinary history, home bakers are continuing a long tradition of evolving and playing with food art. Baking these treats is a testament to the joy of combining classic techniques with modern pop culture, resulting in a dessert that is truly unforgettable.
Cookie Monster Macarons
Ingredients
Equipment
Method
- Sift together the almond flour and 1 cup powdered sugar. Discard any large pieces.
- Whip egg whites until frothy. Gradually add granulated sugar and beat until stiff peaks form. Add vanilla and blue gel coloring near the end.
- Gently fold the dry ingredients into the meringue until the batter falls in a continuous ribbon (macaronage stage).
- Pipe 1.5-inch circles onto prepared baking sheets. Tap trays firmly on the counter to release air bubbles.
- Let rest at room temperature for 30-60 minutes until a dry skin forms.
- Bake at 300°F (150°C) for 13-15 minutes. Let cool completely before removing.
- Whip softened butter, 1.5 cups powdered sugar, vanilla, and heavy cream until fluffy.
- Pipe buttercream onto half of the blue shells. Top with a second shell at an angle.
- Press a mini chocolate chip cookie into the buttercream and attach two candy eyes to the top shell.