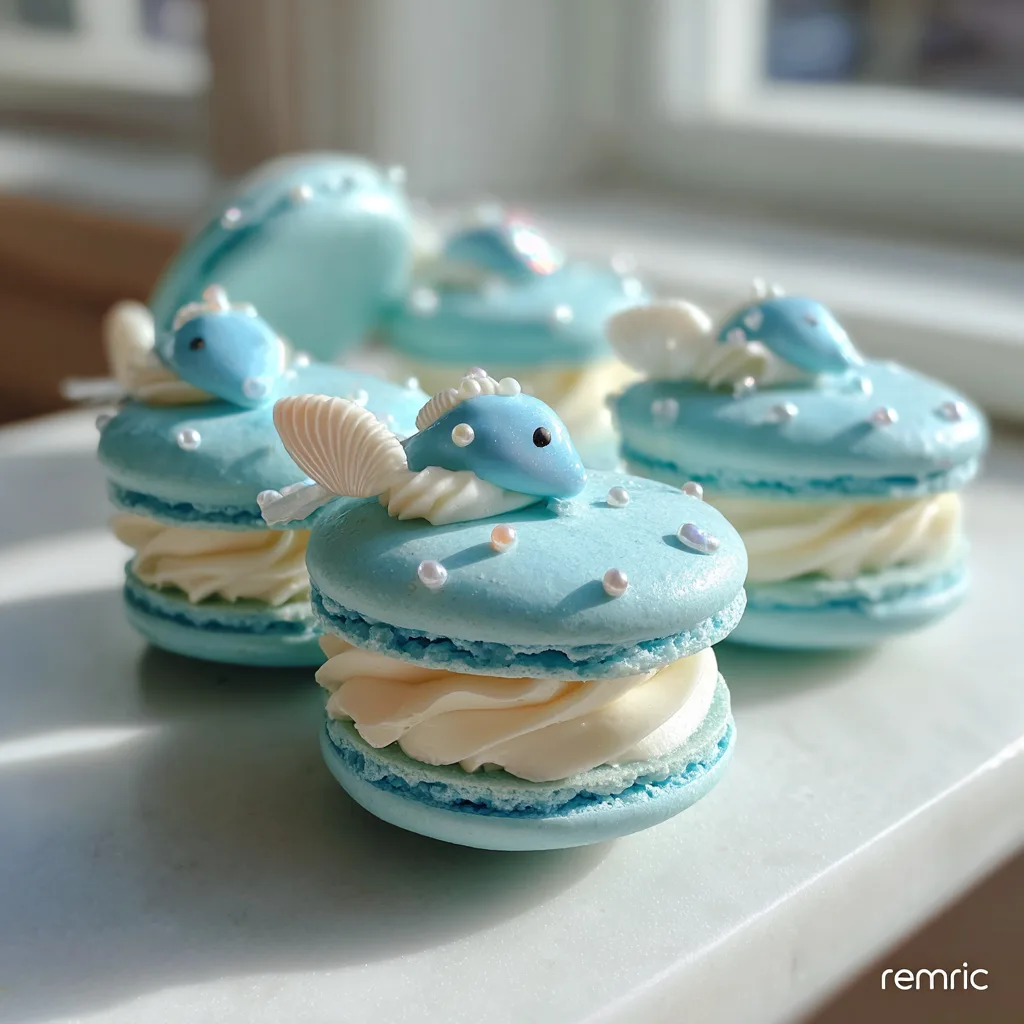
Clam Shell Macarons with Pearls
The Ultimate Turquoise Clam Shell Macarons with Edible Pearls
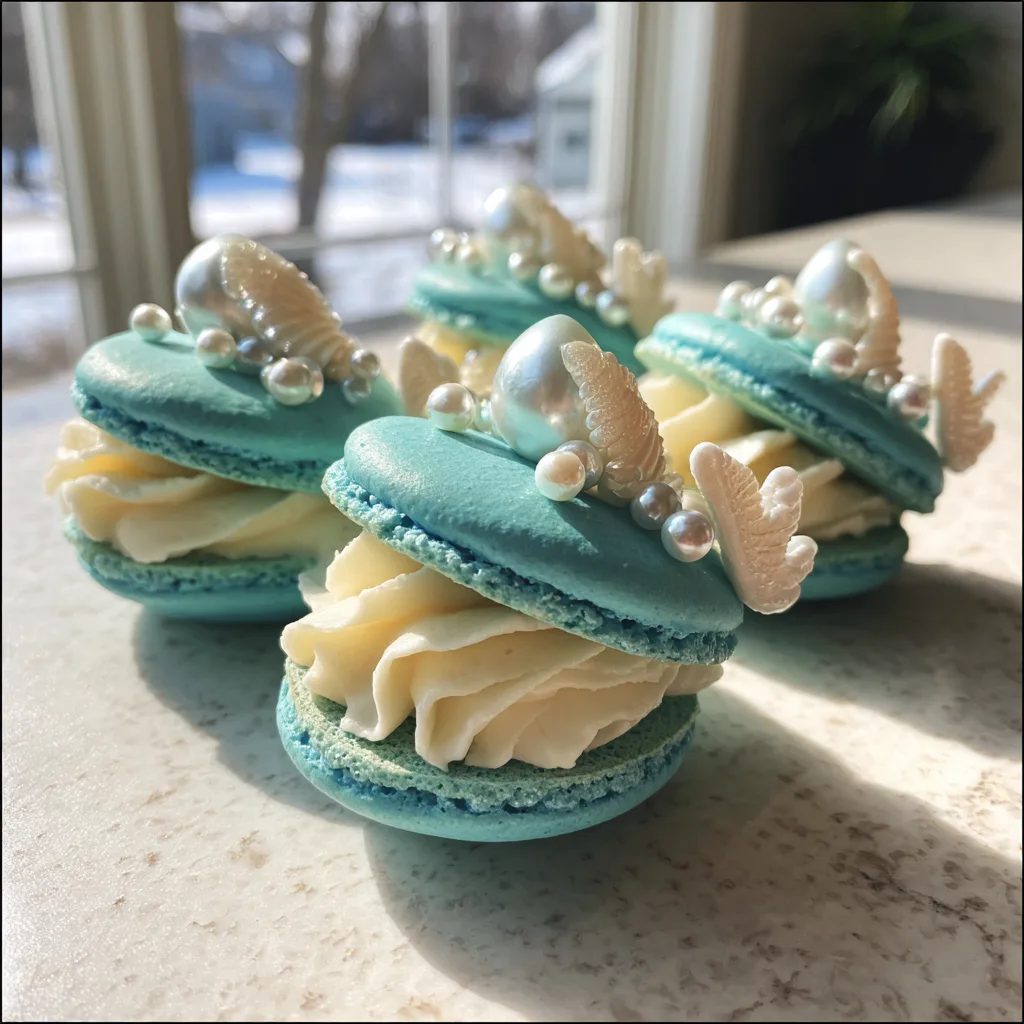
If you are looking for a show-stopping dessert that will absolutely steal the spotlight at your next themed event, look no further than these exquisite Turquoise Clam Shell Macarons. Whether you are hosting a magical mermaid birthday party, an elegant “under the sea” baby shower, or a sophisticated beach wedding, these delicate treats are the perfect centerpiece. They look incredibly impressive, almost too cute to eat, but one bite of the crisp, almond meringue shell giving way to smooth, creamy buttercream will convince your guests otherwise.
French macarons are already known for being elegant and slightly finicky, symbolizing a certain level of baking prowess. By taking that classic technique and applying a whimsical twist—piping them to resemble open clam shells revealing a precious pearl—you elevate them to a work of edible art. The vibrant turquoise color is eye-catching, while the shimmering edible pearl nestled inside adds a touch of magic that delights both children and adults alike. Despite their intricate appearance, achieved through careful piping and assembly, they rely on the same foundational French macaron method that many home bakers know and love.
In this comprehensive guide, we will walk you through the entire process. We will cover the science behind the perfect meringue, the crucial “macaronage” folding technique to achieve the right batter consistency, the specific piping method needed to create the clam shape, and the final assembly that brings these underwater treasures to life. Get your piping bags ready; we are diving deep into the art of clam shell macarons!
Why You Will Love This Themed Macaron Recipe
Beyond their obvious visual appeal, there are many reasons why this specific recipe is a winner. First, it is incredibly customizable. While we love the striking turquoise pictured here, you can easily adapt the shell color to match any color scheme, from soft pastel pinks and purples for a princess theme to deep ocean blues. The filling, too, is a blank canvas. A classic vanilla buttercream lets the almond flavor of the shells shine, but you could easily swap it for lemon buttercream, coconut ganache, or even a white chocolate filling to suit your tastes.
Furthermore, these macarons are a fantastic make-ahead dessert. Macarons actually taste better after “maturing” in the fridge for 24 to 48 hours, as this allows the moisture from the filling to soften the inside of the shells, creating that signature chewy-yet-crisp texture. This means you can finish your baking well before party day, reducing stress and leaving you more time to enjoy the event. They also freeze beautifully, meaning you can prep weeks in advance if needed.
Finally, the “wow factor” cannot be overstated. Bringing out a platter of these pearl-holding clams guarantees gasps of delight. They are highly photogenic, making them perfect for Instagram and Pinterest, and they show your guests that you put extra thought and care into creating something truly special for them.
Understanding the French Meringue Method
For this recipe, we utilize the French meringue method. This is generally considered the most approachable method for home bakers as it does not require cooking a sugar syrup to a specific temperature, unlike the Italian method. It involves whisking egg whites with granulated sugar until stiff, glossy peaks form, and then folding in a mixture of finely ground almond flour and powdered sugar.
The success of your macarons hinges essentially on two major steps: the meringue and the macaronage. The meringue provides the structure and lift. You need stiff peaks that stand straight up when you pull the whisk out of the bowl; if the tip curls over, it’s not ready. The macaronage is the process of deflating some of that air while incorporating the dry ingredients. Under-mix, and your macarons will be lumpy and cracked. Over-mix, and the batter will be too runny, resulting in flat pancakes with no “feet.” You are looking for a “lava-like” consistency where the batter flows off the spatula in a continuous ribbon and you can draw a figure-eight without the stream breaking.
Ingredients You Will Need
Precision is key in macaron baking. It is highly recommended to use a kitchen scale to weigh your ingredients in grams for the most consistent results. Cups can vary too greatly in volume.
For the Macaron Shells:
- 100 g Egg Whites: Aged overnight in the fridge and brought to room temperature are best, but fresh room temperature whites work too. Ensure there is absolutely no yolk taint.
- 90 g Granulated Sugar: Superfine sugar dissolves easier, but regular granulated sugar works if added slowly.
- 130 g Almond Flour: Use super-fine blanched almond flour. Even if it looks fine, you must sift it.
- 130 g Powdered Sugar (Confectioners’ Sugar): Contains cornstarch which helps with structure. Do not swap for granulated.
- 1/4 tsp Cream of Tartar: Optional, but helps stabilize the egg whites and prevent over-whipping.
- Turquoise Gel Food Coloring: Do not use liquid food coloring, as adding extra moisture can ruin the macaron batter. Use a concentrated gel or powder color.
For the Filling and Assembly:
- 1/2 cup Unsalted Butter: Softened to room temperature.
- 1 1/2 cups Powdered Sugar: Sifted to avoid lumps in your buttercream.
- 1 tsp Vanilla Extract: For classic flavor, or sub with coconut or almond extract.
- 1-2 tbsp Heavy Cream or Milk: To adjust the consistency of the filling.
- Large Edible Sugar Pearls/Gobstoppers: You will need one for each finished macaron (about 20-25). White or pearlescent finish looks best.
Step-by-Step Instructions
Part 1: Making the Macaron Shells
- Prep and Sift: Line two large baking sheets with parchment paper or silicone macaron mats. Wipe down your mixing bowl and whisk attachment with vinegar or lemon juice to ensure they are completely free of grease. Sift the almond flour and 130g powdered sugar together into a bowl three times. Discard any large almond bits that won’t pass through the sieve. This ensures smooth shells.
- Whip the Meringue: Place the room temperature egg whites and cream of tartar in the clean bowl of a stand mixer fitted with the whisk attachment. Start whipping on medium-low speed until the whites become foamy.
- Add Sugar and Color: Increase speed to medium. Slowly rain in the granulated sugar, about a teaspoon at a time, allowing it to dissolve between additions. Once all sugar is incorporated, increase speed to medium-high and whip until stiff, glossy peaks form. Add a few drops of turquoise gel food coloring during the final stages of whipping until you reach your desired shade (remember the color fades slightly upon baking).
- Macaronage (Folding): Remove the bowl from the mixer. Add about one-third of the sifted almond flour mixture to the meringue. Gently fold it in using a rubber spatula. Add the remaining dry ingredients and continue folding. Scrape around the sides and bottom of the bowl, cutting through the center. The goal is to deflate the batter just enough. Test frequently: stop folding when the batter falls off the spatula in a thick, continuous ribbon that can form a figure-eight that slowly sinks back into the mass within about 10-15 seconds.
- Piping the Clams: Transfer the batter to a piping bag fitted with a medium round tip (like a Wilton 12). To create the clam shape, hold the piping bag at a 45-degree angle to the baking sheet. Pipe a round dollop, then immediately drag the tip slightly toward you while releasing pressure to create a slightly tapered oval shape, rather than a perfect circle. Pipe half the shells this way for the “bottoms”. For the “tops,” you can pipe standard rounds or try to replicate the tapered shape. Space them about 2 inches apart.
- Tap and Dry: Once piped, firmly tap the baking sheets against the counter 3-4 times to release trapped air bubbles. Use a toothpick to pop any stubborn bubbles on the surface. Let the macarons sit out at room temperature for 30 to 60 minutes, or until a matte skin forms on top. You should be able to gently touch the surface without batter sticking to your finger. This step is crucial for developing the “feet.”
- Bake: While they are drying, preheat your oven to 300°F (150°C). An oven thermometer is highly recommended as oven temperatures vary. Bake one tray at a time on the center rack for 15-18 minutes. They are done when they have distinct feet and do not wiggle on the parchment paper when gently touched. Let them cool completely on the baking sheet before attempting to remove them.
Part 2: Filling and Assembly
- Make the Buttercream: In a medium bowl, beat the softened butter with an electric mixer until pale and creamy (about 3-5 minutes). Gradually add the sifted powdered sugar, mixing on low speed until combined. Add the vanilla extract and 1 tablespoon of heavy cream. Increase speed to high and beat for another 3-4 minutes until fluffy. If it’s too stiff, add another tablespoon of cream.
- Assemble: Pair up your macaron shells by size. Transfer the buttercream to a piping bag fitted with a small round or star tip. Pipe a generous dollop of buttercream onto the flat side of the bottom shells.
- Add the Pearl: Gently press one large edible sugar pearl into the center of the buttercream dollop.
- Create the Clam: Take the matching top shell and place it over the filling and pearl at an angle, pressing down gently on the back edge so it looks like a hinged, open clam shell.
- Mature: Place the assembled macarons in an airtight container in the refrigerator for at least 24 hours before serving. Bring them to room temperature for about 20 minutes before eating for the best flavor and texture.
Expert Tips for Macaron Success
Watch the Humidity: Macarons hate humidity. If it is a rainy or very humid day, it will take much longer for the skins to form during the drying step. You can try drying them near a dehumidifier or under the stovetop fan set to low.
Don’t Skip the Aging: It is tempting to eat them right away, but freshly baked macarons can be crunchy and hollow. The “maturation” process in the fridge allows the filling to hydrate the shell, creating that perfect chewy interior.
Oven Temperature is Crucial: If your oven runs too hot, the shells might crack or brown too quickly. If it’s too cool, they won’t develop feet and might be hollow inside. Use an oven thermometer to ensure accuracy. If your macarons are browning on one side, try rotating the pan halfway through baking.
Fun Variations to Try
Once you have mastered the basic technique, the possibilities are endless. Try these fun variations to switch things up:
Flavor Infusions: Add a teaspoon of lemon zest to the macaron batter during the final folding stage for a bright citrus note. For the filling, try a cream cheese frosting or a rich white chocolate ganache instead of buttercream.
Two-Tone Shells: Divide your batter before adding color. Dye half turquoise and leave half white (or dye it light purple). Carefully spoon the two colors side-by-side into your piping bag to create a marbled effect when you pipe the clam shells.
Decorated Shells: Once the shells are baked and cooled, you can brush them with a little edible luster dust mixed with vodka for a shimmering, pearlescent finish on the outside of the shell before assembling.
Conclusion
Creating these turquoise clam shell macarons is a labor of love that yields spectacular results. While they require patience and precision, the final product is a whimsical, delicious, and professional-looking treat that will leave a lasting impression on anyone lucky enough to receive one. Embrace the process, don’t be discouraged if your first batch isn’t perfect, and enjoy the magical world of French macaron baking!
Turquoise Clam Shell Macarons with Edible Pearls
Ingredients
Equipment
Method
- Wipe down mixing bowl and whisk with vinegar. Line baking sheets with parchment.
- Sift almond flour and 130g powdered sugar together three times. Discard large bits.
- Whip egg whites and cream of tartar on medium-low until foamy. Increase speed and gradually rain in granulated sugar.
- Whip to stiff peaks, adding turquoise gel color during the final stages.
- Fold sifted dry ingredients into meringue in three batches (macaronage) until batter flows in a slow, continuous ribbon that can form a figure-eight.
- Transfer to piping bag with round tip. Pipe tapered oval rounds onto baking sheets to resemble clam halves.
- Tap trays firmly on counter to release air bubbles. Let dry for 30-60 minutes until a matte skin forms.
- Preheat oven to 300°F (150°C). Bake one tray at a time for 15-18 minutes. Cool completely on trays.
- For filling: Beat softened butter until creamy. Gradually add powdered sugar, vanilla, and cream until fluffy.
- Pipe buttercream onto bottom shells. Place one pearl in the center. Angle top shell over the pearl to create an open clam look.
- Refrigerate in airtight container for 24 hours to mature before serving.