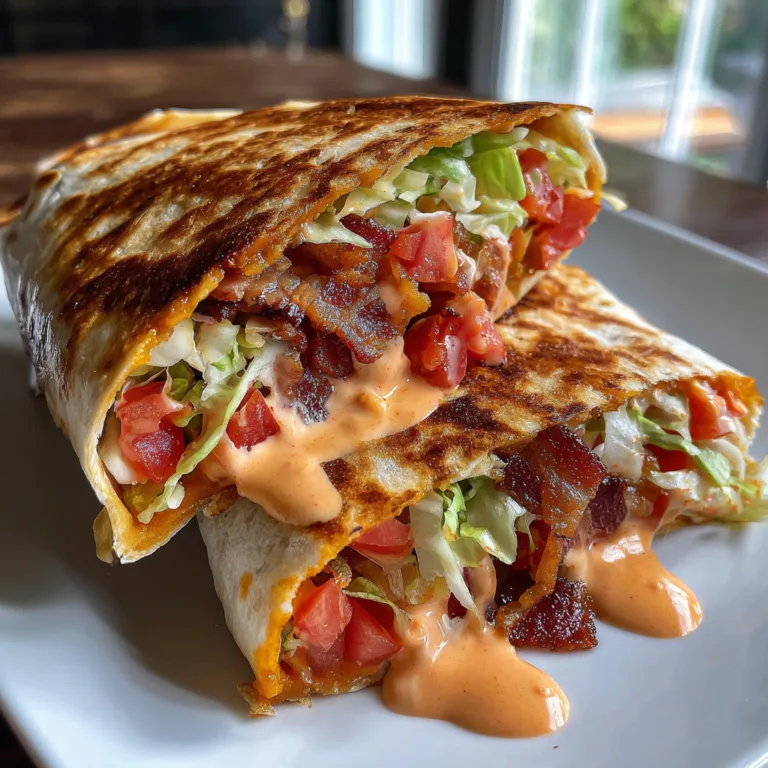
Cheesy Garlic Chicken Wraps
Ooey-Gooey Cheesy Garlic Chicken Wraps: The Ultimate Comfort Food Guide
There are few things in the culinary world as universally beloved as the combination of tender chicken, aromatic garlic, and an abundance of melted, stretchy cheese, all neatly folded into a perfectly toasted tortilla. The Ooey-Gooey Cheesy Garlic Chicken Wrap is a masterclass in texture and flavor, offering a satisfying crunch on the outside that yields to a rich, savory, and incredibly creamy interior. Whether you are searching for a quick weeknight dinner to feed a hungry family, a satisfying weekend lunch, or a crowd-pleasing snack for game day, this recipe delivers on every front. In this comprehensive guide, we will explore everything you need to know to create the ultimate cheesy garlic chicken wraps in your own kitchen, from selecting the right ingredients to mastering the perfect golden-brown toast.
Why You Will Fall in Love with These Cheesy Garlic Chicken Wraps
In today’s fast-paced world, finding a meal that is both exceptionally delicious and remarkably easy to prepare can feel like a daunting task. These wraps bridge the gap between gourmet comfort food and accessible home cooking. One of the primary reasons this recipe is a standout is its incredible versatility. The core components—chicken, cheese, and tortillas—serve as a blank canvas that can be adapted to suit almost any palate or dietary preference. Furthermore, the entire cooking process, from chopping the garlic to taking that first glorious bite, can be completed in under 30 minutes. This makes it an ideal solution for those evenings when time is short but the craving for something hearty and homemade is strong.
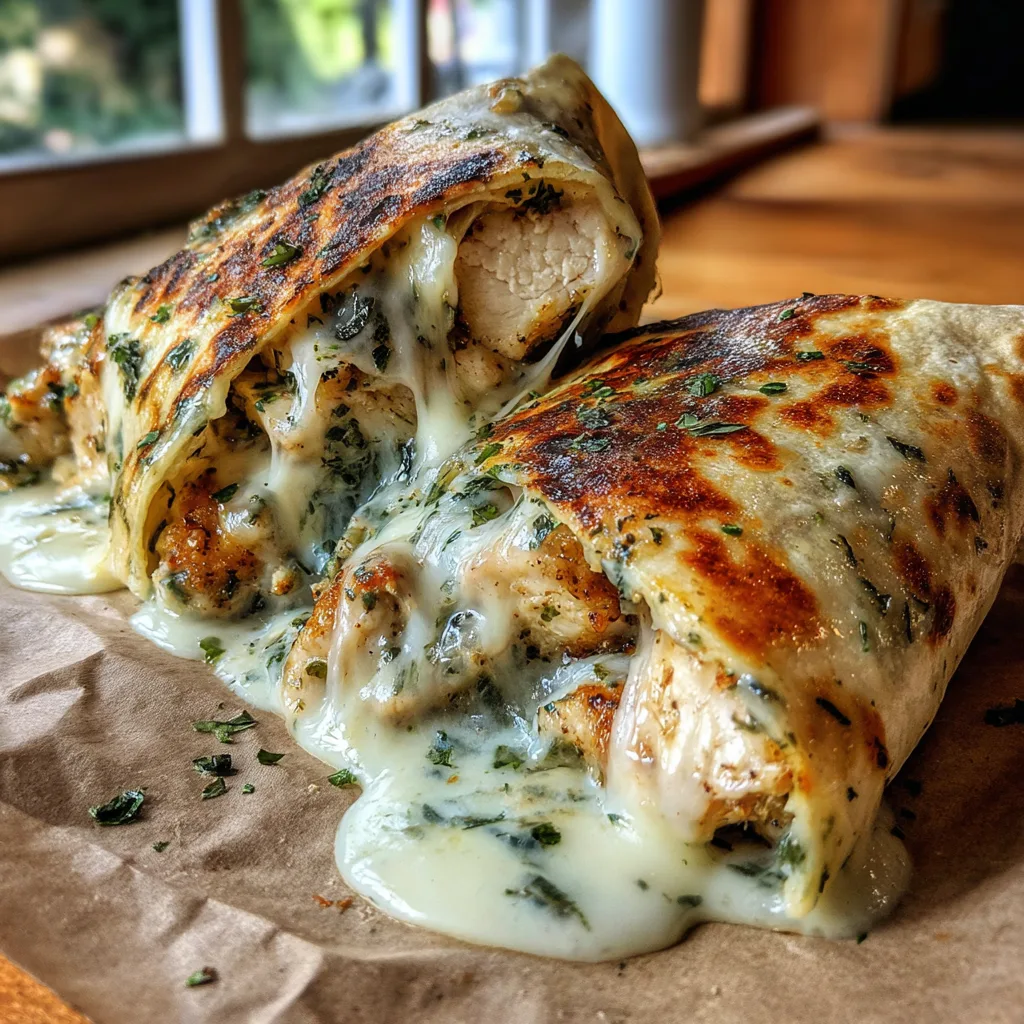
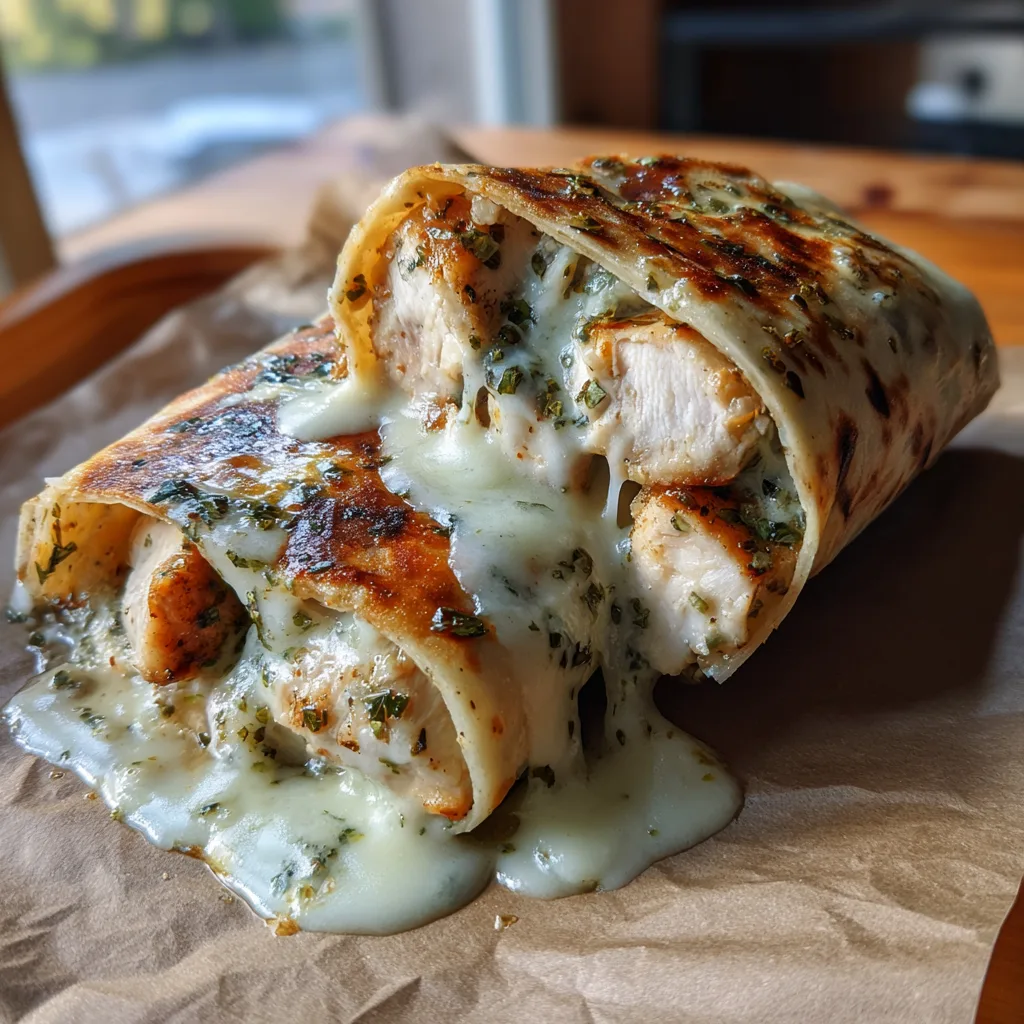
Beyond the convenience, the sensory experience of eating these wraps is truly something special. As you bite through the crisped, slightly charred exterior of the tortilla, you are met with an eruption of melted mozzarella and the savory, buttery notes of garlic and herbs. The chicken, cooked to juicy perfection, provides a substantial and satisfying protein base that ensures the meal is not just tasty, but genuinely filling. It is a handheld feast that feels indulgent without requiring hours of labor over a hot stove.
The Magic of the Ingredients: Breaking Down the Components
To achieve the signature “ooey-gooey” texture and robust flavor profile of these wraps, understanding your ingredients is crucial. Every element plays a specific role in building the final masterpiece.
The Chicken: The Heart of the Wrap
Boneless, skinless chicken breasts are the standard choice here due to their lean profile and ability to absorb flavors beautifully. However, chicken thighs can also be used if you prefer a richer, slightly more forgiving cut of meat. The secret to great wrap filling is ensuring the chicken is cut into bite-sized pieces so that every mouthful contains the perfect ratio of meat, cheese, and tortilla. Seasoning the chicken generously before it even hits the pan is non-negotiable for building layers of flavor.
The Garlic and Butter: The Flavor Powerhouse
Garlic is the undisputed star of the flavor profile. While garlic powder can be used in a pinch, fresh minced garlic provides a pungent, aromatic quality that simply cannot be replicated. When this fresh garlic is sautéed in rich, unsalted butter, it creates a foundational sauce that coats the chicken and infuses the entire wrap with a deeply savory essence. The butter also aids in browning the chicken and adding a luxurious mouthfeel to the filling.
The Cheese: Achieving Maximum Gooeyness
Not all cheeses are created equal when it comes to melting. For the ultimate ooey-gooey experience, low-moisture part-skim mozzarella is a fantastic choice. It offers the classic “cheese pull” that makes these wraps so visually appealing and texturally satisfying. Provolone or a mild Monterey Jack are also excellent alternatives. For an added punch of flavor, mixing in a handful of freshly grated Parmesan or sharp cheddar can elevate the taste profile significantly.
The Tortillas: The Perfect Vessel
Large, burrito-sized flour tortillas are essential for this recipe. They need to be large enough to hold a generous amount of filling without tearing or bursting during the folding process. Flour tortillas also toast beautifully in a skillet, developing those coveted golden-brown spots and a slightly flaky texture that contrasts perfectly with the soft interior. Corn tortillas are generally not recommended for this specific recipe as they lack the pliability needed for a tight wrap.
Ingredients You Will Need
Gathering high-quality ingredients is the first step toward wrap perfection. Here is what you will need:
- – 1 lb (450g) boneless, skinless chicken breasts, diced into bite-sized pieces
- – 4 large burrito-sized flour tortillas
- – 2 cups shredded mozzarella cheese (or a blend of mozzarella and provolone)
- – 4 cloves garlic, minced
- – 3 tablespoons unsalted butter
- – 1 tablespoon olive oil
- – 1 teaspoon Italian seasoning (or a mix of dried oregano and basil)
- – 1/2 teaspoon smoked paprika
- – 1/2 teaspoon onion powder
- – Salt and freshly cracked black pepper to taste
- – 2 tablespoons fresh parsley, finely chopped (optional, for garnish and flavor)
Step-by-Step Instructions for Perfect Wraps
Follow these detailed steps to ensure your wraps turn out perfectly toasted on the outside and wonderfully melted on the inside.
- Prepare the Chicken: Begin by cutting your chicken breasts into uniform, bite-sized pieces. This ensures even cooking. In a medium bowl, toss the chicken pieces with the Italian seasoning, smoked paprika, onion powder, salt, and black pepper until completely coated.
- Cook the Chicken: Heat the olive oil and 1 tablespoon of the butter in a large skillet over medium-high heat. Once the butter has melted and the pan is hot, add the seasoned chicken. Cook for about 5-7 minutes, stirring occasionally, until the chicken is golden brown on all sides and cooked through (internal temperature of 165°F/74°C).
- Infuse with Garlic: Reduce the heat to medium-low. Add the remaining 2 tablespoons of butter and the minced garlic to the skillet with the chicken. Sauté for 1-2 minutes, stirring constantly, until the garlic is fragrant. Be careful not to let the garlic burn, as it will become bitter. Stir in the fresh chopped parsley. Remove the skillet from the heat.
- Assemble the Wraps: Lay the large flour tortillas flat on a clean work surface. Distribute a generous handful of shredded cheese down the center of each tortilla. Spoon the hot garlic butter chicken evenly over the cheese on each tortilla. Top the chicken with another layer of shredded cheese (this double-layering ensures the wrap holds together).
- Fold the Wraps: To fold, tuck the sides of the tortilla in first, then roll tightly from the bottom up, keeping the filling securely enclosed inside. Ensure the seam is facing down to prevent unrolling.
- Toast to Perfection: Wipe the skillet clean or use a clean pan. Heat it over medium heat (you can add a tiny smear of butter or a spray of oil if you like, but the residual butter from the wrap usually suffices). Place the wraps seam-side down in the hot skillet. Press down gently with a spatula. Toast for 2-3 minutes until golden brown and crispy. Carefully flip and toast the other side for another 2-3 minutes.
- Serve and Enjoy: Remove the wraps from the skillet, slice them in half diagonally to reveal the gooey cheese, and serve immediately while hot.
Pro Tips for the Best Results
Creating a good wrap is easy, but creating a great wrap requires a little bit of finesse. Here are some insider tips to elevate your wrap game:
Do Not Overstuff: It is incredibly tempting to load up the tortillas with as much chicken and cheese as possible. However, overstuffing is the number one cause of wraps tearing or bursting in the pan. Stick to the suggested ratios, leaving enough border space to fold the sides in securely.
Warm the Tortillas First: Cold tortillas are stiff and prone to cracking when folded. Briefly warm your tortillas in the microwave for about 10-15 seconds, or toss them in a dry, warm skillet for a few seconds per side. This makes them pliable, stretchy, and much easier to work with.
The “Seam-Side Down” Rule: When toasting your wraps, always start with the folded seam facing down against the hot pan. The heat will melt the cheese near the seam, effectively sealing the wrap shut so it doesn’t pop open when you flip it.
Grate Your Own Cheese: While pre-shredded cheese in bags is convenient, it is often coated in anti-caking agents like potato starch or cellulose. These agents prevent the cheese from clumping in the bag, but they also prevent it from melting smoothly. For the absolute best ooey-gooey texture, buy a block of cheese and grate it yourself.
Delicious Variations to Try
Once you have mastered the base recipe, the possibilities are endless. Here are a few ways to customize your cheesy garlic chicken wraps:
Make it Spicy: If you love a kick of heat, add a pinch of red pepper flakes to the chicken while it cooks. You can also mix some sriracha, hot sauce, or diced jalapeños directly into the filling before folding.
Add Veggies: Sneak in some extra nutrition by sautéing vegetables along with the chicken. Bell peppers, onions, mushrooms, and spinach all work wonderfully. Just be sure to cook off any excess moisture from the veggies so your wrap doesn’t become soggy.
Bacon and Ranch: For an indulgent twist, add crispy, crumbled bacon to the chicken mixture. Serve the wraps with a side of high-quality ranch dressing for dipping.
Different Proteins: This recipe works equally well with thinly sliced steak, ground turkey, or even cooked shrimp. Just adjust your cooking times accordingly to ensure the protein is cooked safely.
What to Serve with Your Cheesy Chicken Wraps
While these wraps are certainly hearty enough to stand on their own, pairing them with the right side dish can transform them into a complete, well-rounded meal. Because the wraps are rich and cheesy, lighter side dishes often provide the best balance.
A crisp green salad dressed with a sharp vinaigrette helps cut through the richness of the cheese and butter. Roasted vegetables, such as asparagus, zucchini, or broccoli, add an earthy flavor and necessary fiber. If you are leaning into comfort food territory, you cannot go wrong with classic French fries, sweet potato wedges, or a steaming bowl of tomato soup for dipping.
How to Store, Freeze, and Reheat
These wraps are excellent for meal prep, as they store and reheat surprisingly well if handled correctly.
Storing in the Fridge: Allow any leftover wraps to cool completely to room temperature. Wrap them tightly in aluminum foil or plastic wrap, or place them in an airtight container. They will keep in the refrigerator for up to 3-4 days.
Freezing: You can freeze these wraps either before or after toasting. To freeze, wrap them individually in foil and place them in a heavy-duty freezer bag. They will last for up to 2 months. Thaw overnight in the refrigerator before reheating.
Reheating: To restore that crispy exterior, avoid the microwave if possible, as it will make the tortilla soft and chewy. Instead, reheat the wraps in a skillet over medium-low heat until warmed through and the cheese is remelted. Alternatively, you can bake them in an oven preheated to 350°F (175°C) for about 10-15 minutes.
Frequently Asked Questions (FAQs)
Can I use leftover rotisserie chicken? Absolutely! Using pre-cooked rotisserie chicken makes this fast recipe even faster. Simply shred or dice the chicken, warm it in the skillet with the garlic and butter, and proceed with assembling the wraps.
Why is my wrap soggy? A soggy wrap is usually the result of too much moisture in the filling. Ensure your chicken is cooked until the juices evaporate. If adding veggies, make sure they are well-sautéed to remove excess water. Also, serve the wraps immediately after toasting.
Can I make these gluten-free? Yes, you can easily substitute the standard flour tortillas with your favorite brand of large, pliable gluten-free tortillas. Be mindful that gluten-free tortillas can sometimes be more fragile, so handle them gently during the folding process.
In conclusion, the Ooey-Gooey Cheesy Garlic Chicken Wrap is a triumph of simple, satisfying flavors. By following this guide, you are well on your way to creating a restaurant-quality meal right in your own kitchen that is guaranteed to become a regular feature in your weekly dinner rotation.
Ooey-Gooey Cheesy Garlic Chicken Wraps
Ingredients
Equipment
Method
- Toss the diced chicken breasts with Italian seasoning, smoked paprika, onion powder, salt, and pepper until evenly coated.
- Heat the olive oil and 1 tablespoon of butter in a large skillet over medium-high heat. Add the chicken and cook for 5-7 minutes until golden brown and cooked through.
- Reduce heat to medium-low. Add the remaining 2 tablespoons of butter and minced garlic to the skillet. Sauté for 1-2 minutes until fragrant. Stir in fresh parsley, then remove from heat.
- Lay tortillas flat. Place a handful of shredded cheese in the center of each, top with the hot garlic butter chicken, and add another layer of cheese.
- Fold the sides of the tortillas inward, then roll tightly from the bottom up to seal the filling inside.
- In a clean skillet over medium heat, place the wraps seam-side down. Toast for 2-3 minutes per side until crispy and golden brown.
- Remove from heat, slice diagonally, and serve immediately.