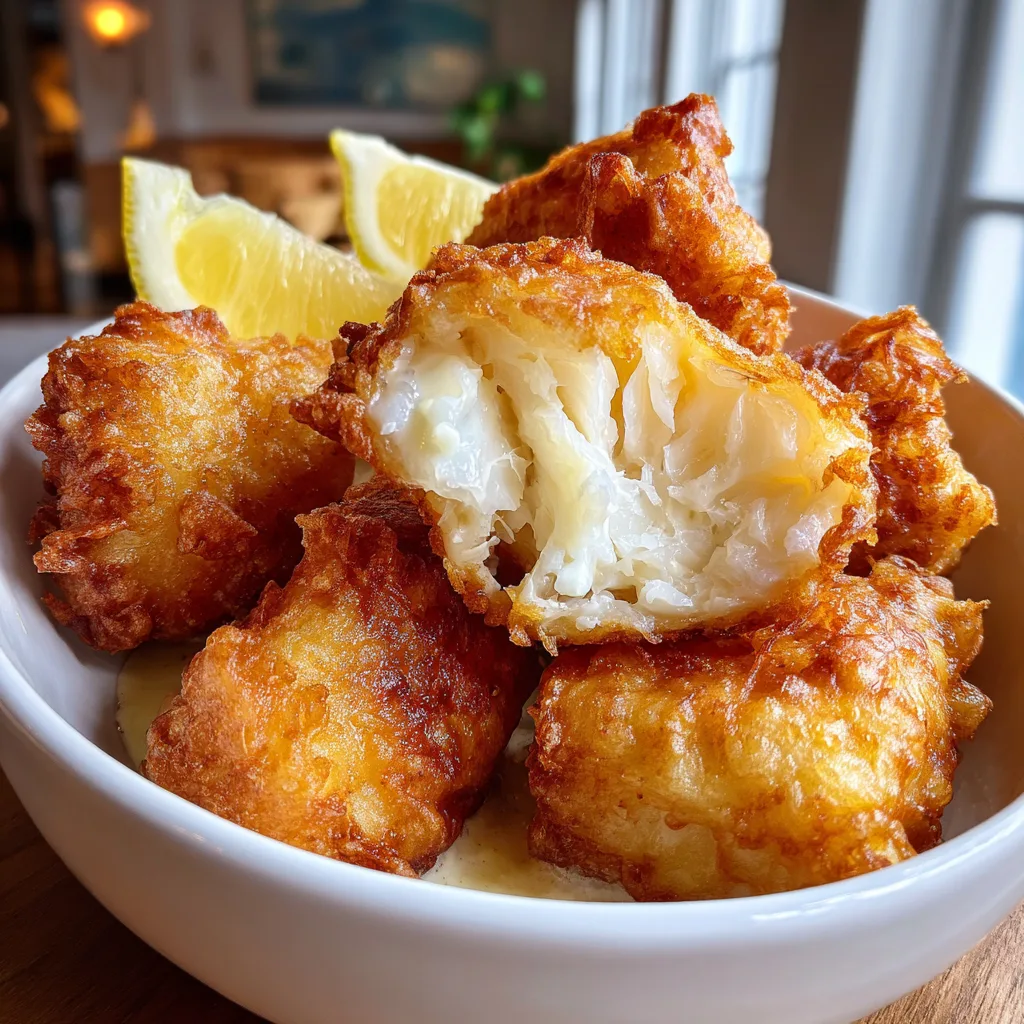
Beer Battered Halibut
The Ultimate Golden Brown Beer Battered Halibut
There is a universal comfort found in a perfectly executed plate of fried fish. The contrast between a shatteringly crisp, deeply golden crust and the tender, steaming, flaky white fish inside is a culinary triumph that spans across cultures. When it comes to the pinnacle of this experience, nothing quite compares to Golden Brown Beer Battered Halibut. Halibut, often considered the “steak of seafood,” boasts a firm texture and a clean, mild flavor that makes it the absolute perfect canvas for a rich, flavorful beer batter. If you have been intimidated by the idea of deep-frying seafood at home, fear not. This comprehensive guide will walk you through the science, the technique, and the secrets to achieving pub-quality battered fish right in your own kitchen.
The beauty of this recipe lies in its rustic simplicity. You do not need a culinary degree to master it; you only need an understanding of a few key principles regarding temperature and batter consistency. Whether you are hosting a casual summer fish fry or just craving a comforting, hearty dinner on a rainy Tuesday, this beer battered halibut will quickly become a highly requested favorite in your household.
Why Halibut is the King of the Fryer
When selecting fish for frying, the texture and fat content are critical. While cod and haddock are traditional choices for classic British fish and chips, halibut elevates the dish to a gourmet level. Halibut is a lean, firm-fleshed white fish. Its density is its greatest asset here.
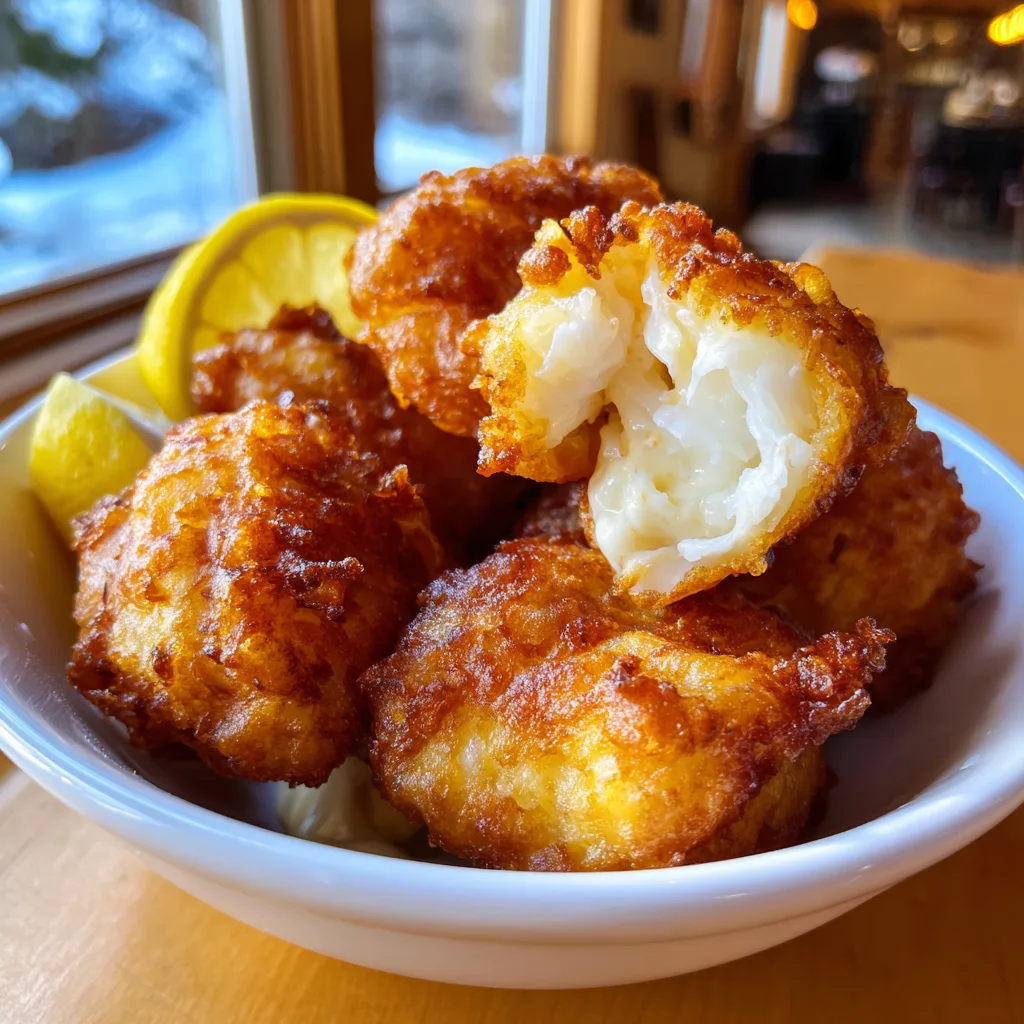
More delicate fish, like tilapia or flounder, can completely fall apart in the hot oil or turn to mush beneath the heavy batter. Halibut stands up to the intense heat and the weight of the coating. When cooked perfectly, it flakes into large, meaty, snow-white chunks that retain their structural integrity while remaining incredibly moist. Its mild, slightly sweet flavor profile also ensures that the fish doesn’t compete with the savory, yeasty notes of the beer batter, creating a perfectly balanced bite.
The Science of the Perfect Beer Batter
A great batter is the difference between a greasy, heavy crust and a light, airy, crispy shell. Beer is not just added for flavor; it is a crucial chemical component in the frying process.
First, beer provides carbonation. Those little bubbles get trapped in the thick batter. When the batter hits the hot oil, those bubbles expand and burst, creating a lacy, delicate structure that results in a lighter crust. Second, alcohol evaporates at a much faster rate and at a lower temperature than water. This means the batter dries out and crisps up significantly faster than a water-based batter would, preventing the fish from overcooking inside while you wait for the outside to turn golden brown. Finally, the foaming agents naturally present in beer help to insulate the fish, allowing it to gently steam inside its crispy shell rather than absorbing excess cooking oil.
To maximize crispiness, this recipe also utilizes cornstarch in addition to all-purpose flour. Cornstarch contains no gluten. By cutting the flour with cornstarch, we lower the overall gluten development in the batter, which prevents it from becoming tough or chewy, ensuring a delicate, shattering crunch.
Choosing the Right Beer
The beer you choose will directly impact the final flavor of your crust. You want a beer with good carbonation and a flavor profile that complements, rather than overwhelms, the seafood.
Lagers and Pilsners: These are the gold standard for fish batter. They are highly carbonated, light, and crisp. They provide the necessary lift and a subtle yeasty flavor without being overly heavy.
Pale Ales: If you prefer a slightly more robust, hoppy flavor in your crust, a mild pale ale works wonderfully. Just be careful not to choose anything too bitter, like a heavy IPA, as that bitterness can concentrate during frying and clash with the sweet fish.
Stouts and Porters: While some swear by dark beers for their batter, be aware that they will yield a very dark, heavily flavored crust. They can be delicious, but they might overpower the delicate nature of the halibut.
Essential Frying Equipment and Safety
Deep frying at home requires attention and respect for hot oil, but with the right tools, it is incredibly safe and straightforward.
- A Heavy-Bottomed Pot or Dutch Oven: You need a pot that retains heat well. Cast iron enamel Dutch ovens are perfect for this. Do not use a thin, flimsy pot, as the oil temperature will fluctuate wildly.
- A Deep-Fry Thermometer: This is arguably the most important tool. Frying blind is a recipe for disaster. If the oil is too cold, the fish will absorb it and become greasy. If it is too hot, the batter will burn before the fish cooks. You need to maintain a steady 375°F (190°C).
- A Spider or Slotted Spoon: For safely lowering the fish into the oil and retrieving it without carrying over excess grease.
- A Wire Cooling Rack: Set this over a baking sheet. Never drain fried food directly on paper towels; the steam will get trapped underneath and immediately turn your crispy batter soggy. A wire rack allows air to circulate underneath.
Ingredients You Will Need
For the Fish:
- – 1.5 lbs fresh Halibut fillets (skinless, cut into 2-inch wide strips or “nuggets”)
- – 1/4 cup all-purpose flour (for dredging)
- – 1 teaspoon Kosher salt
- – 1/2 teaspoon black pepper
For the Beer Batter:
- – 1 cup all-purpose flour
- – 1/4 cup cornstarch
- – 1 teaspoon baking powder
- – 1 teaspoon Kosher salt
- – 1/2 teaspoon garlic powder
- – 1/2 teaspoon paprika (for color)
- – 1 cup cold beer (Lager or Ale preferred, very cold)
For Frying:
- – 1 to 2 quarts of neutral frying oil (Canola, Peanut, or Vegetable oil)
Step-by-Step Instructions
- Prepare the Fish: Pat the halibut fillets completely dry with paper towels. Moisture is the enemy of a crispy crust. Cut the fillets into uniform pieces—either classic fish stick shapes or slightly larger nuggets. Season the pieces generously on all sides with salt and pepper.
- Set Up Your Frying Station: Pour about 2 to 3 inches of oil into your Dutch oven. Attach your deep-fry thermometer and begin heating the oil over medium-high heat until it reaches exactly 375°F (190°C). Place your wire cooling rack over a baking sheet nearby.
- Mix the Dry Ingredients: In a large mixing bowl, whisk together the 1 cup of flour, cornstarch, baking powder, salt, garlic powder, and paprika.
- Dredge the Fish: Place the 1/4 cup of dredging flour into a shallow dish. Lightly coat each piece of seasoned halibut in the dry flour, shaking off any excess. This dry layer gives the wet batter something to cling to, preventing it from slipping off the slick fish in the hot oil.
- Mix the Wet Batter: Once your oil has reached the target temperature, it is time to mix the batter. Do not do this early! You want the beer’s carbonation to be as active as possible. Pour the very cold beer into the bowl with the dry batter ingredients. Whisk gently just until combined. It is perfectly fine if there are a few lumps; do not overmix, or you will develop gluten and lose the bubbles.
- Dip and Fry: Working in small batches (about 3 or 4 pieces at a time), dip the floured halibut into the beer batter, letting the excess drip off for a second. Carefully lower the fish into the hot oil, dropping it away from you to prevent splashing.
- Manage the Fry: Fry the fish for about 4 to 6 minutes, gently turning them occasionally with your spider or tongs, until they are deeply golden brown and crispy all over. Ensure the oil temperature stays between 360°F and 375°F during the frying process.
- Drain and Season: Remove the cooked fish from the oil and transfer it immediately to the prepared wire rack. While it is still piping hot and glistening with oil, immediately hit it with a tiny pinch of extra salt.
- Repeat: Allow the oil to return to 375°F before adding the next batch of fish.
Serving Suggestions
To fully appreciate this dish, the accompaniments are just as important as the fish itself. Serve your golden brown halibut immediately while it is still audibly crispy.
A classic homemade tartar sauce is essential. Mix good quality mayonnaise with finely chopped dill pickles, a squeeze of fresh lemon juice, chopped capers, and a pinch of fresh dill. The creamy, acidic sauce cuts through the richness of the fried batter perfectly.
For a true pub experience, provide a bottle of malt vinegar for dashing over the hot fish and, of course, a generous side of thick-cut French fries (chips) or creamy homemade coleslaw. Don’t forget ample wedges of fresh lemon; a bright squeeze of citrus juice right before eating wakes up all the flavors.
Conclusion
Mastering this Golden Brown Beer Battered Halibut at home is incredibly rewarding. By understanding the importance of oil temperature, the science of a cold, carbonated batter, and starting with a premium, firm fish like halibut, you can achieve a seafood dinner that rivals any coastal restaurant. It is a hearty, satisfying, and deeply comforting meal that brings the nostalgic joy of a classic fish fry right to your dining table.
Golden Brown Beer Battered Halibut
Ingredients
Equipment
Method
- Pat the halibut fillets completely dry and cut into uniform pieces. Season all sides with salt and pepper.
- Heat 2-3 inches of oil in a Dutch oven to 375°F (190°C). Set a wire cooling rack over a baking sheet nearby.
- In a shallow dish, coat the seasoned fish pieces lightly with the 1/4 cup of dredging flour, shaking off excess.
- In a large bowl, whisk together the batter dry ingredients: 1 cup flour, cornstarch, baking powder, salt, garlic powder, and paprika.
- Just before frying, pour the cold beer into the dry batter mixture and whisk gently until just combined (some lumps are fine).
- Dip the floured fish pieces into the wet batter, let excess drip off, and carefully lower into the hot oil.
- Fry in small batches for 4-6 minutes, turning occasionally, until deeply golden brown and crispy.
- Transfer cooked fish to the wire rack and immediately sprinkle with a tiny pinch of salt. Let oil return to 375°F before the next batch.