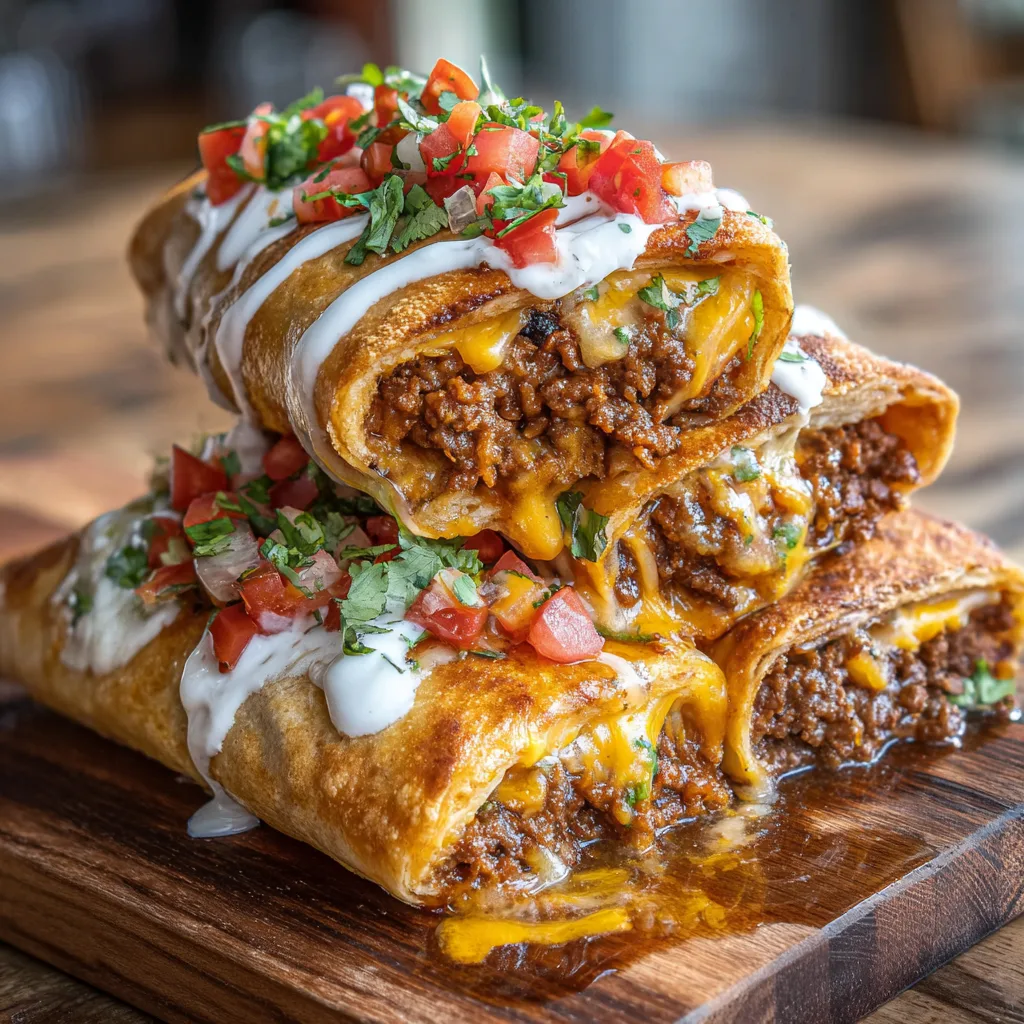
Beef & Cheese Chimichangas
The Ultimate Beef and Cheese Chimichangas: Crispy, Cheesy, and Unforgettable
When it comes to comfort food, few culinary traditions deliver quite like Tex-Mex. The bold spices, the comforting carbohydrates, the endless varieties of melted cheese, and the deeply satisfying textures make it a universally beloved cuisine. But among the pantheon of tacos, enchiladas, and fajitas, there stands a legendary dish that elevates the simple burrito to staggering new heights of deliciousness: the Beef and Cheese Chimichanga. If you have ever been to a Mexican-American restaurant and marveled at the golden, blistered, crispy exterior giving way to a molten, savory, heavily spiced interior, you know exactly what kind of magic we are talking about.
A chimichanga is, in its simplest definition, a deep-fried burrito. But to dismiss it as just a fried burrito is to ignore the transformative power of hot oil on a flour tortilla. The frying process creates a shattering, flaky crust that contrasts perfectly with the gooey, wet, savory filling inside. In this comprehensive, deep-dive guide, we are going to explore everything you need to know to make restaurant-quality Beef and Cheese Chimichangas right in your own kitchen. We will cover the fascinating history of the dish, break down the ideal ingredient ratios, teach you the foolproof folding method to prevent oil leaks, and explore various cooking methods so you can enjoy this treat whether you want to deep fry, air fry, or bake.
The Fascinating Origins of the Chimichanga
Before we start browning our beef and shredding our cheese, it is worth taking a moment to appreciate where this incredible dish comes from. Unlike many traditional Mexican dishes that date back centuries to Mesoamerican civilizations, the chimichanga is a relatively modern invention, and its birthplace is proudly claimed by the American Southwest—specifically, the state of Arizona.
Legend has it that the chimichanga was born by pure, glorious accident in the early to mid-20th century. The most famous origin story centers around a restaurant called El Charro Cafe in Tucson, Arizona. As the story goes, the owner, Monica Flin, accidentally dropped a prepared meat burrito into a vat of bubbling deep-frying oil. Because young children were in the kitchen, instead of yelling a traditional Spanish profanity that begins with “ch,” she quickly pivoted and shouted “chimichanga!”—a nonsense word roughly equivalent to “thingamajig” or “whatchamacallit.”
Whether this exact story is the absolute historical truth or a colorful piece of culinary folklore, one thing is certain: the chimichanga became an instant sensation. The magical combination of a crunchy, flaky exterior with a hot, steamy, savory interior captured the hearts (and stomachs) of the American Southwest, quickly spreading to Tex-Mex menus across the entire country.
Why You Will Be Obsessed With This Recipe
If you are accustomed to buying frozen chimichangas from the grocery store or waiting until you go to a restaurant to enjoy them, making them from scratch is going to change your life. Here is why this specific Beef and Cheese Chimichanga recipe will become a permanent staple in your dinner rotation:
- Incredible Texture Contrast: The hallmark of a great chimichanga is the crunch. By shallow frying or deep frying the flour tortilla, it puffs up, blisters, and becomes incredibly flaky. When you bite through that crispy shell into the soft, gooey melted cheese and the tender ground beef, your brain lights up with culinary joy.
- Budget-Friendly and Generous: Ground beef is one of the most economical proteins you can buy. When stretched with a little bit of onion, garlic, and wrapped in affordable flour tortillas, you can feed a large family or host a dinner party for a fraction of the cost of eating out.
- Make-Ahead and Freezer-Friendly: This is a meal-prepper’s dream. You can assemble an entire batch of these chimichangas, wrap them tightly, and freeze them before cooking. On a busy weeknight, you can pull them out and have a homemade, piping hot dinner with zero prep work.
- Endlessly Customizable: While we are focusing on the classic pairing of ground beef and cheese, the technique you will learn here applies to any filling you can dream up. From shredded chicken and green chiles to carnitas and black beans, the chimichanga shell is a blank canvas.
Deep Dive: Essential Ingredients for the Perfect Chimichanga
A chimichanga is only as good as what you put inside it. Let us break down the crucial components that will elevate your dish from average to extraordinary.
The Meat: Ground Beef
For the classic, diner-style Tex-Mex flavor, ground beef is essential. We highly recommend using 80/20 ground beef (80% lean, 20% fat). The fat is where the flavor lives. If you use extremely lean ground beef (like 96/4), your filling will end up dry and crumbly. The 20% fat content ensures the meat stays juicy and luscious, even after it is cooked, wrapped, and fried. You will drain off the excess grease after browning, so do not worry about the filling being too oily.
The Flavor Base: Aromatics and Spices
Plain ground beef is boring. You need to build a flavor foundation. Start with freshly diced yellow onions and minced garlic. Cook them in the beef fat until they are soft and translucent. Next comes the taco seasoning. You can absolutely use a store-bought packet for convenience, but making your own allows you to control the sodium and heat. A robust blend of chili powder, ground cumin, smoked paprika, garlic powder, onion powder, dried oregano, salt, and black pepper is all you need. To make the beef “saucy” (so it isn’t dry inside the tortilla), you will add a splash of beef broth or tomato sauce and let it simmer until it thickens into a rich gravy that coats the meat.
The Cheese Blend: Melt and Flavor
Do not skimp on the cheese, and more importantly, grate it yourself! Pre-shredded cheese in bags is coated with anti-caking agents like cellulose or potato starch. This prevents the cheese from clumping in the bag, but it also prevents it from melting smoothly inside your chimichanga. Buy a block and use a box grater.
For the ultimate flavor and texture, use a 50/50 blend of:
- Sharp Cheddar: Provides the bold, classic, slightly tangy flavor.
- Monterey Jack: This is an absolute melting champion. It is mild in flavor but turns incredibly gooey and stretchy when heated, giving you that beautiful “cheese pull” when you cut the chimichanga in half.
The Wrapper: Flour Tortillas
You must use flour tortillas for chimichangas. Corn tortillas will crack, fall apart, and turn into a greasy mess if you try to roll them this large and fry them. Look for “burrito-sized” flour tortillas (usually 10 to 12 inches in diameter). The larger size makes them much easier to fold securely, preventing your precious filling from leaking out into the hot oil.
Ingredients List
Gather these ingredients to start building your Tex-Mex masterpiece:
- – 1 lb (about 450g) Ground Beef (80/20 preferred)
- – 1 medium Yellow Onion, finely diced
- – 3 cloves Garlic, minced
- – 2 tbsp Taco Seasoning (store-bought or homemade blend of chili powder, cumin, oregano, etc.)
- – 1/3 cup Beef Broth or Water
- – 1.5 cups Sharp Cheddar Cheese, freshly grated
- – 1.5 cups Monterey Jack Cheese, freshly grated
- – 6 large Burrito-Sized Flour Tortillas
- – Vegetable Oil, Canola Oil, or Peanut Oil (for frying)
- – Optional Toppings: Sour cream, diced tomatoes, fresh cilantro, guacamole, salsa, shredded lettuce
Step-by-Step Instructions
Follow these steps closely to achieve that perfectly sealed, perfectly crispy chimichanga.
- Cook the Beef Mixture: Heat a large skillet over medium-high heat. Add the ground beef and the diced onion. Cook, breaking the meat apart with a wooden spoon, until the beef is fully browned and no pink remains, and the onions are soft (about 7-9 minutes). Drain any excess grease from the skillet.
- Season and Simmer: Reduce the heat to medium-low. Add the minced garlic and cook for 1 minute until fragrant. Stir in the taco seasoning and the beef broth. Let the mixture simmer for 3 to 5 minutes. The liquid will reduce and thicken, creating a saucy, flavor-packed coating around the beef. Remove from heat and let it cool slightly.
- Warm the Tortillas: This is a crucial step! Cold flour tortillas are stiff and will crack when you try to fold them. Wrap your stack of tortillas in a damp paper towel and microwave them for about 30-40 seconds until they are warm, soft, and pliable.
- Assemble the Chimichangas: Lay a warm tortilla flat on a clean surface. Place about 1/3 cup of the beef mixture slightly below the center of the tortilla. Top with a generous handful (about 1/2 cup combined) of the grated cheddar and Monterey Jack cheeses.
- Fold Tightly (The Envelope Method): Fold the bottom edge of the tortilla up and over the filling, pulling it back slightly to pack the filling tight. Fold the left and right sides in toward the center. Finally, roll the entire thing forward tightly to seal it. The goal is a compact, rectangular package with no open gaps. Secure the flap with a wooden toothpick if it feels loose.
- Heat the Oil: In a deep skillet or a Dutch oven, pour in enough oil to reach about 1 inch deep (shallow fry). Heat the oil over medium-high heat until it reaches 350°F to 375°F (175°C to 190°C). If you don’t have a thermometer, drop a tiny piece of tortilla in; if it immediately sizzles and floats to the top, the oil is ready.
- Fry to Golden Perfection: Carefully place the chimichangas into the hot oil, seam-side down first. Frying the seam side first seals the chimichanga shut, preventing it from unrolling. Fry for 1 to 2 minutes until golden brown and crispy. Using metal tongs, carefully flip them over and fry for another 1 to 2 minutes on the other side.
- Drain and Rest: Remove the chimichangas from the oil and place them on a wire cooling rack set over a baking sheet, or a plate lined with paper towels, to let the excess oil drain off. Let them rest for 3-5 minutes so the cheese sets slightly before cutting.
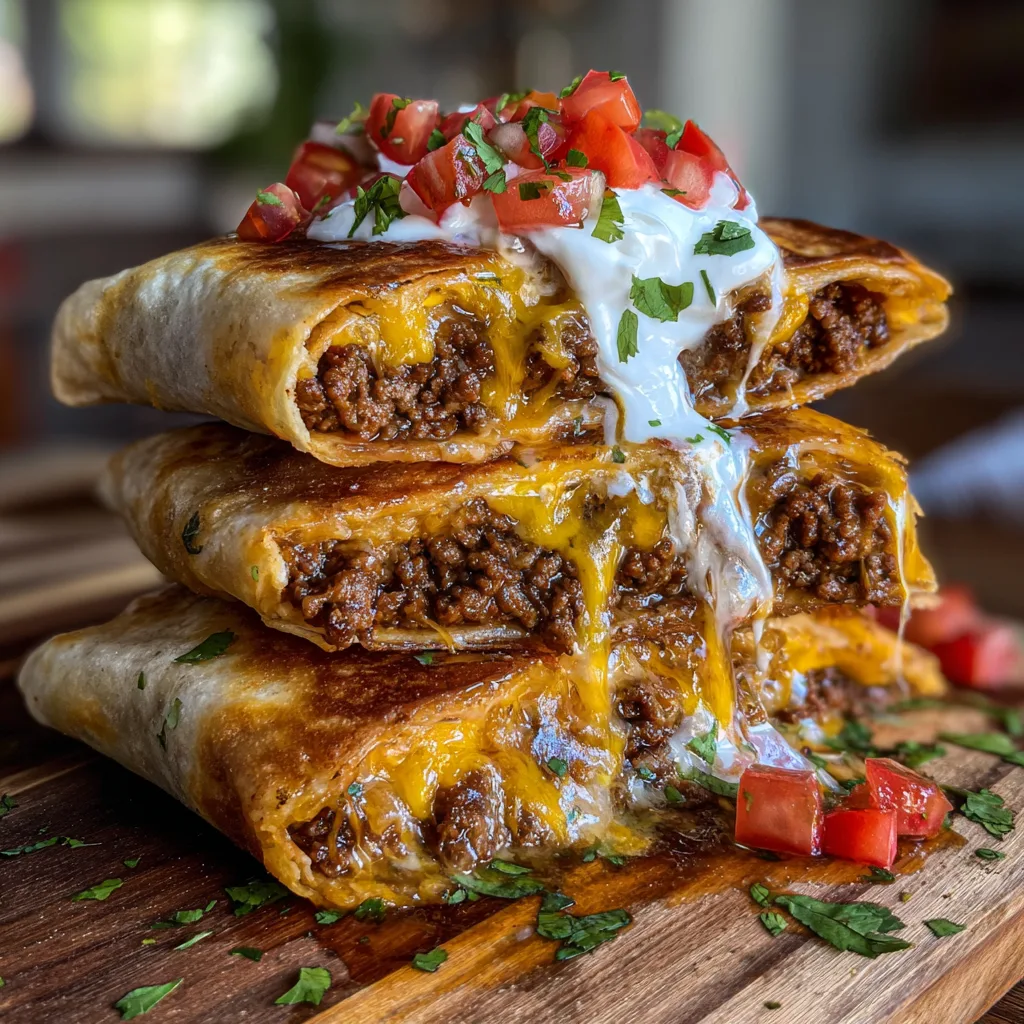
- Garnish and Serve: Serve hot, topped generously with sour cream, diced tomatoes, chopped cilantro, and any other toppings you desire.
The Art of Folding a Chimichanga
The biggest fear most people have when making chimichangas is the filling leaking out into the hot oil. When water (from the meat or cheese) hits hot oil, it causes violent splattering, which is dangerous and ruins your oil. Mastering the fold is essential.
The key is temperature and tension. As mentioned in the instructions, the tortilla must be warm. A cold tortilla lacks elasticity. When you fold the sides in, you must ensure they overlap the meat completely. As you execute the final roll, keep your fingers tight against the sides, tucking as you go. Think of it like swaddling a baby or wrapping a very tight present. If your tortilla is over-stuffed, it will burst. Do not give in to the temptation to add more meat than the recipe calls for. Less is more when it comes to structural integrity.
Cooking Methods: Deep Frying, Baking, and Air Frying
While frying in a pan of oil yields the most traditional, restaurant-style result, it is not the only way to enjoy a chimichanga. Here are alternative methods depending on your dietary preferences and kitchen equipment.
The Traditional Method: Shallow Frying
As outlined in the recipe, shallow frying (using about 1 inch of oil) is the best balance between achieving a perfect, blistered crust and not having to use a massive gallon of oil for a deep fryer. Canola, vegetable, or peanut oil are best due to their high smoke points. Never use olive oil for this, as it will burn and taste bitter.
The Healthier Method: Oven Baking
If you want to skip the hot oil entirely, baking is a fantastic option. The texture will be slightly different—more like a crispy, toasted wrap rather than a blistered, bubbly shell—but it is still delicious. Preheat your oven to 400°F (200°C). Place the assembled chimichangas seam-side down on a baking sheet lined with parchment paper. To get them crispy, brush the tops and sides generously with melted butter or vegetable oil. Bake for 20-25 minutes, flipping halfway through, until golden brown and crispy.
The Modern Method: Air Frying
The air fryer is a chimichanga’s best friend. It provides an incredible crunch with a fraction of the oil. Preheat your air fryer to 375°F (190°C). Brush or spray the assembled chimichangas all over with cooking oil (avocado oil spray works beautifully). Place them seam-side down in the air fryer basket, ensuring they do not touch. Air fry for 8 to 12 minutes, flipping halfway through, until deeply golden and crispy.
Delicious Variations and Add-Ins
The beef and cheese formula is a classic, but the chimichanga is highly adaptable. Consider these flavorful upgrades next time you cook:
- The Bean and Beef: Stretch your meat further by stirring in a can of drained and rinsed black beans or pinto beans into the beef mixture while it simmers. Alternatively, spread a layer of refried beans onto the tortilla before adding the beef.
- The Spicy Kick: If you love heat, add diced jalapeños or a can of drained green chiles to the beef mixture. You can also swap the Monterey Jack cheese for Pepper Jack.
- The Chicken Chimi: Swap the ground beef for shredded rotisserie chicken mixed with salsa verde, cream cheese, and a dash of cumin for a rich, tangy poultry alternative.
- The Breakfast Chimichanga: Who says you can’t have chimichangas for breakfast? Fill the tortillas with scrambled eggs, cooked breakfast sausage, hash browns, and cheddar cheese. Fry them up for the ultimate hangover cure or weekend brunch.
What to Serve With Beef and Cheese Chimichangas
A chimichanga is a heavy, rich, and deeply savory main course. To build a balanced meal, you want to pair it with sides that offer contrasting flavors and textures.
Cooling Toppings: A chimichanga needs to be “dressed” after frying. A heavy dollop of cold sour cream provides a creamy temperature contrast to the hot, crispy shell. Fresh pico de gallo, diced tomatoes, or a vibrant salsa offer crucial acidity to cut through the richness of the beef and fried dough. Guacamole adds a luxurious, fresh fat component.
Classic Sides: You cannot go wrong with the traditional Tex-Mex sidekicks. A scoop of fluffy Spanish rice (or cilantro lime rice) and a side of creamy refried beans topped with a little cotija cheese will turn your kitchen table into your favorite local cantina. A simple, crisp green salad with a lime vinaigrette is also a great option to add some lightness to the meal.
Storage, Freezing, and Reheating Guide
Chimichangas are phenomenal for meal prep. Here is how to handle the leftovers so they stay just as delicious on day two (or day thirty!).
Refrigerating Leftovers: If you have cooked chimichangas left over, let them cool completely to room temperature. Store them in an airtight container in the fridge for up to 4 days. Never microwave them to reheat. Microwaving will turn the beautifully crispy shell into a rubbery, soggy mess. Instead, reheat them in an oven at 375°F for 10-15 minutes, or pop them in the air fryer at 350°F for 5-7 minutes until heated through and crispy again.
Freezing Uncooked Chimichangas: This is the ultimate meal prep hack. Assemble the chimichangas, but do not fry them. Wrap each raw, rolled chimichanga tightly in aluminum foil, then place them all in a heavy-duty freezer bag. They will keep for up to 3 months. When you are ready to eat, you do not even need to thaw them! You can shallow fry them straight from frozen (just add an extra 2-3 minutes to the cooking time) or bake them at 400°F for 30-35 minutes.
Frequently Asked Questions
Why did my chimichanga fall apart in the oil?
This usually happens for two reasons: either the tortilla was not warmed up before folding (causing it to tear), or it was overstuffed. Also, ensure you place it seam-side down in the oil first to seal it shut.
Can I use a different type of meat?
Absolutely. Ground turkey, ground chicken, or even plant-based meat crumbles work perfectly with this exact same seasoning method.
What is the difference between a burrito, an enchilada, and a chimichanga?
A burrito is a large flour tortilla filled with various ingredients and served soft. An enchilada is typically made with corn tortillas, rolled around a filling, covered in a chili sauce, and baked. A chimichanga is a burrito that has been deep-fried or pan-fried until the exterior is completely crispy.
Conclusion
Mastering the Beef and Cheese Chimichanga is a culinary triumph that will make you the hero of dinnertime. By taking the time to properly season your beef, selecting the perfect melting cheeses, and learning the delicate art of the burrito fold, you can create a masterpiece of textures and flavors. Whether you choose to traditionally fry them to golden perfection, crisp them up in the air fryer, or bake them for a lighter touch, the result is guaranteed to be a comforting, mouth-watering meal that your family will request time and time again. Gather your ingredients, warm up those tortillas, and get ready to enjoy the ultimate Tex-Mex comfort food!
Beef and Cheese Chimichangas
Ingredients
Equipment
Method
- In a large skillet over medium-high heat, brown the ground beef and diced onions until meat is cooked through and onions are soft. Drain excess grease.
- Reduce heat to medium-low. Add minced garlic and cook for 1 minute. Stir in taco seasoning and beef broth. Simmer for 3-5 minutes until the liquid thickens and coats the meat.
- Wrap the tortillas in a damp paper towel and microwave for 30-40 seconds until warm and pliable.
- Place about 1/3 cup of the beef mixture and 1/2 cup of the mixed cheeses slightly below the center of each warm tortilla.
- Fold the bottom over the filling, fold in the sides, and tightly roll it up like a burrito. Secure with a toothpick if necessary.
- Heat about 1 inch of oil in a deep skillet to 350°F-375°F. Carefully place the chimichangas seam-side down into the hot oil.
- Fry for 1-2 minutes per side until golden brown and crispy. Remove and drain on a wire rack or paper towels.
- Top with sour cream, fresh tomatoes, and cilantro. Serve hot.