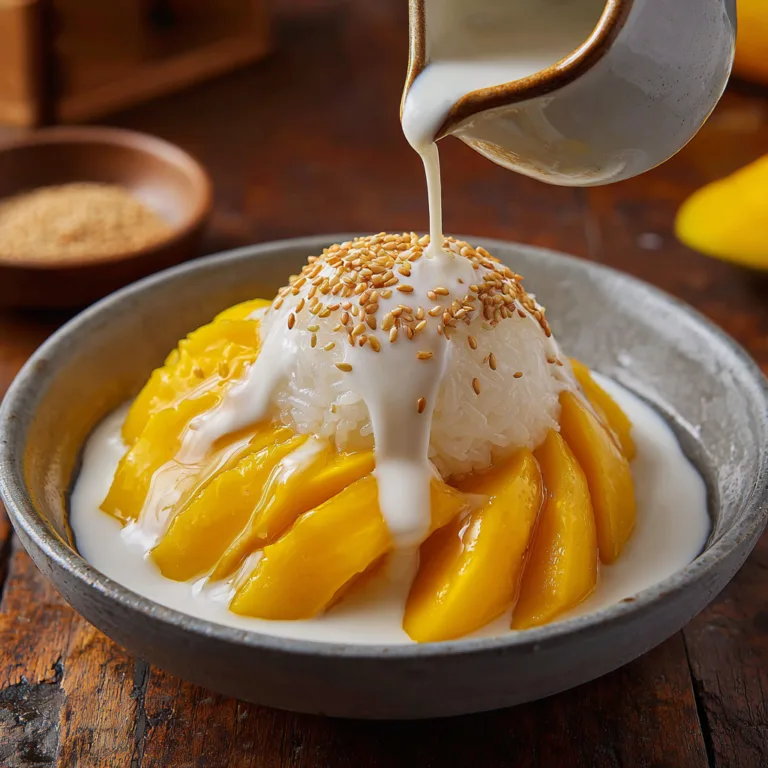
Baked Bloomin Apples
The Ultimate Fast & Easy Baked Bloomin’ Apples Recipe: A Cozy Autumn Delight
When the air turns crisp and the leaves begin to transform into vibrant shades of orange, red, and gold, our culinary cravings naturally shift towards warm, comforting, and spice-infused treats. Nothing captures the absolute essence of the autumn season quite like the aroma of apples baking in the oven, mingling with rich butter, sweet brown sugar, and earthy cinnamon. While traditional apple pies, cobblers, and crisps have long held their rightful place at the fall dessert table, there is a visually stunning, incredibly delicious, and surprisingly simple alternative that is guaranteed to steal the spotlight: the Fast & Easy Baked Bloomin’ Apple.
Inspired by the famous deep-fried “blooming onion” appetizer found in steakhouses, this dessert takes the core concept—slicing a spherical ingredient so it opens up like a blooming flower—and applies it to crisp, fresh orchard apples. The result is a masterpiece of texture and flavor. By slicing the apple into thin “petals” that remain attached at the base, you dramatically increase the surface area. This allows the decadent cinnamon-brown sugar butter mixture to seep deep into every single crevice of the fruit, caramelizing beautifully as it bakes. When you pull it out of the oven and finish it with a drizzle of sticky caramel sauce and a dollop of whipped cream or a scoop of vanilla bean ice cream, you have a show-stopping dessert that looks like it took hours of painstaking labor, but requires only minutes of actual prep time.

In this comprehensive, ultimate guide, we will dive deep into the art and science of creating the perfect Baked Bloomin’ Apple. From selecting the absolute best apple varieties for baking to mastering the slicing technique, exploring mouth-watering variations, and learning the secrets to a flawless presentation, this article provides everything you need to become a blooming apple expert.
Why the “Bloomin'” Technique Changes Everything
You might be wondering, why go through the effort of slicing the apple into a blooming pattern instead of just chopping it up or baking it whole? The answer lies in the incredible combination of culinary science, texture, and flavor distribution.
When you bake a whole, uncut apple, the skin acts as a barrier, trapping the moisture inside. The apple essentially steams in its own juices. While this can yield a soft, pleasant dessert, the flavorings (like sugar and spices) usually only sit in the hollowed-out core or on the very surface. Conversely, when you chop an apple into a crisp or pie, the pieces can sometimes turn into a uniform mush, losing their distinct structural integrity.
The “bloomin'” technique offers the absolute best of both worlds. The bottom base of the apple remains intact, holding the entire structure together so it presents beautifully as a single, elegant portion. Meanwhile, the dozens of thin, vertical slices fan out during the baking process. This fanning action allows the hot oven air to circulate around each individual “petal.” Furthermore, the warm, melting mixture of butter, dark brown sugar, and cinnamon flows down into the deep cuts. As the apple bakes, the water evaporates from the exposed flesh, concentrating the apple’s natural sugars, while the butter and brown sugar caramelize on the edges of the petals. This creates an irresistible textural contrast: the inside of the petals remain soft, tender, and juicy, while the outside edges become slightly chewy, sticky, and deeply caramelized.
Choosing the Perfect Apple for Baking
The foundation of this recipe relies entirely on the quality and type of apple you choose. Not all apples are created equal, especially when it comes to withstanding the heat of an oven. You need an apple that boasts a firm structure so it doesn’t collapse into applesauce, yet offers a flavor profile that balances sweetness and tartness to cut through the richness of the caramel and butter.
- Honeycrisp: Often considered the gold standard for both eating raw and baking, the Honeycrisp is an exceptional choice for bloomin’ apples. It has a remarkably firm, crisp texture that holds its shape beautifully in the oven. Its flavor is bright, complex, and intensely sweet-tart, which pairs perfectly with warm fall spices.
- Granny Smith: If you prefer a dessert that leans heavily into the tart end of the spectrum to balance the ultra-sweet caramel and brown sugar, Granny Smith is your go-to. Its dense flesh holds up incredibly well to heat, and the sharp acidity prevents the final dish from becoming cloyingly sweet.
- Braeburn: This is a highly underrated baking apple. Braeburns bake up wonderfully juicy but retain their shape, offering a highly concentrated, classic apple flavor with hints of nutmeg and cinnamon naturally present in their profile.
- Fuji: Fuji apples are incredibly sweet and naturally juicy. They have a firm texture that works well for the blooming technique, though they may yield a slightly softer final result than a Honeycrisp or Granny Smith. They are perfect if you want a naturally sweeter dessert.
- Pink Lady (Cripps Pink): Known for their beautiful pinkish skin and high acidity, Pink Ladies are fantastic bakers. They maintain a wonderful crunch and have a vibrant, effervescent flavor that shines through the heavy butter and sugar.
Apples to Avoid: It is highly recommended to steer clear of softer varieties like Red Delicious, McIntosh, or Gala for this specific recipe. While delicious for snacking or making applesauce, their cellular structure breaks down far too quickly under high heat, causing your beautiful blooming flower to collapse into a mushy puddle on the baking tray.
Detailed Ingredient Breakdown
Creating this masterpiece requires only a handful of common pantry staples, making it the ultimate impromptu dessert when you have guests coming over or simply need a quick weeknight treat.
- The Apples: As discussed, firm, crisp apples are essential. You will need one medium-to-large apple per person.
- Unsalted Butter: Butter is the vehicle that carries the spices and sugar deep into the apple. It provides richness and helps to create the gooey caramel sauce in the bottom of the pan. Using unsalted butter allows you to control the sodium level of the dessert.
- Dark Brown Sugar: While light brown sugar works, dark brown sugar is far superior for this recipe. It contains a higher percentage of molasses, which provides a deeper, more complex caramel flavor, a richer color, and a slightly stickier texture that clings beautifully to the apple petals.
- Ground Cinnamon: The quintessential autumn spice. It adds warmth and aromatic depth that enhances the natural flavor of the apples.
- Ground Nutmeg (Optional but recommended): A tiny pinch of freshly grated nutmeg adds an earthy, slightly nutty background note that elevates the overall flavor profile from simple to gourmet.
- Salt: A tiny pinch of kosher salt or sea salt mixed into the butter-sugar mixture is a secret weapon. Salt enhances sweetness and balances the flavors, preventing the dessert from tasting flat.
- Caramel Sauce: A heavy drizzle of high-quality caramel sauce applied right before serving takes this dessert over the edge. You can use store-bought caramel or easily make a homemade salted caramel sauce.
- Toppings: The finishing touches are what make it special. A star-piped dollop of homemade whipped cream, a generous scoop of premium vanilla bean ice cream, or even a spoonful of mascarpone cheese adds a necessary cool, creamy contrast to the hot, sticky apple. Slivers of toasted almonds, crushed pecans, or a sprinkle of extra cinnamon sugar can add visual appeal and crunch.
Mastering the Slicing Technique
The most crucial step in this recipe is achieving the perfect “bloom.” It might seem intimidating, but with the right tools and a simple trick, it is incredibly easy.
Step 1: The Prep. Start by thoroughly washing and drying your apples. You can choose to peel them or leave the skin on. Leaving the skin on provides a rustic look, helps the apple hold its shape slightly better, and retains valuable fiber and nutrients. If the skin is very thick or waxy, peeling might be preferred for a more tender bite.
Step 2: The Coring. Using an apple corer or a sharp melon baller, remove the core of the apple. Crucial Tip: Do not push the corer all the way through the bottom! You want to leave about a half-inch of the base intact to hold the slices together. If you accidentally go all the way through, you can plug the hole with a small piece of the discarded core to prevent all the delicious butter from leaking out immediately.
Step 3: The Slicing. Place the cored apple upright on a cutting board. Now, to prevent your knife from slicing all the way down and splitting the apple in half, place a wooden chopstick or a wooden spoon handle on either side of the apple. These will act as a physical bumper for your knife blade. Using a sharp paring knife or a small chef’s knife, make a slice straight down through the center of the apple until the blade hits the chopsticks. Rotate the apple slightly and make another slice. Continue doing this until you have created thin, even slices all the way around the apple. The more slices you make, the more “petals” your flower will have, and the more surface area there will be for the sugar and spices.
Step-by-Step Baking Instructions
- Preheat the Oven: Begin by preheating your oven to 375°F (190°C). This temperature is hot enough to caramelize the sugars and soften the apple quickly without completely obliterating its structure. Spray a baking dish or a cast-iron skillet with non-stick cooking spray, or line a baking sheet with parchment paper for easy cleanup.
- Prepare the Filling: In a small microwave-safe bowl, melt the unsalted butter. Once melted, aggressively whisk in the dark brown sugar, ground cinnamon, nutmeg, and a tiny pinch of salt. The mixture should form a thick, grainy, sweet paste.
- Stuff the Apples: Place your carefully sliced apples into the prepared baking dish. Gently use your fingers to slightly separate the “petals” of the apple. Take your butter and brown sugar paste and generously press it into the center cavity of the apple, and rub it all over the top, taking care to push some of the mixture down into the cuts between the slices. Do not worry if it looks messy; it will all melt and distribute evenly in the oven.
- The Bake: Cover the baking dish tightly with aluminum foil. This traps the steam initially, helping the tough apple flesh to soften. Bake covered for 15 minutes.
- The Caramelization: After 15 minutes, remove the foil. The apples should be starting to soften and fan out. Continue to bake uncovered for another 15 to 20 minutes. During this uncovered phase, use a spoon to baste the apples every 5-7 minutes with the melted buttery syrup pooling at the bottom of the dish. This basting is the secret to a glossy, perfectly coated, highly flavorful exterior. The apples are done when they are tender enough to easily pierce with a fork, but still hold their shape.
- Cooling and Plating: Remove the apples from the oven and let them rest in the baking dish for about 5 minutes. The hot sugar syrup is dangerously hot and needs a moment to slightly cool and thicken. Using a large spatula, carefully transfer each apple to a serving plate or a rustic wooden board.
- The Grand Finale: Drizzle each warm apple generously with rich caramel sauce. Top the center with a large dollop of freshly whipped cream or a scoop of cold vanilla ice cream. Garnish with toasted sliced almonds or a final dusting of cinnamon sugar. Serve immediately while hot!
Pro Tips for Flawless Execution
Even a recipe this simple benefits from a few expert tricks to guarantee absolute perfection every single time.
The Basting Process: Do not skip the basting step! Pouring the hot, sweet butter mixture over the apples as they bake is what creates that sticky, glossy, irresistible glaze. It also ensures the exposed edges of the petals don’t dry out in the dry heat of the oven.
Checking for Doneness: Ovens vary, and apples vary wildly in their density and moisture content. Keep a close eye on the apples during the last 10 minutes of baking. You want them soft and tender, but if you overbake them, they will collapse into mush. A paring knife should slide into the thickest part of a petal with very little resistance.
Make-Ahead Strategy: While Baked Bloomin’ Apples are best served fresh out of the oven, you can prepare the apples ahead of time. You can core and slice the apples up to 4 hours in advance. To prevent browning, gently toss the sliced apples in a mixture of cold water and a tablespoon of lemon juice, then drain them well and store them in the refrigerator in an airtight container. When you are ready for dessert, simply stuff them with the butter mixture and bake.
Creative and Decadent Variations
The beauty of this recipe is its versatility. Once you master the basic technique, you can customize the flavor profile to suit any craving.
The Apple Crisp Bloom: Combine the joy of an apple crisp with the presentation of a bloomin’ apple. Mix together rolled oats, flour, extra butter, and chopped pecans to create a crumble topping. After stuffing the apple with the initial butter-sugar mix, pack the crumble mixture on top and into the crevices before baking. This adds an incredible crunchy texture.
The Maple Bacon Bloom: For a savory-sweet twist that will blow your mind, substitute the caramel sauce with pure, high-quality maple syrup. Before baking, sprinkle finely chopped, pre-cooked crispy bacon bits into the slices. The smoky, salty pork pairs phenomenally with the sweet, tender apple.
The adult-only Bourbon Glaze: Add a splash (about a tablespoon) of good quality bourbon or dark rum to the butter and brown sugar mixture before stuffing the apples. The alcohol will cook off during baking, leaving behind a rich, complex, oaky flavor profile that elevates the dessert to a restaurant-quality experience.

Frequently Asked Questions (FAQs)
Can I make these in an air fryer instead of an oven?
Yes, absolutely! The air fryer creates a beautifully crispy edge on the apple petals. Preheat your air fryer to 350°F (175°C). Prepare the apples as directed, place them in the air fryer basket (you may need to use a small piece of parchment paper or a silicone liner to catch the melting butter), and air fry for 15-20 minutes, basting halfway through, until tender.
How do I store and reheat leftovers?
If you somehow have leftovers, store the cooled baked apples in an airtight container in the refrigerator for up to 3 days. To reheat, it is best to place them back in the oven at 350°F (175°C) for about 10 minutes until warmed through. The microwave works in a pinch (about 1 minute on high), but it will make the texture softer and less appealing.
Do I absolutely have to use an apple corer?
While an apple corer makes the job incredibly fast and uniform, it is not strictly necessary. You can use a sharp paring knife to carefully cut a circular well into the center of the apple, scooping out the seeds with a small spoon or melon baller. Just remember not to cut all the way through the bottom!
Conclusion
The Fast & Easy Baked Bloomin’ Apple is more than just a dessert; it is an experience. It brings together the nostalgic, heartwarming flavors of the autumn season in a presentation that is both rustic and undeniably elegant. The contrast between the hot, spice-infused, tender fruit and the cool, creamy toppings is a culinary triumph that will have your family and guests requesting this dish time and time again.
By following the techniques, tips, and variations outlined in this guide, you are fully equipped to turn an ordinary basket of apples into an extraordinary treat. So grab your favorite crisp apples, preheat your oven, and get ready to enjoy the ultimate comfort food that perfectly celebrates the magic of fall. Happy baking!
Fast & Easy Baked Bloomin’ Apples
Ingredients
Equipment
Method
- Preheat oven to 375°F (190°C). Spray a baking dish with non-stick spray.
- Cut the top off each apple and use an apple corer to remove the core, being careful not to cut all the way through the bottom.
- Place an apple on a cutting board with chopsticks on either side. Make deep circular cuts around the center, then slice downwards to create thin ‘petals’, stopping when the knife hits the chopsticks.
- In a small bowl, mix the melted butter, brown sugar, cinnamon, nutmeg, and salt until a paste forms.
- Place apples in the baking dish. Press the butter mixture into the center of each apple and between the slices.
- Cover the dish with foil and bake for 15 minutes.
- Remove foil. Bake uncovered for an additional 15-20 minutes, basting the apples with the melted syrup every 5 minutes, until tender.
- Remove from oven and transfer to serving plates. Drizzle generously with caramel sauce.
- Top with a dollop of whipped cream or ice cream, and garnish with sliced almonds before serving hot.