Rainbow Italian Ice
The Ultimate Homemade Rainbow Italian Ice Recipe: A Taste of Pure Summer Nostalgia
There are few things in this world that can instantly transport you back to the carefree days of childhood quite like a towering, brightly colored cup of Rainbow Italian Ice. Also affectionately known in some regions as “Water Ice,” this iconic, frost-kissed treat is the absolute epitome of summertime joy. It is the dessert you chased the ice cream truck down the street for; it is the refreshing cup you enjoyed on the boardwalk after a long day in the sun; it is the brightly stained tongue and the sweet, icy relief on a sweltering July afternoon. But what if you did not have to wait for the local ice cream parlor to open or the familiar jingle of the neighborhood truck to enjoy this vibrant masterpiece? What if you could recreate that exact, perfect, scoopable, sweet-and-tart magic right in your own kitchen?
Creating homemade Rainbow Italian Ice is not only entirely possible, but it is also one of the most rewarding and visually stunning culinary projects you can undertake during the warmer months. Unlike heavy, dairy-based ice creams that require tempering egg yolks and rich custards, or complicated pastries that demand precise baking times, making Italian ice is a surprisingly simple process that relies on fundamental food science, patience, and a little bit of creativity. In this incredibly comprehensive, step-by-step guide, we are going to dive deep into the fascinating world of frozen water desserts. We will explore the crucial differences between Italian ice, shaved ice, and sorbet; we will break down the exact chemistry required to achieve that perfectly smooth, scoopable texture without an expensive ice cream maker; and we will guide you through layering those iconic neon colors—cherry red, lemon yellow, and blue raspberry—to create a dessert that is just as breathtaking to look at as it is delicious to eat. Get ready to transform your freezer into the ultimate summer oasis.
Understanding the Magic: Italian Ice vs. Sorbet vs. Snow Cones
Before we begin mixing our colorful syrups, it is important to understand exactly what Italian ice is and what makes it so uniquely beloved. Many people use the terms for frozen treats interchangeably, but there are distinct differences that affect both the preparation method and the final texture.
A Snow Cone is perhaps the most rudimentary of the frozen treats. It consists of hard, crunchy crushed ice that is scooped into a paper cone, over which a wildly sweet, unblended flavored syrup is poured. The ice is completely unflavored until the moment of serving, and because the ice crystals are large and dense, the syrup often pools at the very bottom, leaving you with crunchy, flavorless ice at the top and a cloying puddle of sugar water at the base.
Sorbet, on the other hand, is a refined, elegant dessert. It is almost always made with a large percentage of fresh fruit puree or high-quality fruit juice, blended with sugar and water, and then churned in an ice cream machine. The churning process introduces air (overrun) into the mixture while it freezes, resulting in a dense, exceptionally smooth, and slightly creamy texture, despite containing zero dairy. Sorbets are intensely fruit-forward and often served as a palate cleanser in fine dining.
Italian Ice (or Water Ice) sits comfortably in a magical middle ground, though it leans closer to a sorbet than a snow cone. True Italian ice is created by blending the flavorings (often a mix of fruit juices, extracts, and sugar syrups) completely with the water before the freezing process begins. As it freezes, the mixture is agitated or scraped periodically. This prevents the water from forming a single, rock-hard block of ice. Instead, it creates millions of tiny, microscopic ice crystals suspended in a sweet syrup. The result is a texture that is remarkably smooth, incredibly refreshing, fluffy enough to be easily scooped, but firmer and icier than a churned sorbet. It melts beautifully on the tongue, delivering an intense, sweet flavor in every single bite without the crunch of a snow cone.
The Science of the Perfect Scoop: Why Sugar is Your Best Friend
If you were to take a cup of water, flavor it with a few drops of extract, and put it in the freezer, you would end up with a solid, impenetrable brick of flavored ice. You could hit it with a hammer, and it would just shatter into sharp shards. So, how do we get that lush, scoopable consistency that defines proper Italian ice?
The secret lies entirely in the sugar. In the world of frozen desserts, sugar is not just a sweetener; it is a vital structural ingredient. Sugar lowers the freezing point of water. When you dissolve a significant amount of sugar into water to create a syrup, the water molecules cannot easily bond together to form large, solid ice crystals. The sugar molecules physically get in the way. Therefore, the mixture requires a much colder temperature to freeze completely solid. At standard home freezer temperatures (around 0°F or -18°C), a properly balanced sugar-water mixture will only partially freeze, remaining slushy, pliable, and perfectly scoopable.
However, getting the ratio right is key. Too little sugar, and your Italian ice will be icy, hard, and difficult to eat. Too much sugar, and the mixture will never fully freeze, leaving you with a cold, sticky soup. For this recipe, we utilize a secret weapon common in commercial kitchens: Light Corn Syrup. Corn syrup is an invert sugar, which means it prevents standard granulated sugar from crystallizing and becoming gritty. By adding just a small amount of corn syrup to our base, we ensure that the final texture of our Italian ice is impeccably smooth, mimicking the mouthfeel of the professional treats you buy at the boardwalk.
The Iconic Flavor Profiles: Red, Yellow, and Blue
While you can make Italian ice in absolutely any flavor your heart desires—from sophisticated fresh basil-lemon to rich mango—the “Rainbow” Italian ice has a very specific, nostalgic flavor profile. It relies on three distinct, brightly colored layers that, when scooped together, create a beautiful tie-dye effect and a medley of classic candy flavors.
The Red Layer (Cherry): The anchor of the rainbow. Cherry provides a deep, sweet, and slightly tart base that is universally loved. In this recipe, we achieve the classic flavor using cherry extract or cherry drink mix, colored with a vibrant red gel to make it pop.
The Yellow Layer (Lemon): The crucial middle layer. Lemon provides a sharp, acidic bite that perfectly cuts through the intense sweetness of the red and blue layers. For the best flavor, we use real, fresh-squeezed lemon juice combined with a touch of lemon extract to give it that bright, sunshine-yellow glow and zesty punch.
The Blue Layer (Blue Raspberry): The wildly fun, slightly mysterious, and totally nostalgic top layer. Blue raspberry is a staple of childhood treats. Since blue raspberries do not actually exist in nature, this flavor is purely the result of fun extracts and neon blue food coloring. It offers a sweet, mellow, berry-like finish that ties the whole cup together.
Essential Ingredients for Your Kitchen
To craft this breathtaking dessert, you will need to gather a few simple ingredients. The beauty of this recipe is that it uses pantry staples combined with specific extracts to create magic.
- – Water: (6 cups total) The foundation of the ice. Filtered water is highly recommended, as any chlorine or mineral taste from tap water will be noticeable in the final product.
- – Granulated White Sugar: (2 cups total) Essential for both sweetness and achieving the proper frozen texture.
- – Light Corn Syrup: (3 tablespoons) The secret ingredient that prevents crystallization and ensures a smooth, non-gritty, perfectly scoopable texture.
- – Fresh Lemon Juice: (1/2 cup) For the yellow layer. Freshly squeezed is imperative; bottled lemon juice has a metallic aftertaste that will ruin the delicate flavor of the ice.
- – Flavor Extracts/Drink Mixes: You will need Cherry extract (or unsweetened cherry Kool-Aid powder) and Blue Raspberry extract (or unsweetened blue raspberry Kool-Aid powder). If using unsweetened drink packets, they provide excellent flavor and color simultaneously.
- – Liquid or Gel Food Coloring: Red, Yellow, and Blue. Even if using drink mixes, a small drop of gel coloring ensures the neon vibrancy required for a true “rainbow” look.
Step-by-Step Instructions: The Art of the Freeze and Scrape
Making Italian ice at home without a specialized churning machine requires the “Freeze and Scrape” method. It is a labor of love, but the results are incredibly rewarding.
- Create the Simple Syrup Base: In a medium saucepan, combine the 6 cups of filtered water, 2 cups of granulated sugar, and 3 tablespoons of light corn syrup. Place the saucepan over medium-high heat. Stir the mixture frequently until it comes to a gentle simmer and the sugar is completely, 100% dissolved. The liquid should be perfectly clear. Remove the pot from the heat and let this simple syrup cool to room temperature. You have just created the master base for your Italian ice.
- Divide the Base: Once the syrup has cooled, divide it equally into three separate medium-sized mixing bowls. You should have about 2 cups of liquid in each bowl.
- Flavor and Color the Yellow Layer: To the first bowl, add the 1/2 cup of fresh-squeezed lemon juice. Add 1-2 drops of yellow food coloring to achieve a bright, sunny hue. Whisk well to combine. Pour this mixture into a shallow, freezer-safe casserole dish (a 9×9 inch glass or metal baking pan works perfectly).
- Flavor and Color the Red Layer: To the second bowl, add 1 teaspoon of cherry extract (or 1/2 packet of unsweetened cherry drink mix). Add 1-2 drops of red food coloring. Whisk thoroughly until the color is deep and vibrant. Pour this mixture into a second shallow, freezer-safe pan.
- Flavor and Color the Blue Layer: To the third bowl, add 1 teaspoon of blue raspberry extract (or 1/2 packet of unsweetened blue raspberry drink mix). Add 1-2 drops of blue food coloring. Whisk completely. Pour this mixture into a third shallow, freezer-safe pan.
- The Initial Freeze: Carefully place all three pans into your freezer on a flat, level surface. Set a timer for 45 minutes.
- The Scraping Process: After 45 minutes, remove the pans from the freezer. The edges should just be starting to freeze and get slushy, while the center will still be liquid. Using a sturdy metal fork, aggressively scrape the frozen edges into the liquid center, breaking up any large ice chunks. You want to agitate the mixture as much as possible. Return the pans to the freezer.
- Repeat and Fluff: Repeat this exact scraping process every 30 to 45 minutes for the next 3 to 4 hours. Every time you scrape, the mixture will become thicker, slushier, and lighter in color as air is incorporated into the tiny ice crystals. The goal is to prevent a solid block of ice from forming. By the end of the 4 hours, each pan should be filled with a fluffy, scoopable, perfectly smooth colored ice.
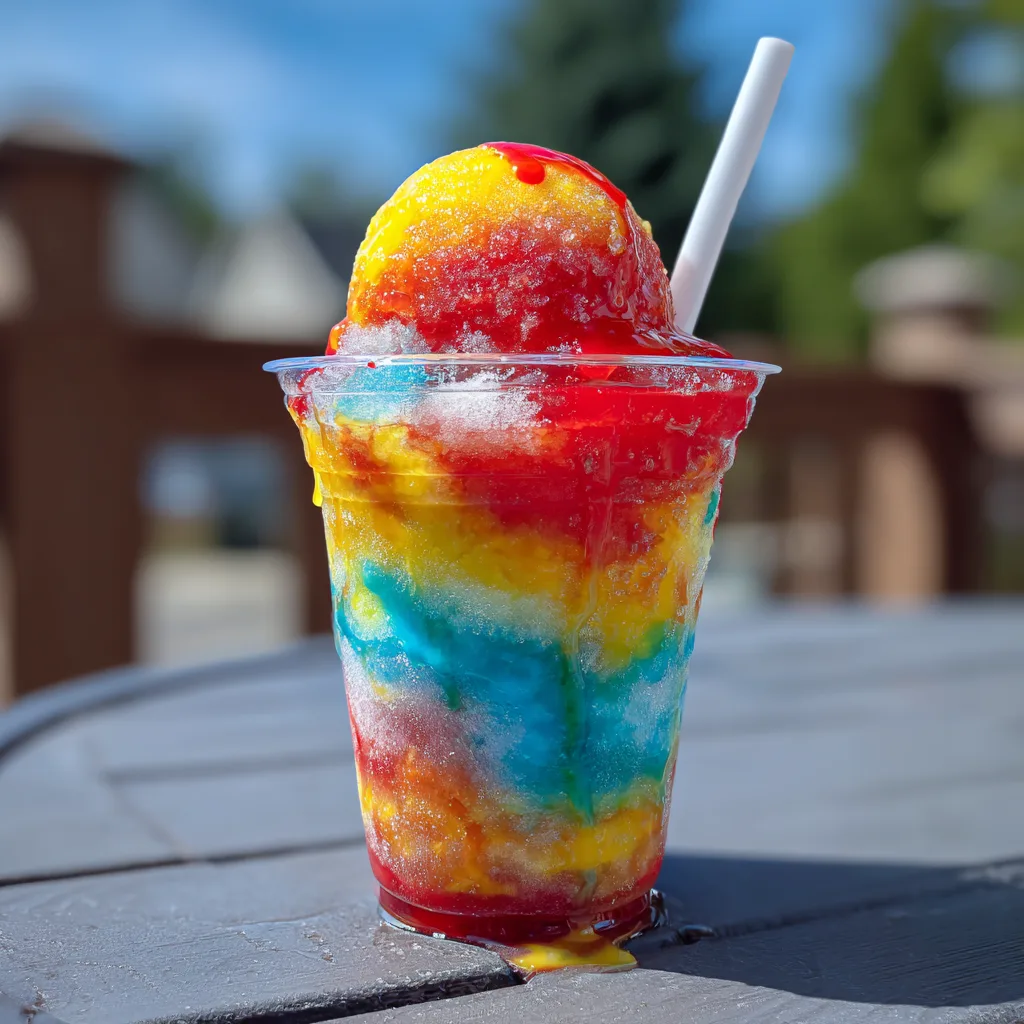
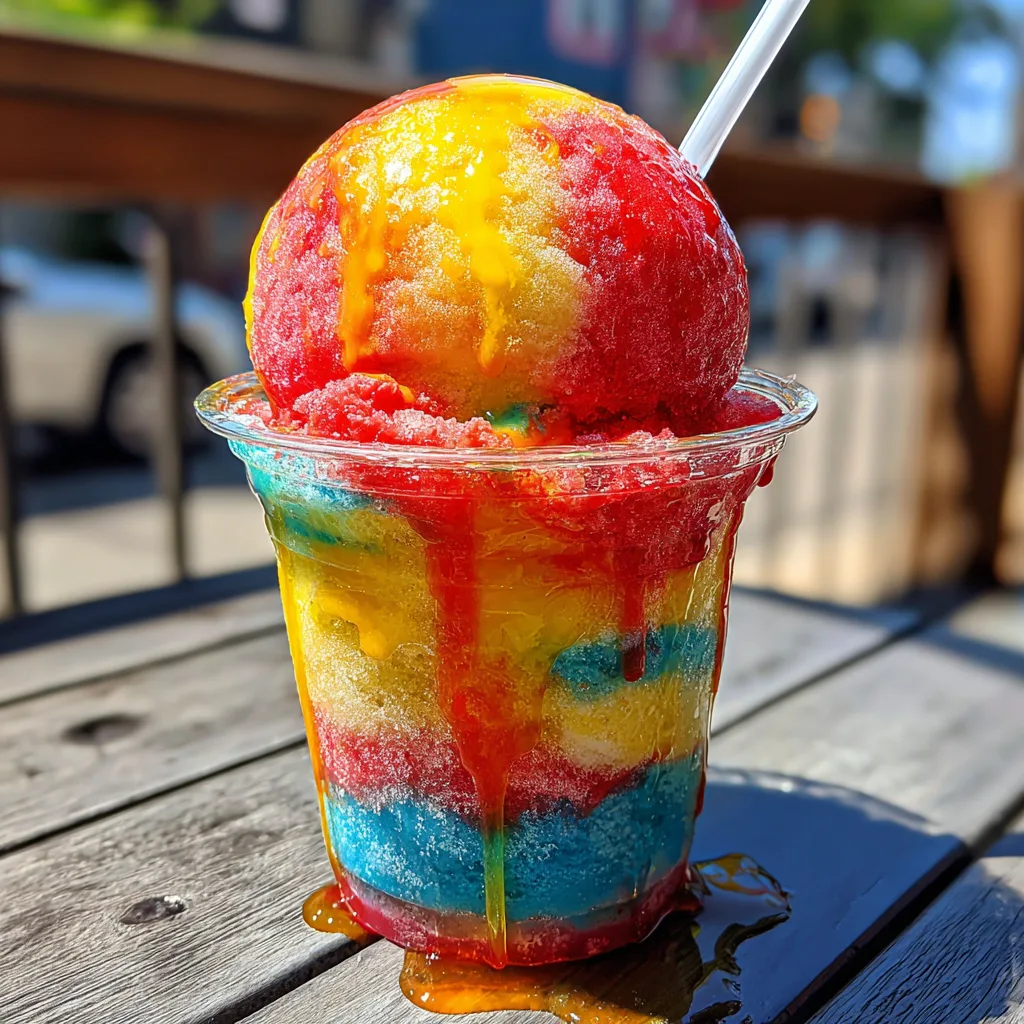
- Assemble the Rainbow: Once all three flavors are fully frozen and fluffed, it is time to build your masterpiece. Take a tall, clear plastic cup (clear is essential to show off the colors!). Use an ice cream scoop to drop a generous scoop of the red cherry ice into the bottom. Gently press it down to create an even layer. Next, add a scoop of the yellow lemon ice directly on top of the red, pressing gently. Follow with a scoop of the blue raspberry ice. Finally, use your scoop to grab a little bit of all three colors at once and place a massive, beautifully swirled dome directly on top of the cup.
- Serve and Enjoy: Stick a spoon right into the top dome and serve immediately. Watch as the colors slowly begin to melt and mix, creating a beautiful, sweet, refreshing summer experience.
Pro Tips for the Ultimate Italian Ice Texture
If you find that the “Freeze and Scrape” method is too time-consuming, or if you accidentally forgot about your pans and they froze completely solid, do not panic! You can utilize your kitchen appliances to rescue the dessert. Simply take the solid block of flavored ice, let it sit on the counter for 10 minutes to soften slightly, and then break it into large chunks. Throw these chunks into a heavy-duty food processor or a high-powered blender (like a Vitamix) and pulse it repeatedly until it breaks down into a smooth, fluffy snow. Transfer it back to a container and freeze for 20 minutes to firm up before scooping.
For an even more professional texture, if you happen to own an ice cream maker, you can absolutely use it! Simply pour one chilled flavor base into the running ice cream machine and let it churn for 20-25 minutes until it reaches a slushy, thick consistency. Transfer it to a freezer container to firm up, wash the machine bowl, and repeat with the next flavor. The churning process introduces air perfectly, resulting in an exceptionally smooth commercial-quality water ice.
Exciting Variations and Adult Twists
Once you master the base syrup recipe, you are no longer limited to just the rainbow colors. The possibilities for customizing your Italian ice are truly endless.
- Real Fruit Sorbet-Ice: Instead of extracts, puree 2 cups of fresh strawberries, mangoes, or watermelon until completely smooth. Strain the puree to remove seeds, and mix it directly into the cooled simple syrup base before freezing and scraping. You get a much more natural, intensely fruity flavor.
- The Philadelphia Gelati: Take a cue from the famous water ice shops on the East Coast and create a “Gelati.” This involves layering your freshly made Italian ice in a cup, alternating with layers of rich, creamy vanilla soft serve ice cream or frozen custard. The contrast between the tart, icy water ice and the smooth, fatty dairy is an absolute revelation.
- Adults-Only Boozy Slushies: For a spectacular summer pool party treat, you can add alcohol to the mix! Stir 2 to 3 tablespoons of vodka, white rum, or tequila into each flavor base right before you put it in the freezer. Be aware that alcohol lowers the freezing point significantly. Your ice will be much softer, slushier, and will melt much faster, so serve it quickly in chilled glasses!
- The Sour Patch Twist: If you love incredibly sour candies, add 1/2 teaspoon of citric acid powder (often found in the canning section of the grocery store) to your simple syrup base while it is boiling. It will give all three flavors an intense, mouth-puckering sour kick that balances the high sugar content beautifully.
Conclusion: The Perfect Summer Project
Making Homemade Rainbow Italian Ice is so much more than just following a recipe; it is about capturing the pure, unadulterated essence of summer in a cup. While the process requires a bit of time and dedication to the scraping method, the payoff is immense. You are rewarded with a dessert that is vibrant, visually spectacular, incredibly refreshing, and entirely free of the artificial preservatives found in many store-bought varieties.
Whether you are looking for a fun, interactive kitchen project to do with children on a long summer afternoon, preparing a show-stopping dessert for a backyard barbecue, or simply satisfying your own craving for a nostalgic boardwalk treat, this recipe delivers on all fronts. By understanding the vital role of sugar, utilizing the magic of corn syrup, and embracing the satisfying art of the “freeze and scrape,” you can master the craft of water ice. So, clear out some space in your freezer, grab your favorite neon food coloring, and get ready to scoop your way to the ultimate, colorful, frosty summer paradise!
Homemade Rainbow Italian Ice
Ingredients
Equipment
Method
- In a saucepan, combine water, sugar, and light corn syrup. Heat over medium-high, stirring frequently, until sugar is completely dissolved. Remove from heat and let cool to room temperature.
- Divide the cooled syrup equally into three separate bowls (about 2 cups per bowl).
- To the first bowl, add fresh lemon juice and yellow food coloring. Whisk and pour into a shallow freezer pan.
- To the second bowl, add cherry extract and red food coloring. Whisk and pour into a second shallow freezer pan.
- To the third bowl, add blue raspberry extract and blue food coloring. Whisk and pour into a third shallow freezer pan.
- Place all three pans in the freezer for 45 minutes.
- Remove pans and use a sturdy fork to aggressively scrape the frozen edges into the liquid center. Return to the freezer.
- Repeat the scraping process every 30-45 minutes for 3 to 4 hours until the ice is completely frozen, fluffy, and scoopable.
- To serve, layer a scoop of red, then yellow, then blue into a clear plastic cup. Top with a large swirled scoop containing all three colors. Serve immediately.