Pink Glitter Chocolate Strawberries
Pink Glitter Chocolate Covered Strawberries: The Ultimate Dazzling Dessert Guide
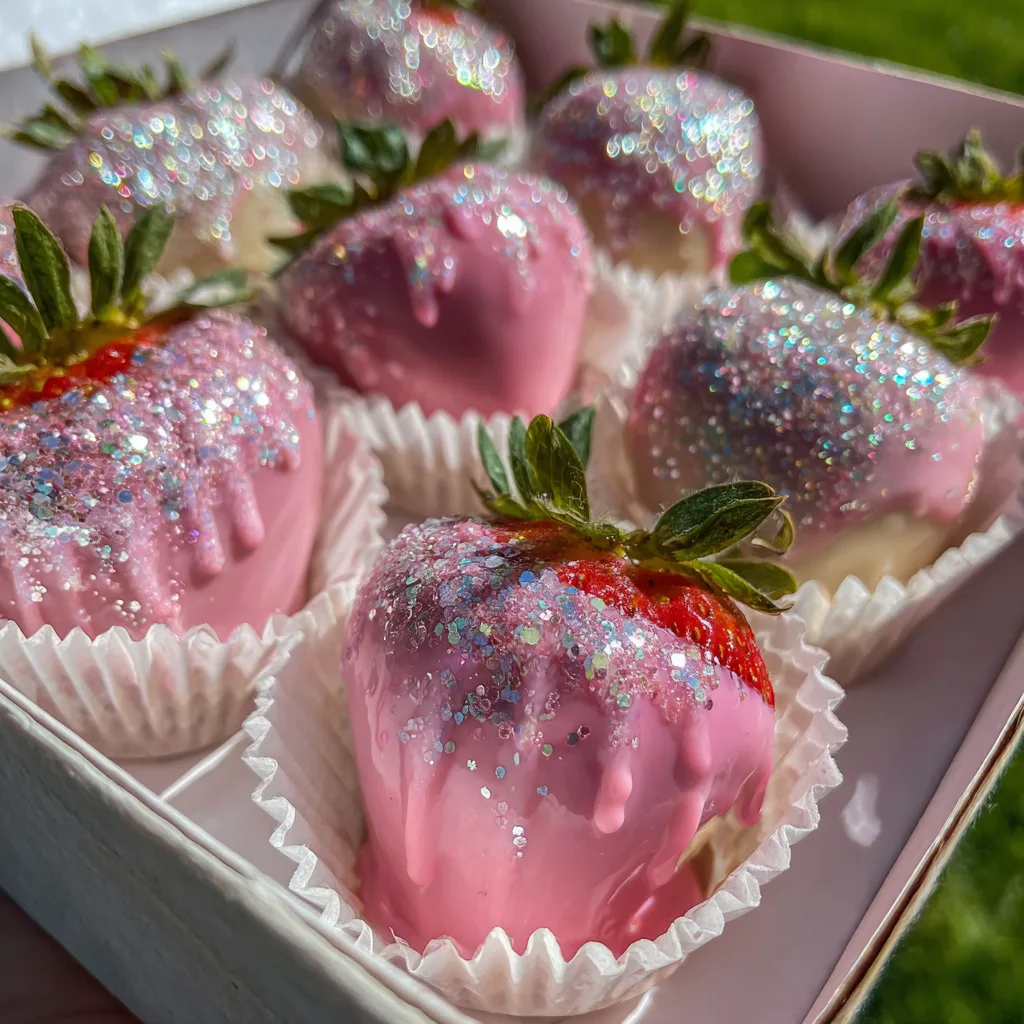
There is something undeniably magical about a dessert that sparkles. Pink Glitter Chocolate Covered Strawberries take the classic, beloved romantic treat and elevate it to a show-stopping, eye-catching centerpiece. Whether you are preparing a special Valentine’s Day surprise, assembling a sweet table for a baby shower, curating a Mother’s Day brunch, or simply want to treat yourself to something extraordinary, these shimmering, jewel-like strawberries are the perfect solution. They combine the juicy, tart freshness of ripe strawberries with the rich, creamy sweetness of chocolate, all finished with a glamorous layer of edible glitter and pearl dust.
In this comprehensive guide, we will explore everything you need to know to create these gorgeous, bakery-worthy treats right in your own home kitchen. From selecting the perfect produce to mastering the melting process, applying the glitter flawlessly, and storing your creations, you will become a strawberry-dipping expert by the end of this article.
The Magic Behind the Sparkle: Understanding Edible Glitter
Before we dive into the process, it is essential to understand the starring ingredient: the glitter. Not all glitter is created equal, and when it comes to food, safety is paramount. When shopping for the sparkle to coat your pink chocolate strawberries, you must look specifically for “edible glitter” or “edible luster dust.”
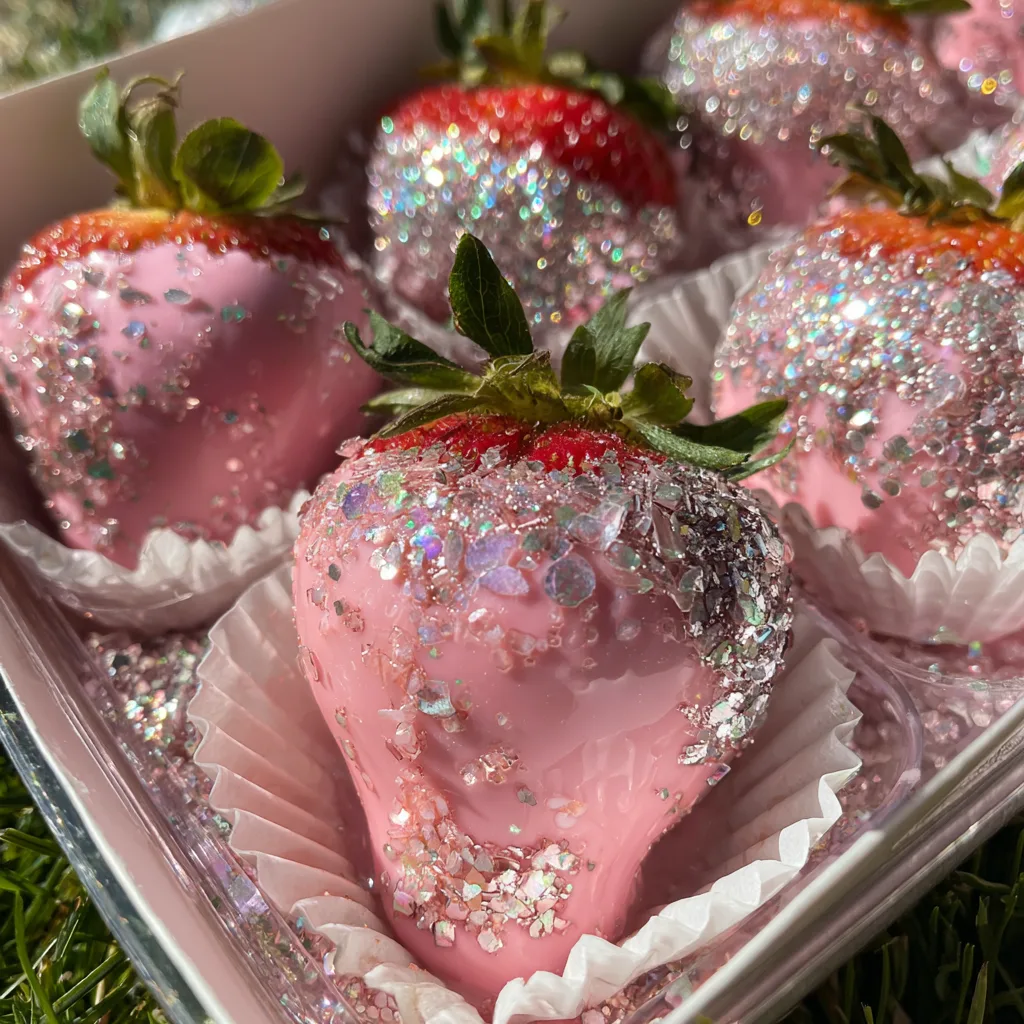
Many craft glitters are labeled “non-toxic,” but that does not mean they are edible. Non-toxic simply means it will not immediately poison you, but it is made of micro-plastics and is not meant to be digested. True edible glitter is typically made from food-grade ingredients like sugar, acacia gum, maltodextrin, and pearlescent pigments based on mica. For the dazzling silver berries in our recipe, a coarse edible glitter (sometimes called edible disco dust or sugar crystals) provides that heavy, encrusted diamond look. For the smooth pink berries, a light brushing of edible pearl dust gives them that high-end, satin-glass finish.
Selecting and Preparing the Perfect Strawberries
The foundation of any great chocolate-covered strawberry is, of course, the strawberry itself. Because you are covering them in a sweet coating, you want a berry that provides a sturdy base and a tart contrast.
Size and Shape: Look for medium to large strawberries that are relatively uniform in size. This ensures your final box looks professional and cohesive. Avoid massive, mutated-looking berries as they can be difficult to dip and eat, and avoid tiny ones that will be overwhelmed by the chocolate-to-fruit ratio.
Ripeness: You want berries that are bright red and fragrant, but still firm. Overripe, mushy strawberries will leak juice into the chocolate, causing it to seize or slip off. The leaves (the calyx) should be bright green and perky, not wilted or brown, as they provide the crucial “handle” for dipping.
The Golden Rule of Washing: Water is the ultimate enemy of melted chocolate. Even a single drop of water can cause a bowl of smooth, silky chocolate to seize into a gritty, unworkable paste. Therefore, washing and drying your strawberries is a critical step. Wash them gently under cool water, then lay them out on a paper towel-lined baking sheet. Pat them completely dry, and let them sit at room temperature for at least 30 minutes to an hour to air dry completely. They must be bone-dry before they ever touch the chocolate.
Choosing Your Coating: Chocolate vs. Candy Melts
To achieve that perfect, opaque pastel pink color, you have two main options: pink candy melts (or coating wafers) or real white chocolate colored with food dye.
Candy Melts: This is the easiest and most beginner-friendly route. Candy melts are formulated with vegetable oils instead of cocoa butter. This means they do not require tempering (the precise heating and cooling process needed for real chocolate to set with a snap and shine). They melt smoothly, coat easily, and harden quickly at room temperature. They also come pre-colored in beautiful shades of pink.
Real White Chocolate: If you prefer the authentic taste of real chocolate, use high-quality white chocolate chips or bars. However, white chocolate is notoriously finicky to melt because it burns easily. Furthermore, if you want to dye white chocolate pink, you absolutely must use an oil-based food coloring or special chocolate coloring. Standard water-based or gel food coloring will cause the chocolate to seize instantly.
For this recipe, we highly recommend using high-quality pink candy melts or white chocolate compound coating for ease of use and vibrant color.
Ingredients
- – 1 lb (about 16-20) fresh, firm, large strawberries with healthy green leaves
- – 12 oz (1 bag) pink candy melts or premium pink chocolate coating wafers
- – 1 tablespoon refined coconut oil or vegetable shortening (optional, for thinning the chocolate)
- – 1 small container edible silver glitter or coarse edible sugar crystals
- – 1 small container edible pink or white pearl luster dust
Instructions
- Prep the Workspace: Line a large baking sheet with parchment paper or a silicone baking mat. Have your edible glitter ready in a small, deep bowl, and your luster dust ready with a clean, food-safe, dry paintbrush.
- Wash and Dry: Wash the strawberries thoroughly. Gently pat them dry with paper towels, ensuring the leaves are also dry. Let them sit on a dry towel for 30-60 minutes to air dry completely. This step is non-negotiable!
- Melt the Chocolate: Place the pink candy melts in a microwave-safe bowl. Microwave on 50% power for 30 seconds. Stir. Repeat this process (30 seconds at 50% power, then stir) until the candy melts are completely smooth and liquid. Do not rush this, or the candy will burn and clump.
- Thin if Necessary: If the melted pink coating is too thick, stir in the coconut oil or shortening, 1/2 teaspoon at a time, until it flows smoothly off a spoon like a ribbon.
- Dip the Smooth Berries (Half the Batch): Grasp a strawberry by the green leafy stem. Dip it straight down into the pink chocolate, rotating it slightly to coat all sides evenly. Lift it out and let the excess chocolate drip back into the bowl. Scrape the very bottom of the strawberry lightly against the lip of the bowl to remove the chocolate tail. Place it on the parchment paper. Repeat for half of your berries.
- Dip and Glitter (The Other Half): Dip another strawberry into the pink chocolate as described above. Before the chocolate has a chance to set (while it is still completely wet), hold the strawberry over the bowl of edible glitter. Use a spoon to generously pour the glitter all over the wet chocolate until it is entirely coated. Tap the stem gently to shake off the loose excess, then place it on the parchment paper. Repeat for the remaining berries.
- Apply the Pearl Dust: Once the plain pink strawberries are completely dry and hardened (about 15-20 minutes at room temperature, or 5 minutes in the fridge), take your dry food-safe paintbrush, dip it into the edible pearl luster dust, and gently brush it all over the surface of the smooth pink berries to give them a gorgeous, metallic glass-like sheen.
- Set and Serve: Let all the strawberries set completely before moving them to small fluted cupcake liners and placing them in a bakery box for presentation.
Pro Tips for the Perfect Dip
Room Temperature Berries: If you use strawberries straight from the refrigerator, the sudden temperature change when they hit the warm chocolate can cause condensation to form under the chocolate shell. This leads to “sweating” strawberries and chocolate that slips right off the fruit. Let your berries come to room temperature before dipping.
The Toothpick Trick: If your strawberry leaves are wilted or difficult to hold, insert a toothpick gently into the top of the strawberry (where the stem is) to act as a handle for dipping. You can remove it once the chocolate sets, or cover the hole with a piped dot of chocolate.
Rescue Seized Chocolate: If your candy melts overheat and become thick and clumpy, you can sometimes rescue them by adding a spoonful of solid vegetable shortening and stirring vigorously. However, if the chocolate seized due to water exposure, it is unfortunately ruined for dipping (though you can save it to bake into brownies!).
Creative Variations
While the pink and silver combination is utterly stunning, the techniques you learn here can be adapted for any occasion or color palette.
The Midas Touch: Swap the pink melts for dark chocolate, and the silver glitter for edible gold leaf or gold luster dust. This creates a deeply dramatic, luxurious dessert perfect for New Year’s Eve or an anniversary.
Ombre Pink: Instead of making them all the same color pink, divide your white chocolate into three bowls. Tint one light pink, one medium pink, and one dark magenta. Dip a third of the berries into each color, finishing them all with a dusting of pearl powder for a beautiful gradient effect in the box.
Drizzles and Textures: For the berries that are not coated in glitter, melt a small amount of contrasting chocolate (like bright white or dark brown), place it in a piping bag or Ziploc bag with a tiny corner snipped off, and aggressively drizzle it back and forth over the set pink berries. You can then immediately sprinkle crushed freeze-dried raspberries or tiny edible pearls onto the wet drizzle.
Serving Suggestions & Occasions
Presentation is half the fun with a dessert this glamorous. As seen in the inspiration image, nestling each strawberry into a white mini-cupcake liner prevents them from rolling around and smudging each other. Arranging them in a pristine white bakery box makes them look like a gift from a high-end boutique patisserie.
These pink glitter chocolate-covered strawberries pair beautifully with dry sparkling wines, like a crisp Champagne or a dry Prosecco. The acidity and bubbles of the wine cut through the rich, sweet chocolate coating. If serving them at a baby shower or daytime event, they look beautiful alongside a sparkling pink lemonade or a sophisticated Earl Grey tea.
Proper Storage Instructions
Chocolate-covered strawberries are incredibly delicate and have a very short shelf life. They are truly best enjoyed the exact same day they are made.
Do Not Freeze: Never freeze chocolate-covered strawberries. When they thaw, the fruit will turn to mush and release all its water, completely destroying the chocolate shell.
Room Temperature vs. Refrigerator: If you plan to eat them within 12 hours, store them in a cool, dry place at room temperature, uncovered. Storing them in an airtight container at room temp will trap moisture and cause them to sweat. If you must keep them overnight, place them in the refrigerator, loosely covered with a paper towel to absorb ambient moisture. Be aware that taking them out of the cold fridge into a warm room will cause condensation to form on the glitter and chocolate, slightly dulling their shine.
Fun Facts and Cultural Context
Did you know that the concept of dipping strawberries in chocolate was invented relatively recently? It is widely credited to a woman named Lorraine Lorusso, who worked at a small gourmet store in Chicago called Stop N’ Shop in the 1960s. She decided to temper a batch of high-quality chocolate and dip the season’s freshest strawberries into it. The treats were an instant, massive hit with customers, and the idea quickly spread worldwide, becoming the ultimate symbol of edible romance.
Today, the art of the chocolate-covered strawberry has expanded far beyond simple dark chocolate. With the advent of candy melts, edible food sprays, luster dusts, and edible glitters, these treats have become a canvas for sugar artists and home bakers alike, allowing for incredible creativity and personalization. By making these Pink Glitter Chocolate Covered Strawberries, you are participating in a delicious, evolving culinary tradition.
Pink Glitter Chocolate Covered Strawberries
Ingredients
Equipment
Method
- Wash strawberries gently and pat completely dry with paper towels. Let air dry for 30 minutes to ensure no moisture remains.
- Line a large baking sheet with parchment paper.
- In a microwave-safe bowl, melt pink candy melts in 30-second intervals at 50% power, stirring in between until smooth. Add coconut oil if too thick.
- Holding a strawberry by the stem, dip it straight into the pink chocolate. Tap off excess. Place on parchment paper. Repeat for half the strawberries.
- For the remaining strawberries, dip in chocolate, and while the coating is still completely wet, generously sprinkle edible silver glitter all over. Place on parchment.
- Allow all strawberries to harden completely (about 15-20 minutes).
- Using a dry food-safe paintbrush, lightly dust the smooth (non-glittered) pink strawberries with pearl luster dust for a shiny finish.
- Place each strawberry in a mini cupcake liner and serve within 24 hours.