Cotton Candy Frosting
Magical Swirled Cotton Candy Frosting
There are few things in the culinary world that instantly transport you back to the pure, unadulterated joy of childhood quite like the taste and smell of cotton candy. The aroma of spun sugar conjures up memories of summer carnivals, bustling fairgrounds, and the sheer delight of holding a giant, fluffy pink cloud on a paper cone. Now, imagine taking that whimsical, nostalgic flavor and transforming it into a rich, creamy, and visually spectacular topping for your favorite baked goods. That is exactly what this Magical Swirled Cotton Candy Frosting achieves. Bursting with vibrant pastel colors, shimmering with edible glitter, and boasting an incredibly light, airy texture, this frosting is a show-stopping addition to any dessert table, birthday party, or weekend baking project.
Creating a truly memorable frosting is about more than just mixing sugar and fat; it is about crafting an experience. When you pipe a multi-colored, perfectly ridged swirl of this cotton candy frosting onto a simple vanilla cupcake, you are elevating a standard treat into an edible piece of art. The beautiful intertwining ribbons of soft pink, baby blue, and pale yellow mimic the classic colors of traditional spun sugar, while the specialized cotton candy flavoring oil provides an authentic, unmistakable taste that will have your guests asking for your secret recipe. Best of all, despite its professional, bakery-window appearance, this frosting is astonishingly simple to whip up in a standard home kitchen using readily available ingredients and a few clever piping techniques.
Why You Will Love This Recipe
If you are looking for a way to add a touch of magic to your baking repertoire, this recipe is guaranteed to become a fast favorite. First and foremost, the visual impact is absolutely stunning. The tricolor swirl technique, which we will cover in detail, creates a mesmerizing, mesmerizing pastel rainbow effect that appeals to children and adults alike. It is the ultimate “wow factor” frosting, perfect for unicorn-themed parties, mermaid celebrations, baby showers, or simply bringing a smile to someone’s face on a rainy afternoon.
Beyond its striking appearance, the texture of this frosting is a dream. By incorporating heavy whipping cream into the powdered sugar base, the resulting frosting is incredibly light, fluffy, and smooth. It does not carry the dense, sometimes cloying weight of traditional American buttercream. Instead, it melts in your mouth, leaving behind that signature sweet, slightly caramelized flavor of carnival cotton candy. Furthermore, this recipe is highly adaptable. While we feature a three-color swirl, you can easily customize the colors to match your specific event theme or holidays, making it a versatile tool in your baking arsenal.
The Anatomy of a Perfect Fluffy Frosting
To understand why this recipe works so well, it helps to look at the science behind the ingredients. Traditional American buttercream relies heavily on a high ratio of butter to powdered sugar, which provides excellent structure for piping but can sometimes feel overly sweet or heavy on the palate. By contrast, a whipped frosting that utilizes heavy cream introduces a significant amount of air and moisture into the mixture.
When heavy cream is whipped, the fat molecules trap air bubbles, creating a voluminous, cloud-like texture. In this recipe, the powdered sugar provides the necessary sweetness and stabilization, ensuring the frosting holds its shape when piped into those beautiful, sharp swirls. The small amount of liquid from the cream also dissolves some of the sugar crystals, resulting in a smoother, less gritty mouthfeel. The key to success is temperature control: ensuring your heavy cream is very cold helps it whip up faster and hold its structure better alongside the sugar.
Sourcing and Using the Right Flavoring
The single most critical element of this recipe—the ingredient that transforms it from a generic sweet vanilla frosting into a true cotton candy experience—is the flavoring. You cannot achieve an authentic cotton candy taste using standard grocery store extracts like vanilla or almond. You need a dedicated cotton candy flavoring.
When shopping for this, you will generally encounter two types: alcohol-based extracts and oil-based flavorings (often called candy oils or drams). For frosting, oil-based flavorings are generally superior. They are highly concentrated, meaning you only need a very small amount (usually just a teaspoon) to achieve a robust flavor without altering the consistency of your icing. Alcohol-based extracts can sometimes evaporate quickly or leave a slightly harsh aftertaste if too much is used. Look for professional baking brands online or at your local craft and hobby store in the cake decorating aisle. When adding the flavoring, always start with a smaller amount, taste your frosting, and add more drop by drop until you reach your desired level of nostalgia.
Mastering the Multi-Colored Swirl Technique
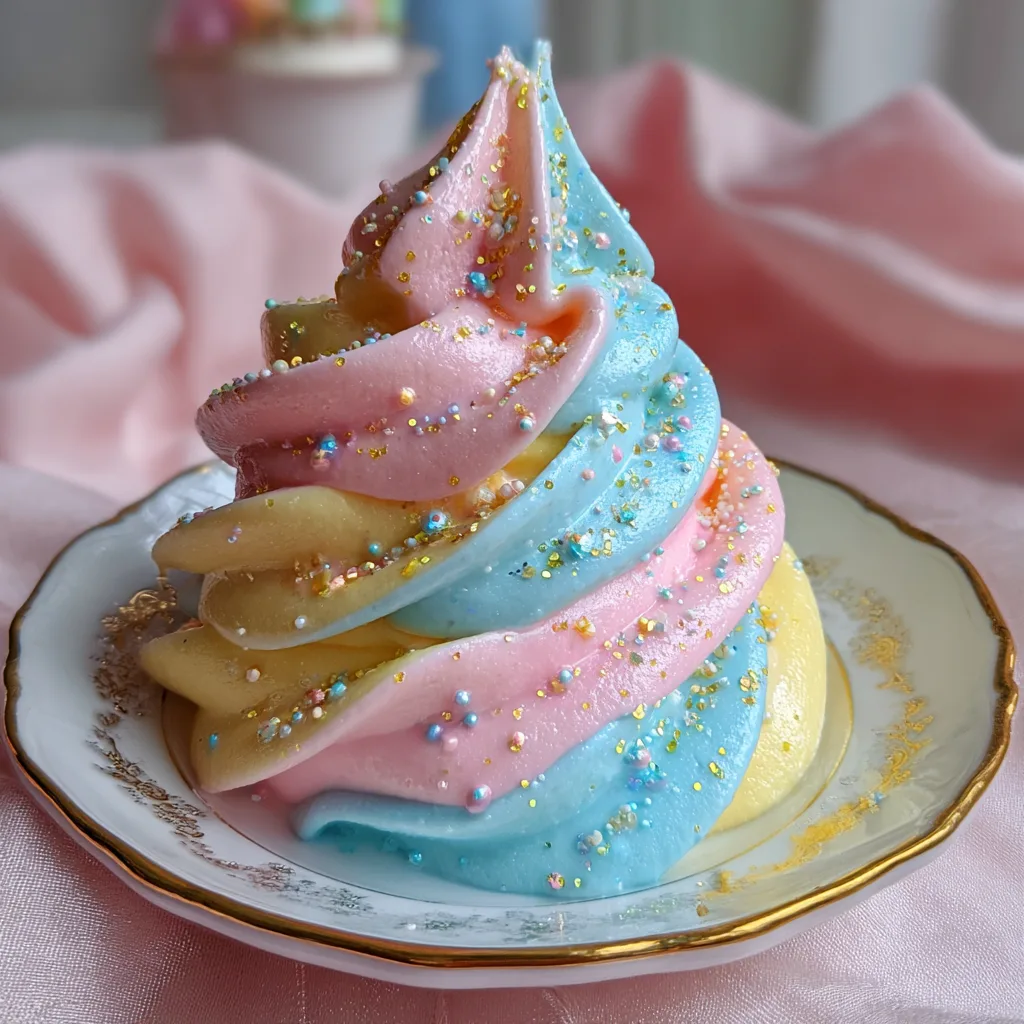
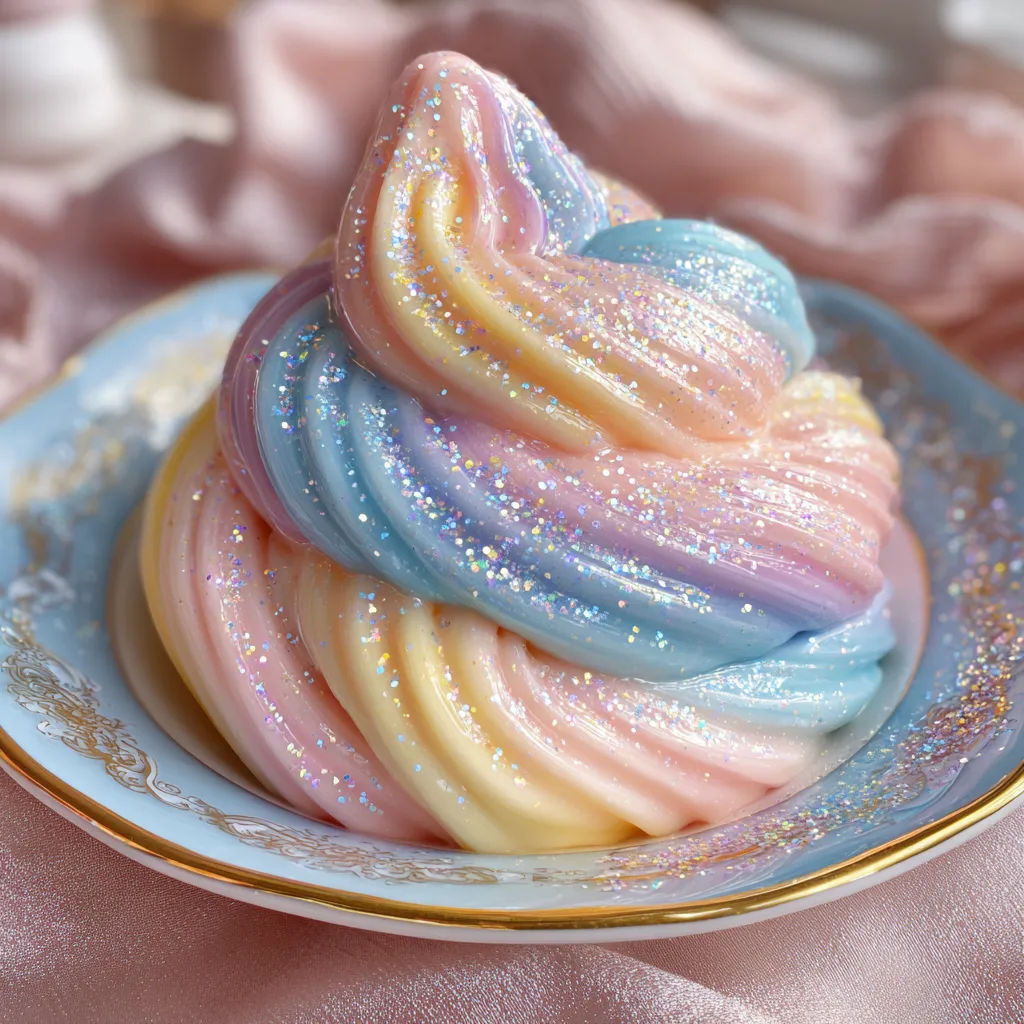
The secret to getting distinct, clean lines of pink, blue, and yellow in a single swirl is a brilliant, yet simple, technique involving plastic wrap. If you simply throw three colors of frosting into a piping bag side-by-side, they will inevitably muddy together, resulting in a murky, unappetizing purplish-brown mess. The plastic wrap method prevents this entirely.
Once your frosting is made, you will divide it evenly into three separate bowls. Using high-quality gel food coloring (which provides vibrant color without adding excess liquid that could thin your frosting), tint one bowl pastel pink, one pastel blue, and leave the third a very pale yellow or natural white. Next, lay a large, flat sheet of plastic cling wrap on your kitchen counter. Spoon the pink frosting into a thick line horizontally across the plastic wrap. Spoon the blue frosting into a parallel line right next to the pink, and do the same with the yellow frosting next to the blue.
Carefully roll the plastic wrap into a log or “sausage,” twisting the ends tightly so the three colors are bundled together but remain separated by their boundaries. Snip one twisted end off the plastic wrap log, drop the whole log (snipped end down) into a large piping bag fitted with a large star tip (like a 1M tip), and pipe away! As you squeeze the bag, all three colors will flow through the tip simultaneously, creating a perfect, bakery-quality pastel rainbow swirl.
The Magic of Edible Glitter
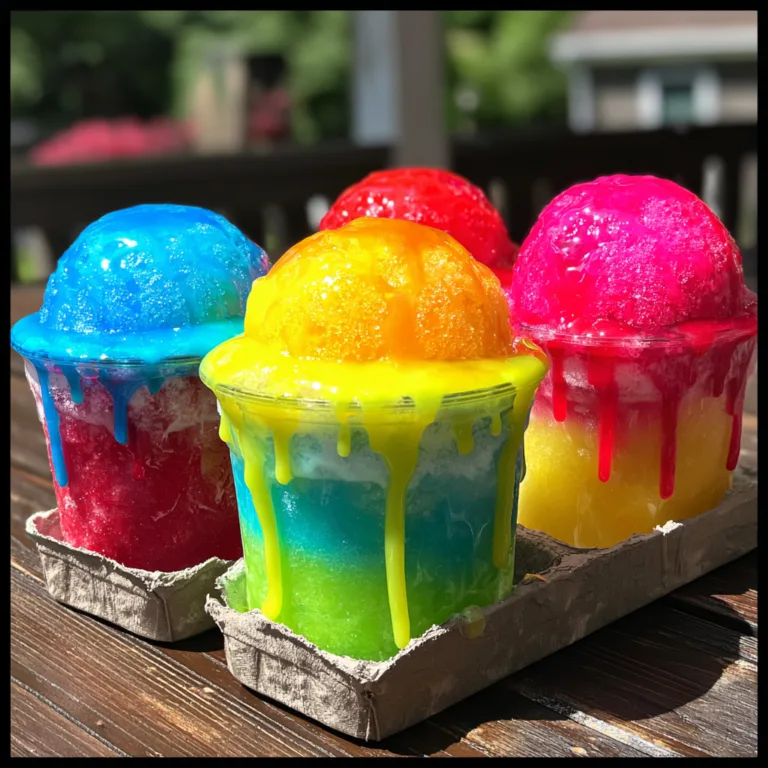
To truly capture the essence of a magical, whimsical treat, the finishing touch of edible glitter is non-negotiable. As seen in the beautiful inspiration images, a dusting of sparkle elevates the frosting to another dimension. However, it is absolutely vital to ensure you are using food-safe products.
Many craft glitters are labeled “non-toxic,” but this does not mean they are edible. Non-toxic simply means it will not immediately poison you if a tiny amount is ingested, but it is often made of micro-plastics that are not meant to be processed by the human digestive system. You must look for products specifically labeled as “edible glitter,” “luster dust,” or “edible pearlescent dust.” These are usually formulated from sugar, acacia gum, and food-grade mica pigments. To apply it, simply sprinkle it over the frosting immediately after piping, while the surface is still slightly sticky, allowing the glitter to adhere beautifully and catch the light from every angle.
Ingredients
Gather these ingredients to create your magical frosting. For the best results, ensure your butter (if using a buttercream base variation) is softened to room temperature, but if following this specific whipped cream base, keep the cream ice cold.
- – Powdered Sugar: 1 cup (confectioners’ sugar), sifted to remove any lumps for the smoothest possible texture.
- – Heavy Whipping Cream: 1/4 cup, must be very cold straight from the refrigerator to whip properly.
- – Unsalted Butter: 1/2 cup (1 stick), softened to room temperature. This provides the pipeable structure needed to hold the heavy cream and sugar.
- – Cotton Candy Flavoring: 1 teaspoon (use a high-quality oil or specialized extract).
- – Pinch of Salt: To cut the sweetness and balance the flavor profile.
- – Gel Food Coloring: Soft pink, baby blue, and lemon yellow (gel is highly preferred over liquid drops).
- – Edible Glitter: 1 teaspoon, for sprinkling on top.
Step-by-Step Instructions
Follow these steps carefully for the fluffiest, most colorful frosting you have ever made.
- 1. Cream the Butter: In the bowl of a stand mixer fitted with the paddle attachment (or using a large bowl and a hand mixer), beat the softened butter on medium-high speed for about 5 minutes until it is incredibly pale, light, and creamy.
- 2. Add the Sugar: Reduce the mixer speed to low. Gradually add the sifted powdered sugar, about 1/4 cup at a time, allowing it to fully incorporate before adding the next batch. Once all the sugar is added, scrape down the sides of the bowl with a rubber spatula.
- 3. Whip in the Cream: With the mixer still on low, slowly pour in the cold heavy whipping cream, the cotton candy flavoring, and the pinch of salt.
- 4. Fluff it Up: Increase the mixer speed to medium-high and whip the frosting for another 3 to 4 minutes. The frosting should double in volume and become exceptionally light, airy, and fluffy.
- 5. Divide and Color: Divide the finished frosting evenly into three separate, smaller bowls. Using a toothpick, add a tiny amount of pink gel food coloring to the first bowl, blue to the second, and yellow to the third. Fold the colors in gently until you reach your desired pastel shades.
- 6. Prepare the Swirl Log: Lay out a 12-inch piece of plastic cling wrap flat on the counter. Spoon the pink frosting into a thick line down the center. Spoon the blue frosting right next to it, and the yellow frosting on the other side. Roll the plastic wrap to form a log, twisting the ends tightly.
- 7. Pipe and Decorate: Snip one twisted end off the plastic wrap log and slide it into a piping bag fitted with a large star tip. Pipe the frosting in a circular motion onto your cupcakes or cake. Immediately sprinkle generously with edible glitter before the frosting sets.
Pro Tips for Perfect Piping
Piping frosting is an art form, but with a few simple tricks, anyone can achieve professional-looking results. Always ensure you are squeezing the piping bag from the top, not the middle. Twist the top of the bag tightly to trap the air and force the frosting down toward the tip. Use your dominant hand to apply steady, even pressure, and use your non-dominant hand simply to guide the tip.
For the classic “ice cream swirl” look, start piping at the outer edge of your cupcake. Apply even pressure and draw a complete circle around the perimeter. Once you complete the first circle, move slightly inward and pipe a second, smaller circle on top of the first. Continue this spiraling motion upward, gradually releasing pressure as you reach the very top center, and quickly pull the bag straight up to create a perfect, sharp peak.
Storage and Make-Ahead Instructions
This frosting can absolutely be made ahead of time, which is perfect for breaking up the workload of a large baking project. If you are not using the frosting immediately, place it in an airtight container in the refrigerator for up to one week. Because it contains heavy cream and butter, it will harden significantly in the fridge.
When you are ready to use it, you must allow it to come completely back to room temperature—this can take an hour or two depending on your kitchen’s climate. Once it is soft again, place it back into your mixer and whip it for a minute or two to restore its airy, fluffy texture before dividing, coloring, and piping. You can also freeze this frosting in an airtight container for up to three months; thaw it overnight in the refrigerator, then bring to room temperature and re-whip.
Troubleshooting Common Frosting Issues
If your frosting seems too stiff and difficult to pipe, you can thin it out by adding an extra half-teaspoon of heavy cream at a time, whipping well after each addition until you reach the desired consistency. Conversely, if your frosting is too runny and won’t hold a sharp peak, it may be because your kitchen is too warm and the butter has melted, or you added too much liquid. You can try chilling the bowl in the refrigerator for 10 minutes and re-whipping, or carefully add a few more tablespoons of sifted powdered sugar to stiffen it up.
If your colors seem dull, remember that buttercream has a naturally yellowish tint from the butter. To achieve true, bright pastel colors, it sometimes helps to neutralize the yellow base by adding a microscopic speck of purple food coloring to the plain frosting before dividing it into your pink, blue, and yellow batches. The purple cancels out the yellow, giving you a clean white canvas to dye.
Conclusion
This Magical Swirled Cotton Candy Frosting is more than just a recipe; it is an invitation to play, create, and indulge your inner child. With its mesmerizing pastel swirls, shimmering glitter finish, and authentic carnival flavor, it is guaranteed to be the highlight of any dessert table. By utilizing the plastic wrap technique and understanding the balance of butter, powdered sugar, and heavy cream, you can effortlessly pipe bakery-quality creations right in your own kitchen. So grab your piping bags, unleash your creativity, and get ready to enjoy the sweetest, fluffiest taste of nostalgia!
Cotton Candy Frosting
Ingredients
Equipment
Method
- Beat the softened butter in a mixer on medium-high speed for 5 minutes until pale and creamy.
- Reduce speed to low and gradually add the sifted powdered sugar. Scrape down the sides of the bowl once incorporated.
- With the mixer on low, slowly pour in the cold heavy cream, cotton candy flavoring, and salt.
- Increase speed to medium-high and whip for 3-4 minutes until the frosting is light, fluffy, and has doubled in volume.
- Divide the frosting evenly into three bowls. Tint one bowl pastel pink, one pastel blue, and one pale yellow using gel food coloring.
- Lay a sheet of plastic wrap flat on the counter. Pipe or spoon a thick line of each color side-by-side onto the wrap.
- Roll the plastic wrap into a log, twisting the ends tightly to secure the three colors together.
- Snip one end off the plastic wrap log and place it inside a piping bag fitted with a large star tip.
- Pipe swirls onto your desired dessert and immediately sprinkle generously with edible glitter.