Starburst Drip Cocktail
The Vibrant Starburst Drip Cocktail: A Sweet, Layered Masterpiece
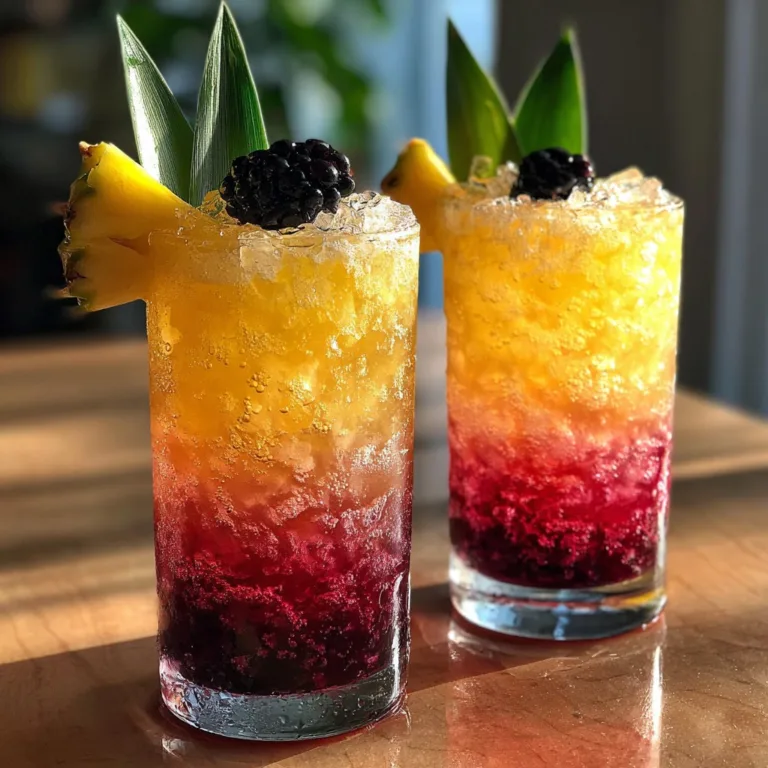
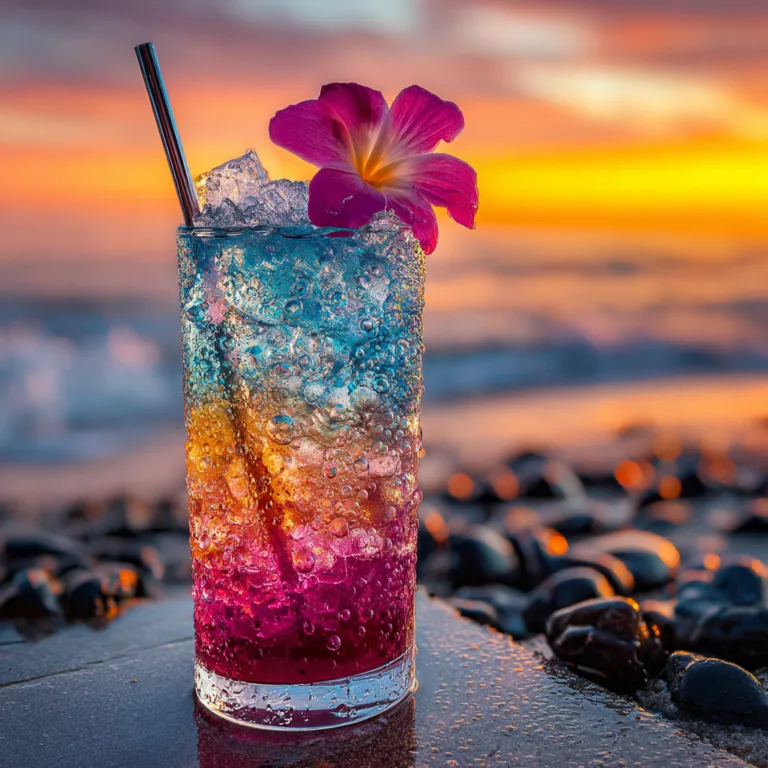
There is something undeniably magical about a cocktail that perfectly captures the essence of your favorite childhood candy while offering the sophisticated presentation of a high-end lounge drink. The Starburst Drip Cocktail is exactly that—a stunning, visually arresting, and incredibly delicious beverage that brings the fruity, chewy joy of a Starburst candy directly into your happy hour. With its mesmerizing gradient of deep purple, vibrant pink, and sunny orange, this layered drink is guaranteed to be the center of attention at any gathering, from summer pool parties to festive holiday celebrations.
Creating a layered cocktail might seem like a daunting task reserved only for professional mixologists, but the truth is that anyone can master this technique at home with a little patience and an understanding of the science behind it. In this comprehensive guide, we will dive deep into everything you need to know to craft the perfect Starburst Drip Cocktail. We will explore the specific gravity of liquids, the optimal flavor combinations to mimic that iconic candy taste, step-by-step layering instructions, and how to create that gorgeous purple sugared rim. Get ready to elevate your home bartending skills and impress your guests with this mouth-watering, candy-inspired creation.

The Science and Art of Layered Cocktails
Before we start pouring liquids into a glass, it is crucial to understand exactly how layered cocktails work. The secret lies in a concept called “specific gravity.” In simple terms, specific gravity refers to the density or weight of a liquid compared to water. Liquids with a high sugar content, such as syrups and sweet liqueurs, have a higher specific gravity and are heavier. Conversely, liquids with a high alcohol content and lower sugar content are lighter and have a lower specific gravity.
To create distinct layers that do not instantly muddy together, you must pour your ingredients in order of their density, starting with the heaviest liquid at the bottom and finishing with the lightest liquid at the top. If you try to pour a heavy syrup over a light spirit, the syrup will sink straight through, ruining the gradient effect. In the Starburst Drip Cocktail, our base layer consists of dense, sugary syrups (like grenadine), our middle layer features moderately sweet fruit juices and liqueurs, and our top layer is dominated by lighter juices and vodka.
Another crucial element in layering is the ice. Crushed ice or a glass packed completely full of cubed ice is essential. The ice acts as a buffer, slowing down the flow of the liquid as you pour it into the glass. This gentle dispersion prevents the force of the pouring liquid from plunging too deeply into the layer below it. Finally, the tool of the trade: the bar spoon. By slowly pouring the lighter liquids over the back of a spoon positioned just above the previous layer, you can gently float the liquids on top of one another, creating that stunning, sharp gradient.
Deconstructing the Starburst Flavor Profile
A true Starburst candy is characterized by an intense, juicy burst of fruit flavor paired with a subtle, creamy sweetness that mimics the chewy taffy texture. To replicate this complex flavor profile in a glass, we cannot simply rely on fruit juice alone. We need to introduce a creamy, vanilla element to smooth out the tartness and emulate the candy’s signature chew.
The Vanilla Element: This is where Vanilla Vodka becomes the unsung hero of this recipe. Standard vodka would simply add an alcoholic bite, but vanilla vodka introduces a soft, bakery-like sweetness that instantly tricks the brain into perceiving a candy-like texture and taste. It smooths out the edges of the citrus juices and binds the various fruit flavors together beautifully.
The Fruit Elements: To achieve the multi-colored gradient and the complex fruitiness, we utilize a combination of classic mixers. Grenadine provides the heavy, sweet, pomegranate-cherry base. A touch of peach schnapps adds a fuzzy, summery sweetness to the middle layer. Finally, a blend of orange and pineapple juices provides the bright, tart, and acidic top layer that gives the cocktail its refreshing finish. When sipped through a straw—moving from the light citrus top down to the rich, dark berry base—the experience perfectly mirrors the sensation of eating a handful of different colored Starburst candies at once.
Essential Ingredients for the Starburst Drip
To craft this masterpiece, you will need a well-stocked bar and a few specific ingredients. Here is a detailed breakdown of everything required to bring this vibrant drink to life.
For the Sugared Rim
- Light Corn Syrup: This is the perfect edible glue for your rim. It is thick enough to hold heavy sugar crystals and dries clear and shiny.
- Purple Sanding Sugar: Look for coarse sanding sugar or sparkling sugar in the baking aisle. If you cannot find purple, you can easily make your own by placing coarse white sugar in a zip-top bag and adding one drop of red and one drop of blue food coloring, then massaging the bag until the color is uniform.
The Bottom Layer (Deep Purple/Magenta)
- Grenadine Syrup: This heavy, sweet, red syrup forms the dense base of the cocktail.
- Blue Curacao: Just a tiny splash of this blue, orange-flavored liqueur mixed with the red grenadine creates the deep purple color at the bottom of the glass.
The Middle Layer (Pink/Peach)
- Vanilla Vodka: The star spirit that provides the candy-like essence.
- Peach Schnapps: Adds a sweet, fruity depth.
- Cranberry Juice: Provides a tart edge and helps create the vibrant pink transition color.
The Top Layer (Sunny Orange)
- Orange Juice: Freshly squeezed is always best for flavor, but high-quality bottled juice works perfectly for vibrant color.
- Pineapple Juice: Adds a tropical sweetness and creates a nice frothy texture when shaken.
Garnishes
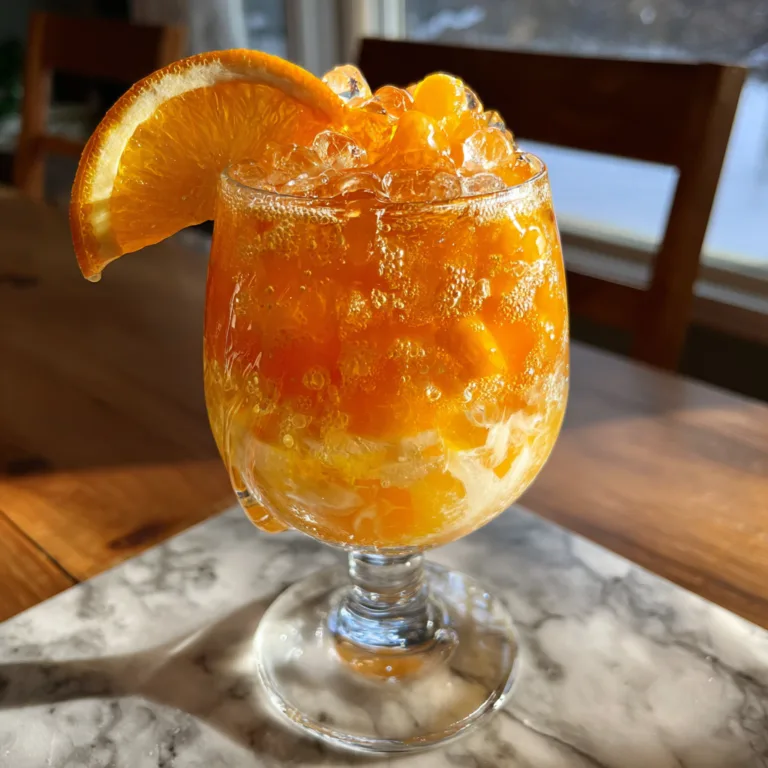
- Fresh Orange Slices: A bright pop of fresh fruit signals the citrus notes within.
- Colorful Paper Straws: Enhances the playful, party-ready vibe of the drink.
- Starburst Candies: Optional, but scattering them around the base of the glass makes for an incredible presentation.
Step-by-Step Instructions for Flawless Execution
Follow these steps closely, and do not rush the pouring process. Patience is the key to a beautifully layered cocktail.
- Prepare the Rim: Pour a small amount of light corn syrup onto a flat plate. On a separate small plate, pour out an even layer of your purple sanding sugar. Take your crystal-cut rocks glass and dip the rim gently into the corn syrup, ensuring an even coat. Then, dip the sticky rim into the purple sugar, rolling it slightly to ensure a thick, sparkling crust. Set the glass aside to let the rim set for a moment.
- Fill with Ice: Fill the rimmed glass entirely to the brim with ice cubes. Do not skimp on the ice; it is crucial for slowing the liquids down and maintaining the layers.
- Create the Purple Base: In a small jigger or shot glass, combine the grenadine and a dash of Blue Curacao. Stir them together until they form a deep purple hue. Pour this mixture directly over the ice into the bottom of your glass.
- Mix the Middle Layer: In a cocktail shaker filled with ice, combine the vanilla vodka, peach schnapps, and cranberry juice. Shake vigorously for about 10 seconds until well chilled.
- Float the Middle Layer: Take your bar spoon and hold it upside down (convex side up) over the glass, resting the tip of the spoon just against the inside of the glass, slightly above the purple liquid level. Slowly and gently strain the pink mixture from your shaker over the back of the spoon. The liquid should fan out over the spoon and gently rest on top of the heavier purple base.
- Prepare the Top Layer: Rinse out your cocktail shaker, add fresh ice, and pour in the orange juice and pineapple juice. Shake gently just to chill and combine.
- Float the Top Layer: Using the exact same spoon technique, place the spoon just above the pink layer and slowly pour the chilled juice mixture over the back of the spoon. It should float beautifully on top, completing the gradient.
- Garnish and Serve: Slide a fresh half-wheel of orange onto the rim of the glass (being careful not to disturb the sugar). Insert two colorful striped paper straws. Serve immediately while the glass is frosty and glistening!
Pro Tips for Home Bartenders
Chill Everything: Cold liquids are denser than warm liquids. By ensuring all your ingredients (including the juices and syrups) are thoroughly chilled in the refrigerator before you begin, you will have a much easier time creating distinct, sharp layers that do not bleed into one another.
The Spoon Technique is Non-Negotiable: You cannot pour directly from a bottle or shaker and expect a layered drink. If you do not have a long-handled bar spoon, a regular cereal spoon will work, provided you pour very slowly and carefully.
Serve with a Stirrer (or Let the Straws do the Work): Layered cocktails look phenomenal, but they do not taste balanced if you drink them layer by layer. The heavy syrup at the bottom is too sweet on its own, and the top layer might be too tart. Advise your guests to admire the presentation, take a quick photo, and then use their straw to gently stir the drink, integrating the flavors before taking a large sip.
Creative Variations and Mocktail Options
One of the best things about the Starburst Drip concept is its versatility. You can easily modify this recipe to suit different tastes or dietary requirements.
The Starburst Drip Mocktail (Non-Alcoholic): To create a family-friendly version of this stunning drink, simply swap the alcohol for flavorful syrups and juices. For the base, stick with the grenadine and blue food coloring. For the middle layer, substitute the vodka and schnapps with a mix of cranberry juice and a splash of peach or vanilla syrup (often found in the coffee aisle). Keep the top layer as a mix of orange and pineapple juice. The layering technique remains exactly the same.
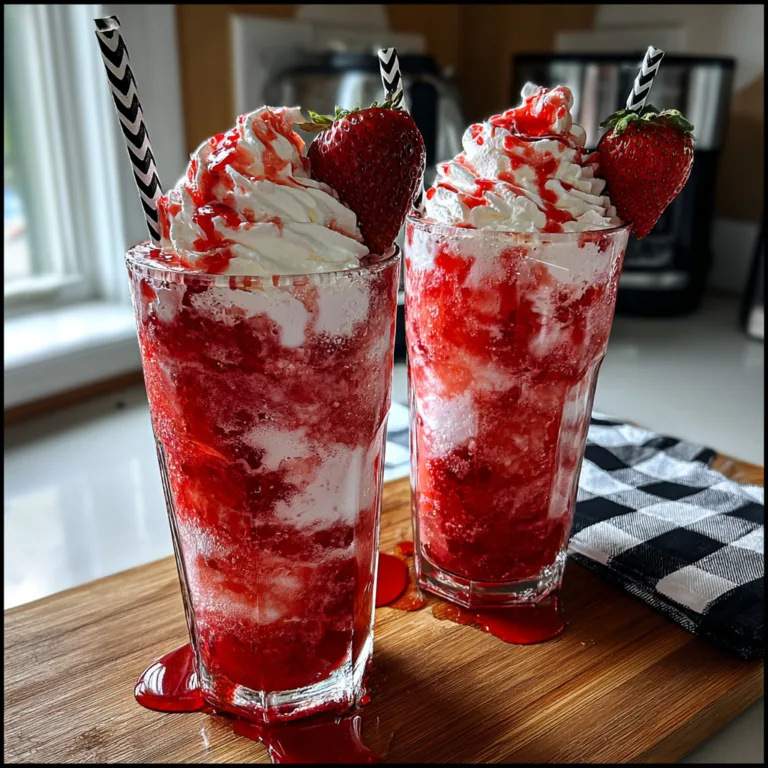
Different Candy Colors: Want to recreate the Pink Starburst (arguably the best flavor)? Ditch the purple base and orange top. Create a heavy base using strawberry syrup, a middle layer of cranberry and vanilla vodka, and a top layer of a lighter pink lemonade or grapefruit juice.
Infused Spirits: If you want to take the candy theme to the absolute maximum, you can infuse your own vodka. Unwrap about 15-20 Starburst candies of the same color and place them in a mason jar with a cup of plain vodka. Let it sit for 24-48 hours, shaking occasionally, until the candies are completely dissolved. Use this intensely flavored, brightly colored spirit as the base for your cocktail creations.
When to Serve the Starburst Drip
This cocktail is an absolute showstopper and deserves to be served at events where it can be properly appreciated. It is the ultimate signature drink for a summer pool party or a backyard barbecue, where its bright colors mirror the vibrant energy of the season. It is also an incredibly popular choice for bachelorette parties, bridal showers, or “girls’ night in” gatherings, where sweet, fruity, and photogenic drinks are always in high demand.

Because it requires a bit of assembly time per glass, it might not be the best choice if you are solely responsible for bartending a party of 50 people. However, for an intimate gathering of 4 to 8 friends, crafting these drinks can be a fun, interactive part of the evening. You can even set up a DIY layering station, pre-mixing the layers in separate pitchers and teaching your guests how to use the bar spoon to pour their own creations.
Conclusion
The Starburst Drip Cocktail proves that you do not have to choose between a drink that looks incredible and one that tastes amazing. By combining the nostalgic, juicy, vanilla-laced flavors of a beloved candy with the sophisticated mixology technique of density layering, you create a beverage experience that delights all the senses. The sparkling purple rim catches the eye, the gradient of colors mesmerizes, and the complex, fruity flavor profile keeps you coming back for more. Gather your ingredients, grab your bar spoon, and get ready to pour a little bit of magic into your next happy hour!
Starburst Drip Cocktail
Ingredients
Equipment
Method
- Prepare the rim: Dip the edge of your rocks glass lightly into corn syrup, then dip it into the purple sanding sugar to create a thick crust. Fill the glass entirely to the top with ice cubes.
- Create the base: In a small glass, mix the grenadine and Blue Curacao until it forms a deep purple color. Pour this mixture directly into the bottom of your ice-filled glass.
- Mix the middle layer: In a cocktail shaker filled with ice, add the vanilla vodka, peach schnapps, and cranberry juice. Shake well to chill.
- Float the middle layer: Hold a bar spoon upside down inside the glass, just above the purple liquid. Slowly and carefully strain the chilled pink mixture from the shaker over the back of the spoon so it floats on top of the purple base.
- Mix the top layer: Rinse your shaker, add fresh ice, orange juice, and pineapple juice. Shake gently to chill.
- Float the top layer: Using the same spoon technique, place the spoon just above the pink layer and slowly pour the chilled juice mixture over the back of the spoon to create the final top layer.
- Garnish with a fresh orange slice on the rim and insert two colorful straws. Serve immediately and instruct guests to stir before drinking.