📖 B. INTRODUCTION
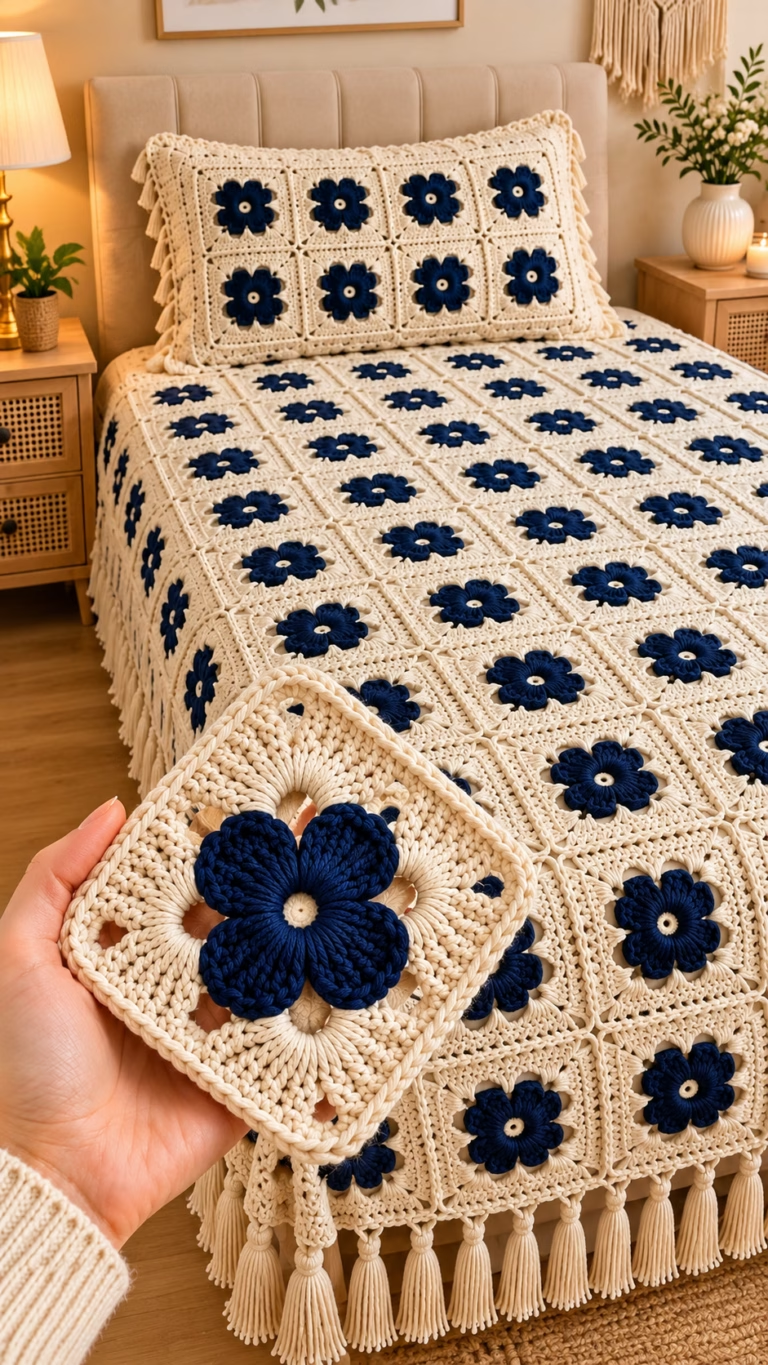
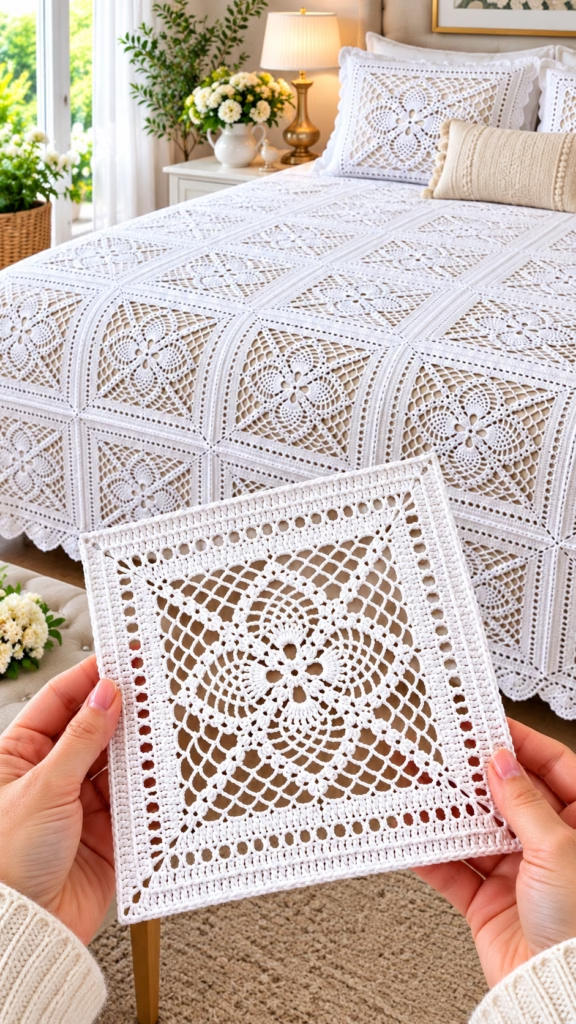
There is something undeniably breathtaking about a crisp, white, intricate crochet lace bedspread bathed in morning light. The Heirloom Elegance Lace Granny Square captures that timeless, vintage aesthetic in a surprisingly accessible motif pattern. Featuring a striking central floral design radiating into delicate diamond mesh and framed by crisp eyelet borders, this square is a testament to the beauty of classic crochet geometry.
Whether you are crafting a legacy piece to pass down through generations, designing a set of matching decorative pillows, or simply challenging yourself with a new lace motif, this pattern delivers maximum visual impact. The repeating squares join together to create a stunning secondary pattern where the corners meet, transforming simple shapes into a magnificent, continuous tapestry of lace.
While it looks intricate, the design is built on familiar stitches—chains, single crochets, and double crochets—worked with precision. Gather your favorite mercerized cotton yarn and settle in to stitch a piece of heirloom history.
🔍 C. MAIN PATTERN OVERVIEW
This pattern details the construction of a single, large-scale lace crochet square. The square begins in the round with a four-lobed floral center, expands outward using chain-space mesh arches to create a diamond silhouette, and is finally “squared off” with solid double crochet rounds and a distinctive eyelet border.
When multiple squares are joined, they form a breathtaking, continuous geometric lace fabric ideal for the luxurious bedspreads and matching pillow shams seen in classic home decor. Instructions for a simple scalloped edge for the final assembled blanket are also included.
🎯 D. SKILL LEVEL
Intermediate This pattern requires careful counting, consistent tension, and comfort with working into chain spaces rather than the tops of stitches.
- Working in the round
- Creating and working into chain spaces (ch-sp)
- Stitch placement in specific skipped stitches
- Maintaining even tension across open mesh sections
📏 E. FINISHED SIZE
- Single Motif: Approximately 10 x 10 inches (25.5 x 25.5 cm) unblocked, and 10.5 x 10.5 inches (26.5 x 26.5 cm) aggressively blocked.
- Size will vary depending on your choice of yarn weight, hook size, and personal tension. The reference uses a crisp, thin yarn that holds its shape beautifully.
🧮 F. GAUGE
- First 4 Rounds: 3 inches (7.5 cm) in diameter.
- Gauge is less critical than achieving a fabric you love with a drape suitable for your final project. However, tight, consistent stitches in the solid border sections will help the square maintain its crisp edges.
🧶 G. REQUIRED YARN AMOUNTS
- Per Motif: Approximately 65-75 yards (60-68 meters) of fingering weight (Size 1 or Size 2) mercerized cotton yarn.
- For a Throw (4×5 squares – 20 total): ~1,500 yards (1,370 m).
- For a Queen Bedspread (8×8 squares – 64 total): ~4,800 yards (4,390 m).
- Note: Yardage does not include joining or the final blanket border. Add roughly 15% extra for assembly and edging. All squares in the primary design use a single, solid crisp white color.
🧰 H. MATERIALS
- Yarn: Fingering weight (#1 Super Fine) or Sport weight (#2 Fine) 100% mercerized cotton in bright white.
- Hook: 3.0 mm (US C or D) crochet hook (or size needed to obtain your preferred fabric).
- Tapestry Needle: For weaving in ends.
- Scissors: Small snips.
- Stitch Markers: 4 markers to denote the corner chain spaces for the final border rounds.
- Blocking Supplies: Rust-proof T-pins and a blocking mat (crucial for lace motifs).
🔤 I. ABBREVIATIONS – US TERMS
- ch: chain
- ch-sp: chain space
- dc: double crochet
- hdc: half double crochet
- inc: increase (2 stitches in the same stitch/space)
- MR: magic ring
- sc: single crochet
- sk: skip
- sl st: slip stitch
- sp: space
- st(s): stitch(es)
📝 J. NOTES BEFORE YOU BEGIN
- 🧵 Continuous vs. Joined: The center rounds (1-3) and the final border rounds (10-13) are joined at the end of each round with a slip stitch. The mesh rounds (4-9) are worked continuously; do not join unless specified, simply flow into the next chain loop.
- ⚠️ Corner Markers: Place a stitch marker in the ch-3 space of each corner to easily identify it on the next round.
- ✅ Blocking is Mandatory: Lace squares will look ruffled and messy until they are wet-blocked. The final beautiful geometric precision relies entirely on stretching and pinning the finished square.
🪡 K. COMPLETE PATTERN
🌸 Center Floral Motif
What it is for: The dense central anchor of the square. Yarn: White. Quantity: 1 per square.
- R1: Make a MR. Ch 1, work 8 sc into the ring. Pull tight to close. Sl st to first sc to join. (8 sc)
- R2: Ch 1, sc in same st. Ch 5, sk 1 sc, sc in next sc. Repeat from * to * 3 times. For the final loop, ch 2 and dc into the first sc to form the last loop and keep your hook in the center of the space. (4 ch-sps)
- R3: Ch 1, sc in the space formed by the joining dc. In the next ch-5 sp work (3 dc, ch 3, 3 dc), sc in next ch-sp. Repeat from * to * 3 times, omitting the final sc. Sl st to the first sc to join. (4 flower petals formed).
🕸️ Diamond Mesh Body
What it is for: The openwork lace framing the center.
- R4: Sl st into the first 3 dc and into the ch-3 sp at the tip of the first petal. Ch 1, sc in same sp. Ch 5, dc in the sc between petals, ch 5, sc in the ch-3 sp at the tip of the next petal. Repeat from * to * around, joining with a sl st to the first sc. (8 ch-5 sps)
- R5: Sl st into first 2 chs of the first ch-5 sp. Ch 1, sc in same sp. Ch 5, sc in next ch-sp. Repeat from * to * 7 times. Join with sl st to first sc. (8 ch-5 sps)
- R6 (Establishing Corners): Sl st into next ch-sp. Ch 1. (Sc, ch 5, sc) all in the same ch-sp (this forms the corner). [Ch 5, sc in next ch-sp] twice. Ch 5. Repeat from * to * 3 more times. Join with sl st to first sc. (16 ch-5 sps total; 4 corners, 12 sides)
- R7: Sl st into the corner ch-5 sp. Ch 1. (Sc, ch 5, sc) in corner sp. [Ch 5, sc in next ch-sp] 3 times. Ch 5. Repeat from * to * 3 more times. Join with sl st. (20 ch-5 sps)
- R8: Sl st into corner ch-5 sp. Ch 1. (Sc, ch 5, sc) in corner sp. [Ch 5, sc in next ch-sp] 4 times. Ch 5. Repeat from * to * 3 more times. Join with sl st. (24 ch-5 sps)
- R9: Sl st into corner ch-5 sp. Ch 1. (Sc, ch 5, sc) in corner sp. [Ch 5, sc in next ch-sp] 5 times. Ch 5. Repeat from * to * 3 more times. Join with sl st. (28 ch-5 sps)
🧱 Solid Framing and Eyelet Border
What it is for: Creating the crisp, defined edges that allow the squares to be joined seamlessly.
- R10 (Solid Frame): Sl st into the corner ch-5 sp. Ch 3 (counts as dc). In the same sp, work (2 dc, ch 3, 3 dc) – first corner made. Work 5 dc into each of the next 6 ch-5 sps across the side. In the corner ch-5 sp work (3 dc, ch 3, 3 dc). Repeat from * to * 3 times. Work 5 dc into each of the remaining 6 ch-sp across the last side. Join with a sl st to the top of the beginning ch-3. (36 dc per side)
- R11 (Eyelet Round): Ch 4 (counts as dc + ch 1). Sk the next dc, dc in the next dc. In the corner ch-3 sp work (dc, ch 3, dc). [Ch 1, sk 1 dc, dc in next dc] across the side to the next corner. Repeat from * to * around. Join with a sl st to the 3rd ch of the beginning ch-4.
- R12 (Solid Finish): Ch 1, sc in same st. Work 1 sc in each dc and 1 sc in each ch-1 sp across. In the corner ch-3 sp work (2 sc, ch 2, 2 sc). Repeat around. Join with sl st to first sc.
- R13 (Final Edge): Ch 1, sc in same st and in each st across. In the corner ch-2 sp, work 3 sc. Sc in each st across. Repeat around. Join with sl st to first sc.
- Fasten off: Cut yarn leaving a 6-inch tail. Weave in all ends neatly on the back of the work.
🎨 L. STYLING / ASSEMBLY / STABILITY / FINAL SHAPING
📌 Wet Blocking
The motif will not look like a perfect square straight off the hook.
- Soak the finished square in cool water for 15 minutes.
- Gently press out excess water in a towel (do not wring).
- Pin the square to a blocking mat, ensuring the corners form precise 90-degree angles and the eyelet borders are perfectly straight. Allow to dry completely.
🧵 Joining the Squares
To achieve the seamless bedspread look seen in the reference:
- Align two blocked squares right sides together.
- Using a yarn needle and the same white yarn, whipstitch the inner loops only (back loops) of the final single crochet round together. This creates a beautifully flat, invisible seam.
- Continue joining into rows, and then join the rows together into your final blanket dimension.
〰️ Final Scalloped Bedspread Edging
Once all squares are joined into a blanket:
- R1: Sc evenly around the entire perimeter of the blanket, placing 3 sc in each outer corner.
- R2: Sk 2 sts, 7 dc in next st, sk 2 sts, sc in next st. Repeat from * to * around to create the elegant scalloped drape at the floor.
💡 M. HELPFUL CROCHET TIPS
- 💡 Consistent Tension: When working the chain-5 mesh loops, ensure your chains are tight and even. Baggy chains will distort the central lace pattern.
- 💡 Counting is Key: Always verify you have exactly 5 dc in each mesh space during Round 10 to ensure your square remains flat.
- 💡 Invisible Join: For a cleaner look at the end of each round, replace the final slip stitch with an invisible join using a tapestry needle.
- 💡 Block As You Go: If making a large bedspread, block your squares in batches. Do not leave 64 squares to block at the very end!
- 💡 Batch the Ends: Weave in the starting and ending tails immediately after finishing each square to save yourself hours of tedious work later.
- 💡 Yarn Choice: Stick to mercerized cotton. Acrylic yarns may stretch over time, and non-mercerized cotton lacks the crisp sheen that makes this vintage style pop.
🧼 N. CARE INSTRUCTIONS
- Washing: Machine wash on a gentle/delicate cycle in cool water, preferably inside a large mesh laundry bag to prevent the lace loops from catching on zippers or agitators.
- Drying: Do not tumble dry. Lay flat to dry on towels or blocking mats.
- Maintenance: Over time, heavy cotton blankets can stretch. Re-blocking after washing will restore the perfect crisp geometry of the eyelet edges.
❓ R. FAQ
❓ Can I use a different weight yarn? Yes, but it will change the finished size. Using worsted weight yarn and a 5.0mm hook will create a much larger square (roughly 14 inches) which makes for a faster afghan, though it will have a chunkier, less delicate aesthetic than the crisp white lace shown.
❓ My square is ruffling in the center, what did I do wrong? Ruffling usually means there are too many stitches or your chain loops are too loose. Ensure you only chained 5 in the mesh rounds. If it’s a minor ruffle, aggressive wet blocking will usually flatten it out perfectly.
❓ How do I make the matching pillows? As shown in the background, simply stitch four squares together (a 2×2 grid) for the front panel, and four for the back panel. Join the panels around three sides, insert a pillow form (preferably covered in white or beige fabric to let the lace stand out), and seam the final side shut.
❓ Is it necessary to weave in ends if I’m sewing them together anyway? Absolutely. Because the lace is openwork, loose tails will eventually poke through to the front. Weave them securely into the solid double-crochet border rounds (Rounds 10 & 11) to hide them permanently.
❓ Can I make this in multiple colors? While the classic heirloom look relies on solid white, this pattern looks beautiful with a contrasting center flower or alternating border colors. Keep in mind that color changes mean more ends to weave in!