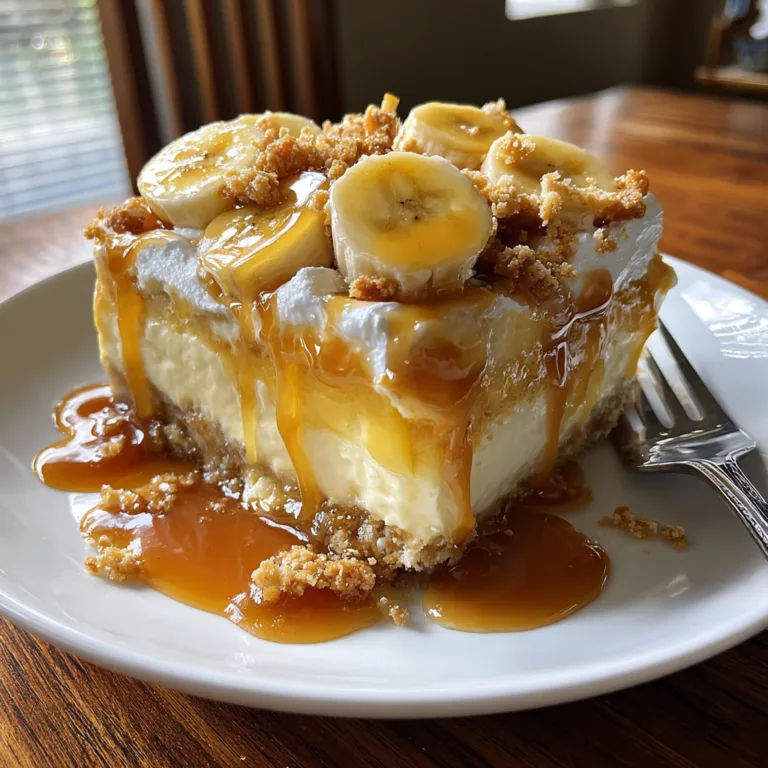
Red Velvet Strawberry Cheesecake
The Ultimate Red Velvet Strawberry Cheesecake Recipe
When it comes to show-stopping desserts, few creations can rival the visual appeal and downright decadent flavor profile of a beautifully layered cake. The Red Velvet Strawberry Cheesecake is the undisputed champion of indulgent treats, marrying the tangy, chocolate-kissed richness of a classic red velvet cake with the velvety smoothness of a New York-style cheesecake, all crowned with a vibrant, glossy, and sweet strawberry compote. This dessert is not just a cake; it is an experience, a centerpiece, and a testament to the magic of baking from scratch. Whether you are preparing for a romantic Valentine’s Day dinner, a festive holiday gathering, a birthday celebration, or simply seeking a spectacular weekend baking project, this recipe will deliver an unforgettable culinary masterpiece.
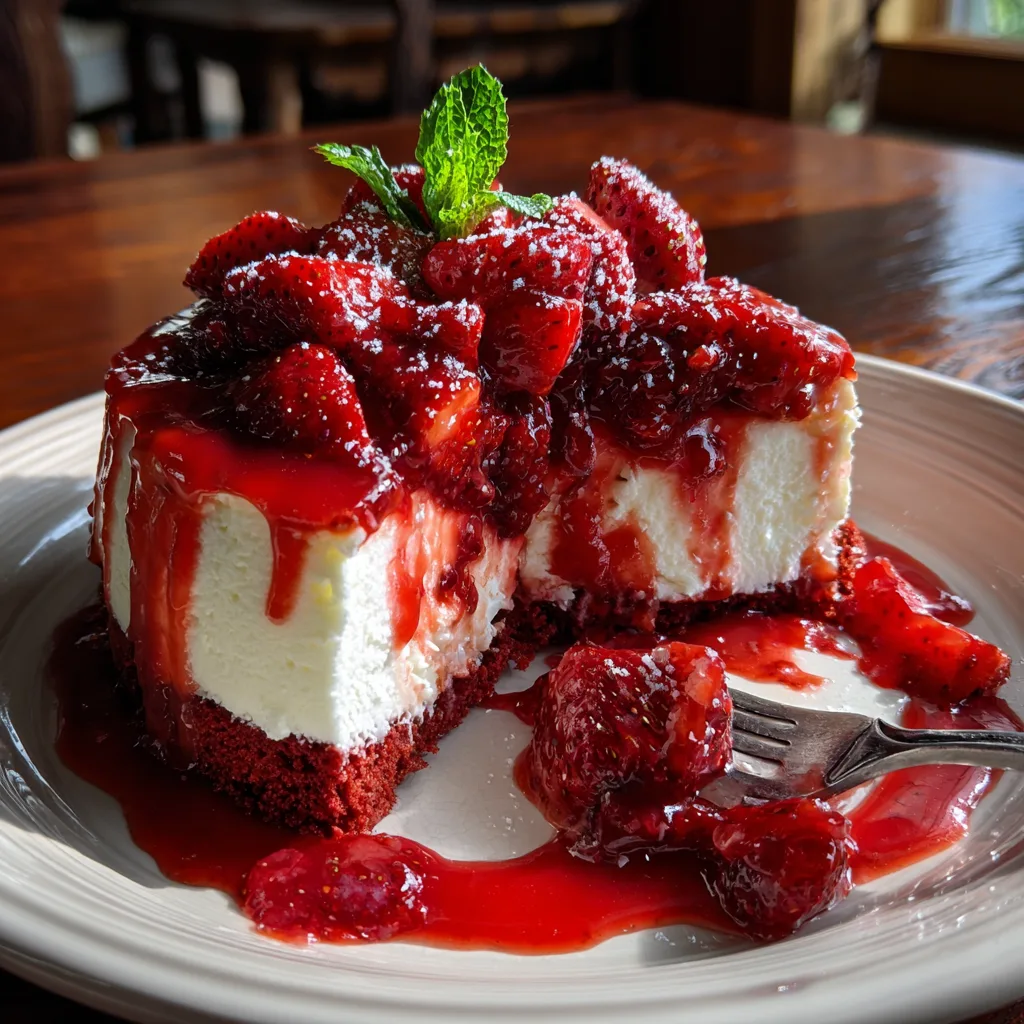
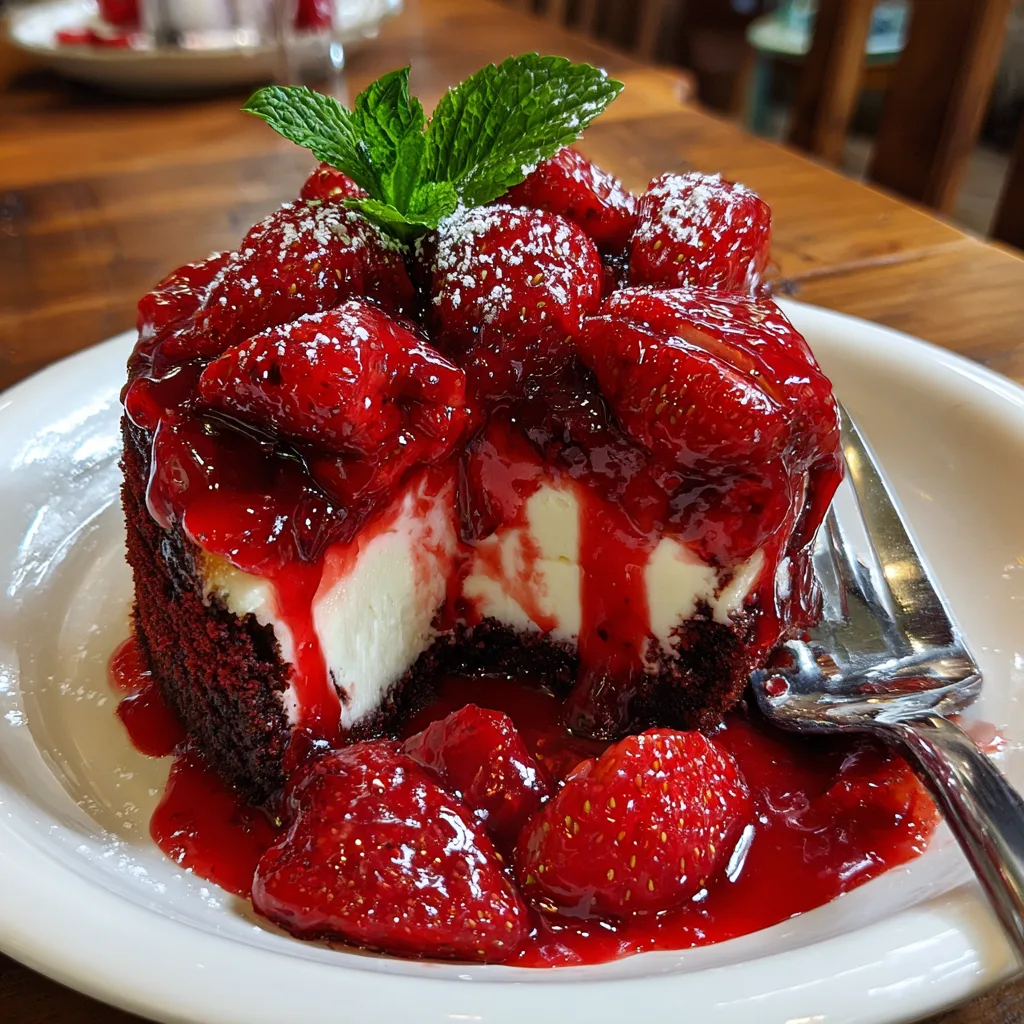
The beauty of this dessert lies in its brilliant contrast. You have the striking crimson hue of the red velvet base, the pure, creamy white of the cheesecake filling, and the jewel-toned, ruby-red strawberry topping glistening under a dusting of powdered sugar. Every forkful offers a symphony of textures: the dense, moist crumb of the cake, the rich, melt-in-your-mouth cream cheese layer, and the fresh, fruity burst of the strawberry topping. In this comprehensive guide, we will walk you through every single step, from understanding the science behind the ingredients to mastering the perfect water bath, ensuring your Red Velvet Strawberry Cheesecake turns out flawlessly.
Why You Will Fall in Love with This Dessert
There are countless reasons why this particular dessert combination has taken the internet and bakeries by storm. First and foremost is the balance of flavors. Traditional cheesecake is incredibly rich, and sometimes a whole slice can feel heavy. However, the addition of the slightly acidic, cocoa-infused red velvet base cuts through that richness. Furthermore, the fresh strawberry topping acts as a palate cleanser, introducing a bright, natural acidity and sweetness that prevents the dessert from becoming cloying.
Another reason to love this recipe is its sheer impressive nature. When you slice into this cake, the distinct, clean layers are a feast for the eyes. It looks like something you would purchase for a premium price at an artisan bakery, yet it is entirely achievable in a home kitchen. While it requires patience—cheesecakes are notoriously demanding when it comes to chilling time—the actual hands-on preparation is straightforward. The payoff for your patience is a dessert that will have your friends and family begging for the recipe.
Cultural Context and Fun Facts
To truly appreciate this dessert, it is fascinating to look at the history of its components. Red velvet cake has a mysterious and much-debated origin story. Some culinary historians trace its roots back to the Victorian era when “velvet” cakes were created using almond flour, cocoa, or cornstarch to soften the protein in the flour, resulting in a finer crumb. The “red” aspect originally came from a chemical reaction between non-Dutched, anthocyanin-rich cocoa powder and acidic ingredients like buttermilk and vinegar. Today, while we primarily use red food coloring to achieve that iconic vibrant hue, the signature buttermilk-vinegar tang remains essential to an authentic red velvet flavor.
Cheesecake, on the other hand, boasts an even longer history, dating back to ancient Greece where a primitive version was served to athletes during the first Olympic games in 776 BC. The modern, cream cheese-based version we adore today was born in America in the late 19th century after the accidental invention of cream cheese by dairyman William Lawrence. Combining these two historical dessert titans into one cohesive cake is a modern marvel of fusion baking.
Essential Ingredients for Success
Before we dive into the methodology, let us explore the critical components that make up this dessert. Using high-quality ingredients at the correct temperatures is the secret to a perfect bake.
For the Red Velvet Base:
- – 1 1/2 cups all-purpose flour
- – 2 tablespoons unsweetened cocoa powder
- – 1/2 teaspoon baking soda
- – 1/4 teaspoon salt
- – 1/2 cup unsalted butter, softened to room temperature
- – 1 cup granulated sugar
- – 1 large egg, room temperature
- – 1/2 cup buttermilk, room temperature
- – 1 tablespoon liquid red food coloring
- – 1 teaspoon vanilla extract
- – 1/2 teaspoon white vinegar
For the Cheesecake Filling:
- – 24 oz (three 8-oz blocks) full-fat cream cheese, softened to room temperature
- – 1 cup granulated sugar
- – 1 cup sour cream, room temperature
- – 1 tablespoon vanilla extract
- – 3 large eggs, room temperature
For the Strawberry Topping:
- – 3 cups fresh strawberries, hulled and quartered
- – 1/3 cup granulated sugar
- – 1 tablespoon lemon juice
- – 1 tablespoon cornstarch mixed with 2 tablespoons cold water (slurry)
- – Powdered sugar and fresh mint leaves for garnish
Step-by-Step Instructions
Follow these detailed steps to ensure each layer of your cake turns out perfectly. Remember, baking is a science, so take your time and follow the guidelines closely.
Step 1: Prepare the Red Velvet Base
- Preheat your oven to 350°F (175°C). Lightly grease a 9-inch springform pan and line the bottom with a circle of parchment paper. Wrap the outside of the pan tightly with multiple layers of heavy-duty aluminum foil to prepare for the water bath later.
- In a medium bowl, whisk together the all-purpose flour, unsweetened cocoa powder, baking soda, and salt. Set this dry mixture aside.
- In the bowl of a stand mixer fitted with a paddle attachment (or using a hand mixer), beat the softened butter and granulated sugar on medium-high speed until light, fluffy, and pale in color. This usually takes about 3 to 4 minutes.
- Add the room temperature egg and beat until fully incorporated, scraping down the sides of the bowl as needed.
- In a small separate bowl or measuring cup, whisk together the buttermilk, liquid red food coloring, vanilla extract, and white vinegar.
- Turn your mixer to low speed. Gradually add the dry ingredients to the butter mixture in three additions, alternating with the wet buttermilk mixture in two additions. Begin and end with the dry ingredients. Mix just until combined; do not overmix, or the cake will become tough.
- Pour the vibrant red batter into the prepared springform pan and smooth the top with an offset spatula. Bake for 20 to 25 minutes, or until a toothpick inserted into the center comes out with just a few moist crumbs. Remove from the oven and let it cool completely in the pan while you prepare the cheesecake filling. Reduce the oven temperature to 325°F (160°C).
Step 2: Mix the Cheesecake Filling
- Ensure your cream cheese is completely softened to room temperature to prevent any lumps in your filling. In a clean, large mixing bowl, beat the cream cheese on medium-low speed until it is perfectly smooth and creamy.
- Gradually pour in the granulated sugar and continue to mix until well combined and the mixture is silky.
- Add the room temperature sour cream and vanilla extract, mixing just until blended.
- With the mixer on the lowest possible speed, add the room temperature eggs one at a time. Mix each egg just until the yolk disappears into the batter. Overmixing the eggs will incorporate too much air into the batter, which can cause your cheesecake to crack and puff up like a soufflé before collapsing.
- Carefully pour the smooth cheesecake filling directly over the cooled red velvet cake base in the springform pan. Use a spatula to gently smooth the top.
Step 3: The Water Bath and Baking
- Place your foil-wrapped springform pan into a larger roasting pan. Carefully pour boiling water into the roasting pan until it reaches about 1 inch up the sides of the springform pan. This water bath (bain-marie) creates a humid environment in the oven, ensuring the cheesecake bakes gently and evenly without cracking or drying out.
- Carefully transfer the roasting pan to the preheated oven. Bake at 325°F (160°C) for 60 to 70 minutes. The cheesecake is done when the edges are set, but the center 2-3 inches still have a slight jiggle to them when you gently shake the pan.
- Once baked, turn the oven off completely. Crack the oven door open slightly (you can use a wooden spoon to hold it open) and leave the cheesecake inside the cooling oven for 1 hour. This gradual cooling process is crucial for preventing cracks.
- After an hour, remove the cheesecake from the water bath, carefully remove the foil, and let it cool completely on a wire rack at room temperature. Once cooled to room temperature, cover the pan tightly with plastic wrap and chill in the refrigerator for at least 6 hours, preferably overnight, to allow the cheesecake to set completely and the flavors to meld.
Step 4: Crafting the Strawberry Topping
- In a medium saucepan, combine the quartered fresh strawberries, granulated sugar, and lemon juice. Place over medium heat and cook, stirring occasionally, until the strawberries begin to break down and release their juices (about 5-7 minutes).
- In a small bowl, mix the cornstarch and cold water until smooth to create a slurry. Stir the slurry into the bubbling strawberry mixture.
- Continue to cook for another 1-2 minutes, stirring constantly, until the sauce thickens and turns glossy. Remove from heat and let the compote cool completely to room temperature.
- Once the cheesecake is fully chilled and set, remove it from the springform pan and place it on your serving platter. Spoon the cooled, glossy strawberry compote over the top of the cheesecake, allowing some of the beautiful juices to drip down the sides.
- Garnish with fresh mint leaves and a light dusting of powdered sugar just before serving.
Pro Tips for the Perfect Layered Cheesecake
Creating a layered dessert can seem intimidating, but following these professional tips will guarantee success every time:
- Room Temperature Ingredients: This is the golden rule of cheesecake baking. If your cream cheese, eggs, or sour cream are cold, they will not emulsify properly, leading to a lumpy batter. Take your ingredients out of the fridge at least two hours before you begin baking.
- Do Not Skip the Water Bath: While it might seem like a hassle, the water bath is non-negotiable for a premium, crack-free cheesecake. The steam provides gentle, even heat and prevents the edges from overcooking before the center is set.
- The Jiggly Center: It is normal to panic when you see the center of your cheesecake jiggling after an hour of baking. Trust the process. The residual heat will continue to cook the center as it cools. Overbaking leads to a dry, crumbly texture.
- Patience is a Virtue: The overnight chill in the refrigerator is essential. Cheesecake needs this time for the structure to solidify and the complex flavors to develop and deepen. Slicing into a warm or freshly baked cheesecake will result in a messy collapse.
Delicious Variations to Try
Once you have mastered the classic Red Velvet Strawberry Cheesecake, you can experiment with fun flavor variations:
- Raspberry Red Velvet: Swap the fresh strawberries for raspberries in the compote. The tartness of raspberries pairs beautifully with the chocolate notes in the red velvet cake.
- Chocolate Ganache Drizzle: For the ultimate chocoholic, add a rich dark chocolate ganache drip over the chilled cheesecake before adding the strawberry topping.
- Oreo Crust Alternative: If you prefer a crunchier base, skip the baked red velvet cake layer and create a crust using crushed red velvet Oreos and melted butter.
Serving Suggestions and Pairings
This magnificent dessert is rich and complex, so it pairs best with beverages that can cut through the sweetness or complement its creamy texture. A freshly brewed cup of dark roast coffee or a shot of espresso is a classic pairing, as the bitterness of the coffee beautifully balances the sweet, creamy cheese. For a festive occasion, serve this cheesecake with a glass of dry Champagne or Prosecco. The effervescence cleanses the palate between rich bites.
When cutting the cheesecake, use a large, sharp chef’s knife. For perfectly clean slices that showcase those distinct layers, dip your knife into a tall pitcher of hot water, wipe the blade completely dry with a clean towel, and then make your slice. Repeat the dipping and wiping process for every single cut.
Storage and Freezing Instructions
To Store: Leftover cheesecake should be stored in the refrigerator. Wrap the cake tightly in plastic wrap or store individual slices in an airtight container to prevent them from absorbing odors from the fridge. It will stay fresh and delicious for up to 5 days.
To Freeze: Cheesecake freezes exceptionally well, making it a great make-ahead dessert! To freeze the whole cake (without the strawberry topping), let it set completely in the fridge overnight. Then, wrap the entire cheesecake (still on the springform pan bottom or transferred to a cardboard cake round) in two layers of plastic wrap, followed by a layer of heavy-duty aluminum foil. Freeze for up to 2 months. To thaw, leave it wrapped and place it in the refrigerator overnight. Make and add the fresh strawberry topping on the day you plan to serve it.
There you have it—a comprehensive guide to creating the ultimate Red Velvet Strawberry Cheesecake. Enjoy the process of baking this spectacular dessert, and savor every single decadent, glossy, and creamy bite!
Red Velvet Strawberry Cheesecake
Ingredients
Equipment
Method
- Preheat oven to 350°F (175°C). Line a 9-inch springform pan with parchment paper and wrap the outside tightly with heavy-duty foil.
- For the base: Whisk dry ingredients together. Beat butter and sugar until fluffy, then mix in the egg.
- Whisk buttermilk, food coloring, vanilla, and vinegar together. Alternately add dry and wet ingredients to the butter mixture.
- Pour batter into pan and bake for 20-25 minutes. Let cool completely. Reduce oven to 325°F (160°C).
- For the filling: Beat cream cheese until smooth. Add sugar, sour cream, and vanilla. Mix in eggs one at a time on low speed.
- Pour filling over the cooled base. Place springform pan in a roasting pan filled with 1 inch of boiling water (water bath).
- Bake for 60-70 minutes until edges are set but center jiggles slightly. Turn oven off, leave door cracked, and let cool inside for 1 hour.
- Remove from water bath and chill in the refrigerator for at least 6 hours or overnight.
- For the topping: Cook strawberries, sugar, and lemon juice over medium heat for 5-7 minutes. Stir in cornstarch slurry and boil for 1 minute until thickened. Cool completely.
- Pour cooled strawberry topping over the chilled cheesecake before serving. Garnish with powdered sugar and mint.