Pineapple Upside Down Cookies
The Ultimate Pineapple Upside Down Sugar Cookies: A Tropical Twist on a Classic
If you have ever found yourself torn between the buttery, comforting chew of a classic sugar cookie and the sticky, caramelized, fruit-forward joy of a traditional pineapple upside-down cake, then you have just stumbled upon your new favorite dessert. The Pineapple Upside Down Sugar Cookie is a stroke of baking genius. It takes the very best elements of the beloved retro cake and condenses them into a handheld, perfectly portioned, and stunningly beautiful cookie.
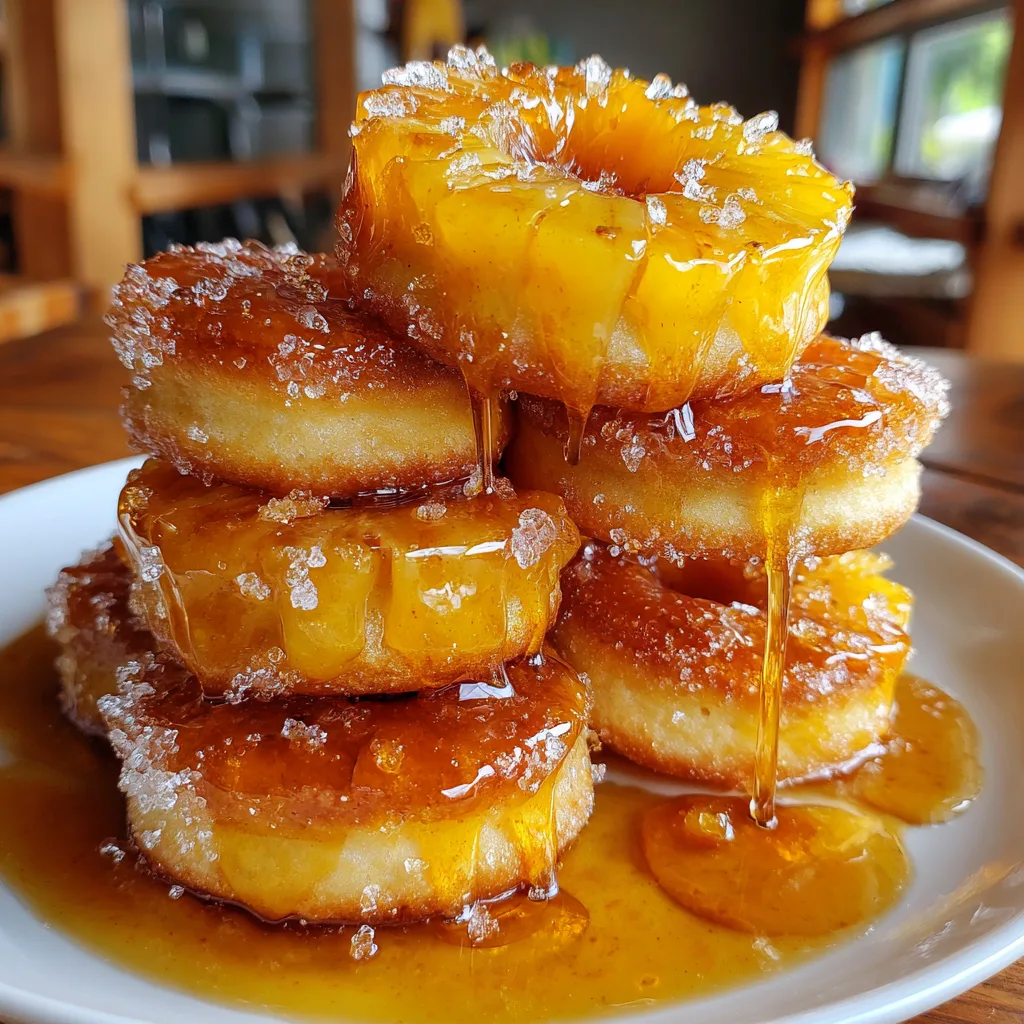
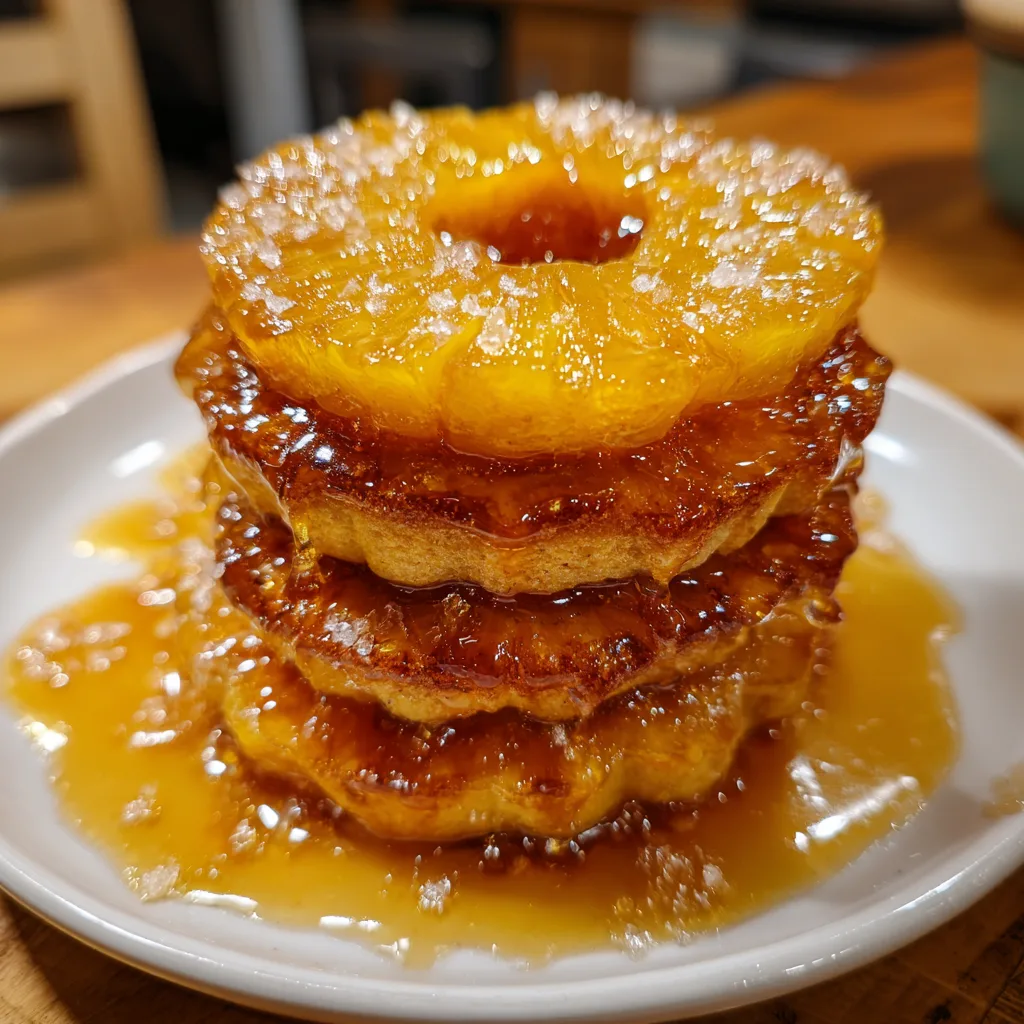
These cookies are not just a treat for the taste buds; they are a feast for the eyes. A tender, buttery sugar cookie base is crowned with a vibrant, juicy pineapple ring. As they bake together, the fruit juices meld with a generous sprinkling of coarse sugar, creating a glistening, caramelized crust that is completely irresistible. In this comprehensive guide, we will walk you through every step of creating these bakery-worthy masterpieces right in your own kitchen.
Why You Will Fall in Love with These Cookies
There is a reason why hybrid desserts are taking the culinary world by storm. They allow us to experience familiar flavors in exciting new formats. Here is why these Pineapple Upside Down Sugar Cookies deserve a permanent spot in your baking repertoire:
Firstly, the texture profile is phenomenal. A great dessert plays with contrasting textures, and this cookie delivers on all fronts. You get the soft, chewy center of a perfectly baked sugar cookie, the slight crispness of the cookie edges, the tender bite of the warm pineapple, and the satisfying crunch of the caramelized coarse sugar on top. It is a symphony of textures in every single bite.
Secondly, they offer built-in portion control. While a whole pineapple upside-down cake can be a heavy commitment (and sometimes messy to serve), these cookies are individual, grab-and-go treats. They are perfect for potlucks, bake sales, summer picnics, or simply packing into a lunchbox for a sweet midday surprise.
Finally, the visual appeal is unmatched. The bright yellow rings of pineapple sitting atop golden-brown cookies, sparkling with sugar crystals, look like little rays of sunshine on a platter. They are inherently festive and require absolutely no complicated icing, piping, or decorating skills to look professionally made.
The Essential Ingredients and Their Roles
Baking is a science, and understanding your ingredients is the key to consistent, delicious results. Let’s break down what goes into these tropical treats.
The Sugar Cookie Base
– Unsalted Butter: The foundation of any good sugar cookie. Using unsalted butter allows you to control the exact sodium content of your dough. It must be softened to room temperature so it can be properly creamed with the sugar, incorporating air for a light, tender crumb.
– Granulated Sugar: Provides the essential sweetness and helps the cookies spread perfectly. The sharp edges of the sugar crystals also help cut into the butter during the creaming process, trapping air.
– Egg: Acts as the binder, holding the dough together while adding richness and a subtle chewiness to the final baked good.
– Vanilla Extract: The background flavor enhancer. A good quality pure vanilla extract bridges the gap between the buttery cookie and the bright, acidic fruit on top.
– All-Purpose Flour: The structural backbone. All-purpose flour has the perfect protein content to give the cookies structure without making them tough or bread-like.
– Baking Powder and Baking Soda: The leavening agents. A combination of both gives the cookies a gentle lift. The baking soda will also aid in achieving that beautiful golden-brown color.
– Salt: Essential for balancing the sweetness. Without salt, baked goods taste flat and one-dimensional.
The Pineapple Topping
– Canned Pineapple Rings: While fresh pineapple is wonderful, canned pineapple rings are actually preferred for this recipe. They are uniform in size, consistently sweet, and most importantly, they have been softened by the canning process. Fresh pineapple contains an enzyme called bromelain that can sometimes mess with the texture of baked goods, and it holds a lot more unpredictable moisture. Be sure to drain them incredibly well and pat them dry with paper towels.
– Coarse Sparkling Sugar (Turbinado or Sanding Sugar): This is the secret to the signature glistening top. Sprinkling coarse sugar generously over the pineapple ring before baking creates a slightly crunchy, deeply caramelized exterior that mimics the sticky topping of an upside-down cake.
– Brown Sugar (Optional): For a deeper, more molasses-like caramel flavor, a tiny pinch of light brown sugar underneath the pineapple ring can work wonders.
Equipment You Will Need
You do not need a professional pastry kitchen to make these, but having the right tools makes the process seamless.
– Electric Mixer: A stand mixer or a hand mixer is crucial for properly creaming the butter and sugar until light and fluffy.
– Baking Sheets: Heavy-duty, light-colored aluminum baking sheets distribute heat evenly. Dark pans can cause the bottoms of the cookies to burn before the pineapple is caramelized.
– Parchment Paper or Silicone Baking Mats: Absolutely essential. Because of the sugary, sticky nature of the pineapple and the coarse sugar, these cookies will aggressively stick to an unlined pan.
– Cookie Scoop: Ensures that all your cookies are exactly the same size, which means they will all bake at the same rate.
– Paper Towels: A highly underrated tool in this recipe, needed to extract as much moisture as possible from the pineapple rings.
Step-by-Step Instructions to Perfection
Follow these detailed steps to achieve cookie nirvana.
1. Prepare the Pineapple: This is arguably the most critical step. Open your can of pineapple rings and drain the juice completely (save it for a smoothie or a cocktail!). Place the rings flat on a layer of paper towels. Place more paper towels on top and press gently. Let them sit for at least 15 minutes to absorb excess moisture. If they are too wet, your cookies will turn out soggy.
2. Make the Dough: In a large mixing bowl, beat the softened butter and granulated sugar together on medium-high speed for about 2-3 minutes, until pale and fluffy. Scrape down the sides of the bowl. Add the egg and vanilla extract, beating until fully incorporated.
3. Incorporate Dry Ingredients: In a separate, smaller bowl, whisk together the flour, baking powder, baking soda, and salt. Turn your mixer down to low speed and gradually add the dry ingredients to the wet ingredients. Mix just until the flour disappears. Overmixing will lead to tough cookies.
4. Chill the Dough (Crucial!): Because this dough is quite soft and needs to hold up to the weight and moisture of the pineapple, chilling is mandatory. Cover the bowl with plastic wrap and refrigerate for at least 1 hour, or up to overnight.
5. Assembly: Preheat your oven to 350°F (175°C). Line your baking sheets with parchment paper. Using a large cookie scoop (about 2-3 tablespoons of dough), scoop the chilled dough and roll it into smooth balls. Place them on the baking sheet, leaving plenty of room between them as they will spread. Flatten each ball slightly with the palm of your hand.
6. The Crowning Glory: Place one dried pineapple ring firmly into the center of each flattened dough mound. Press down gently so the dough comes up slightly around the edges of the fruit. Generously sprinkle the entire top of the cookie—both the fruit and the exposed dough—with coarse sugar.
7. Bake and Cool: Bake for 14-16 minutes, or until the edges of the cookies are a deep golden brown and the coarse sugar has melted slightly into the fruit. Remove from the oven. Allow the cookies to cool on the baking sheet for at least 10 minutes before attempting to move them. They are very fragile when hot. Transfer to a wire rack to cool completely.
Pro-Tips for the Best Results
Moisture is the Enemy: We cannot stress this enough—dry your pineapple rings! If you skip this step, the juice will bleed into the dough as it bakes, creating a gooey, underbaked center that falls apart when you pick it up.
Don’t Skimp on the Sugar: The coarse sugar on top is not just for decoration; it provides a necessary crunch that contrasts with the soft fruit and chewy cookie. Be generous with it.
Watch the Edges: Because of the added moisture from the fruit, these take slightly longer to bake than a standard sugar cookie. You are looking for a distinctly golden-brown edge, which indicates the center is baked through.
Exciting Variations to Try
Once you have mastered the master recipe, feel free to get creative!
The Maraschino Cherry Addition: To make these look even more like the classic cake, press a drained, dried maraschino cherry into the center hole of the pineapple ring before baking.
Coconut Pineapple Cookies: Add half a cup of shredded, unsweetened coconut to the dry ingredients of your cookie dough for a true Piña Colada flavor profile.
Rum Glaze: If you want to take these over the top, whisk together a cup of powdered sugar, a splash of milk, and a teaspoon of rum extract. Drizzle this glaze over the cooled cookies for an adult twist.
Storage and Freezing Instructions
Because these cookies contain fruit, they have a shorter shelf life than standard cookies.
Room Temperature: Store in an airtight container at room temperature for up to 2 days. To prevent them from sticking together, place a sheet of parchment or wax paper between layers.
Refrigerator: They will keep in an airtight container in the fridge for up to 5 days. They are actually quite delicious eaten chilled!
Freezing: You can freeze the baked cookies. Cool them completely, layer them with parchment paper in a freezer-safe container, and freeze for up to 2 months. Thaw at room temperature. Alternatively, you can freeze the unbaked, scooped dough balls (without the pineapple). When ready to bake, add a few extra minutes to the baking time, pressing the pineapple in just before baking.
Frequently Asked Questions
Can I use crushed pineapple instead of rings?
It is not recommended. Crushed pineapple holds far too much moisture, even when drained, and it will prevent the cookie from baking properly. Stick to the rings for structural integrity.
Why did my cookies spread out into a massive puddle?
This usually happens for two reasons: either your butter was melted rather than just softened, or you skipped the dough chilling step. Cold dough is essential for preventing over-spreading.
Can I make the dough ahead of time?
Absolutely. You can make the cookie dough, cover it tightly, and keep it in the refrigerator for up to 3 days before assembling and baking.
Conclusion
Pineapple Upside Down Sugar Cookies are a brilliant, joyful convergence of two beloved desserts. They offer the nostalgic, comforting flavors of a classic retro cake delivered in the convenient, satisfying format of a chewy sugar cookie. With their sparkling, caramelized fruit topping and tender crumb, they are guaranteed to be the star of your next gathering or the highlight of your weeknight baking sessions.
By following the careful steps of drying your fruit, chilling your dough, and generously applying that coarse sugar crunch, you will achieve bakery-level results that look just as incredible as they taste. So preheat your oven, grab your favorite mixing bowl, and get ready to experience a little slice of tropical paradise right in your own kitchen. Happy baking!
Pineapple Upside Down Sugar Cookies
Ingredients
Equipment
Method
- Drain the canned pineapple rings completely. Place them on multiple layers of paper towels, cover with more paper towels, and press gently to extract as much moisture as possible. Let sit for at least 15 minutes.
- In a large bowl, cream together the softened butter and granulated sugar until light and fluffy, about 2-3 minutes. Beat in the egg and vanilla extract.
- In a separate bowl, whisk together the flour, baking powder, baking soda, and salt. Gradually mix the dry ingredients into the wet ingredients until just combined.
- Cover the dough tightly with plastic wrap and chill in the refrigerator for at least 1 hour.
- Preheat oven to 350°F (175°C). Line baking sheets with parchment paper.
- Scoop about 2 tablespoons of dough per cookie and roll into balls. Place on the baking sheet spaced 3 inches apart. Flatten each ball slightly with your hand.
- Press one dried pineapple ring firmly into the center of each flattened cookie. Generously sprinkle the entire cookie and pineapple ring with coarse sugar.
- Bake for 14-16 minutes until the edges are deep golden brown. Let cool on the baking sheet for 10 minutes before transferring to a wire rack to cool completely.