Ultimate Candy Overload Cake
The Ultimate Candy Overload Birthday Cake: A Showstopping Masterpiece
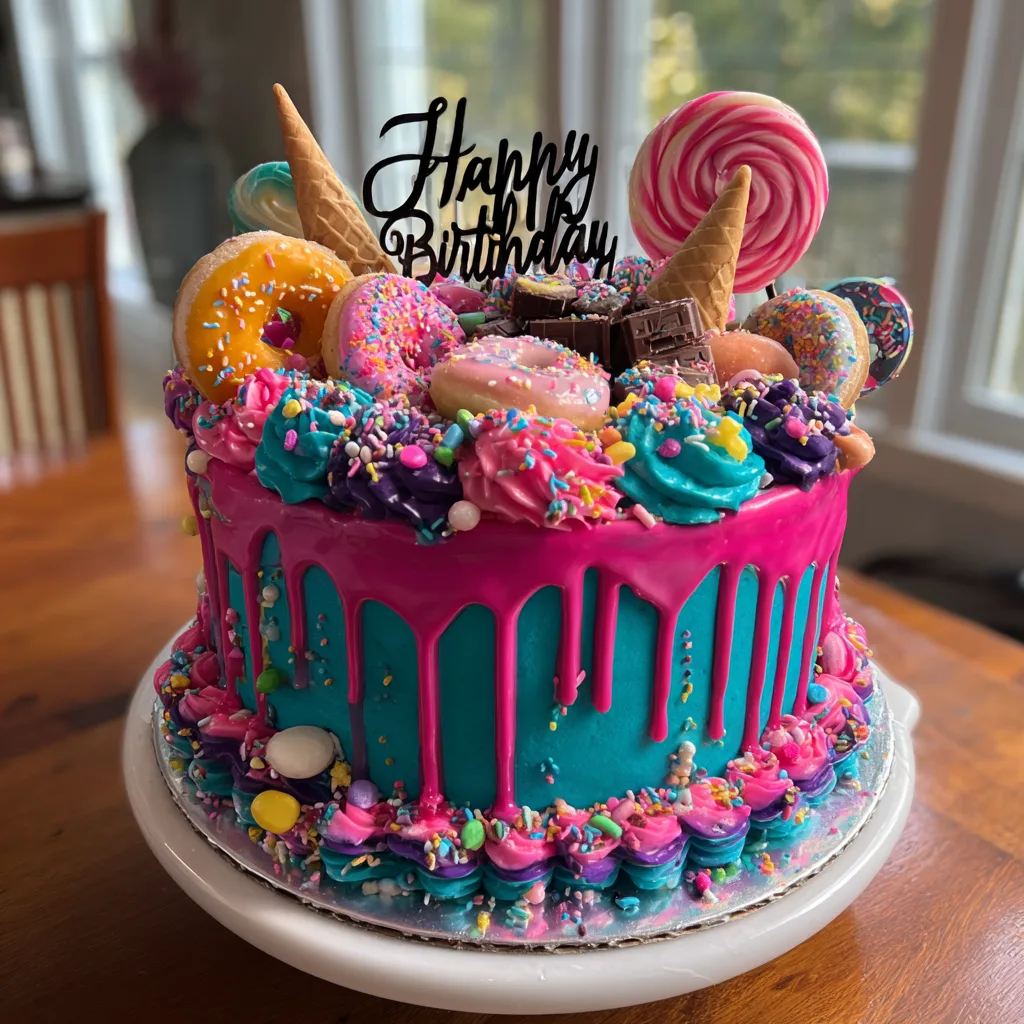
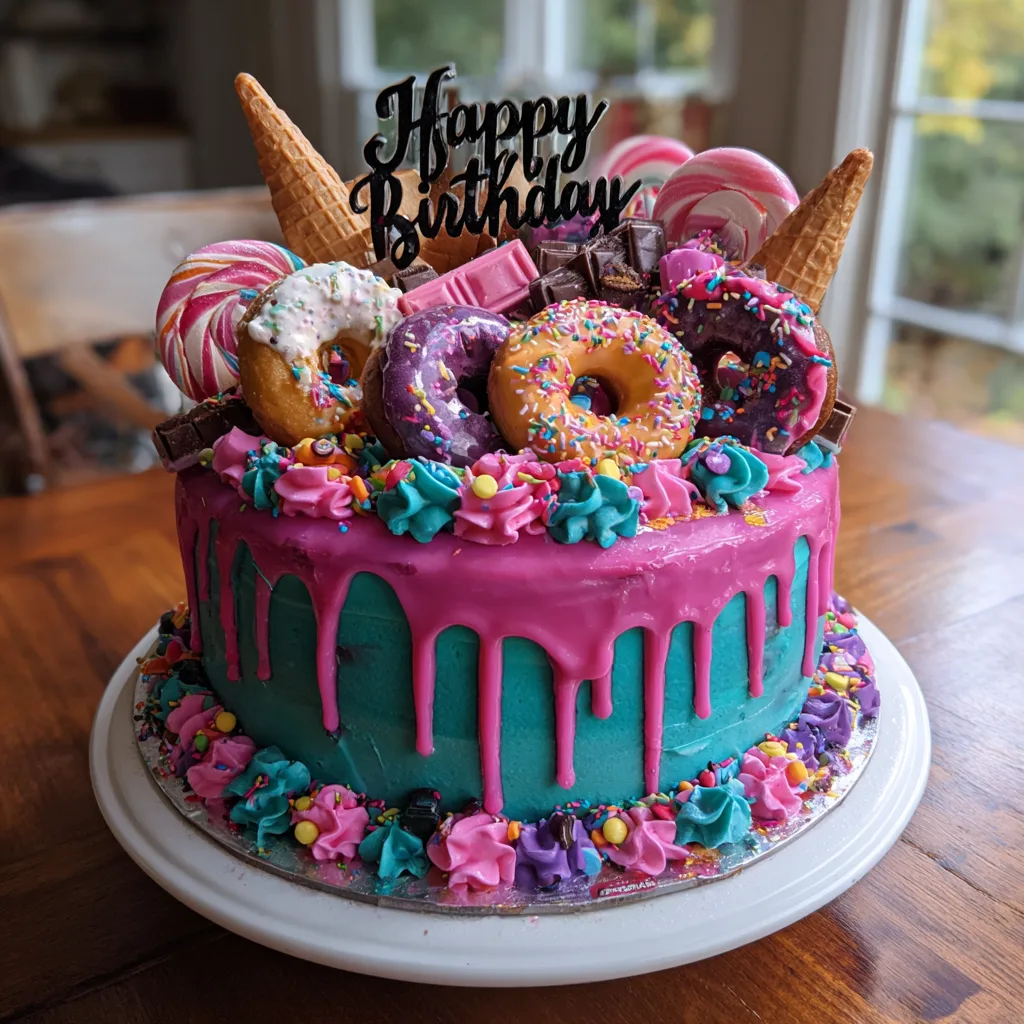
When it comes to celebrating a special milestone, a standard sheet cake simply will not do. You need a showstopper, a conversation starter, and a dessert that makes both children and adults gasp with pure delight. Enter the Ultimate Candy Overload Birthday Cake. This towering, vibrant creation is the stuff of childhood dreams—a veritable Candyland brought to life in sugar, flour, and butter. With its striking teal buttercream, electric pink ganache drip, and an outrageous mountain of donuts, lollipops, chocolates, and gumballs, this cake is an absolute celebration of joy. If you want to create memories that will last a lifetime and capture the most incredible birthday photographs, this is the only recipe you will ever need.
While the visual impact of this epic drip cake is undeniably intense, the real magic lies in the fact that it is entirely achievable in a home kitchen. You do not need a commercial bakery or a degree from a pastry school to pull this off. What you need is a reliable, sturdy cake recipe, a silky smooth American buttercream, a basic understanding of chocolate ganache temperatures, and a wildly creative spirit. This comprehensive guide will walk you through every single step, from baking the perfectly moist layers to the final placement of the last sprinkle. Get ready to unleash your inner cake artist and create an edible masterpiece that is just as wildly delicious as it is beautiful.
The Magic of the Over-the-Top Birthday Cake
There is a profound psychological joy associated with over-the-top desserts. They transport us back to the whimsical worlds of Willy Wonka and Saturday morning cartoons. A standard cake says “Happy Birthday,” but a Candy Overload Cake screams it from the rooftops. It represents abundance, celebration, and the breaking of everyday rules. On your birthday, you shouldn’t have to choose between a donut, a chocolate bar, a lollipop, or a slice of cake—you should be able to have them all, stacked magnificently on one plate.
Furthermore, this style of cake allows for ultimate personalization. The beauty of the “overload” concept is that there is no wrong way to decorate it. If the birthday guest of honor loves a specific type of candy bar, gummy worm, or cookie, you can seamlessly integrate it into the design. The vibrant teal, pink, and purple color palette used in this specific recipe creates a stunning neon-pop aesthetic, but the colors can easily be swapped to match any party theme, favorite sports team, or personal preference.
Breaking Down the Components of a Masterpiece
To successfully tackle a project of this magnitude, you must look at the cake not as one giant daunting task, but as four manageable, distinct components. By breaking the process down, you ensure each element is executed perfectly.
Component 1: The Cake Base. A cake this tall and heavy with toppings requires a structurally sound foundation. A delicate sponge cake will collapse under the weight of the candy and buttercream. We utilize a dense, moist, and incredibly flavorful vanilla butter cake (often studded with sprinkles to make it a funfetti cake). This provides the necessary stability to hold the skewers, lollipops, and heavy donuts without sinking or crumbling.
Component 2: The Buttercream. We rely on a classic American Buttercream for this design. While Swiss or Italian meringue buttercreams are lighter, American buttercream crusts slightly as it dries. This slight crust acts as a protective shell, ensuring your bright teal background stays pristine and holds up the massive piped rosettes and heavy candy pieces without sliding.
Component 3: The Ganache Drip. The iconic drip effect is achieved using a white chocolate ganache colored with oil-based food coloring. Water-based food coloring will cause the chocolate to seize, so oil-based candy colors are essential here. The drip adds a dynamic, artistic element that bridges the gap between the smooth sides of the cake and the chaotic abundance of the top decorations.
Component 4: The Candy Overload. This is where you let your imagination run wild. The key to a visually appealing overload is varying the sizes, shapes, and textures of your toppings. Large items like glazed donuts and swirl lollipops provide height and structure, while medium items like mini chocolate bars and gumballs fill the gaps. Finally, sprinkles and piped buttercream stars add the finishing textural details.
Essential Tools for Cake Decorating
While you can certainly bake a cake with just a bowl and a spoon, executing a professional-looking tall drip cake requires a few specific tools. Investing in these items will make the process infinitely smoother and more enjoyable.
A revolving cake turntable is perhaps the most important tool. It allows you to smoothly rotate the cake while holding your bench scraper steady, creating flawlessly smooth sides. Speaking of the bench scraper, a tall metal or acrylic icing scraper is vital for achieving those sharp, straight edges on your teal buttercream.
You will also need an offset spatula for spreading frosting between the layers and creating the initial crumb coat. Heavy-duty piping bags and large piping tips (such as a 1M open star tip or an 8B French star tip) are necessary for piping the massive rosettes that border the top and bottom of the cake. Finally, a plastic squeeze bottle is highly recommended for applying the pink ganache drip; it offers far more control than using a spoon.
Ingredients You Will Need
Gathering high-quality ingredients is the first step toward baking success. Ensure all your cold ingredients (eggs, butter, milk) are at room temperature before beginning to ensure a smooth, emulsified batter.
- For the Cake Layers:
- – 3 cups all-purpose flour
- – 2 1/2 teaspoons baking powder
- – 1/2 teaspoon salt
- – 1 cup (2 sticks) unsalted butter (softened)
- – 2 cups granulated sugar
- – 4 large eggs (room temperature)
- – 1 tablespoon pure vanilla extract
- – 1 cup whole milk (room temperature)
- – 1/2 cup rainbow jimmies sprinkles (optional, for funfetti)
- For the American Buttercream:
- – 2 cups (4 sticks) unsalted butter (softened to room temperature)
- – 7-8 cups powdered sugar (sifted)
- – 1/4 cup heavy whipping cream
- – 1 tablespoon clear vanilla extract (to preserve colors)
- – Pinch of salt
- – Gel food coloring (Teal, Neon Pink, Violet)
- For the Pink Drip:
- – 1/2 cup high-quality white chocolate chips
- – 2-3 tablespoons heavy whipping cream
- – Neon pink oil-based candy coloring
- For the Candy Decor:
- – 2-3 mini glazed donuts (with blue icing and sprinkles)
- – Assorted swirl lollipops
- – Miniature chocolate bars (like Hershey’s)
- – Large colorful gumballs
- – 1 mini ice cream cone
- – Assorted candies and matching sprinkles
- – “Happy Birthday” cake topper
Step-by-Step Instructions
Follow these steps meticulously to build your edible masterpiece. Patience during the chilling steps is absolutely critical for structural integrity.
- Bake the Cake Layers: Preheat your oven to 350°F (175°C). Grease and line three 8-inch round cake pans with parchment paper. In a medium bowl, whisk the flour, baking powder, and salt. In a stand mixer, beat the softened butter and sugar on high speed until pale and fluffy (about 4 minutes). Add eggs one at a time, beating well after each, then add vanilla. Turn the mixer to low and alternate adding the dry ingredients and the milk, beginning and ending with the dry ingredients. Do not overmix. Fold in the sprinkles if using. Divide batter evenly among the pans and bake for 30-35 minutes until a toothpick comes out clean. Cool completely on wire racks.
- Prepare the Buttercream: In a clean stand mixer bowl, beat the softened butter on medium-high for 5 minutes until very pale and creamy. Gradually add the sifted powdered sugar, about two cups at a time, mixing on low speed. Add the clear vanilla, heavy cream, and a pinch of salt. Turn the mixer up to medium-high and whip for another 3-5 minutes until the frosting is incredibly light and fluffy.
- Color the Frosting: Divide the frosting. You will need about half of the total batch colored teal for the main exterior. Divide the remaining frosting into three bowls: color one batch hot pink, one batch deep purple, and leave a small amount teal for piping accents. Cover all bowls with damp paper towels to prevent crusting.
- Assemble and Crumb Coat: Level the cooled cake layers using a serrated knife. Place the first layer on a cake board on your turntable. Spread a thick layer of teal frosting. Add the next cake layer and repeat. Top with the final layer. Apply a thin layer of teal frosting over the entire outside of the cake to catch any loose crumbs. Chill the cake in the refrigerator for 30 minutes to set this “crumb coat.”
- Final Frosting: Remove the chilled cake. Apply a thick, even layer of the teal buttercream all over the cake. Use your bench scraper, holding it at a 45-degree angle against the cake, and slowly spin the turntable to smooth the sides. Swipe an offset spatula across the top to create sharp edges. Chill the cake for another 30 minutes. The cake MUST be cold before applying the drip.
- Create the Pink Drip: Place the white chocolate chips and heavy cream in a microwave-safe bowl. Heat in 15-second intervals, stirring vigorously after each, until completely smooth and melted. Stir in the neon pink oil-based coloring until vibrant. Let the ganache cool slightly until it is the consistency of thick syrup. Pour it into a squeeze bottle.
- Apply the Drip: Remove the cold cake from the fridge. Using the squeeze bottle, slowly squeeze drops of ganache over the top edge of the cake, allowing it to drip down the sides. Vary the pressure to create drips of different lengths. Once the edges are done, fill in the top of the cake with more ganache and smooth it flat with a clean offset spatula. Let it set for 10 minutes.
- Pipe the Details: Fit piping bags with large star tips and fill them with the pink, purple, and teal frosting. Pipe large rosettes and swirls around the bottom border of the cake, and create a towering, uneven border of swirls on the top of the cake. This creates a “nest” to hold the heavy candies.
- The Candy Overload: Now is the time to unleash your creativity! Start with the largest items first. Secure the mini donuts into the buttercream swirls. Push the lollipops firmly into the top of the cake. Nestle the mini chocolate bars and gumballs into the gaps between the piping. Place the mini ice cream cone upside down on a large dollop of frosting so it looks like it was dropped. Fill in any remaining spaces with extra sprinkles and smaller candies. Finally, insert the “Happy Birthday” topper right in the center.
Expert Tips for the Perfect Drip
The drip can be the most intimidating part of the process, but understanding temperature makes it foolproof. The golden rule is: Cold Cake, Warm Drip. If your cake is room temperature, the ganache will slide all the way down to the board, creating a puddle rather than a controlled drip. If your ganache is too hot, it will melt the buttercream.
Always do a test drip on the back of the cake. Squeeze one single drip down the side. If it runs too fast and hits the bottom, your ganache is too hot or too thin; let it cool for 5 more minutes. If it seizes up into a thick blob that barely moves, it is too cold; pop it in the microwave for 5 seconds to loosen it up. Finding that perfect “Goldilocks” consistency is the key to professional-looking ribbons of ganache.
Delicious Variations to Try
The beauty of this template is its endless versatility. Once you master the technique, you can alter the aesthetic entirely.
The Chocoholic’s Dream: Swap the vanilla cake for a rich devil’s food chocolate cake. Use a dark chocolate buttercream and a milk chocolate ganache drip. Overload the top with full-sized candy bars, chocolate truffles, crushed Oreos, peanut butter cups, and brownie squares.
Pastel Unicorn Magic: Use a lighter, pastel color palette of soft pinks, lavenders, and mint greens. Swap the heavy donuts for light meringue kisses, pastel macarons, marshmallows, white chocolate shards, and edible glitter.
Galaxy Explorer: Frost the cake in a mixture of black, deep blue, and purple buttercream, blended to look like the night sky. Use a metallic silver or neon green drip, and top with star-shaped cookies, rock candy “crystals,” and spherical chocolates that look like planets.
Serving Suggestions and Storage
Cutting a cake this tall can be tricky. Do not try to cut standard wedge slices, as they will be too massive and topple over. Instead, remove the large candy pieces and set them aside. Use a sharp, hot knife to cut a grid pattern across the cake, serving tall, rectangular portions. Wipe the blade clean between every single cut to ensure beautiful, neat slices that showcase the layers.
Because American Buttercream relies on a high ratio of butter, this cake is best served at room temperature. If you serve it cold straight from the fridge, the frosting will be hard and waxy, and the cake crumb will taste dry. If you have made the cake in advance and stored it in the refrigerator, take it out at least 2 to 3 hours before slicing to allow the butter to soften and the flavors to bloom.
Leftovers can be stored in an airtight container at room temperature for up to 2 days, or in the refrigerator for up to 5 days. You can also freeze individual slices wrapped tightly in plastic wrap for up to 3 months.
Fun Facts: The History of the Birthday Cake
While an epic candyland drip cake feels incredibly modern, the tradition of birthday cakes dates back thousands of years. The ancient Egyptians are credited with “inventing” the celebration of birthdays (originally marking the “birth” of a pharaoh into a god). However, it was the Ancient Greeks who adopted the tradition and added the cake. They baked moon-shaped honey cakes to offer to Artemis, the goddess of the moon, and placed candles on them to make them glow like the moon.
The modern birthday cake, complete with icing and decorations, has its roots in 18th-century Germany during a celebration known as Kinderfest, which was held for children. They would place a candle on the cake for each year of the child’s life, plus an extra one to symbolize the hope for another year. Today, we carry on that joyous tradition, elevating it to breathtaking new heights with creations like this magnificent Candy Overload Cake. Gather your ingredients, pipe those colorful swirls, and get ready to celebrate in the most spectacular way possible!
Ultimate Candy Overload Birthday Cake
Ingredients
Equipment
Method
- Preheat oven to 350°F (175°C). Grease and line three 8-inch cake pans. Whisk dry ingredients in a bowl.
- Cream butter and sugar until pale and fluffy. Add eggs one at a time, then vanilla. Alternate adding dry ingredients and milk until just combined. Bake for 30-35 minutes and cool completely.
- Whip softened butter for the frosting until pale. Gradually add powdered sugar, clear vanilla, heavy cream, and salt. Whip until fluffy.
- Color half the frosting teal. Color remaining frosting in separate bowls hot pink and purple. Keep covered to prevent drying.
- Assemble the cake layers with teal frosting in between. Apply a thin crumb coat of teal frosting around the whole cake. Chill for 30 minutes.
- Apply a final, thick, smooth layer of teal buttercream. Use a bench scraper to get sharp edges. Chill for another 30 minutes until cold.
- Melt white chocolate and cream in the microwave. Stir in pink oil-based coloring. Cool slightly, put into a squeeze bottle, and apply drips around the top edge of the cold cake.
- Pipe large rosettes using the pink, purple, and extra teal frosting around the base and top of the cake.
- Decorate the top wildly with donuts, lollipops, chocolates, gumballs, and a ‘Happy Birthday’ topper.