Banana Pudding Cheesecake Squares Recipe
Banana Pudding Cheesecake Squares: The Ultimate Comfort Dessert
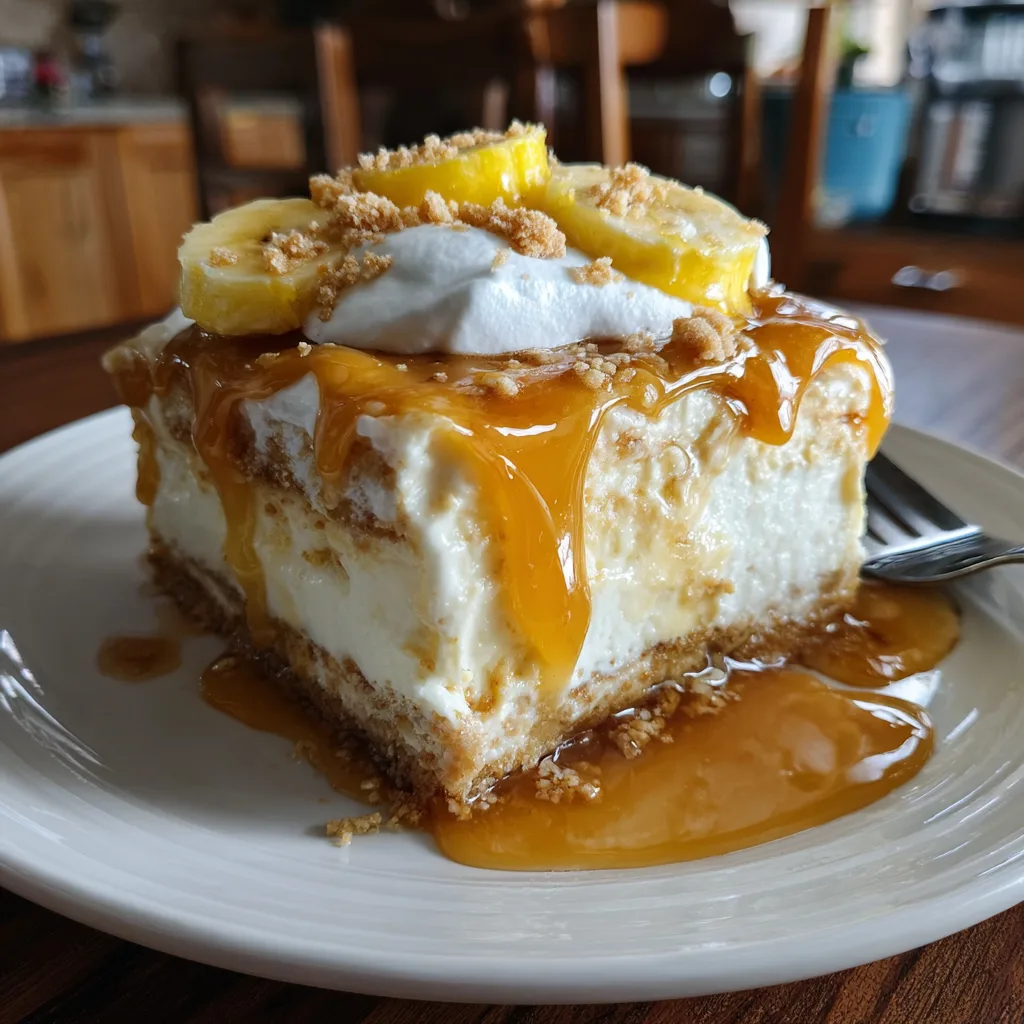
If you have ever found yourself torn between the classic comfort of Southern banana pudding and the rich, decadent texture of a New York-style cheesecake, this recipe is the answer to your prayers. Banana Pudding Cheesecake Squares combine the best of both worlds into one handheld, easy-to-serve dessert bar. Imagine a buttery, crunchy Nilla wafer crust topped with a velvety, banana-infused cheesecake layer, all finished off with fluffy whipped cream, fresh banana slices, and a drizzle of glossy caramel. It is the kind of dessert that stops conversation at potlucks and has everyone begging for the recipe.
This dessert isn’t just about taste; it’s about texture. The crunch of the crust contrasts beautifully with the smooth, dense filling and the light, airy topping. It’s cool, creamy, and packed with that nostalgic banana flavor we all love. Whether you are baking for a holiday gathering, a summer BBQ, or just a Tuesday night treat, these bars are guaranteed to be a hit. In this guide, we will walk you through everything you need to know to make the perfect batch, from selecting the right bananas to getting that clean, professional slice.

Why You Will Fall in Love With This Recipe
There are countless dessert recipes out there, but this one stands out for a few specific reasons. First, it is surprisingly easy to make. unlike a full-sized cheesecake which often requires a water bath and careful monitoring to prevent cracks, these squares are baked in a standard 9×13 pan and are much more forgiving. The “cheesecake” aspect is simplified but sacrifices none of the flavor.
Second, it is incredibly versatile. You can dress it up with elaborate garnishes like spun sugar or keeping it humble with just a few wafer crumbs. It travels well, making it perfect for picnics or office parties. Plus, it actually tastes better after sitting in the fridge for a day, allowing the flavors to meld—meaning it is the ultimate make-ahead dessert. If you love the taste of banana cream pie but want something sturdier and richer, this is the recipe for you.
Ingredients
To create these luscious Banana Pudding Cheesecake Squares, you will need the following simple ingredients found in most pantries:
The Crust
- – 2 cups Nilla Wafers (crushed into fine crumbs)
- – 1/2 cup Unsalted butter (melted)
- – 1/4 cup Granulated sugar
The Cheesecake Filling
- – 24 oz Cream cheese (softened to room temperature, 3 blocks)
- – 1 cup Granulated sugar
- – 1/2 cup Sour cream (room temperature)
- – 1 tsp Vanilla extract
- – 3 large Eggs (room temperature)
- – 1 cup Ripe bananas (mashed smoothly, about 2-3 bananas)
- – 1 tbsp Lemon juice (to prevent browning)
The Topping & Garnish
- – 1 cup Heavy whipping cream (cold)
- – 1/4 cup Powdered sugar
- – 1 tsp Vanilla extract
- – 2 Fresh bananas (sliced for garnish)
- – 1/4 cup Caramel sauce (store-bought or homemade)
- – Extra Nilla Wafers (crushed or whole for decoration)
Instructions
Follow these step-by-step instructions to achieve the perfect balance of crunchy crust and creamy filling.
Step 1: Prep the Kitchen
1. Preheat your oven to 325°F (163°C). Line a 9×13 inch baking pan with parchment paper, leaving an overhang on the sides to act as a “sling” for easy removal later. Lightly grease the paper with cooking spray.
Step 2: Make the Crust
2. In a medium mixing bowl, combine the crushed Nilla wafers, sugar, and melted butter. Mix until the texture resembles wet sand.
3. Pour the crumb mixture into your prepared pan. Press it down firmly and evenly into the bottom to form a solid crust. You can use the bottom of a measuring cup or glass to help pack it down tightly. Bake for 10 minutes, then remove and let it cool slightly while you make the filling.
Step 3: Create the Cheesecake Batter
4. In a large bowl (or stand mixer fitted with the paddle attachment), beat the softened cream cheese and granulated sugar on medium-low speed until smooth and creamy. Scrape down the sides of the bowl to ensure no lumps remain.
5. Add the sour cream and vanilla extract, mixing until combined.
6. Mash your ripe bananas in a separate small bowl with the lemon juice (this helps keep them bright). Fold the mashed bananas into the cream cheese mixture.
7. Add the eggs one at a time, mixing on low speed just until blended after each addition. Important: Do not overmix the batter once the eggs are added, as incorporating too much air can cause the cheesecake to crack or sink.
Step 4: Bake
8. Pour the cheesecake batter over the pre-baked crust and spread it out evenly with a spatula.
9. Bake in the preheated oven for 40–50 minutes. The edges should be set and slightly puffy, but the center should still have a slight “jiggle” when you gently shake the pan. It will continue to firm up as it cools.
10. Turn off the oven and crack the door open slightly. Let the cheesecake sit in the cooling oven for about 20 minutes (this gentle cooling helps prevent cracks). Remove from the oven and cool completely on a wire rack to room temperature.
Step 5: Chill
11. Once at room temperature, cover the pan tightly with plastic wrap and refrigerate for at least 4 hours, preferably overnight. The cheesecake needs this time to set fully.
Step 6: Top and Serve
12. Before serving, make the whipped topping. Beat the cold heavy cream, powdered sugar, and vanilla until stiff peaks form.
13. Spread the whipped cream over the chilled cheesecake layer.
14. Lift the cheesecake out of the pan using the parchment paper overhang. Place on a cutting board and slice into squares.
15. Right before serving, top each square with fresh banana slices, a drizzle of caramel sauce, and extra Nilla wafers.
Tips for the Perfect Cheesecake Squares
Making cheesecake can be intimidating, but these squares are very beginner-friendly. Here are some pro tips to ensure success:
Room Temperature Ingredients: This is the golden rule of cheesecake. Ensure your cream cheese, eggs, and sour cream are all at room temperature before you start mixing. Cold ingredients result in lumpy batter, and overbeating to get rid of lumps leads to cracks.
Avoid Overmixing: Once you add the eggs, mix on the lowest speed possible. You want to blend the eggs in, not whip air into the batter. Air bubbles trapped in the batter will expand in the oven and then collapse, causing cracks.
Ripe Bananas: Use bananas that are spotty and brown, just like you would for banana bread. They contain more natural sugars and have a much stronger banana flavor than green or yellow ones.
Clean Cuts: To get those sharp, professional-looking edges on your squares, use a sharp knife. Run the knife under hot water and wipe it dry with a paper towel between every single cut. The heat melts through the cheese for a smooth line, and wiping it prevents crumbs from smearing.
Variations to Try
Feel like experimenting? Here are a few ways to twist this recipe:
- Chocolate Bottom: Swap the Nilla wafers for Oreo cookies (remove the filling or keep it in for extra sweetness) to make a chocolate crust.
- Dulce de Leche: Instead of regular caramel sauce, drizzle Dulce de Leche over the top for a deeper, milkier sweetness.
- Pudding Layer: For an extra punch of banana flavor, you can spread a thin layer of prepared instant banana pudding between the baked cheesecake and the whipped cream topping.
- Toasted Coconut: Sprinkle toasted coconut flakes on top of the whipped cream for a tropical vibe.
Storage and Freezing
Refrigerator: Store leftover squares in an airtight container in the refrigerator for up to 5 days. Note that fresh banana garnishes will brown quickly, so it is best to add those right before eating. If storing with bananas on top, brush them with a little lemon juice to delay browning.
Freezer: These bars freeze beautifully! You can freeze the baked cheesecake slab (without the whipped topping and garnish) for up to 3 months. Wrap it tightly in plastic wrap and then foil. Thaw in the fridge overnight before adding the toppings. If you want to freeze individual slices, place them on a baking sheet to freeze solid, then wrap individually.
Serving Suggestions
These Banana Pudding Cheesecake Squares are rich, so small squares go a long way. They pair wonderfully with a hot cup of coffee to balance the sweetness. For a summer party, serve them alongside a scoop of vanilla bean ice cream if you want to be truly indulgent.
Enjoy making this delightful mashup of two American classics. It is sure to become a requested favorite in your household!
Banana Pudding Cheesecake Squares
Ingredients
Equipment
Method
- Preheat oven to 325°F (163°C). Line a 9×13 inch baking pan with parchment paper.
- Mix crushed Nilla wafers, 1/4 cup sugar, and melted butter. Press firmly into bottom of the pan.
- Bake crust for 10 minutes, then cool slightly.
- Beat cream cheese and 1 cup sugar until smooth. Add sour cream and vanilla.
- Fold in mashed bananas mixed with lemon juice.
- Add eggs one at a time, mixing on low speed just until blended.
- Pour batter over crust and bake 40-50 minutes until center is set but slightly jiggly.
- Turn off oven, crack door, and let sit 20 mins. Cool completely on rack, then refrigerate 4+ hours.
- Whip heavy cream, powdered sugar, and vanilla to stiff peaks. Spread over chilled bars.
- Slice and garnish with fresh bananas and caramel sauce before serving.