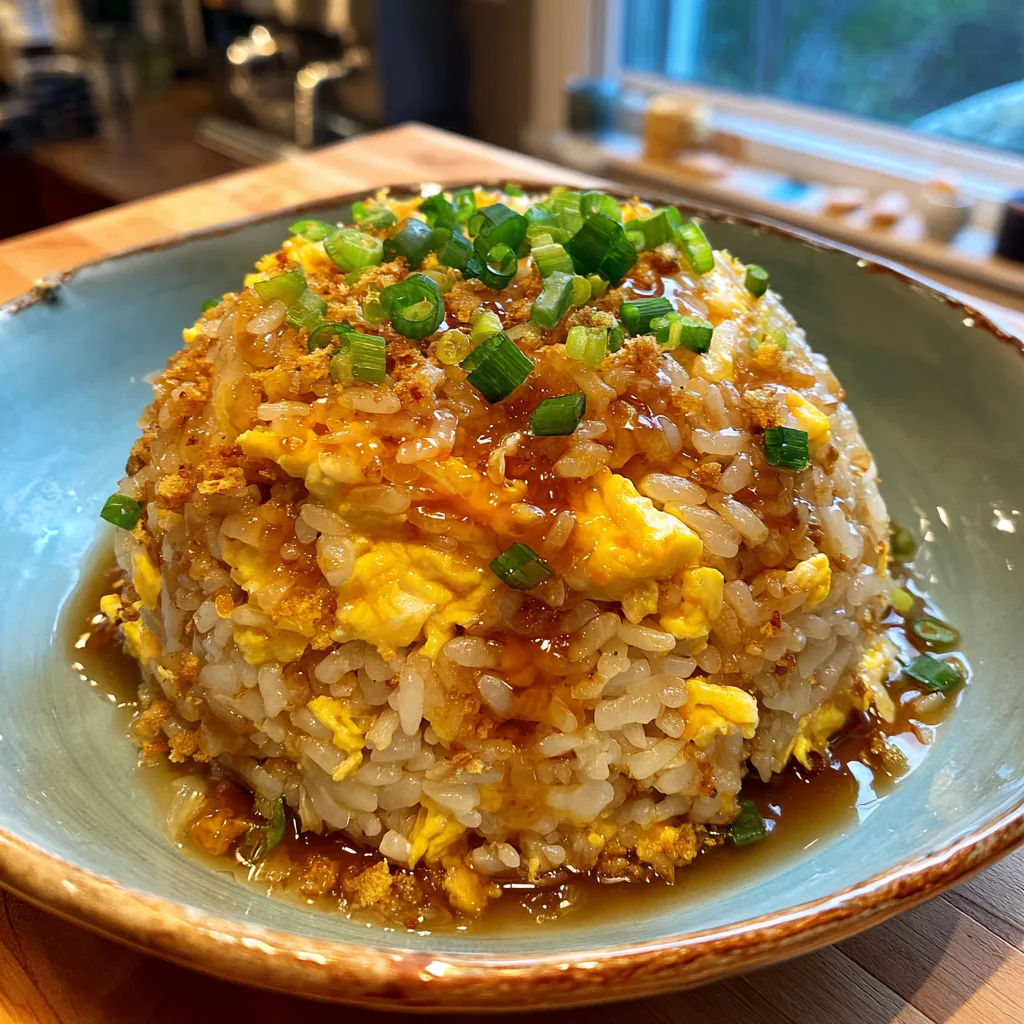
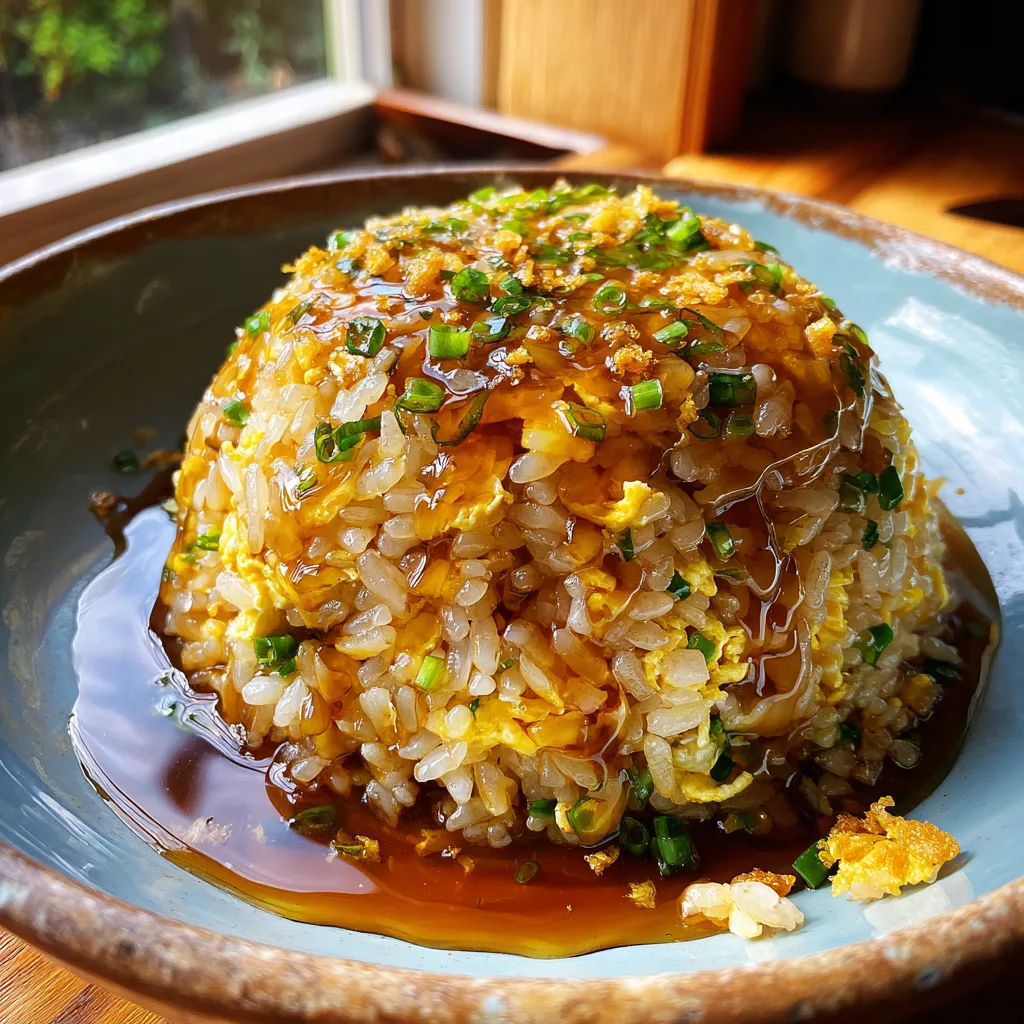
Japanese Garlic Fried Rice
The Ultimate Japanese Garlic Fried Rice Recipe
Welcome to your new favorite comfort food and weeknight dinner staple. If you have ever been to a Japanese teppanyaki restaurant or a hibachi steakhouse, you already know the irresistible, mouth-watering aroma of garlic and butter hitting a screaming hot griddle. That intoxicating scent is usually the prelude to a mountain of golden, savory Japanese Garlic Fried Rice. The good news? You do not need a commercial flat-top grill or years of chef training to recreate this culinary masterpiece right in your own kitchen. This comprehensive guide will walk you through everything you need to know to make the ultimate Japanese Garlic Fried Rice, yielding a dish so deeply flavorful and satisfying that it might just steal the spotlight from your main course.
Unlike standard Chinese takeout fried rice, which often relies on a complex medley of vegetables, various meats, oyster sauce, and sesame oil, Japanese-style garlic fried rice (often referred to as garikku raisu) champions simplicity. It leans heavily into a highly concentrated flavor profile built entirely around three core pillars: rich butter, pungent toasted garlic, and umami-packed Japanese soy sauce. When these three elements combine with high heat and slightly chewy, perfectly cooked short-grain rice, culinary magic happens. Read on to discover the secrets, science, and exact techniques to master this beloved dish.
The Magic of Japanese Garlic Fried Rice
There is a specific reason why this dish is universally adored. It is a masterclass in balance. The intense, almost sweet allium notes of perfectly toasted garlic are mellowed and carried by the rich, dairy fats of the butter. The soy sauce hits the hot pan and instantly caramelizes, wrapping every single grain of rice in a smoky, salty umami blanket. The addition of fluffy scrambled eggs provides a textural contrast and a canvas for the robust flavors, while vibrant green onions cut through the richness with a fresh, crisp, peppery bite.
In Japan, fried rice is generally divided into two main categories: Chahan and Yakimeshi. While the terms are often used interchangeably today, traditionally, Chahan implies a Chinese-influenced fried rice, while Yakimeshi (literally translated to “grilled rice”) feels a bit more indigenous to Japanese home cooking and teppanyaki grills. Japanese Garlic Fried Rice firmly plants its roots in the latter category, celebrating the fusion of Western ingredients (butter) with traditional Japanese staples (short-grain rice and shoyu).
Understanding the Crucial Ingredients
Because this recipe uses so few ingredients, the quality and type of each ingredient are absolutely paramount. You cannot hide behind a dozen different sauces here. Every component must pull its weight.
The Rice: The foundation of this dish is Japanese short-grain or medium-grain rice (often sold as sushi rice). Unlike the long-grain jasmine or basmati rice typically used in Thai or Chinese fried rice, Japanese rice has a higher starch content. This gives it a signature plump, slightly sticky, and chewy texture. However, for fried rice, you do not want it too sticky, which is why using day-old, chilled rice is non-negotiable. As the rice sits in the fridge overnight, a process called starch retrogradation occurs. The starches crystallize, firming up the grains and drying out the exterior moisture. This ensures that when the rice hits the hot wok, the grains separate beautifully and absorb the butter and soy sauce without turning to mush.
The Garlic: This is the star of the show. Do not use pre-minced jarred garlic; it lacks the volatile oils and sharp bite of fresh garlic and often carries a sour, metallic undertone. You need fresh, firm heads of garlic. We will be using it in two ways in this recipe: finely minced for infusing the oil and butter, and optionally sliced thin to create crispy garlic chips for an irresistible garnish.
The Butter: Unsalted butter is highly recommended here. Since soy sauce brings a significant amount of sodium to the party, using unsalted butter allows you to control the final seasoning perfectly. The butter not only adds richness but also aids in the browning and caramelization of the rice grains.
The Soy Sauce: Use a high-quality Japanese soy sauce (shoyu), such as Kikkoman. Japanese soy sauce is typically brewed with toasted wheat, giving it a slightly sweeter, rounder, and less aggressively salty flavor profile compared to some Chinese dark or light soy sauces. If you want to elevate the dish further, a dash of white pepper adds a floral, earthy heat that perfectly complements the garlic.
Ingredients
- – 3 cups cooked Japanese short-grain rice (day-old and chilled in the refrigerator)
- – 4 tablespoons unsalted butter, divided
- – 1 tablespoon neutral cooking oil (canola, vegetable, or grapeseed)
- – 6 to 8 cloves fresh garlic, finely minced (adjust according to your garlic preference)
- – 2 large eggs, lightly beaten
- – 2 tablespoons high-quality Japanese soy sauce (shoyu)
- – 1/2 teaspoon kosher salt (or to taste)
- – 1/4 teaspoon ground white pepper or black pepper
- – 1/2 cup finely chopped green onions (scallions), both white and green parts
Instructions
- Prepare the Rice: Remove your day-old chilled rice from the refrigerator. Using wet hands or a wooden spoon, gently break up any large clumps of rice. You want the grains to be as separated as possible before they hit the heat. This is a crucial step to ensure even coating and cooking.
- Heat the Pan: Place a large wok or a wide, heavy-bottomed skillet (like cast iron) over medium-high heat. Allow the pan to get hot before adding any fat. This prevents the rice from sticking and helps achieve that slightly charred, smoky flavor known as “wok hei” (breath of the wok).
- Infuse the Oil and Butter: Add 1 tablespoon of neutral oil and 2 tablespoons of the unsalted butter to the hot pan. Swirl them together until the butter is completely melted and slightly foamy. Lower the heat to medium so you do not burn the aromatics.
- Toast the Garlic: Add the finely minced garlic to the melted butter and oil mixture. Sauté continuously for about 1 to 2 minutes. Watch it closely! You want the garlic to turn a pale golden brown and release its fragrance. If it turns dark brown or black, it will taste bitter, and you will need to start over.
- Scramble the Eggs: Push the golden, fragrant garlic to one side of the pan. Pour the lightly beaten eggs into the empty side of the pan. Let them sit for a few seconds to set slightly, then use your spatula to quickly scramble them into soft, fluffy curds. Once mostly cooked but still slightly wet, mix the eggs together with the garlic.
- Fry the Rice: Turn the heat back up to medium-high. Add the chilled, separated rice to the pan. Use a tossing and pressing motion with your spatula to mix the rice with the garlic and egg. Press the rice down slightly against the hot surface of the pan, let it sit for 15 seconds to toast, then toss and repeat. Do this for about 3 to 4 minutes until the rice is heated through and slightly crispy on the edges.
- Season with Soy Sauce: Push all the rice to the center of the pan, creating a clear ring around the outer edge of the wok or skillet. Pour the soy sauce directly onto the exposed hot metal around the edge of the pan, rather than directly onto the rice. This allows the soy sauce to blister, caramelize, and slightly reduce before you toss it into the rice, vastly deepening its flavor. Immediately toss the rice to coat evenly.
- Add Final Touches: Add the remaining 2 tablespoons of butter, the salt, and the white pepper. Toss continuously until the butter is completely melted and has created a glossy, rich coating over every single grain of rice.
- Garnish and Serve: Turn off the heat. Fold in the chopped green onions, reserving a small pinch for garnish on top of each bowl. Stir them through using the residual heat of the pan so they maintain their bright color and crunch. Serve immediately while piping hot.
Expert Tips for Restaurant-Quality Fried Rice
Mastering fried rice is more about technique than complex ingredients. Here are the pro-tips that separate a soggy, mediocre bowl of rice from a stellar, restaurant-quality meal:
The “Day-Old Rice” Rule is Not a Myth: We cannot stress this enough. Freshly cooked rice is full of steam and moisture. If you try to fry it, you will end up with a gummy, mashed-potato-like consistency. If you absolutely must make fried rice on the same day, cook the rice with about 10% less water than usual, spread it out in a thin layer on a baking sheet, and put it in the freezer for 20-30 minutes, or in front of a fan to rapidly dry the exterior of the grains.
Prep Everything in Advance (Mise en Place): Fried rice cooks incredibly fast over high heat. Once you start cooking, you will not have time to stop and chop green onions or mince garlic. Have every single ingredient measured, chopped, and resting in small bowls right next to your stove before you even turn on the burner.
Do Not Crowd the Pan: If you are making a double batch, it is highly recommended to cook it in two separate rounds. If you put too much rice in the pan at once, the temperature of the pan will drop dramatically. Instead of frying and toasting, the rice will end up steaming in its own juices, leading to a mushy texture.
The Soy Sauce Sizzle: The technique of pouring the soy sauce on the hot perimeter of the pan instead of directly on the food is a classic Asian cooking technique. The Maillard reaction occurs rapidly when the soy sauce hits the hot metal, burning off harsh alcohols and creating complex, savory caramel notes that elevate the whole dish.
Delicious Variations and Add-Ins
While this recipe focuses on the pure, unadulterated joy of garlic and butter, Japanese Garlic Fried Rice is a wonderful blank canvas. Once you master the base recipe, feel free to experiment with these additions:
Protein Power: To turn this side dish into a heavy, satisfying main course, add protein. Diced chicken thigh, shrimp, or cubed steak work wonderfully. Cook the protein first in the pan, remove it, and set it aside. Proceed with the rice recipe, and fold the cooked protein back in at the very end just to heat it through.
Crispy Garlic Chips: For a true teppanyaki experience, start the recipe by thinly slicing 3 extra cloves of garlic. Fry them gently in the butter and oil mixture until they are crispy and golden brown. Remove them with a slotted spoon and set them on a paper towel. Cook the rest of the rice in that garlic-infused oil, and sprinkle the crispy chips on top right before serving for an incredible crunch.
Vegetable Boost: Keep it traditional with a mix of finely diced carrots, peas, and corn. If adding vegetables, sauté them right after the minced garlic and before the eggs, ensuring they are cooked through before adding the rice.
Spice It Up: If you love a kick of heat, add a pinch of red pepper flakes when toasting the garlic, or drizzle a little bit of Japanese rayu (chili oil) or sriracha over the finished dish.
What to Serve with Japanese Garlic Fried Rice
This dish is incredibly versatile. It is robust enough to stand on its own for a quick lunch, but it truly shines when paired with complementing proteins and sides. Here are some pairing ideas to create a complete, restaurant-worthy meal at home:
Steakhouse Classic: Serve it alongside a perfectly seared ribeye or New York strip steak. The rich, buttery rice is the ultimate companion to a juicy cut of beef. Add a side of sautéed mushrooms and zucchini to complete the teppanyaki illusion.
Seafood Extravaganza: Pair the garlic rice with seared scallops, garlic butter shrimp, or a delicate filet of miso-glazed black cod. The umami in the rice enhances the natural sweetness of the seafood.
Poultry Perfection: Chicken teriyaki or crispy chicken katsu served over a bed of this garlic fried rice is a guaranteed crowd-pleaser, balancing sweet, salty, and savory notes.
Storage and Reheating Guidelines
If you find yourself with leftovers—though it is highly unlikely once you take your first bite—proper storage is key to maintaining the texture.
To Store: Allow the fried rice to cool completely to room temperature. Transfer it to an airtight container and store it in the refrigerator for up to 3 to 4 days.
To Reheat: The microwave is actually a great tool here. Place the rice in a microwave-safe bowl. Because the rice will have dried out a bit in the fridge, sprinkle a few drops of water over the top. Cover the bowl loosely with a damp paper towel and microwave on high for 1 to 2 minutes, stirring halfway through. The steam from the damp paper towel will help rehydrate the grains and melt the butter back into a glossy coating. Alternatively, you can reheat it in a skillet over medium heat with a tiny splash of oil or a small pat of butter, tossing until warmed through.
Conclusion
Making incredible Japanese Garlic Fried Rice at home is a highly rewarding culinary endeavor. It proves that you do not need a pantry full of obscure ingredients to create complex, deeply satisfying flavors. By respecting the technique—using day-old rice, managing your heat, and allowing the garlic, butter, and soy sauce to harmonize—you can create a dish that rivals any expensive steakhouse side. So the next time you have leftover white rice sitting in your fridge, skip the takeout menu, grab a few heads of garlic and some butter, and treat yourself to this golden, aromatic masterpiece. Happy cooking!
Japanese Garlic Fried Rice
Ingredients
Equipment
Method
- Break up any clumps in the day-old chilled rice using wet hands or a spoon.
- Heat a large wok or skillet over medium-high heat. Add 1 tbsp oil and 2 tbsp butter until melted and foamy.
- Lower heat to medium. Add minced garlic and toast for 1-2 minutes until pale golden and fragrant.
- Push garlic to the side. Pour in beaten eggs and quickly scramble into soft curds, then mix with the garlic.
- Turn heat to medium-high. Add the chilled rice. Toss and press the rice against the hot pan to fry for 3-4 minutes.
- Push rice to the center. Pour soy sauce around the hot edges of the pan to blister, then toss the rice to coat evenly.
- Add the remaining 2 tbsp butter, salt, and white pepper. Toss until butter is melted and rice is glossy.
- Turn off heat, fold in chopped green onions, and serve immediately hot.