Banana Pudding Easter Truffles
Banana Pudding Easter Truffles: The Ultimate Springtime Dessert
Welcome to the ultimate guide for making the most irresistible, mouth-watering Banana Pudding Easter Truffles you will ever taste. If you are a fan of classic Southern banana pudding but want something a little more bite-sized, portable, and perfectly themed for your spring celebrations, you have landed in the right place. These truffles capture all the nostalgic flavors of the iconic dessert—sweet bananas, buttery vanilla wafers, and rich cream—all wrapped up in a crisp, sweet white chocolate shell and topped with festive pastel sprinkles. They are an absolute showstopper for any Easter gathering, potluck, or just a fun weekend kitchen project with the family.
The beauty of this recipe lies in its simplicity and its incredible flavor payoff. There is no need to turn on the oven, no complicated pastry techniques, and no stressful assembly. By simply combining crushed cookies, ripe bananas, and a creamy binder, you create a dense, flavorful center that mimics the taste and texture of banana pudding perfectly. Once rolled into balls and dipped in a glossy white chocolate coating, these little treats become elegant, festive, and dangerously easy to eat. In this comprehensive guide, we will walk you through every single step, provide expert tips for success, explore the history of these flavors, and ensure your Easter dessert table is the talk of the town.
Why You Will Fall in Love with Banana Pudding Truffles
There are countless reasons why these Banana Pudding Easter Truffles deserve a permanent spot in your recipe collection. First and foremost is the flavor. Traditional banana pudding relies on the magical synergy between fresh bananas, vanilla custard or pudding, and crispy vanilla wafers that soften perfectly over time. These truffles condense that exact flavor profile into a single, intense bite. The interior is moist, sweet, and bursting with authentic banana flavor, while the white chocolate shell provides a satisfying snap that contrasts beautifully with the soft center.
Secondly, these truffles are incredibly convenient. Serving traditional layered banana pudding at a party usually requires bowls, spoons, and a bit of a messy scooping process. These truffles are entirely finger food. You can easily arrange them on a beautiful platter, and guests can simply grab one (or three) as they mingle. They are also portion-controlled, making them a great addition to a larger dessert buffet where people want to sample a little bit of everything.
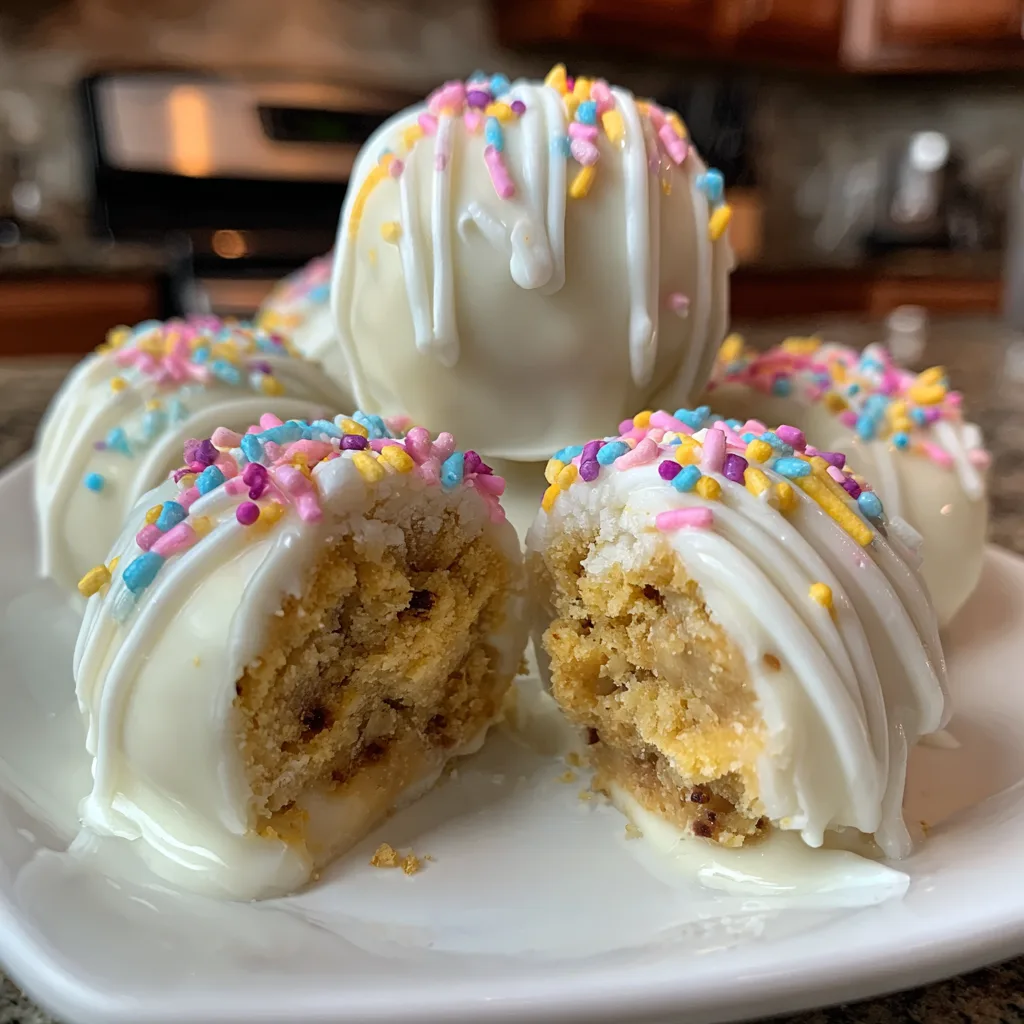
Finally, the visual appeal is unmatched. The smooth, shiny white chocolate coating serves as a blank canvas for whatever decorations you choose. For Easter, a generous shower of pastel pink, blue, and yellow sprinkles instantly transforms them into festive, springtime gems. They look like they came straight out of a high-end bakery, but they are surprisingly simple to achieve in a standard home kitchen. They also make fantastic edible gifts; packaged in a cute box tied with a pastel ribbon, they are guaranteed to bring a smile to anyone’s face.
The Magic and Convenience of No-Bake Easter Desserts
Spring holidays, particularly Easter, often involve elaborate meals. You might be roasting a ham, preparing scalloped potatoes, steaming asparagus, and baking fresh dinner rolls. With so much oven space and prep time dedicated to the savory portion of the feast, having a reliable, stunning no-bake dessert is a lifesaver. No-bake desserts relieve the pressure of timing everything perfectly. You do not have to worry about a cake rising properly or cookies burning while you are distracted by the main course.
These Banana Pudding Easter Truffles can be made entirely in advance. In fact, they often taste better after a day or two in the refrigerator, as the flavors have time to meld and deepen. You can crush the wafers, mix the filling, and even roll the truffles days ahead of your event. The dipping process can also be done the day before, leaving you completely free to focus on your guests and the rest of your meal on the actual holiday.
Furthermore, no-bake recipes are wonderfully forgiving. If your filling seems slightly too dry, you can add a touch more banana or a splash of milk. If it seems too wet, simply add a few more crushed wafers. It is an intuitive, tactile way of cooking that is highly adaptable and almost foolproof, making it a perfect recipe to tackle with children or novice bakers who want to contribute to the holiday spread.
Essential Ingredients You Will Need
To create these phenomenal Banana Pudding Easter Truffles, you will need a handful of accessible, everyday ingredients. The quality of your ingredients will directly impact the final taste, so it pays to choose them carefully.
- – Vanilla Wafers: You will need about one standard box (11-12 ounces) of vanilla wafer cookies. These form the structural base of the truffle and provide that essential, buttery, nostalgic flavor.
- – Ripe Bananas: You will need 1 to 2 very ripe bananas. Look for bananas that have plenty of brown spots on the peel; these are much sweeter and have a softer texture that mashes easily into the dough.
- – Cream Cheese: One 8-ounce block of full-fat cream cheese, softened to room temperature. This acts as the binder, holding the cookie crumbs and banana together while adding a subtle tang that balances the sweetness.
- – Vanilla Extract: 1 teaspoon of pure vanilla extract enhances the vanilla flavor of the wafers and bridges the gap between the banana and the chocolate.
- – White Chocolate Melting Wafers or Chips: You will need about 16 ounces of high-quality white chocolate or vanilla candy melts. Candy melts (like almond bark or specialized coating wafers) are highly recommended because they melt smoothly and set up with a firm, shiny finish without the need for tempering.
- – Coconut Oil (Optional): If you are using standard white chocolate chips, 1 tablespoon of coconut oil or vegetable shortening can help thin the chocolate, making it easier to dip the truffles and achieve a smooth coating.
- – Pastel Sprinkles: An assortment of spring-themed pastel sprinkles (jimmies, nonpareils, or confetti) to decorate the truffles and give them their signature Easter look.
Step-by-Step Instructions for Perfect Truffles
Follow these detailed steps to ensure your Banana Pudding Easter Truffles turn out perfectly every single time.
- Prepare the Cookie Crumbs: Begin by placing the vanilla wafers into a food processor. Pulse them until they are ground into fine crumbs. If you do not have a food processor, you can place the cookies in a large, heavy-duty zip-top bag and crush them thoroughly with a rolling pin until fine. Reserve about two tablespoons of the crumbs for garnish if desired, and place the rest in a large mixing bowl.
- Mash the Bananas: In a small separate bowl, peel your ripe bananas and mash them thoroughly with a fork until they are relatively smooth with only small lumps remaining. You want about 1/2 cup of mashed banana total.
- Mix the Wet Ingredients: In a medium bowl, use an electric hand mixer to beat the softened cream cheese until it is completely smooth and creamy. Add the mashed banana and the vanilla extract to the cream cheese, and beat again until well combined.
- Combine and Form the Dough: Pour the wet banana and cream cheese mixture into the bowl with the crushed vanilla wafers. Use a large rubber spatula or a wooden spoon to fold the ingredients together until a thick, uniform dough forms. It should be moist enough to hold together when squeezed, but not overly sticky.
- Portion and Chill: Line a baking sheet with parchment paper or a silicone baking mat. Using a small cookie scoop or a tablespoon, portion out the dough and roll it between your palms to form smooth, round balls (about 1 inch in diameter). Place the formed truffles on the prepared baking sheet. Once all the dough is rolled, place the baking sheet in the refrigerator for at least 1 hour, or in the freezer for 30 minutes, until the balls are firm to the touch. This step is crucial; if the truffles are too soft, they will fall apart in the warm chocolate.
- Melt the White Chocolate: Place your white chocolate melts or chips in a microwave-safe bowl. If using standard chips, add the coconut oil. Microwave on 50% power in 30-second increments, stirring well after each increment, until the chocolate is completely melted, smooth, and glossy. Be very careful not to overheat the chocolate, or it will seize and become clumpy.
- Dip the Truffles: Remove the chilled truffles from the fridge. Working with one at a time, drop a truffle into the melted white chocolate. Use a fork to gently roll it around until completely coated. Lift the truffle out with the fork, tapping the handle gently against the side of the bowl to allow the excess chocolate to drip off. Carefully slide the coated truffle back onto the parchment-lined baking sheet.
- Decorate Immediately: White chocolate sets quickly, especially when coating cold truffles. Therefore, you must sprinkle your pastel Easter decorations onto the top of the truffle immediately after placing it on the baking sheet, before the chocolate hardens.
- Let Set: Repeat the dipping and decorating process with the remaining truffles. Once all truffles are coated, let them sit at room temperature for about 15-20 minutes until the chocolate shell is completely set and hardened. If your kitchen is warm, you can pop the tray into the refrigerator for 10 minutes to speed up the process.
Expert Tips for Truffle Making Success
While this recipe is straightforward, a few expert tricks will elevate your truffles from good to bakery-quality spectacular.
First, managing the moisture level of your filling is key. Bananas vary greatly in size and moisture content. If your dough feels too sticky to roll after combining the wet and dry ingredients, simply crush a few more vanilla wafers (or even graham crackers if you run out) and fold them in until the texture is manageable. Conversely, if the mixture is crumbly and will not hold a ball shape, add a tiny splash of milk or another spoonful of cream cheese.
Second, temperature control during dipping is vital. Your truffle centers must be very cold and firm. If they warm up too much while you are dipping, the dough will start to mix into the white chocolate, causing a lumpy, messy coating. If you notice your truffles getting soft, pause and put them back in the freezer for 10 minutes before continuing. Additionally, your melted chocolate should be warm and fluid, but not boiling hot.
Finally, for the cleanest, most professional-looking truffles, use a fork or a specialized dipping tool. Never use a spoon, as it will pool too much chocolate at the base of the truffle, creating a wide “foot” instead of a neat, round sphere. Sliding the truffle off the fork with a toothpick helps maintain a smooth finish.
Delicious Variations and Substitutions
The beauty of this foundational recipe is that it is incredibly versatile. You can easily adapt these truffles to suit different tastes or utilize ingredients you already have in your pantry.
Flavor Boosters: To amplify the banana flavor, you can add 1/2 teaspoon of banana extract to the cream cheese mixture. If you love the pairing of banana and cinnamon, try adding 1/2 teaspoon of ground cinnamon or a pinch of nutmeg to the crushed wafer crumbs before mixing.
Cookie Alternatives: While vanilla wafers are traditional for banana pudding, they are not the only option. Golden Oreos work phenomenally well and add an extra layer of sweetness from the cream filling. Graham crackers, shortbread cookies, or even crushed animal crackers will provide excellent structure and a delicious flavor profile.
Chocolate Coatings: While white chocolate provides the classic look and allows the pastel sprinkles to pop, you are not limited to it. Milk chocolate or dark chocolate are excellent pairings for banana. You could also dip them in white chocolate and then drizzle them generously with melted dark chocolate or even caramel for a more decadent presentation.
Serving Suggestions for Spring Gatherings
Presentation is everything, especially during holidays like Easter. To make these Banana Pudding Truffles truly shine on your dessert table, consider how you display them. A tiered dessert stand is an excellent way to showcase their bright, festive colors. You can intersperse them with fresh strawberries or small bunches of grapes for a beautiful, bountiful spring look.
If you are hosting a sit-down Easter brunch or dinner, placing a single truffle inside a miniature pastel cupcake liner and setting one at each place setting serves as a delightful, edible table decoration. They also pair wonderfully with an after-dinner coffee, a cup of Earl Grey tea, or a glass of cold milk.

Fun Facts About Banana Pudding
Banana pudding has a rich and surprisingly complex history. While it is heavily associated with Southern cuisine in the United States, its origins can be traced back to the late 19th century when bananas began to be widely imported and became more accessible to the average consumer. Early recipes were simply layers of sponge cake, custard, and sliced bananas.
The iconic inclusion of vanilla wafers is largely credited to the National Biscuit Company (now Nabisco). In the 1920s, they began printing a recipe for banana pudding on the boxes of their vanilla wafers to boost sales. The marketing strategy was a massive success, forever cementing the vanilla wafer as the quintessential cookie for this dessert. Transforming this historic, layered dessert into a modern, bite-sized truffle is a wonderful way to honor culinary history while enjoying a contemporary treat.
Storage and Make-Ahead Instructions
Because these truffles contain fresh banana and cream cheese, proper storage is crucial for maintaining their freshness and food safety.
Refrigeration: Store the finished, completely set truffles in an airtight container in the refrigerator. Layer them between sheets of wax paper or parchment paper to prevent them from sticking together. They will keep well in the fridge for up to 5 days. They are delicious served straight from the fridge, offering a satisfying, cool snap from the chocolate and a dense, fudgy center.
Freezing: These truffles freeze exceptionally well, making them an ideal make-ahead dessert. Place the fully set truffles in an airtight, freezer-safe container or a heavy-duty freezer bag. They can be frozen for up to 2 months. When you are ready to enjoy them, simply transfer them to the refrigerator to thaw overnight. Avoid thawing them at room temperature, as rapid temperature changes can cause condensation to form on the chocolate, ruining the glossy finish and potentially causing the sprinkles to bleed their colors.
With this comprehensive guide, you are fully equipped to create a batch of spectacular Banana Pudding Easter Truffles. They are fun to make, stunning to look at, and absolutely delicious to eat. Enjoy the process and the inevitable compliments from your family and friends!
Banana Pudding Easter Truffles
Ingredients
Equipment
Method
- Crush the vanilla wafers into fine crumbs using a food processor or a zip-top bag and rolling pin. Place in a large bowl.
- In a separate bowl, use a hand mixer to beat the softened cream cheese until smooth. Add the mashed banana and vanilla extract, blending until combined.
- Pour the wet cream cheese mixture into the crushed vanilla wafers. Stir until a thick dough forms.
- Scoop out tablespoon-sized portions of the dough and roll them into smooth balls. Place them on a parchment-lined baking sheet.
- Chill the truffles in the refrigerator for at least 1 hour, or in the freezer for 30 minutes, until very firm.
- Melt the white chocolate in a microwave-safe bowl in 30-second increments, stirring until completely smooth.
- Dip each chilled truffle into the melted white chocolate using a fork, tapping off the excess. Return to the parchment paper.
- Immediately top with pastel sprinkles before the chocolate sets.
- Allow truffles to set at room temperature or in the fridge until the coating is hard. Store in an airtight container in the refrigerator.