Blue Moon Ice Cream
The Ultimate Homemade Blue Moon Ice Cream: A Cool, Creamy, and Nostalgic Masterpiece
There is a certain magic to brightly colored food, especially when it comes to dessert. For many, the sight of a vibrant, neon-blue scoop of ice cream instantly transports them back to the carefree days of childhood summers, running toward the jingle of the neighborhood ice cream truck or standing on tiptoes at the local scoop shop. This mesmerizing treat is known as Blue Moon ice cream. It is a legendary, almost mythical flavor that has captivated dessert lovers for decades. Today, we are taking this beloved classic, replicating its secret flavor profile in your very own kitchen, and adding a refreshing, modern twist with the inclusion of fresh, juicy blueberries.
Creating homemade ice cream is an incredibly rewarding culinary adventure. It allows you to control the quality of the ingredients, perfectly balance the sweetness, and achieve a velvety texture that simply cannot be matched by most store-bought alternatives. In this comprehensive guide, we will explore the fascinating history of the Blue Moon flavor, decode its mysterious taste profile, discuss the science of achieving the perfect creamy texture, and walk you through every single step to churn up a batch of this magnificent blue dessert.
The Great Debate: The History and Mystery of Blue Moon Ice Cream
If you grew up in the Upper Midwest of the United States—particularly in Michigan, Wisconsin, or Ohio—Blue Moon ice cream needs no introduction. It is a regional staple, as ubiquitous as vanilla or chocolate. However, if you step outside of this geographical pocket, Blue Moon becomes a perplexing enigma.
The true origin of Blue Moon is shrouded in sweet, sticky mystery. Many food historians trace its creation back to the 1950s in Milwaukee, Wisconsin, attributing it to a flavor chemist named Bill “Doc” Sidon. Regardless of who exactly invented it, the real mystery lies not in its inception, but in its flavor. What exactly does Blue Moon taste like?
Ask ten different people, and you will likely get ten different answers. Some swear it tastes exactly like the milk leftover in a bowl of Froot Loops or Fruity Pebbles cereal. Others insist it has a distinct marshmallow profile, reminiscent of the sweet, fluffy interior of a toasted s’more. Still, others detect strong notes of almond, vanilla, and a hint of tart raspberry or lemon. The beauty of Blue Moon is its subjectivity; it is a flavor that plays on the palate and the imagination simultaneously.
Decoding the Secret Flavor Profile for the Home Kitchen
Because the original recipe is a closely guarded commercial secret, home cooks and pastry chefs have spent years trying to reverse-engineer the perfect Blue Moon base. Through endless testing and tasting, a consensus has emerged on how to capture that nostalgic “cereal milk” and “marshmallow” essence.
The magic combination relies on a precise trio of extracts: pure vanilla extract, high-quality almond extract, and a touch of lemon or raspberry flavoring. The vanilla provides the creamy, marshmallow-like foundation. The almond extract—which must be used sparingly as it can easily overpower the dish—provides that distinctive, slightly fruity, cherry-like kick that mimics the taste of fruity cereals. Finally, a few drops of lemon extract or a dash of raspberry syrup rounds out the profile with a bright, subtle tang that keeps the ice cream from being one-dimensionally sweet.
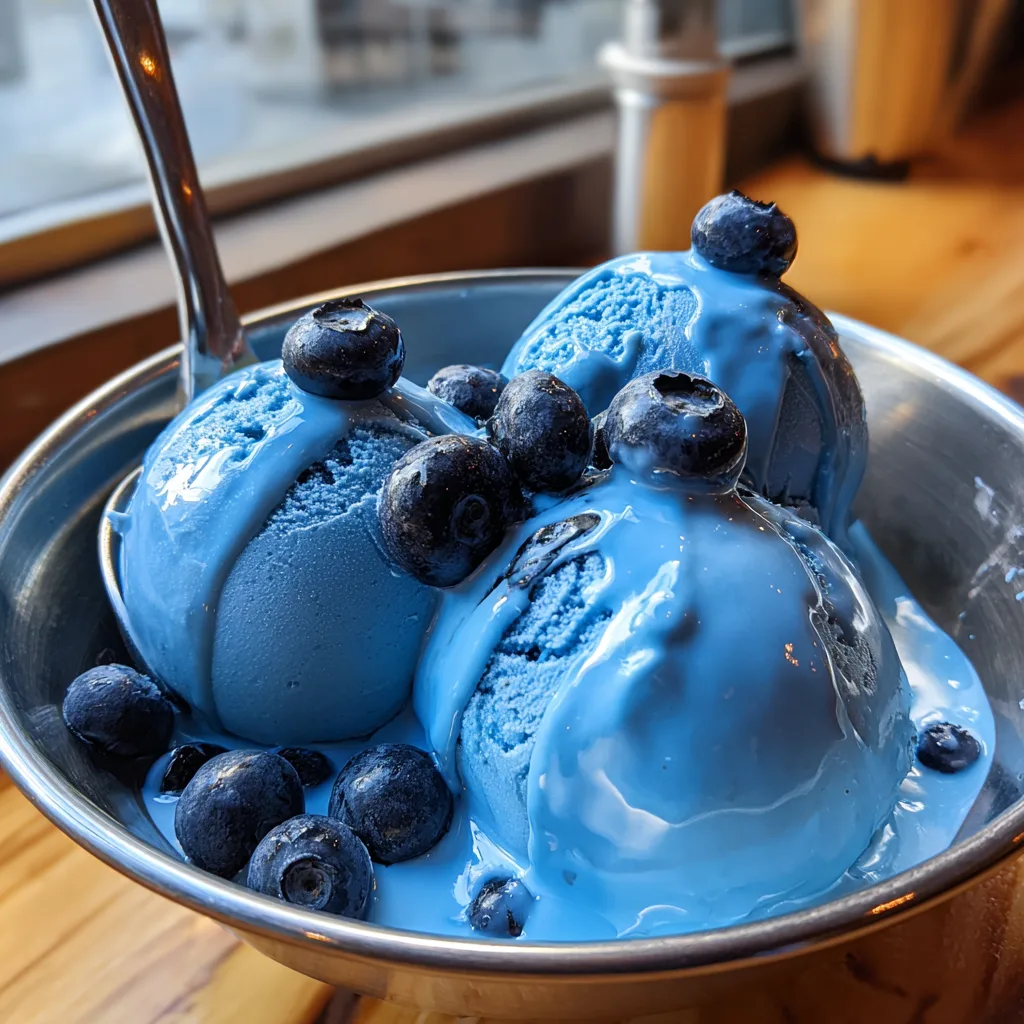
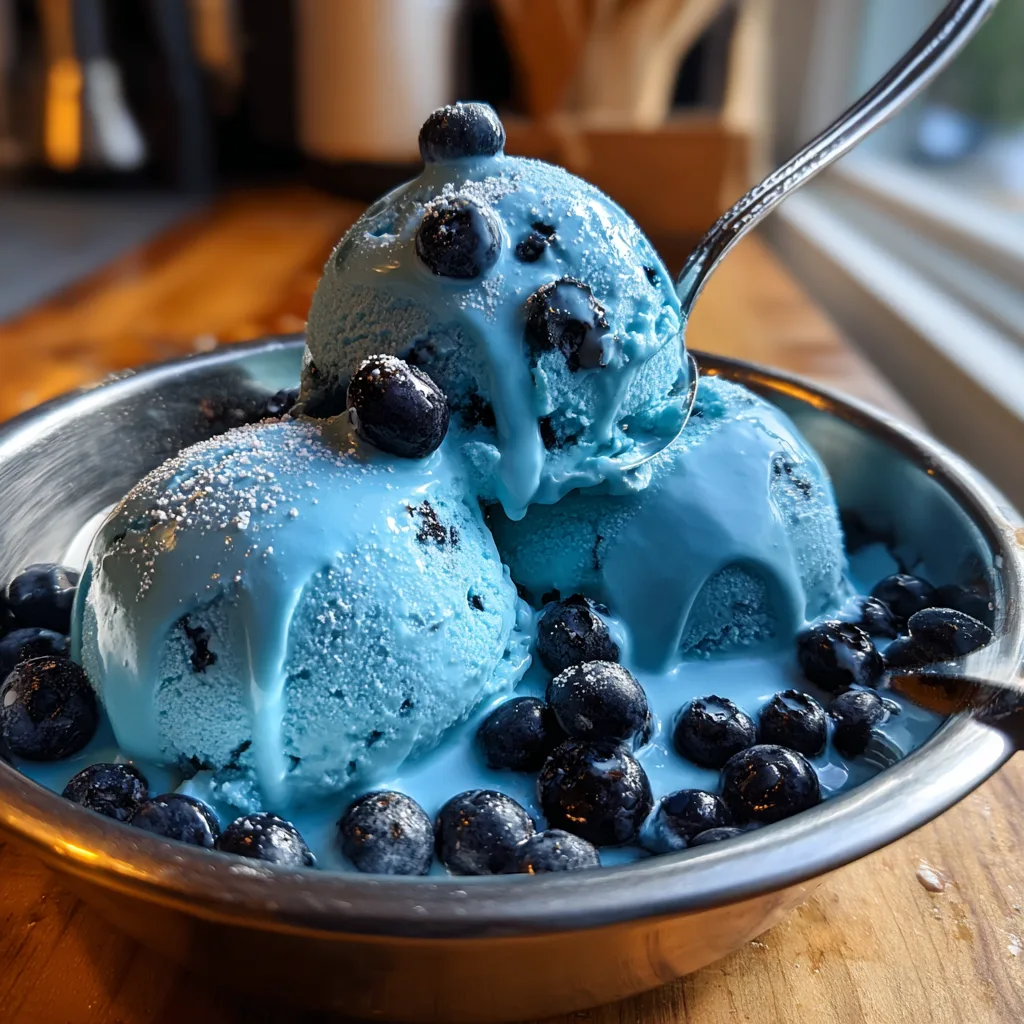
The Visual Appeal: Achieving That Iconic Smurf Blue
You cannot call it Blue Moon if it isn’t strikingly, unapologetically blue. In commercial preparations, this is achieved through standard blue food coloring. For the home cook, you have a few options depending on your dietary preferences and dedication to natural ingredients.
Traditional Food Coloring: Gel food coloring is highly recommended over liquid drops. Liquid drops can dilute your ice cream base and sometimes require a large amount to achieve a deep color, which can occasionally impart a bitter chemical taste. A tiny toothpick swirl of royal blue or sky blue gel paste will give you that iconic, vibrant hue without altering the texture or taste of your custard.
Natural Alternatives: If you prefer to avoid artificial dyes, the modern culinary world offers fantastic natural alternatives. Blue spirulina powder is an excellent choice. Extracted from blue-green algae, the blue pigment (phycocyanin) provides a stunning, vibrant blue color without tasting like seaweed when used in small amounts. Another option is butterfly pea flower powder, which yields a beautiful, slightly more indigo-leaning blue. Both dissolve wonderfully into a warm milk base.
Why Add Blueberries? A Fresh, Fruity Upgrade
While traditional Blue Moon is entirely smooth, our recipe photo inspiration showcases plump, beautiful blueberries nestled into the bright blue scoops. This addition is a stroke of genius for several reasons.
First, the natural tartness of fresh blueberries provides a brilliant counterpoint to the sweet, almond-vanilla profile of the ice cream base. Every bite yields a burst of fresh fruit juice that cuts through the rich dairy. Secondly, freezing blueberries alters their texture, turning them into delightful, icy little flavor bombs that add a wonderful textural contrast to the smooth cream. Lastly, it leans into the “blue” theme perfectly, making the dessert look less like a novelty item and more like a thoughtfully crafted, artisanal treat.
The Science of Creamy Ice Cream: The Custard Base
There are two main styles of homemade ice cream: Philadelphia-style (which uses only milk, cream, and sugar) and French-style (which uses an egg-yolk custard base). To achieve the incredibly rich, velvety, meltingly soft texture seen in premium ice creams, we will use a French-style custard base.
Egg yolks act as a powerful emulsifier. They bind the fat from the heavy cream and the water from the milk, creating a stable, homogenous mixture. When cooked gently to form a custard, the proteins in the egg yolks unfold and coagulate, thickening the base and giving the final ice cream a dense, chewy texture. Furthermore, the fat in the egg yolks coats the tongue, creating a luxurious mouthfeel and preventing the formation of large, gritty ice crystals during the freezing process.
Essential Ingredients for Blue Moon Blueberry Ice Cream
Gathering high-quality ingredients is the first step to success. Here is what you will need:
- – Heavy Whipping Cream (2 cups): This provides the butterfat necessary for a rich mouthfeel. Do not substitute with half-and-half.
- – Whole Milk (1 cup): The milk dilutes the heavy cream just enough to prevent the ice cream from tasting like frozen butter, providing balance.
- – Granulated Sugar (3/4 cup): Sugar doesn’t just sweeten the ice cream; it lowers the freezing point of the mixture, keeping the ice cream scoopable rather than freezing into a solid block of ice.
- – Egg Yolks (5 large): The secret to the rich, custard texture. Save the whites for an omelet or meringue!
- – Pure Vanilla Extract (1 tablespoon): The backbone of the flavor.
- – Almond Extract (1/2 teaspoon): Use pure almond extract. Be careful not to use too much, or it will taste exclusively like marzipan.
- – Lemon Extract (1/4 teaspoon): Just a dash to provide that fruity cereal brightness.
- – Blue Food Coloring: Gel paste is preferred, or 1-2 teaspoons of blue spirulina powder.
- – Fresh Blueberries (1 cup): Washed, thoroughly dried, and chilled.
- – A Pinch of Salt: Essential for balancing the sweetness and enhancing the other flavors.
Step-by-Step Instructions for Churning Perfection
Making a custard base requires patience and a watchful eye. The goal is to cook the eggs enough to thicken the base without scrambling them. Follow these steps carefully for a flawless outcome.
- Prepare your equipment: Ensure your ice cream maker bowl has been freezing for at least 24 hours. Set a fine-mesh sieve over a large, clean mixing bowl. Pour the heavy cream into this bowl. This will be your cooling station.
- Heat the milk and sugar: In a medium saucepan, combine the whole milk, sugar, and salt. Place over medium heat, stirring occasionally until the sugar is completely dissolved and the mixture begins to steam and small bubbles form around the edges. Do not let it boil.
- Whisk the egg yolks: In a separate medium bowl, whisk the egg yolks until they are slightly pale and smooth.
- Temper the eggs (Crucial Step): Slowly, drop by drop, whisk about half of the hot milk mixture into the egg yolks. Whisk constantly! This gradual introduction of heat raises the temperature of the eggs gently, preventing them from scrambling. Once tempered, pour the egg mixture back into the saucepan with the rest of the milk.
- Cook the custard: Return the saucepan to medium-low heat. Stir constantly with a wooden spoon or heatproof spatula, making sure to scrape the bottom and sides of the pan. Cook until the mixture thickens slightly and coats the back of your spoon. If you run your finger through the custard on the spoon, the line should hold its shape. (If you have a thermometer, it should read 170°F to 175°F).
- Strain and chill: Immediately pour the hot custard through the fine-mesh sieve into the bowl containing the cold heavy cream. This stops the cooking process and catches any tiny bits of cooked egg. Whisk the mixture to combine.
- Flavor and color: Whisk in the vanilla extract, almond extract, and lemon extract. Add your blue food coloring (or spirulina powder) a little bit at a time, whisking well until you achieve that perfect, bright Blue Moon hue.
- Age the base: Cover the bowl tightly with plastic wrap, pressing the wrap directly onto the surface of the custard to prevent a skin from forming. Refrigerate the base for at least 4 hours, but preferably overnight. This “aging” process allows the milk proteins to hydrate and the flavors to meld, resulting in a significantly creamier final product.
- Churn the ice cream: Pour the chilled, bright blue base into your ice cream maker. Churn according to the manufacturer’s instructions, usually about 20 to 25 minutes, until the ice cream resembles thick soft serve.
- Add the blueberries: During the very last minute of churning, pour in your chilled, dry fresh blueberries so they are evenly distributed throughout the mixture.
- Freeze to set: Transfer the soft ice cream to an airtight, freezer-safe container. Press a piece of parchment paper directly onto the surface of the ice cream to prevent ice crystals. Freeze for at least 4 hours, or until firm enough to scoop.
Expert Tips for the Best Homemade Ice Cream
Dry Your Mix-ins: When washing your fresh blueberries, make sure they are completely bone-dry before adding them to the ice cream. Any residual water on the outside of the berries will freeze into icy, crunchy patches in your otherwise smooth dessert.
Keep Everything Cold: Ice cream hates warmth. Make sure your base is exceptionally cold before churning. If you are making this on a hot summer day, you can even chill the container you plan to store the final ice cream in so it doesn’t melt upon contact when you transfer it from the machine.
Don’t Over-Churn: Watch your ice cream maker closely. If you churn the mixture for too long, the fat can separate, leaving you with a grainy texture that feels like butter in your mouth. Stop churning as soon as it looks like a thick, cohesive soft serve.
Serving Suggestions and Variations
While this Blue Moon Blueberry Ice Cream is spectacular on its own, served in a chilled metal bowl just like the inspirational photo, it also plays wonderfully with others.
The Ultimate Waffle Cone: Serve massive, melting scoops inside a freshly made, warm vanilla waffle cone. The contrast between the cold, fruity ice cream and the warm, crunchy cone is absolute perfection.
Fruity Cereal Milkshake: Embrace the “cereal milk” flavor profile by blending two scoops of this ice cream with a splash of milk and topping it with a handful of crushed fruity cereal for crunch.
Lemon Pound Cake Sundae: Serve a scoop over a thick slice of toasted lemon pound cake. The bright citrus notes of the cake will highlight the subtle lemon extract and fresh blueberries in the ice cream beautifully.
By following this guide, you are not just making a dessert; you are recreating a piece of culinary nostalgia, enhanced with the fresh, vibrant addition of summer blueberries. The rich, custard base, the magical mystery flavor, and that shocking blue color will make this recipe a permanent fixture in your summer dessert rotation.
Blue Moon Blueberry Ice Cream
Ingredients
Equipment
Method
- Set a fine-mesh sieve over a large bowl. Pour the heavy cream into the bowl. Set aside.
- In a saucepan, heat whole milk, sugar, and salt over medium heat, stirring until sugar dissolves and mixture steams.
- Whisk egg yolks in a separate bowl. Slowly whisk half of the hot milk mixture into the yolks to temper them.
- Pour the tempered yolks back into the saucepan. Cook over medium-low heat, stirring constantly, until the custard thickens and coats the back of a spoon (170°F).
- Immediately strain the hot custard through the sieve into the cold heavy cream. Whisk to combine.
- Whisk in vanilla, almond, and lemon extracts. Add blue food coloring until desired bright blue color is achieved.
- Cover tightly with plastic wrap pressed to the surface. Chill in the refrigerator for at least 4 hours or overnight.
- Pour the chilled base into your ice cream maker and churn according to manufacturer instructions (about 20-25 minutes).
- During the last minute of churning, pour in the chilled, dry blueberries to distribute evenly.
- Transfer to a freezer-safe container, press parchment directly onto the surface, and freeze for at least 4 hours before serving.