Cookie Ice Cream Sandwiches
The Ultimate Homemade Chocolate Chip Cookie Ice Cream Sandwiches
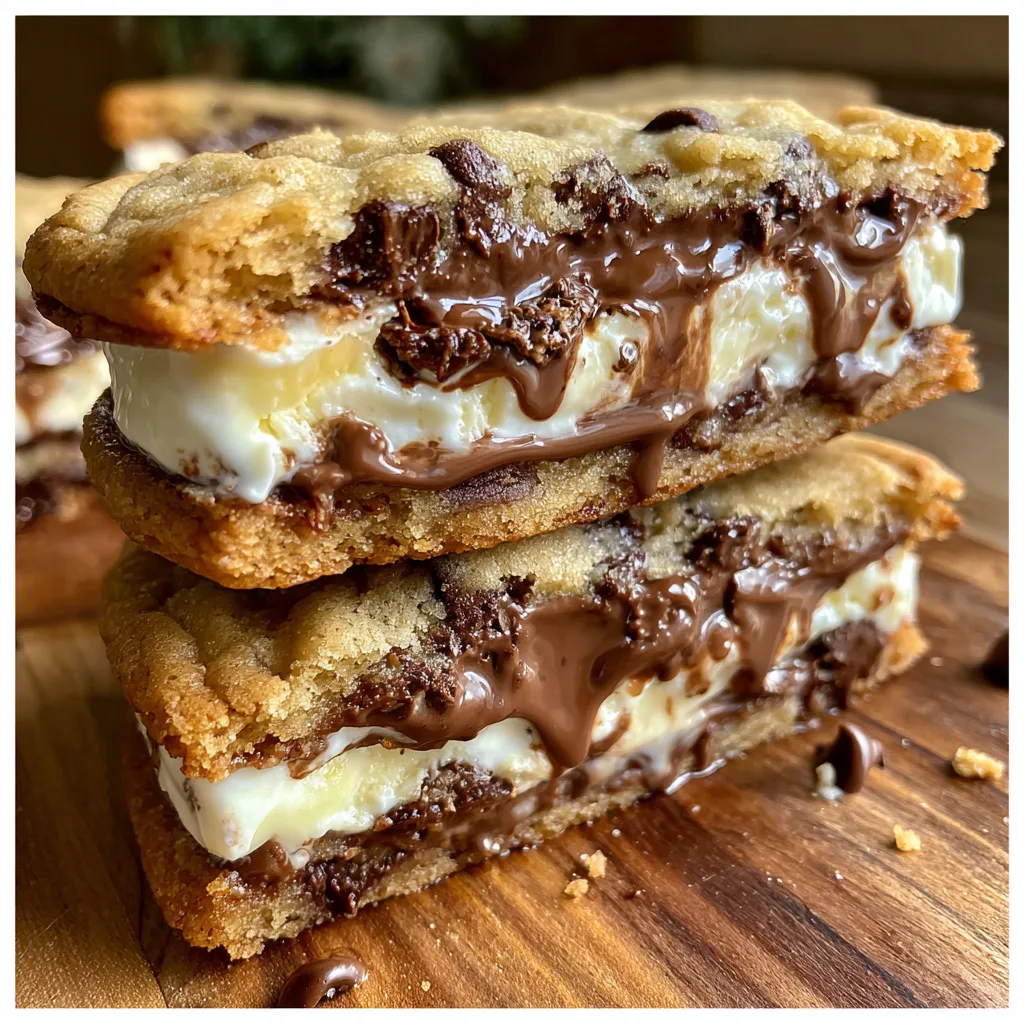
There is arguably no summer treat more nostalgic, indulgent, and universally loved than the Chocolate Chip Cookie Ice Cream Sandwich. Often known by the famous brand name “Chipwich,” this dessert combines two pillars of the sweet world: chewy, buttery chocolate chip cookies and cool, creamy vanilla ice cream. While the store-bought versions are a convenient fix, making them at home elevates the experience to an entirely new level.
Imagine biting into a cookie that is still slightly soft and chewy, yielding perfectly against a thick layer of premium ice cream that hasn’t been sitting in a freezer aisle for months. The contrast of textures—the grain of the sugar in the cookie, the snap of the chocolate chips, and the smooth velvet of the dairy—is culinary perfection. This recipe is designed to help you recreate that magic in your own kitchen with simple ingredients and a few pro tips to ensure structural integrity and maximum flavor.
Why You’ll Love This Recipe: unlike hard, store-bought wafers, these cookies remain soft even when frozen, ensuring the ice cream doesn’t squish out the sides when you take a bite!

The Secret to the Perfect Ice Cream Sandwich
The biggest challenge with homemade ice cream sandwiches is the “squish factor.” If your cookies are too hard or crispy, biting down forces the ice cream out the sides, leaving you with a mess. The secret lies in the cookie recipe itself. We use a higher ratio of brown sugar to white sugar and slightly underbake the cookies. This keeps them fudgy and pliable, even after they have spent time in the freezer.
Additionally, patience is key. We aren’t just slapping ice cream on warm cookies (though that is delicious in a bowl). For a handheld treat, the cookies must be completely cooled, and the assembled sandwiches need a brief stint in the freezer to set up before serving.
Ingredients
To make the best homemade chipwich recipe, you need quality staples. Here is what you will need:
For the Chewy Chocolate Chip Cookies:
- All-Purpose Flour – The structure of the cookie. Spoon and level your flour to avoid dense cookies.
- Unsalted Butter – Softened to room temperature. Using unsalted allows you to control the sodium level.
- Light Brown Sugar – Packed. The molasses in brown sugar adds moisture and chewiness, essential for a frozen cookie.
- Granulated White Sugar – Provides crispy edges to contrast the soft center.
- Eggs – You’ll need one large egg plus an extra egg yolk for richness and tenderness.
- Vanilla Extract – Pure vanilla extract enhances the chocolate flavor.
- Baking Soda – The leavening agent that helps the cookies spread and rise slightly.
- Salt – Balances the sweetness. Sea salt is preferred.
- Cornstarch – A secret bakery ingredient that keeps cookies soft and thick.
- Semi-Sweet Chocolate Chips – Or chunks. You can also use dark chocolate if you prefer a less sweet cookie.
For the Filling & Garnish:
- Vanilla Bean Ice Cream – A high-fat, premium ice cream works best as it melts slower and tastes better.
- Mini Chocolate Chips – Optional, for rolling the edges of the ice cream sandwich (the classic look).
Instructions
Follow these steps to create your own batch of frozen dessert bliss.
Phase 1: Bake the Cookies
- Preheat and Prep: Preheat your oven to 350°F (175°C). Line two large baking sheets with parchment paper. This prevents sticking and makes cleanup easy.
- Mix Dry Ingredients: In a medium bowl, whisk together the flour, baking soda, cornstarch, and salt. Set this aside.
- Cream Butter and Sugars: In a large bowl (or stand mixer), beat the softened butter, brown sugar, and white sugar together on medium speed for about 2–3 minutes until the mixture is light and creamy.
- Add Wet Ingredients: Beat in the egg, extra egg yolk, and vanilla extract until combined. Scrape down the sides of the bowl to ensure everything is incorporated.
- Combine: Gradually add the dry ingredients to the wet ingredients, mixing on low speed just until streaks of flour disappear. Do not overmix!
- Add Chocolate: Fold in the chocolate chips by hand using a spatula.
- Scoop and Bake: Scoop dough into balls (about 2 tablespoons each) and place them on the baking sheets, spaced 2 inches apart. Bake for 10–12 minutes. The edges should be golden, but the centers should still look slightly underdone.
- Cool: Let the cookies cool on the baking sheet for 5 minutes (they will firm up), then transfer them to a wire rack to cool completely.
Pro Tip: Do not attempt to assemble the sandwiches until the cookies are 100% cool. Any residual heat will melt the ice cream instantly and ruin the structure.
Phase 2: Assembly
- Prep the Ice Cream: Take your ice cream out of the freezer about 5–10 minutes before assembly so it is soft enough to scoop but not melting.
- Match the Cookies: Sort your cookies into pairs of similar size and shape. Flip one cookie of each pair upside down (flat side up).
- Scoop: Place a generous scoop (about 1/2 cup) of ice cream onto the flat side of the bottom cookie.
- Sandwich: Place the second cookie on top (flat side down) and gently press down until the ice cream pushes out to the edges.
- Garnish (Optional): If desired, roll the exposed edges of the ice cream in a bowl of mini chocolate chips or sprinkles.
- Freeze: Immediately wrap each sandwich individually in plastic wrap and place them in the freezer. Freeze for at least 30 minutes to 1 hour to let them set.
Variations to Try
Once you master the classic, try these fun twists on DIY frozen dessert treats:
- The Double Chocolate: Use double chocolate chip cookies and chocolate ice cream for a death-by-chocolate experience.
- The Holiday Spice: Use oatmeal raisin or snickerdoodle cookies paired with cinnamon or pumpkin ice cream.
- The Minty Fresh: Classic chocolate chip cookies with mint chocolate chip ice cream. Roll the edges in crushed Oreos.
- Salted Caramel: Drizzle caramel sauce inside the cookie before adding vanilla ice cream, then sprinkle flaky sea salt on the edges.
Serving and Storage Suggestions
These sandwiches are the ultimate make-ahead dessert for parties. You can make them up to a week in advance!
Storage: Keep the sandwiches wrapped tightly in plastic wrap or parchment paper, then place them inside a freezer-safe heavy-duty Ziploc bag. This prevents freezer burn and keeps the cookies tasting fresh. They will keep well for up to 1 month.
Serving: If they have been frozen for more than a few hours, let the sandwiches sit at room temperature for about 5 minutes before serving. This softens the cookie just enough to make it easy to bite into.
Conclusion
Making Chocolate Chip Cookie Ice Cream Sandwiches at home is a rewarding process that yields results far superior to anything you can buy in a box. The combination of high-quality ingredients, customized flavors, and the love put into baking makes every bite a memory. Whether you are hosting a summer BBQ, a kid’s birthday party, or just need a midnight snack, these “Chipwiches” are guaranteed to satisfy your sweet tooth.
The Ultimate Homemade Chocolate Chip Cookie Ice Cream Sandwiches (Chipwich Copycat)
The Ultimate Homemade Chocolate Chip Cookie Ice Cream Sandwiches
There is arguably no summer treat more nostalgic, indulgent, and universally loved than the Chocolate Chip Cookie Ice Cream Sandwich. Often known by the famous brand name “Chipwich,” this dessert combines two pillars of the sweet world: chewy, buttery chocolate chip cookies and cool, creamy vanilla ice cream. While the store-bought versions are a convenient fix, making them at home elevates the experience to an entirely new level.
Imagine biting into a cookie that is still slightly soft and chewy, yielding perfectly against a thick layer of premium ice cream that hasn’t been sitting in a freezer aisle for months. The contrast of textures—the grain of the sugar in the cookie, the snap of the chocolate chips, and the smooth velvet of the dairy—is culinary perfection. This recipe is designed to help you recreate that magic in your own kitchen with simple ingredients and a few pro tips to ensure structural integrity and maximum flavor.
Why You’ll Love This Recipe: unlike hard, store-bought wafers, these cookies remain soft even when frozen, ensuring the ice cream doesn’t squish out the sides when you take a bite!
The Secret to the Perfect Ice Cream Sandwich
The biggest challenge with homemade ice cream sandwiches is the “squish factor.” If your cookies are too hard or crispy, biting down forces the ice cream out the sides, leaving you with a mess. The secret lies in the cookie recipe itself. We use a higher ratio of brown sugar to white sugar and slightly underbake the cookies. This keeps them fudgy and pliable, even after they have spent time in the freezer.
Additionally, patience is key. We aren’t just slapping ice cream on warm cookies (though that is delicious in a bowl). For a handheld treat, the cookies must be completely cooled, and the assembled sandwiches need a brief stint in the freezer to set up before serving.
Ingredients
To make the best homemade chipwich recipe, you need quality staples. Here is what you will need:
For the Chewy Chocolate Chip Cookies:
- All-Purpose Flour – The structure of the cookie. Spoon and level your flour to avoid dense cookies.
- Unsalted Butter – Softened to room temperature. Using unsalted allows you to control the sodium level.
- Light Brown Sugar – Packed. The molasses in brown sugar adds moisture and chewiness, essential for a frozen cookie.
- Granulated White Sugar – Provides crispy edges to contrast the soft center.
- Eggs – You’ll need one large egg plus an extra egg yolk for richness and tenderness.
- Vanilla Extract – Pure vanilla extract enhances the chocolate flavor.
- Baking Soda – The leavening agent that helps the cookies spread and rise slightly.
- Salt – Balances the sweetness. Sea salt is preferred.
- Cornstarch – A secret bakery ingredient that keeps cookies soft and thick.
- Semi-Sweet Chocolate Chips – Or chunks. You can also use dark chocolate if you prefer a less sweet cookie.
For the Filling & Garnish:
- Vanilla Bean Ice Cream – A high-fat, premium ice cream works best as it melts slower and tastes better.
- Mini Chocolate Chips – Optional, for rolling the edges of the ice cream sandwich (the classic look).
Instructions
Follow these steps to create your own batch of frozen dessert bliss.
Phase 1: Bake the Cookies
- Preheat and Prep: Preheat your oven to 350°F (175°C). Line two large baking sheets with parchment paper. This prevents sticking and makes cleanup easy.
- Mix Dry Ingredients: In a medium bowl, whisk together the flour, baking soda, cornstarch, and salt. Set this aside.
- Cream Butter and Sugars: In a large bowl (or stand mixer), beat the softened butter, brown sugar, and white sugar together on medium speed for about 2–3 minutes until the mixture is light and creamy.
- Add Wet Ingredients: Beat in the egg, extra egg yolk, and vanilla extract until combined. Scrape down the sides of the bowl to ensure everything is incorporated.
- Combine: Gradually add the dry ingredients to the wet ingredients, mixing on low speed just until streaks of flour disappear. Do not overmix!
- Add Chocolate: Fold in the chocolate chips by hand using a spatula.
- Scoop and Bake: Scoop dough into balls (about 2 tablespoons each) and place them on the baking sheets, spaced 2 inches apart. Bake for 10–12 minutes. The edges should be golden, but the centers should still look slightly underdone.
- Cool: Let the cookies cool on the baking sheet for 5 minutes (they will firm up), then transfer them to a wire rack to cool completely.
Pro Tip: Do not attempt to assemble the sandwiches until the cookies are 100% cool. Any residual heat will melt the ice cream instantly and ruin the structure.
Phase 2: Assembly
- Prep the Ice Cream: Take your ice cream out of the freezer about 5–10 minutes before assembly so it is soft enough to scoop but not melting.
- Match the Cookies: Sort your cookies into pairs of similar size and shape. Flip one cookie of each pair upside down (flat side up).
- Scoop: Place a generous scoop (about 1/2 cup) of ice cream onto the flat side of the bottom cookie.
- Sandwich: Place the second cookie on top (flat side down) and gently press down until the ice cream pushes out to the edges.
- Garnish (Optional): If desired, roll the exposed edges of the ice cream in a bowl of mini chocolate chips or sprinkles.
- Freeze: Immediately wrap each sandwich individually in plastic wrap and place them in the freezer. Freeze for at least 30 minutes to 1 hour to let them set.
Variations to Try
Once you master the classic, try these fun twists on DIY frozen dessert treats:
- The Double Chocolate: Use double chocolate chip cookies and chocolate ice cream for a death-by-chocolate experience.
- The Holiday Spice: Use oatmeal raisin or snickerdoodle cookies paired with cinnamon or pumpkin ice cream.
- The Minty Fresh: Classic chocolate chip cookies with mint chocolate chip ice cream. Roll the edges in crushed Oreos.
- Salted Caramel: Drizzle caramel sauce inside the cookie before adding vanilla ice cream, then sprinkle flaky sea salt on the edges.
Serving and Storage Suggestions
These sandwiches are the ultimate make-ahead dessert for parties. You can make them up to a week in advance!
Storage: Keep the sandwiches wrapped tightly in plastic wrap or parchment paper, then place them inside a freezer-safe heavy-duty Ziploc bag. This prevents freezer burn and keeps the cookies tasting fresh. They will keep well for up to 1 month.
Serving: If they have been frozen for more than a few hours, let the sandwiches sit at room temperature for about 5 minutes before serving. This softens the cookie just enough to make it easy to bite into.
Conclusion
Making Chocolate Chip Cookie Ice Cream Sandwiches at home is a rewarding process that yields results far superior to anything you can buy in a box. The combination of high-quality ingredients, customized flavors, and the love put into baking makes every bite a memory. Whether you are hosting a summer BBQ, a kid’s birthday party, or just need a midnight snack, these “Chipwiches” are guaranteed to satisfy your sweet tooth.
Homemade Chocolate Chip Cookie Ice Cream Sandwiches
Ingredients
Equipment
Method
- Preheat oven to 350°F (175°C) and line two large baking sheets with parchment paper.
- In a medium bowl, whisk together flour, baking soda, cornstarch, and salt.
- In a large bowl, cream together softened butter, brown sugar, and granulated sugar until light and fluffy (about 2 minutes).
- Add the egg, egg yolk, and vanilla extract. Mix until well combined.
- Gradually mix in dry ingredients until just combined. Fold in the chocolate chips by hand.
- Scoop dough into 2-tablespoon sized balls and place on baking sheets 2 inches apart.
- Bake for 10-12 minutes until edges are golden but centers are still soft. Cool completely on wire racks.
- Once cookies are cool, place a scoop of softened ice cream on the bottom of one cookie. Top with a second cookie and press gently.
- Optional: Roll the exposed ice cream edges in mini chocolate chips.
- Wrap sandwiches in plastic wrap and freeze for at least 30 minutes before serving.